If you really want to impress a party with a massive BBQ dinner, building this large rotisserie BBQ pit could be the way to go. It was built as a dry-fit project meaning that no mortar was used. That makes it easy to not only assemble but to relocate if you want to move it in the future. Also, if a brick happens to crack from the heat, it’s easily replaceable…
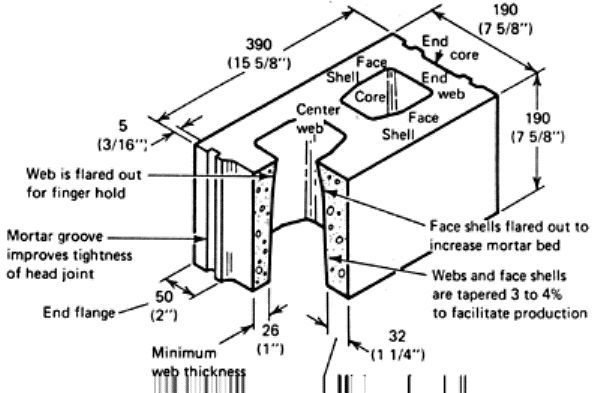
Using standard concrete blocks – aka “Cinder Blocks” – the design is also easily scale-able. You can make it any size you want. The blocks are found at most hardware stores (Home Depot, Lowes, etc.) but this build was able to save money by buying “seconds” from a wholesale distributor at $2.00 apiece…
Give the location quite a bit of thought before assembling the BBQ. Remember that it will be giving off a lot of smoke and heat once it’s fired up. We chose a convenient spot that was a safe distance from trees and play areas. If you use an electric motor you will also want to be located near an outlet…
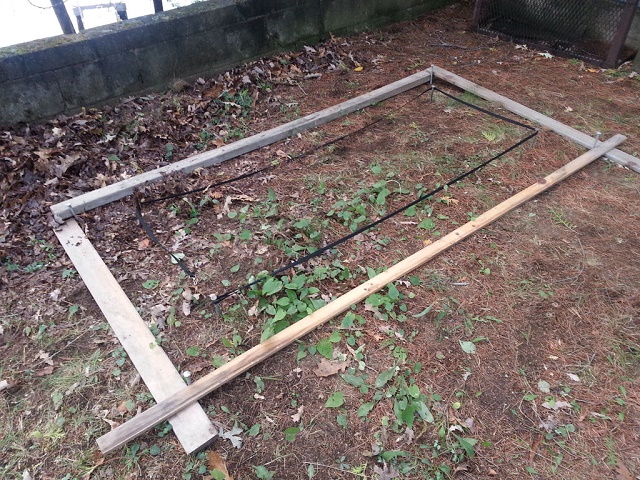
A solid foundation is absolutely critical. After leveling the ground 12″ x 12″ patio stones were laid down to help distribute the weight and keep the bricks from sliding into the hole.
Now you can lay the blocks tightly against each other, checking for level (and square) often. Lay some of the 1st row blocks sideways to allow for air to feed the flames. In some spots “half blocks” were used to complete a row. In other areas “cap blocks” were used which have a finished surface over the holes (not solid top to bottom) to give it a more polished look…
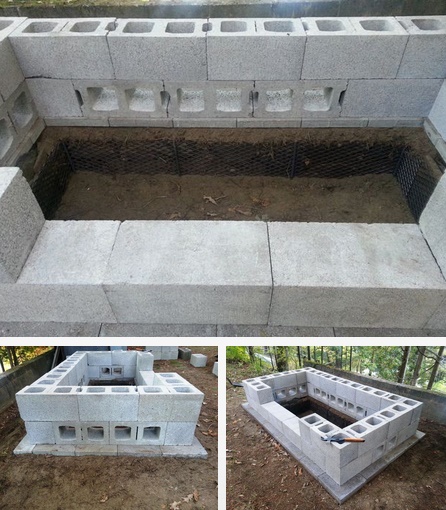
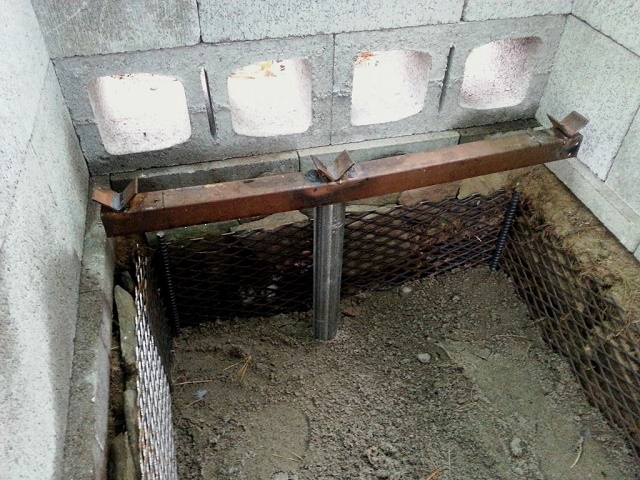
On top of the patio stones 3 rows of cinder blocks were laid down. On one end of the 3rd row, a half block was placed to leave a gap for the spit to come through. Using supports (next step) the spit should come out just above, but not touching, the 2nd row of blocks. After putting 2″ of sand on the bottom of the pit we ended up with 25″ height from ground to spit…

For the spit we used a 8 foot black steel pipe with a few holes drilled along the length. A gear was welded to one end. To support it we used 1.5″ pipe and hammered it 24″ into the ground at both ends of the BBQ. On the tops of these pipes we welded horizontal arms at the desired height, and “v” brackets to hold the rotating pipe….
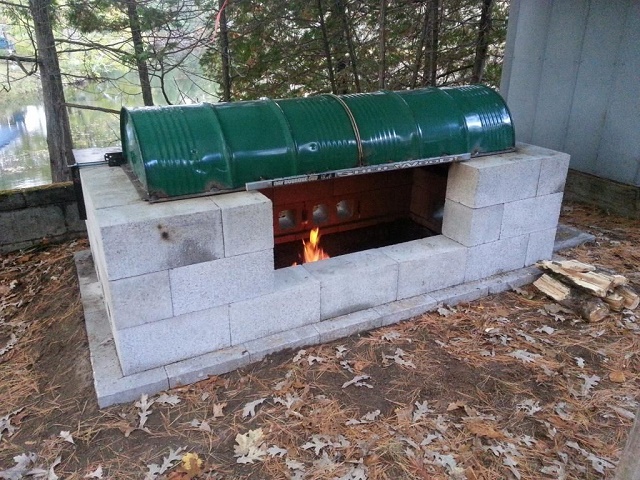
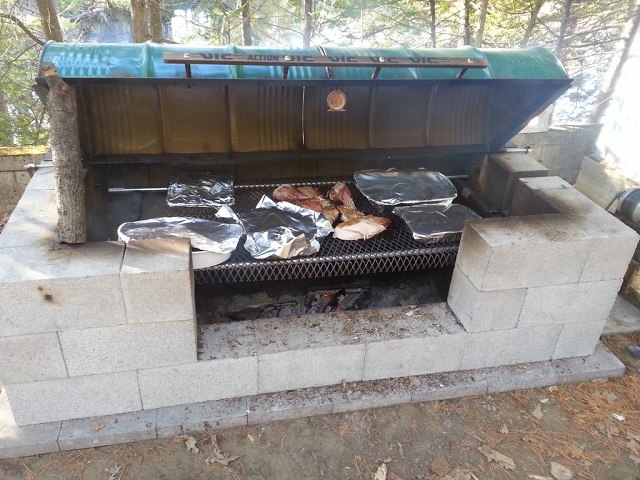
We used an old food-grade drum (cut in half length-wise), some scrounged bed-frame angle iron, and 1/2″ threaded rod to whip up this hinged lid…
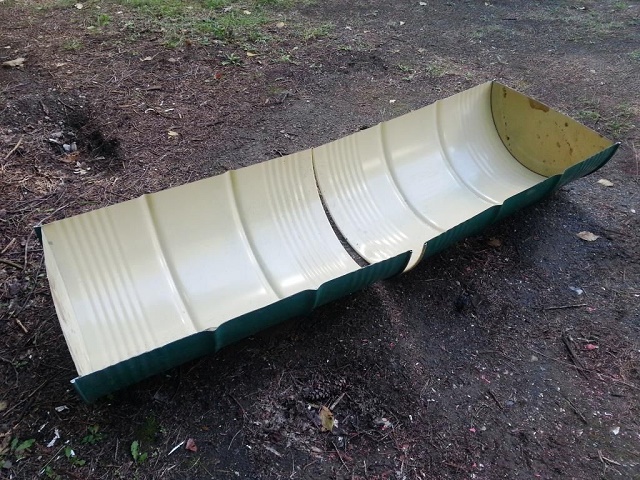
A ‘secret’ feature of this BBQ is the adjustable warming plate. The steel drum wasn’t wide enough front-to-back so we added a 12″ wide steel plate on the back. This makes a great surface for keeping dishes & plates warm while dinner is cooking. It can be moved to allow for more or less smoke to escape too…
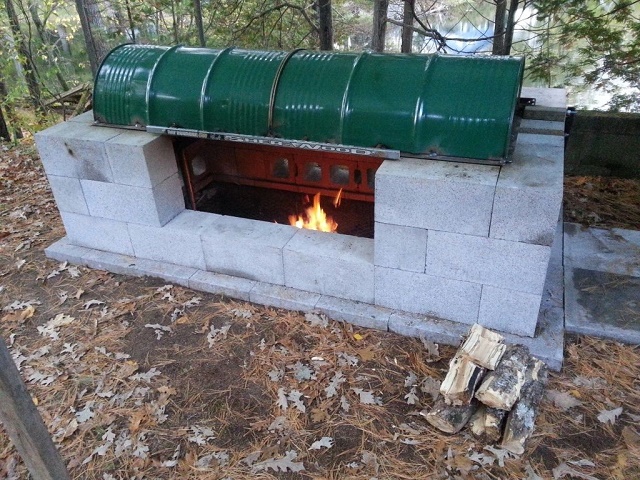
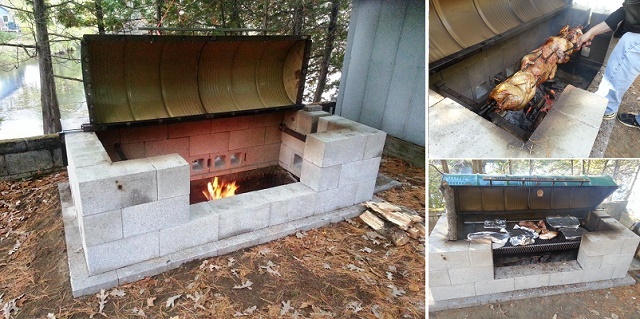
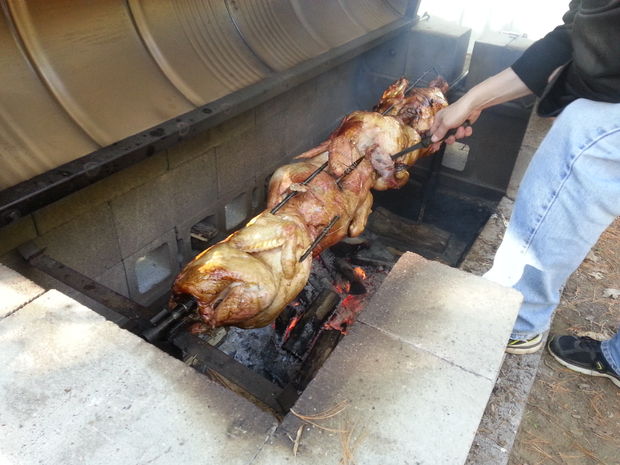
And here’s the finished product in use. We spear the turkeys length-wise and then use large steel ‘nails’ through holes in the spit to keep the meat from spinning freely. Wrap it all securely with stainless wire and foil, and even more wire, to keep it a tight-knit bundle of goodness.
Our 20 lbs birds took about 6 hours of cooking, removing the foil near the end for an hour of browning. Note that we sometimes supplement the fire with charcoal briquettes for a quick and long-lasting heat source….
After the turkeys and rotisserie are removed two more pipes can be laid down on the support arms and a grill placed on top to keep food warm…

If you like this idea, be sure to share it with your friends and inspire someone you know. Anything becomes possible with just a little inspiration…
