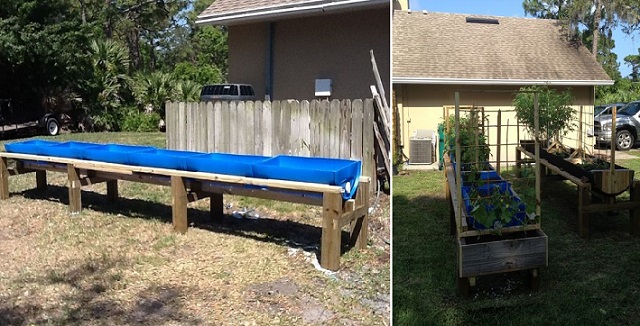
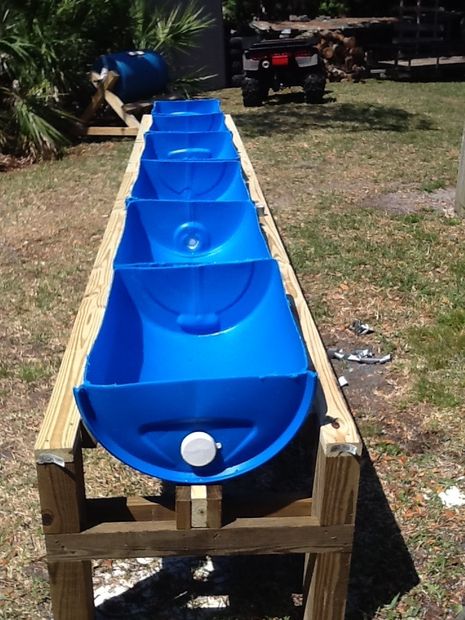
This is a solution I came up with for planting a garden above my septic system leach field. I didn’t want to plant directly on the field, or even create a raised bed. I had access to 55 gallon juice drums and thought I would make use of 3 of them. The stand features the 3 drums cut in half lengthwise, supported by a series of assemblies connected by 2×4 stringers. A good solution for the leach field issue, plus it’s easier on my back.
Step One – Assemble The Assemblies…
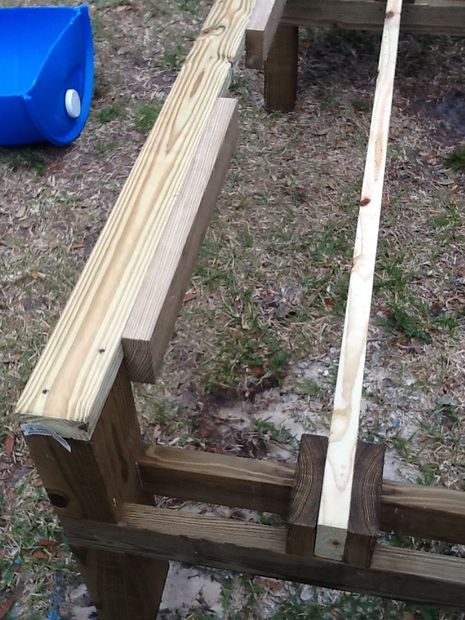
To begin, I created the 4 support assemblies that will be connected by the 2×4 stringers later on. For simplicity, I made them all identical and symmetrical. The two legs are made from 4×6 pressure treated (PT) lumber, and in my case, they measured 26-1/4″ long (high). The cross members that connect each leg are 2×4 PT and connect to the legs via dadoes cut in the legs…
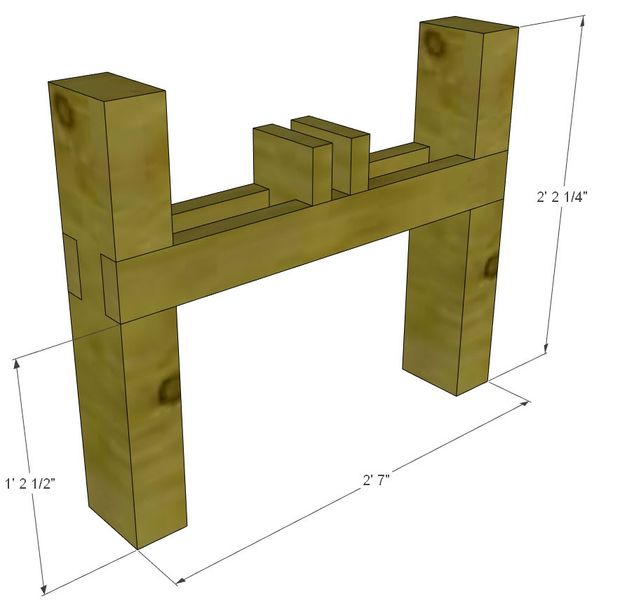
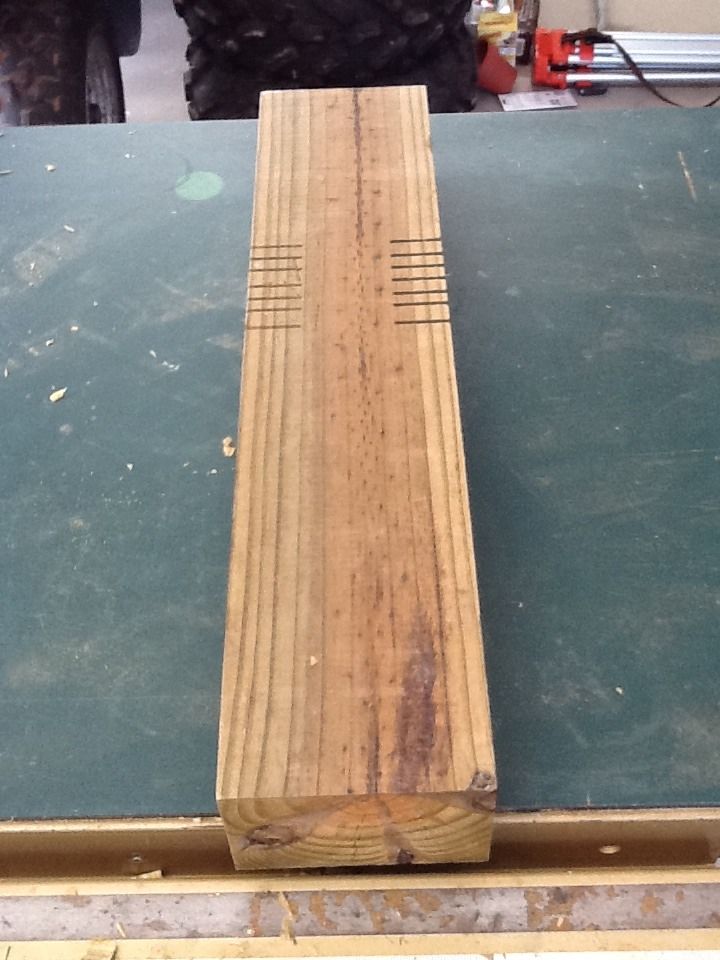
To create the dadoes, I carefully laid them out and hogged out the material using my table saw with the blade set to 1-1/2″ high and the miter gauge. With a series of kerfs cut, I turned to my chisel and hammer and cleaned the dadoes up, making sure a 2×4 would fit in snugly…
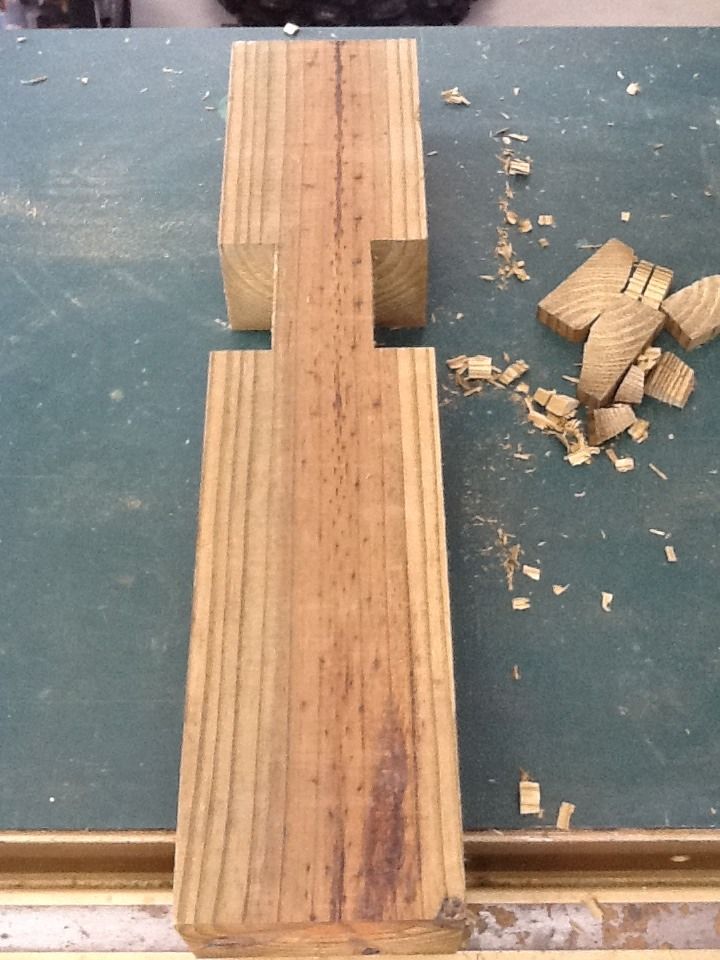
Note that the legs are connected by 2 cross members. Structurally, 1 would be sufficient, but I like the symmetry of using 2 (plus I had the material handy). When the dadoes are done, cut a couple of cross members to length (31″ in my case, which produces a perfect fit for the drums later on), lay on some construction adhesive and put a couple screws in each connection point…
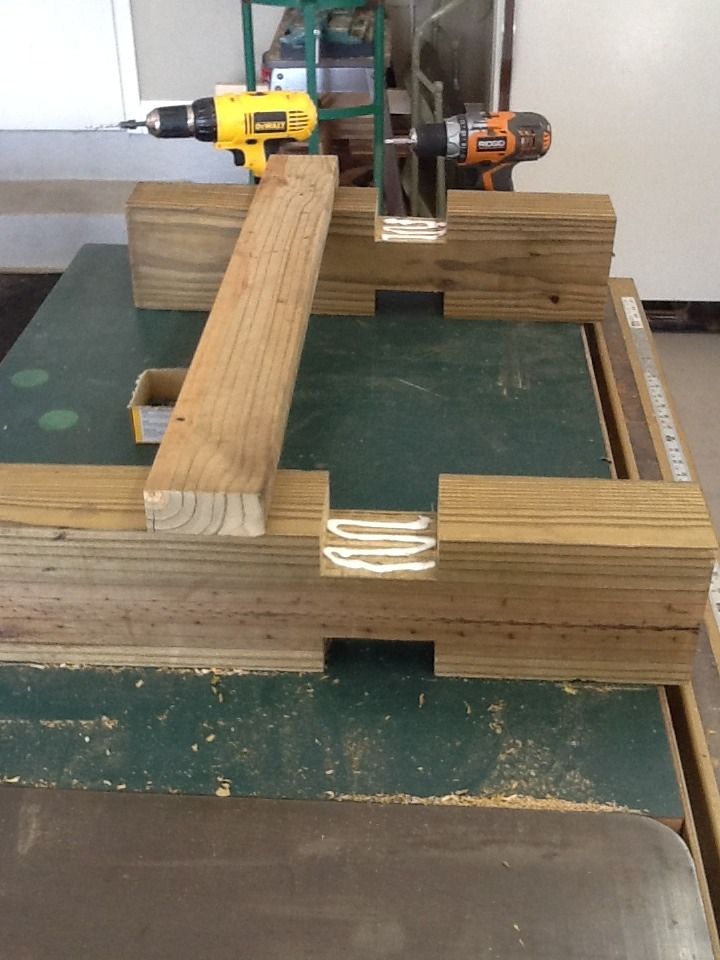
For my 6 half drums, I needed 4 assemblies. There is one more thing each assembly needs: a couple of pieces of wood that will straddle the longitudinal 2×4 that supports the underside of the drums. The inside of each piece go 3/4″ off the centerline of the cross members, so as to create a 1-1/2″ pocket that will hold the longitudinal piece…
Step Two: String Them Together…
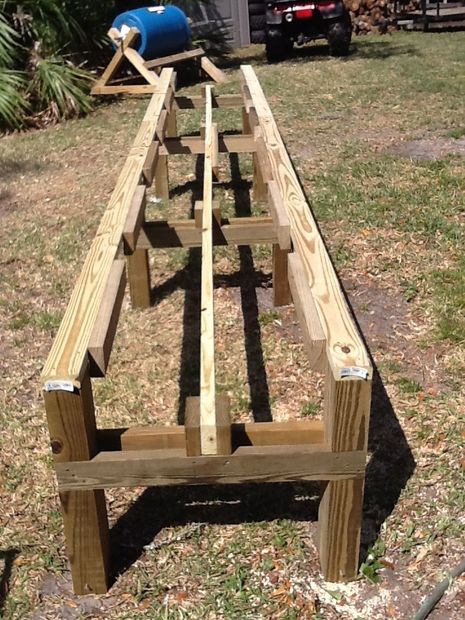
With the assemblies constructed, it’s time to connect them. I started by placing the first one where it needed to be, and temporarily staked it to the ground so it wouldn’t move. Using 2 string lines and precise measurements, I established the correct location for the last assembly. With the end assemblies in place, I used a string line so the intermediate assemblies would line up.
Now place the intermediate assemblies and level them all up. Next lay a 2×4 on the tops of the legs longitudinally, and screw them down. When 1 side is done, proceed to do the other side. Lastly, lay a 2×4 in the straddles that are on the leg assembly cross members and screw them into place. I didn’t use any construction adhesive in the field just in case I ever have to move it…
Step Three: Create A Snug Fit…
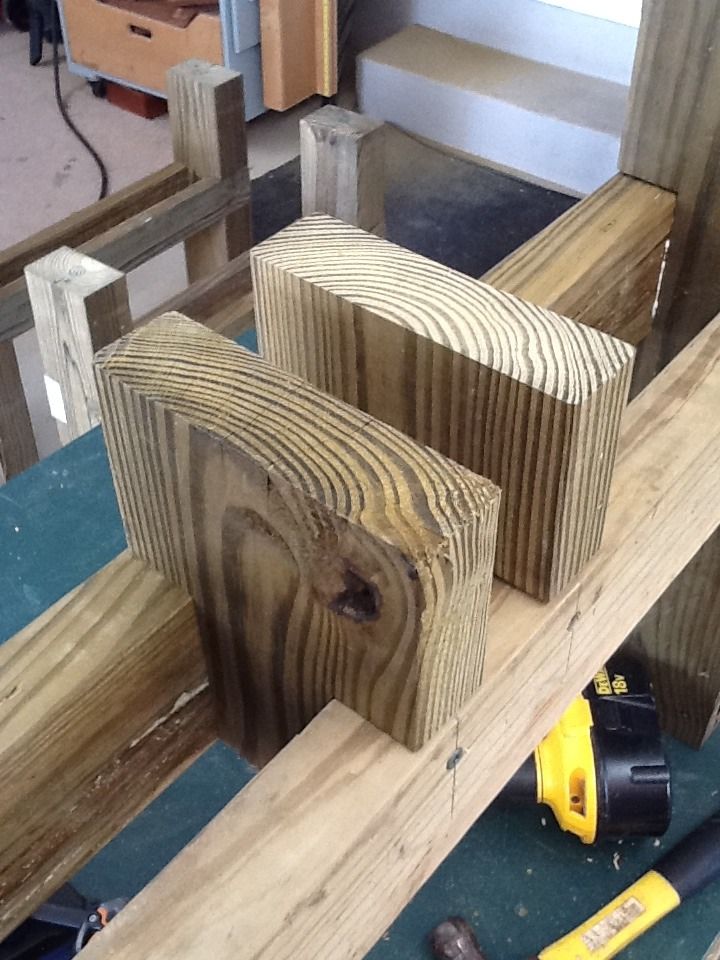
The next step is to screw on some 2′ lengths of 2×4’s to the inside of the 2×4’s you attached to the tops of the legs. These are designed to hold the half drums snugly so they don’t roll. Just lay out the mid point of each drum and center the 2×4 on each mark. Two screws on each is enough…
Step Four: Drum Roll Please…
Now it is time to cut the drums. Just carefully lay out the lines, and use a circular saw with a sharp carbide tipped blade. They cut very easily. Wash out the barrels, and lay them in place. I then drilled a few holes in the bottom of each one (slightly off centerline because of the 2×4 stringer that supports the drums), and then it’s time to fill with soil…
Project Update…
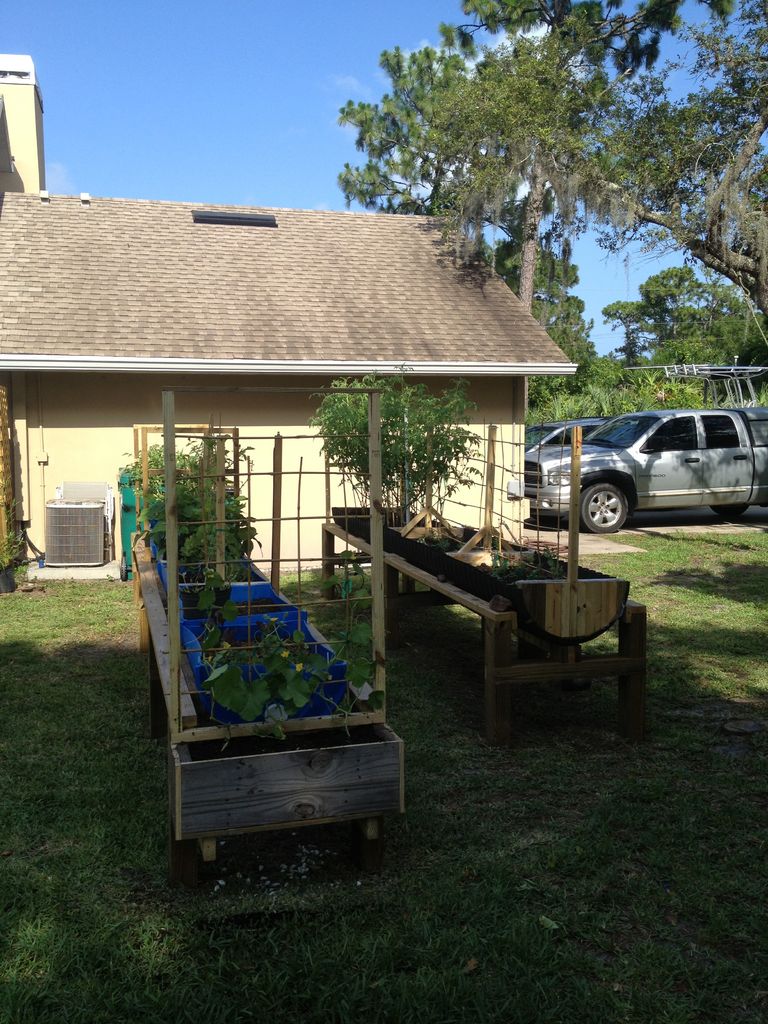
It has been a few months since I finished construction. I liked this project so much that I built another – this time for a 7′ long plastic culvert that was 24″ in diameter. The plants are growing well, and I’m experimenting with different ones since this is my first attempt at vegetable gardening.
One benefit to this design that I hadn’t planned on was the ability to easily add a trellis anywhere you need it. The 2×4 stringers that run along the top of the leg structures provide plenty of options for adding a trellis. I also added a planter box at the end of one, made from a pallet I salvaged and took apart (via Instructables)…