How To Become More Self-Sufficient Without Starting a Full-Blown Farm…
Want to start preserving your harvest, making your own soap, or building a backyard root cellar — but not sure where to begin? “Homesteading Advice” gives you instant lifetime access to 35+ practical homesteading books on food preservation, veggie gardening, DIY natural cleaning products (save over $250 per year with this skill alone), brewing, off-grid energy, and a whole lot more…
Click Here To Check It Out Now!
You are watching 80% of your energy disappear into the sky as smoke—here is how to capture it. Most preppers stockpile gasoline that goes bad in a year, but a master knows how to turn a fallen branch into a high-octane fuel that can power an engine. Wood gasification isn’t just ‘burning wood’; it’s a precision chemical process that turns carbon into a clean-burning combustible gas. Learn how to stop wasting your energy in a fireplace and start running your homestead on the fuel you already have growing in your backyard.
For the modern homesteader or the survivalist, energy independence is the ultimate goal. While solar panels and wind turbines are excellent for charging batteries, they often fall short when you need the raw mechanical power of an internal combustion engine to run a well pump, a saw, or a whole-home generator. This is where the wood gasifier steps in, bridging the gap between ancient fuel and modern machinery.
The concept of wood gasification isn’t new; it is a piece of ancestral wisdom that saw a massive resurgence during World War II when petroleum was scarce. In those days, thousands of vehicles across Europe were converted to run on “producer gas” derived from wood and charcoal. Today, we are reclaiming this technology to ensure that as long as the sun shines and the trees grow, we have the power to keep our lights on and our wheels turning.
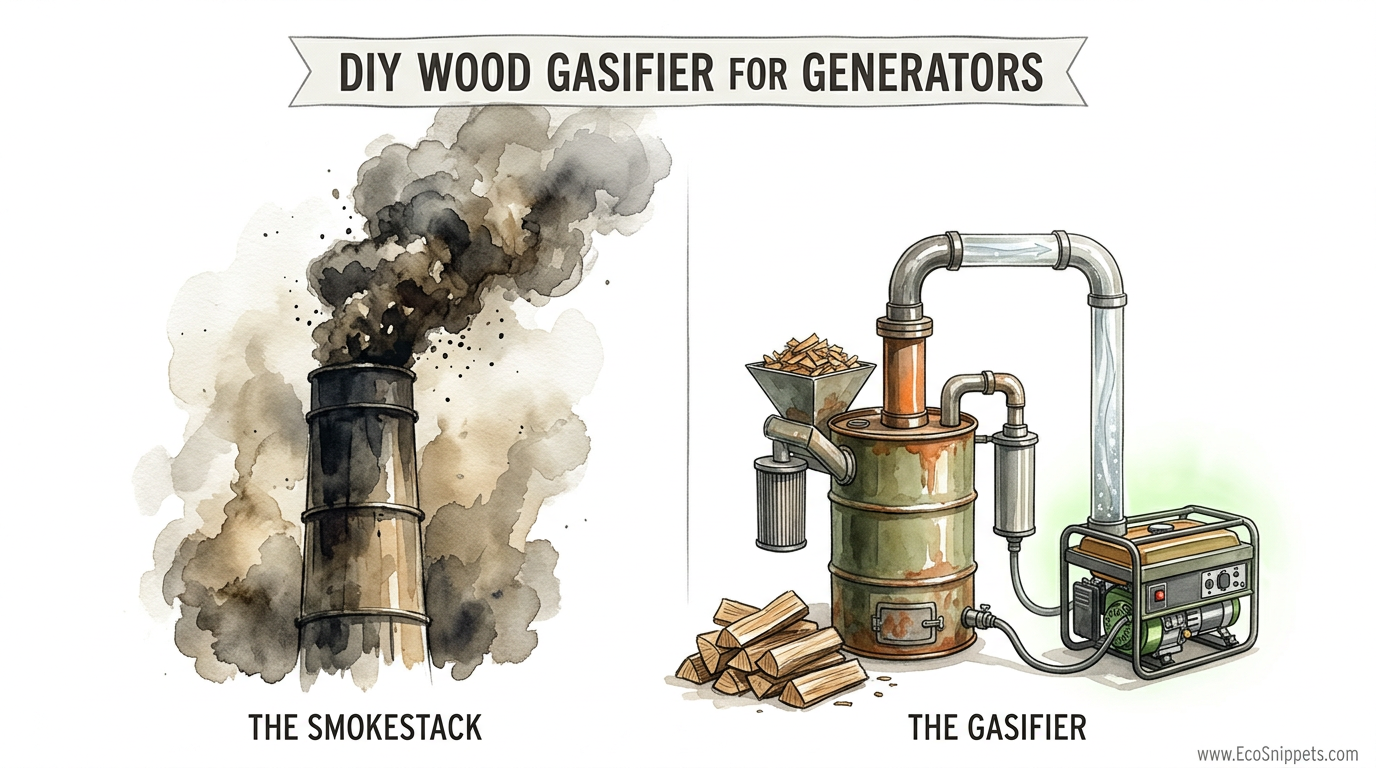
Diy Wood Gasifier For Generators
A DIY wood gasifier for generators is a device that thermally decomposes organic biomass—usually wood chips, pellets, or scrap lumber—in an oxygen-starved environment to produce a flammable gas known as syngas. This syngas consists primarily of carbon monoxide, hydrogen, and a small amount of methane. When filtered and cooled, this gas can be fed directly into the intake of a standard gasoline engine, allowing it to run without a single drop of liquid fuel.
In real-world homesteading, these units are often built from common materials like 55-gallon drums, propane tanks, and stainless steel canisters. They serve as a reliable backup power source that bypasses the need for complex supply chains. Whether you are facing a long-term grid-down scenario or simply want to utilize the waste wood from your woodlot, a gasifier turns a liability into a high-value asset.
Think of the gasifier as a chemical refinery that you can build in your backyard. Instead of burning wood to create heat and smoke, you are “cracking” the wood’s molecular structure to release the energy stored within its carbon bonds. It is the ultimate expression of pioneer grit: taking what others see as debris and refining it into the lifeblood of a functioning homestead.
How Wood Gasification Works: The Four Zones
Understanding the internal physics of a gasifier is crucial for anyone looking to build a reliable unit. The process typically happens in a vertical vessel where gravity feeds the fuel through four distinct chemical reaction zones. Each zone performs a specific task that prepares the gas for your generator.
1. The Drying Zone
At the very top of the hopper, the wood is heated by the rising gases from below. In this zone, moisture is driven out of the wood as steam. If your wood is too wet, this zone becomes overloaded, leading to excessive condensation and a “wet” gas that can extinguish your engine’s spark. Successful operators always ensure their wood has a moisture content below 20% to prevent this.
2. The Pyrolysis Zone
As the wood moves down, it enters the pyrolysis zone, where temperatures range from 400°F to 1100°F. Here, the wood begins to break down into charcoal and releases volatile gases, tars, and vapors. This is the same process used to make charcoal in a kiln, but in a gasifier, we are capturing those vapors rather than letting them escape.
3. The Combustion (Oxidation) Zone
Air is introduced into the unit at this level through nozzles called tuyeres. This creates a localized “fire” that reaches temperatures exceeding 2000°F. The goal here is not just to produce heat, but to create a “thermal cracker” that breaks down the long-chain tars produced in the pyrolysis zone. If this zone isn’t hot enough, those tars will survive and eventually gum up your generator’s valves.
4. The Reduction Zone
Finally, the hot gases pass through a bed of glowing red charcoal. In this oxygen-free environment, a chemical reaction occurs where carbon dioxide (CO2) is reduced back into carbon monoxide (CO), and water vapor is reduced into hydrogen gas (H2). This is where the actual “fuel” is created. The gas that exits this zone is hot, dirty, and ready for the cleaning and cooling stages.
Constructing the System: Step-by-Step Fundamentals
Building a gasifier requires a mix of welding skills and plumbing knowledge. While there are many designs, the “Imbert” or “downdraft” style is the gold standard for running engines because it forces the tars to pass through the hottest part of the fire, effectively destroying them before they reach your machinery.
The Reactor Vessel
Most DIY builds start with a heavy-duty steel container. A common configuration uses a stainless steel fire tube inside a larger mild steel barrel. The stainless steel is necessary for the combustion zone because the extreme temperatures will quickly oxidize and destroy regular carbon steel. You will need to fabricate a “hearth” or a restriction point that narrows the flow of fuel, ensuring that all gas passes through the center of the white-hot charcoal bed.
The Cooling System
The gas leaving the reactor is often over 700°F. Hot gas is less dense, meaning it contains less energy per cubic foot. To get the most power out of your generator, you must cool the gas to near-ambient temperatures. Many homesteaders use a series of long metal pipes, often arranged like a radiator, to dissipate this heat. This process also causes any remaining water vapor and tars to condense into a liquid “condensate,” which can be drained from the bottom of the cooling rack.
The Filtration Train
Even the best reactor will produce some fine ash and soot. You need a multi-stage filtration system to protect your engine. A “cyclone filter” is often the first stage, using centrifugal force to spin out heavy particles. The second stage usually involves a “hay filter” or a “sawdust filter,” where the gas passes through dry organic material that traps the finest dust. Some advanced users include a final “bubbler” or a cloth filter to ensure the gas is crystal clear.
The Air-Fuel Mixer
A gasoline engine cannot run on wood gas alone; it needs oxygen. Instead of a traditional carburetor, you will install a “Mixing T” at the engine’s air intake. This allows you to manually or automatically adjust the ratio of wood gas to fresh air. Because syngas has a lower energy density than gasoline, the engine will require much more “fuel” and less “air” than it normally would. Typically, a simple ball valve on the air intake is enough for a skilled operator to dial in the perfect mix.
Benefits of Using Wood Gas for Generators
The primary advantage of wood gasification is total fuel security. In a situation where the gas stations are dry and the power lines are down, a gasifier allows you to keep your freezers running and your tools powered using nothing but the waste from your own land. It is a renewable energy cycle that you control entirely.
Beyond survivalism, there are significant economic benefits. If you have access to free wood chips or sawdust, your cost per kilowatt-hour drops to nearly zero. Many woodworkers use their shop waste to power their entire workshop, turning a waste product that they would otherwise have to pay to dispose of into usable electricity.
Furthermore, wood gasification is surprisingly clean when compared to traditional wood burning. Because the process “cracks” the smoke and tars, the exhaust from a generator running on wood gas is virtually invisible and lacks the heavy particulates associated with a wood stove. The leftover byproduct in the reactor is high-quality biochar, which can be added to your garden to improve soil health and sequester carbon for centuries.
Challenges and Common Mistakes
The biggest hurdle for beginners is managing tar. If you build a “stratified” or “FEMA” style gasifier—which is simpler to construct—you will likely struggle with tar production. Tar is a sticky, black substance that will seize an engine’s intake valves in a matter of hours. To avoid this, you must ensure your combustion zone is sufficiently hot and your filtration is robust. Never skimp on the cooling and filtering stages; they are what stand between you and a ruined generator.
Another common mistake is using wood that is too large or too wet. Standard gasifiers prefer “chunked” wood—pieces about the size of a matchbox. If the pieces are too large, they create air pockets that allow oxygen to bypass the charcoal bed, resulting in a weak gas. If the wood is wet, the energy of the fire is wasted turning water into steam rather than making fuel. Always season your gasifier fuel just as you would your firewood, aiming for 10-15% moisture.
Safety is also a paramount concern. Wood gas contains high levels of carbon monoxide (CO), which is odorless and deadly. A gasifier must always be operated in a well-ventilated outdoor area. Leak-testing your plumbing is mandatory, as even a small leak can allow CO to accumulate in a shed or garage, posing a lethal threat to anyone inside.
Limitations and Realistic Expectations
It is important to manage your expectations regarding power output. Wood gas has a lower “caloric value” than gasoline. On average, you can expect a 30% to 50% reduction in horsepower when switching from gasoline to syngas. If you have a 10kW generator, it will likely only produce 5kW to 7kW of usable power on wood gas. You must size your generator accordingly; if you need to run a 5kW load, you should convert a 10kW unit to ensure you have enough overhead.
Maintenance is also much higher than with a standard setup. You cannot simply “set it and forget it.” The ash must be emptied from the reactor regularly, filters must be cleaned or replaced, and the condensate must be drained. A wood gasifier is a “hands-on” technology that requires an attentive operator who understands the rhythms of the machine.
Environmental factors also play a role. Cold weather can make starting the unit more difficult and can cause more condensation in the cooling lines, which may freeze if not properly insulated or drained. Conversely, very hot weather can make it harder to cool the gas sufficiently, leading to lower engine efficiency. These are not deal-breakers, but they are variables that a master practitioner must account for.
Comparing Gasifier Designs
When deciding which design to build, you generally choose between ease of construction and gas quality. Below is a comparison of the two most common DIY approaches.
| Feature | FEMA Design (Emergency) | Imbert / Keith Design (Long-Term) |
|---|---|---|
| Complexity | Low – Built with scrap drums | High – Requires precision welding |
| Tar Production | High – Risk of engine damage | Minimal – Tars are thermally cracked |
| Maintenance | Frequent filter cleaning | Less frequent, stable operation |
| Fuel Sensitivity | Very sensitive to moisture | More forgiving due to heat recovery |
For most serious homesteaders, the extra effort of building a refined Imbert-style unit is well worth the investment. The “Keith” gasifier, popularized by Wayne Keith, is a modern evolution of this design that incorporates extensive heat recovery, making it one of the most efficient ways to power a vehicle or a large generator on wood.
Practical Tips and Best Practices
To get started on the right foot, focus on your fuel preparation first. A wood gasifier is only as good as the wood you feed it. Invest in a dedicated wood “chunker” or use a heavy-duty chipper to create consistent fuel sizes. Avoid long, thin sticks that can “bridge” in the hopper, preventing the fuel from falling into the fire zone.
When starting the unit, use a high-powered blower to draw air through the system until the gas becomes “lightable.” You can test this with a simple flare at the end of the line. Once the gas burns with a steady, translucent blue or purple flame, you know it is clean enough to feed into the engine. If the flame is yellow and smoky, you are still producing tars; keep the blower running until the reactor reaches its proper operating temperature.
Pro Tip: Install an O2 (oxygen) sensor in the exhaust of your generator. This allows you to monitor the combustion in real-time. By connecting the O2 sensor to a simple digital gauge, you can precisely adjust your air-fuel mixture valve to maintain the “stoichiometric” ratio, ensuring maximum power and minimum emissions.
Advanced Considerations: Automation and CHP
For those who want to take their system to the next level, automation is the key. Advanced builders use small microcontrollers to operate servo motors on the air-fuel mixture valves. This allows the system to automatically compensate for changes in engine load, such as when a well pump or a refrigerator kicks on. This level of sophistication transforms the gasifier from a manual project into a true utility-grade power source.
Another advanced strategy is Combined Heat and Power (CHP). A generator is only about 25% efficient at turning fuel into electricity; the rest of the energy is lost as heat. By installing a heat exchanger on the generator’s exhaust and another around the gasifier’s cooling pipes, you can capture that “waste” heat to provide hot water or space heating for your home. This can push the total system efficiency above 80%, making it one of the most efficient ways to utilize biomass on a small scale.
Consider also the potential for “dual-fuel” operation. Some homesteaders run their generators on a mix of 90% wood gas and 10% gasoline. This provides the lubrication of the liquid fuel and ensures the engine remains stable even if the gas quality fluctuates slightly. It is a great way to transition into gasification while maintaining a safety net for your equipment.
Realistic Scenario: Powering a Homestead
Imagine a typical autumn day on a self-reliant homestead. You have several cords of hardwood seasoning, but you also have a pile of branches from pruning your orchard. Instead of burning those branches in a brush pile, you run them through a chunker and load them into your gasifier’s hopper.
You fire up the reactor using a small propane torch at the tuyeres. After five minutes of draw from the 12V startup blower, the flare burns blue. You switch the valves, and your 8kW generator rumbles to life, running purely on orchard waste. The unit consumes approximately 1.5 to 2 pounds of wood per kilowatt-hour produced. Over a four-hour run, you use about 40 pounds of wood—roughly two five-gallon buckets—to keep your freezers cold, charge your battery bank, and pump 500 gallons of water into your storage tanks.
When the run is finished, you let the unit cool and then shake the grate to collect the biochar. You now have the power you needed, and you have produced a valuable soil amendment in the process. This isn’t a theoretical dream; it is the daily reality for hundreds of people who have mastered the art of the wood gasifier.
Final Thoughts
Mastering wood gasification is a journey back to the roots of self-reliance. It requires you to step away from the convenience of the gas pump and into the role of a technician and a craftsman. While the learning curve can be steep, the reward is a level of independence that few people in the modern world will ever experience. You aren’t just generating power; you are reclaiming the ability to provide for yourself regardless of external circumstances.
As you begin your journey, start small. Build a simple “flare-only” gasifier to understand the physics of the four zones. Once you can produce a clean, tar-free flame, move on to converting a small, inexpensive engine before attempting to power your main homestead generator. The wisdom of the past is waiting to be rediscovered—one branch at a time.
By integrating wood gasification into your energy strategy, you ensure that your home remains a beacon of light and heat, no matter what the future holds. It is a testament to pioneer grit and a practical solution for anyone serious about living a truly independent life.
