How To Become More Self-Sufficient Without Starting a Full-Blown Farm…
Want to start preserving your harvest, making your own soap, or building a backyard root cellar — but not sure where to begin? “Homesteading Advice” gives you instant lifetime access to 35+ practical homesteading books on food preservation, veggie gardening, DIY natural cleaning products (save over $250 per year with this skill alone), brewing, off-grid energy, and a whole lot more…
Click Here To Check It Out Now!
Our ancestors cooked for 8 hours using only 15 minutes of fuel—here is their secret. Now we rely on a steady stream of electricity to keep our food warm. But Then, homesteaders used ‘Fireless Cookers.’ You bring your stew to a boil for 10 minutes, then tuck it into a highly insulated box. The retained heat finishes the job for free. It’s the ultimate energy hack for a cloud-bound solar homestead.
When the sun refuses to peek through the clouds and your battery bank is looking lean, every watt of electricity feels like a precious resource. In these moments, the modern convenience of an electric slow cooker becomes a liability rather than an asset. This is where the wisdom of the past meets the necessity of the present. The haybox, or fireless cooker, is more than just a box filled with dried grass; it is a masterclass in thermodynamics designed by people who understood that fuel was never meant to be wasted.
The concept is deceptively simple. Most of the energy used in traditional cooking is spent not on the actual chemical transformation of the food, but on fighting the constant loss of heat to the surrounding air. If you can stop that heat from escaping, the food will continue to cook itself using the energy already stored in the pot. This method has sustained pioneers crossing the plains and families surviving the fuel rations of the World Wars. Today, it offers a path to true energy independence for anyone willing to trade a little bit of planning for a lot of self-reliance.
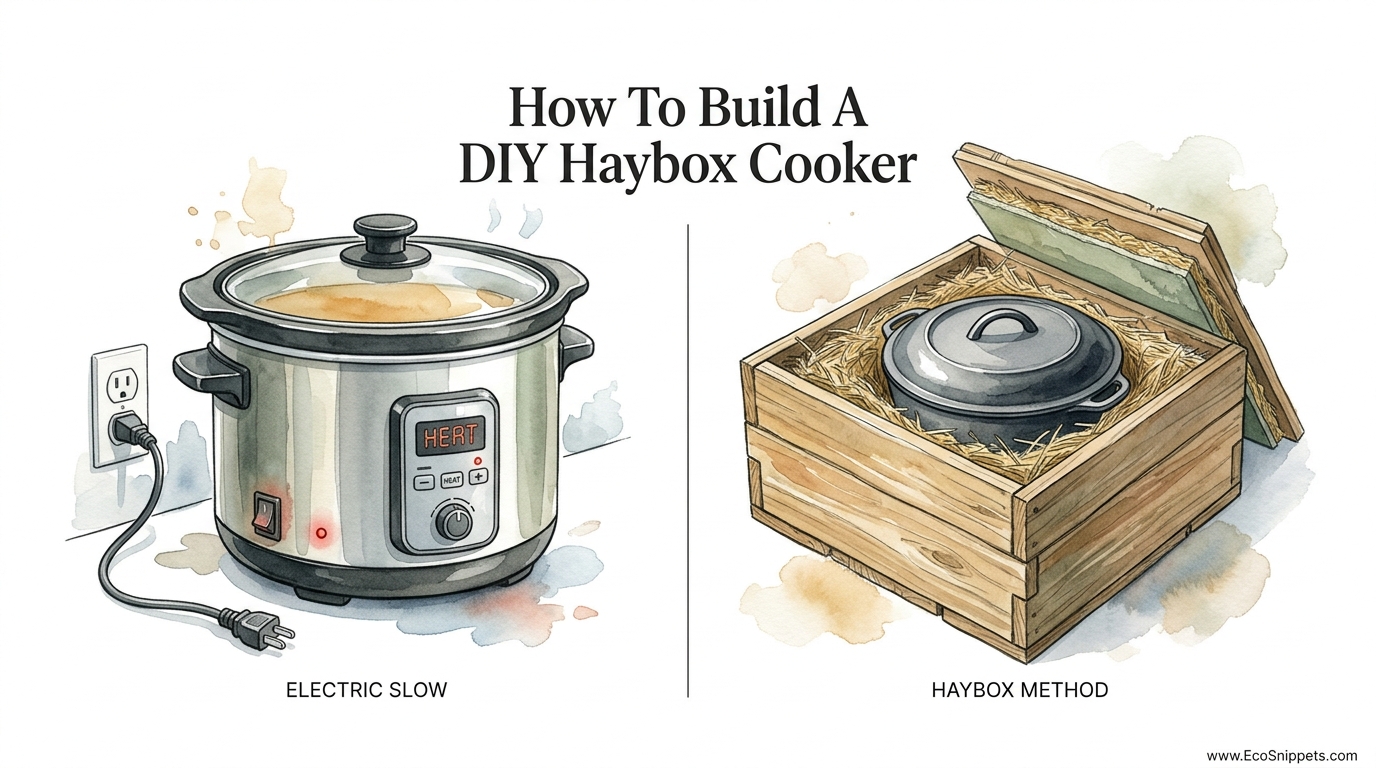
How To Build A DIY Haybox Cooker
A DIY Haybox Cooker is essentially a thermal battery for your kitchen. It is an insulated container designed to hold a cooking pot so snugly that heat loss is slowed to a crawl. In the real world, this looks like a sturdy outer box—made of wood, plastic, or even heavy cardboard—lined with thick layers of insulating material like wool, hay, sawdust, or modern recycled foam. It exists to bridge the gap between high-energy cooking and passive thermal retention, making it a staple for off-grid living, camping, or emergency preparedness.
Think of it as a heavy-duty thermos for your dinner. Just as a thermos keeps your coffee hot for a morning hike, a haybox keeps a five-quart Dutch oven at a simmering temperature for an entire afternoon. This technology was popularized in the 19th century as the “Norwegian Self-Acting Cooker” and later became a household necessity during WWI and WWII to conserve rationed coal and gas. It allows a homesteader to start a meal in the morning with a quick fire, then go out to tend the garden or livestock, knowing a hot meal will be waiting hours later without a single coal being added to the hearth.
Building one requires no specialized tools, only an understanding of how to trap air. The best insulation materials are those that create thousands of tiny pockets of still air, which is the most effective way to block heat transfer. Whether you use traditional sheep’s wool or modern polystyrene, the goal remains the same: create a thermal barrier at least two to four inches thick on all sides of the pot, including the bottom and the lid.
Choosing Your Outer Shell
Your outer container serves as the structural frame and the first line of defense against drafts. A wooden crate is the most durable and nostalgic choice, offering a heavy lid that can be latched down to compress the insulation. However, many modern homesteaders find success using an old plastic camping cooler. Coolers are already semi-insulated and airtight, making them an excellent base for a high-performance fireless cooker. If you are starting from scratch and need a budget-friendly option, two cardboard boxes—one nesting inside the other with a four-inch gap between them—work remarkably well if kept dry.
Selecting the Right Insulation
The heart of your DIY Haybox Cooker is the fill material. Traditionally, dry hay or straw was used because it was abundant on the farm. While effective, hay can be messy and attractive to pests like ants or mice. Raw sheep’s wool is perhaps the gold standard of natural insulators; it is fire-resistant, holds its loft, and has incredible thermal properties. For those in urban environments, shredded newspaper, old wool blankets, or even wood shavings are viable alternatives. Ensure that whatever material you choose is bone-dry, as moisture will conduct heat away from your pot rather than trapping it.
The Physics of Retained Heat: How It Works
Understanding the science behind the haybox helps you troubleshoot your builds and refine your technique. Heat moves in three ways: conduction, convection, and radiation. Your fireless cooker must tackle all three to be effective. Conduction is the direct transfer of heat through solids; you stop this by ensuring your pot doesn’t touch the outer walls of the box. Convection is the movement of heat through air currents; you stop this by packing your insulation tightly to eliminate “voids” where air could circulate. Radiation is the heat energy that “shines” off the pot; you can combat this by lining your box with a reflective material like aluminum foil or Mylar.
When you bring a pot of beef stew to a rolling boil, the water and the heavy cast iron of the pot act as a reservoir of thermal energy. In a standard kitchen, that heat would radiate into the room, requiring the stove to constantly pump in new energy to maintain the temperature. Inside the haybox, that initial “charge” of heat is trapped. The temperature will drop slowly—perhaps only 5 to 10 degrees per hour—leaving the food in the ideal “low and slow” cooking range of 180°F to 200°F for several hours. This is the exact same temperature range used by modern electric slow cookers on their “low” setting.
The key to success is thermal mass. A half-empty pot has too much air inside, which cools down rapidly. For the best results, you should fill your cooking vessel to about 80% or 90% capacity. This ensures there is enough hot liquid and solid food to maintain the temperature long enough to break down tough fibers in meat or soften hard beans and grains. Small quantities of food simply do not hold enough energy to cook themselves through in a large, poorly fitted box.
Benefits of the Fireless Method
The most immediate advantage is the staggering reduction in fuel consumption. Most recipes require only 10 to 15 minutes of active heating on a stove or over a fire to reach a rolling boil. Once the pot is moved to the haybox, the fuel is turned off. For a solar-powered home, this means you can cook a roast in the middle of a winter storm without draining your batteries. For a wood-stove user, it means you don’t have to keep the fire roaring all afternoon just to simmer a pot of beans.
Beyond energy savings, the culinary benefits are noteworthy. Because the heat is coming from within the food itself rather than an external source, it is impossible to burn the bottom of the pot. You will never have to scrape scorched rice or charred beans again. The gentle, declining temperature profile is perfect for tenderizing cheap, tough cuts of meat like chuck roast or brisket. Furthermore, because the pot remains sealed and the liquid never reaches a violent boil, the delicate flavors and nutrients are preserved rather than being steamed away into the kitchen air.
Flexibility is the final great benefit. A haybox is essentially a “set it and forget it” system that requires no monitoring. You can put your dinner in the box at 10:00 AM, go to work or spend the day in the woods, and return at 6:00 PM to a steaming hot meal. It acts as its own serving station, keeping food at a safe, palatable temperature for hours after the cooking is finished. This is particularly useful for large family gatherings where stove space is at a premium.
Challenges and Common Mistakes
The most frequent error is failing to create a “tight nest” for the pot. If there are large gaps between the pot and the insulation, the heat will escape into those air pockets and the temperature will plummet. To avoid this, many homesteaders create a “pillow” filled with the same insulation material that sits directly on top of the pot before the main lid is closed. This ensures that the pot is completely encased in a snug, insulating cocoon with no room for air to move.
Dampness is the silent enemy of the haybox. If your insulation gets wet—either from a spill or from the steam escaping the pot—it loses a massive portion of its R-value. Water is a great conductor of heat, which is the exact opposite of what you want. Always ensure your pot has a tight-fitting lid, and consider wrapping the pot in a clean, dry towel before placing it in the insulation. This towel serves two purposes: it catches any minor drips and keeps the insulation (like hay or sawdust) from falling into your food when you open the pot.
Another pitfall is “peeking.” Every time you open the lid of your fireless cooker to check the progress, you release a significant amount of the stored energy. Unlike a stove where the heat is replenished, a haybox is a closed system. Once the heat is gone, it’s gone. You must trust the process and keep the box sealed until it is time to serve. If you absolutely must check the temperature, use a probe thermometer with a wire that can stay in place, though this can sometimes compromise the seal of the lid.
Limitations: When the Haybox Is Not Ideal
While the haybox is a miracle for stews, soups, and grains, it is not a universal cooking tool. It cannot fry, sear, or bake in the traditional sense. Anything that requires a dry, high-heat environment—like a crusty loaf of bread or a crispy-skinned chicken—cannot be finished in a fireless cooker. You must also be wary of “thin” foods. A clear broth or a pot of watery tea has less thermal mass than a thick porridge or a dense meat stew and will therefore cool down much faster.
Environmental factors also play a role. If you are using a haybox in a freezing cold barn, it will struggle more than if it is sitting in a temperate kitchen. While a well-built box can overcome cold ambient temperatures, the insulation must be significantly thicker to compensate. Additionally, if you are cooking for just one or two people, it can be difficult to fill a large pot to the necessary 80% capacity. In these cases, it is better to use a smaller pot and place it inside a larger pot filled with boiling water to provide the necessary thermal mass.
Finally, there is the time factor. Retained heat cooking is slow. It usually takes two to three times as long as simmering on a stove. If you need a meal in 30 minutes, the haybox is the wrong choice. This is a method for the patient practitioner who values efficiency and flavor over speed. You must plan your meals with a four to eight-hour lead time to get the best results.
Comparison: Electric Slow Cooker vs. Haybox Method
It is helpful to see how these two methods stack up in terms of real-world requirements. While the electric slow cooker is the king of convenience in the modern world, the haybox wins on durability and independence. The following table highlights the key differences for a homesteader making a choice between the two.
| Feature | Electric Slow Cooker | DIY Haybox Cooker |
|---|---|---|
| Energy Source | Continuous Electricity (70W – 250W) | 15 min Initial Fuel (Gas/Wood/Solar) |
| Complexity | High (Electronics, heating element) | Low (Box, insulation, physics) |
| Risk of Burning | Low (but possible if liquid dries out) | Zero (Heat only declines) |
| Portability | Limited (Requires a plug) | High (Cooks while you travel) |
| Cost to Build/Buy | $30 – $150 | $0 – $20 (DIY) |
| Maintenance | Replace if electronics fail | Keep insulation dry and clean |
The electric slow cooker is an excellent tool when you have an abundance of grid power or a very large solar array. However, the haybox is the superior choice for those looking to “unplug.” The fact that a haybox can be built from trash and still outperform a $100 appliance in terms of energy efficiency is a testament to the power of simple, ancestral technology. It is a tool that never breaks, never needs a software update, and will work just as well 50 years from now as it does today.
Practical Tips and Best Practices
To get the most out of your DIY Haybox Cooker, you must pay attention to the details of the “initial boil.” Bringing the food to a boil is not enough; you must ensure the entire thermal mass of the pot and the ingredients is heated through. For large pieces of meat or thick vegetables, this means simmering for at least 15 to 20 minutes before transfer. This ensures the center of the food is just as hot as the liquid, preventing it from acting as a “heat sink” that cools the pot down from the inside once it’s in the box.
Pot selection is equally vital. A thin aluminum pot is a poor choice because it loses heat instantly. A heavy cast iron Dutch oven or a thick-walled stainless steel stockpot is the preferred vessel. These materials have high heat capacity, meaning they “soak up” more energy and release it slowly over time. If your pot has long handles that prevent it from fitting snugly in the box, consider switching to a “stacking” style pot or a traditional “belly” pot with small side handles.
- Pre-heat your box: If it’s a very cold day, put a jug of hot water in the haybox for 10 minutes before you put your food in to warm up the insulation.
- Minimize headspace: If your pot is only half full, fill a clean glass jar with boiling water and place it inside the pot (if there is room) to add thermal mass.
- Use a “drawstring” liner: Sew a simple fabric liner for your insulation nest. This makes it easy to remove and shake out any hay or sawdust, and it keeps the interior looking tidy.
- Seal the lid: Use a heavy weight—like a couple of bricks or a large stone—on top of the outer box lid to ensure the insulation is compressed and the seal is airtight.
Advanced Considerations: R-Value and Solar Integration
For the serious practitioner, optimizing the insulation is a rewarding challenge. Different materials have different R-values (a measure of thermal resistance). While hay is romantic, modern mineral wool or specialized closed-cell foams offer much higher R-values per inch. If you are building a permanent haybox into your kitchen cabinetry, investing in high-end insulation can extend your cooking time from 6 hours to over 12 hours. This allows for the “overnight” cooking of tough grains like whole wheat berries or dry beans that usually require an eternity on the stove.
Integrating a haybox with a solar oven is a powerful combination for the off-grid homestead. You can use the high heat of a solar cooker during the peak sun hours of 11:00 AM to 1:00 PM to bring a pot to a boil, then transfer it to the haybox. This frees up the solar oven to cook a second dish or bake bread, while the first dish finishes in the insulated box. This “cascading” energy system allows you to prepare a full, multi-course meal using nothing but the sun, even on days when the clouds roll in by mid-afternoon.
You can also experiment with “heat stones.” Our ancestors often placed a soapstone or a flat brick in the fire until it was glowing hot, then placed it at the bottom of the haybox beneath the pot. This adds a secondary source of energy that can counteract any minor heat loss, effectively turning your haybox into a high-performance thermal oven. If you use this method, ensure there is a layer of non-combustible material (like a tile or metal plate) between the stone and any flammable insulation like hay or cardboard.
Example Scenario: The 8-Hour Homestead Beef Stew
To see how this works in practice, let’s look at a standard beef stew. In a traditional kitchen, you might sear the meat, add vegetables and broth, and let it simmer on the stove for 3 hours. On a homestead, that’s 3 hours of wood or propane being burned. With a haybox, the process changes only slightly, but the savings are massive.
At 9:00 AM, you brown your beef and onions in a heavy cast iron Dutch oven. You add your carrots, potatoes, and stock. You bring the entire mixture to a vigorous, rolling boil for 15 minutes. This ensures the potatoes and meat are hot all the way to their core. At 9:15 AM, you put the lid on tight, wrap the pot in a single layer of towel, and nestle it into the haybox. You place the insulation pillow on top and latch the lid.
Throughout the day, you go about your chores. At 5:00 PM—nearly eight hours later—you open the box. The internal temperature of the stew is still 165°F. The beef is “fork-tender” because it has been sitting in a gentle, moist heat that doesn’t toughen the proteins. The potatoes are soft but haven’t turned to mush because they weren’t subjected to the turbulence of a constant boil. You serve a hot, nutritious meal that only cost you 15 minutes of fuel.
Final Thoughts
The DIY Haybox Cooker is a bridge to a more resilient way of life. It reminds us that efficiency isn’t always about the latest high-tech gadget; often, it’s about rediscovering the fundamental laws of nature that our grandparents knew by heart. By simply stopping the waste of heat, we reclaim our time, our fuel, and our autonomy. Whether you are building one out of a sense of nostalgia or out of a hard-nosed need for survival, the fireless cooker will quickly become one of the most valued tools on your homestead.
Experimentation is the best way to master this skill. Start with simple foods like rice or lentils to get a feel for how well your box holds heat. Once you trust your build, move on to more complex stews and roasts. Every time you turn off that stove after just 15 minutes and walk away, you’ll feel a sense of “pioneer grit”—the satisfaction of knowing you’ve hacked the energy system using nothing but a box and some common sense. It’s a small step toward self-reliance, but it’s one that tastes like a job well done.
