How To Become More Self-Sufficient Without Starting a Full-Blown Farm…
Want to start preserving your harvest, making your own soap, or building a backyard root cellar — but not sure where to begin? “Homesteading Advice” gives you instant lifetime access to 35+ practical homesteading books on food preservation, veggie gardening, DIY natural cleaning products (save over $250 per year with this skill alone), brewing, off-grid energy, and a whole lot more…
Click Here To Check It Out Now!
When the stores are empty and the power is out, your kitchen cabinets hold the secret to 100 hours of light. Batteries have a shelf life and a fragile supply chain. This ancient DIY lighting method uses common kitchen oil and a bit of cork to create a light source that is as resilient as you are. Stop buying plastic and start using what you already have.
Modern reliance on the grid has made us forget the simple wisdom of our ancestors. For thousands of years, the flickering glow of an oil lamp was the only thing standing between a family and the crushing dark of night. This isn’t about fancy survival gear or high-tech gadgets; it is about reclaiming a skill that kept humanity moving forward long before the first power line was ever strung.
Learning to craft a functional light source from pantry staples is more than just a clever trick. It is a fundamental shift from being a consumer to being a producer. Whether you are facing a temporary storm-induced blackout or a long-term disruption, knowing how to turn a bottle of olive oil into a steady, clean-burning flame ensures your home remains a sanctuary.
DIY Olive Oil Lamps For Off-Grid Lighting
The olive oil lamp is perhaps the oldest form of artificial lighting still in use today. Archaeologists have uncovered clay and stone oil lamps dating back over 5,000 years, with some primitive versions appearing as early as 12,000 BC. These vessels were the lifeblood of ancient Mediterranean civilizations, providing the light necessary for work, study, and spiritual practice.
At its core, an olive oil lamp consists of three parts: a reservoir to hold the oil, a wick to draw the fuel upward, and a support structure to keep the wick in place. Unlike modern kerosene or paraffin lamps, which rely on highly refined petroleum products, an olive oil lamp burns a renewable, organic fat. This makes it uniquely suited for off-grid living where specialized fuels might be impossible to source.
In the real world, this method is still used in traditional religious ceremonies, particularly within Orthodox Christian and Jewish traditions. The Temple Menorah mentioned in ancient texts was fueled by pure, extra-virgin olive oil, chosen for its clean burn and symbolic purity. Today, people living in remote areas or those committed to sustainable living choose olive oil lamps because they are non-toxic and incredibly safe.
The light produced is a soft, warm amber glow. While it may not illuminate a whole room with the intensity of a 60-watt bulb, it provides enough light to read, cook, and navigate safely. Most importantly, it is a “pantry-powered” solution. As long as you have cooking oil, you have light.
How the Mechanics of Oil Lighting Work
Understanding how to build a lamp starts with the science of combustion. Olive oil has a very high flash point, typically between 460°F and 550°F. This means it is much harder to ignite than kerosene or gasoline, which have much lower flash points and can be volatile. Olive oil will not catch fire if you drop a match into a bowl of it; it requires a wick to concentrate heat and vaporize the oil into a burnable gas.
Capillary action is the secondary force at play. As the flame at the top of the wick consumes the oil, it creates a vacuum that pulls more liquid up through the fibers of the wick. Because olive oil is more viscous (thicker) than petroleum fuels, it does not travel as far or as fast. This is why the design of an olive oil lamp must keep the wick very close to the fuel surface—usually no more than a quarter-inch of wick should be exposed above the oil.
To build a basic “Floating Wick” lamp, follow these steps:
First, select a glass jar or ceramic bowl. A pint-sized Mason jar is an excellent choice because the glass is heat-treated to withstand temperature changes. Fill the jar about halfway with water. This acts as a safety barrier and a cooling agent; should the lamp tip over, the water will instantly extinguish the flame.
Next, pour a layer of olive oil on top of the water. The oil will naturally float because it is less dense. You only need about half an inch to an inch of oil to get several hours of burn time.
Create your wick holder using a small piece of natural cork. Slice a disc about a quarter-inch thick from a standard wine cork. Use a needle or a small nail to poke a hole through the center of the cork. If you want to prevent the cork from charring, you can wrap the top with a tiny piece of aluminum foil, though this is not strictly necessary for short-term use.
Prepare your wick by cutting a 1-inch piece of 100% cotton string or twine. Avoid synthetic blends, as they will melt and produce toxic fumes. Thread the cotton through the hole in the cork. Make sure the bottom of the string is long enough to sit in the oil, but not so long that it reaches the water layer.
Place the cork assembly into the jar. Let it sit for a minute to allow the cotton to fully saturate with oil. This is a critical step; lighting a dry wick will cause it to burn away into ash immediately. Once the wick looks dark and wet, strike a match and light the tip.
The Benefits of Choosing Pantry Power
Safety is the primary advantage of olive oil over other fuels. Because of the high flash point mentioned earlier, olive oil lamps are incredibly stable. If a kerosene lamp is knocked over, the fuel can ignite and spread a fire rapidly. If an olive oil lamp spills, the liquid itself is not flammable at room temperature. The flame will almost always go out the moment the wick loses its upright position or hits the water at the bottom of the container.
Health is another significant factor. Petroleum-based lamp oils and candles made from paraffin wax release soot and volatile organic compounds (VOCs) into the air. For individuals with respiratory issues or sensitivities, these can cause headaches and irritation. Pure olive oil burns 99% clean. It produces virtually no smoke and has a neutral or slightly pleasant nutty aroma.
Longevity and storage give olive oil an edge in long-term preparedness. While batteries lose their charge over years and flashlight components can corrode, olive oil remains shelf-stable for a long time. An unopened bottle of high-quality olive oil can last 18 to 24 months in a cool, dark place. Even if the oil goes rancid and is no longer ideal for cooking, it remains perfectly functional as a fuel source.
Economic efficiency is often overlooked. A single liter of olive oil can provide between 250 and 300 hours of light. Compared to the cost of high-quality emergency candles or the recurring cost of replacement batteries, olive oil is one of the most cost-effective ways to maintain light during an extended outage.
Common Mistakes and How to Avoid Them
The most frequent error beginners make is using a wick that is too long or too thick. If the wick extends more than a quarter-inch above the cork, the flame will become too large, start to flicker, and eventually produce smoke. This is because the oil cannot travel up the wick fast enough to keep the fibers cool, causing the cotton itself to burn rather than the oil vapor. Keep the wick trimmed short for a steady, “passionless” flame.
Using synthetic materials for the wick is another pitfall. Polyester, nylon, or even cotton-poly blends will melt and create a hard plastic crust on the wick. This crust blocks the flow of oil, causing the lamp to sputter and die. Always source 100% natural fibers like cotton, hemp, or linen. If you are in a pinch, a strip of cotton fabric from an old t-shirt or a piece of a cotton mop head will work better than a synthetic string.
Water contamination in the wick can also be a problem. When building a lamp with a water base, ensure the wick is only touching the oil layer. If the bottom of the wick dips into the water, it will absorb the water through capillary action. Since water does not burn, it will “poison” the wick, making it impossible to light until it is replaced and dried.
Finally, ignore the temptation to use “lamp oil” or kerosene in a DIY floating cork lamp. These fuels are too volatile for an open-vessel design and could cause a fire hazard. Each lamp design is engineered for the specific viscosity and flash point of its fuel. Keep your vegetable oils in your DIY lamps and your petroleum fuels in your commercial lanterns.
Limitations and Realistic Constraints
While olive oil lamps are brilliant for emergency use, they do have limitations. The most obvious is light output. A single-wick oil lamp produces roughly the same amount of light as a standard candle—about 12 to 15 lumens. This is sufficient for basic tasks but is not enough to illuminate a large workspace or provide high-visibility light for detailed repairs. To light a room, you may need three or four lamps placed strategically.
Portability is another constraint. Because many DIY olive oil lamps are open-topped or use floating wicks, they are not intended to be carried around while lit. Moving them can cause the oil to slosh, potentially submerging the wick or causing the cork to capsize. These are stationary light sources, designed to be set on a table or shelf and left in place.
Fragrance can be a minor issue for some. While pure olive oil is mostly odorless, lower-grade oils or oils that have gone significantly rancid can produce a slight “fried food” smell. This is generally less offensive than the chemical smell of kerosene, but it is something to consider if you are sensitive to scents. Using refined “Light” olive oil typically yields the most odorless burn.
Environmental temperature also plays a role. In extremely cold conditions, olive oil can become cloudy and thicken, or even solidify into a butter-like consistency. If your home drops below 45°F, the oil may struggle to travel up the wick. In such cases, you may need to warm the jar near another heat source before the lamp will function efficiently.
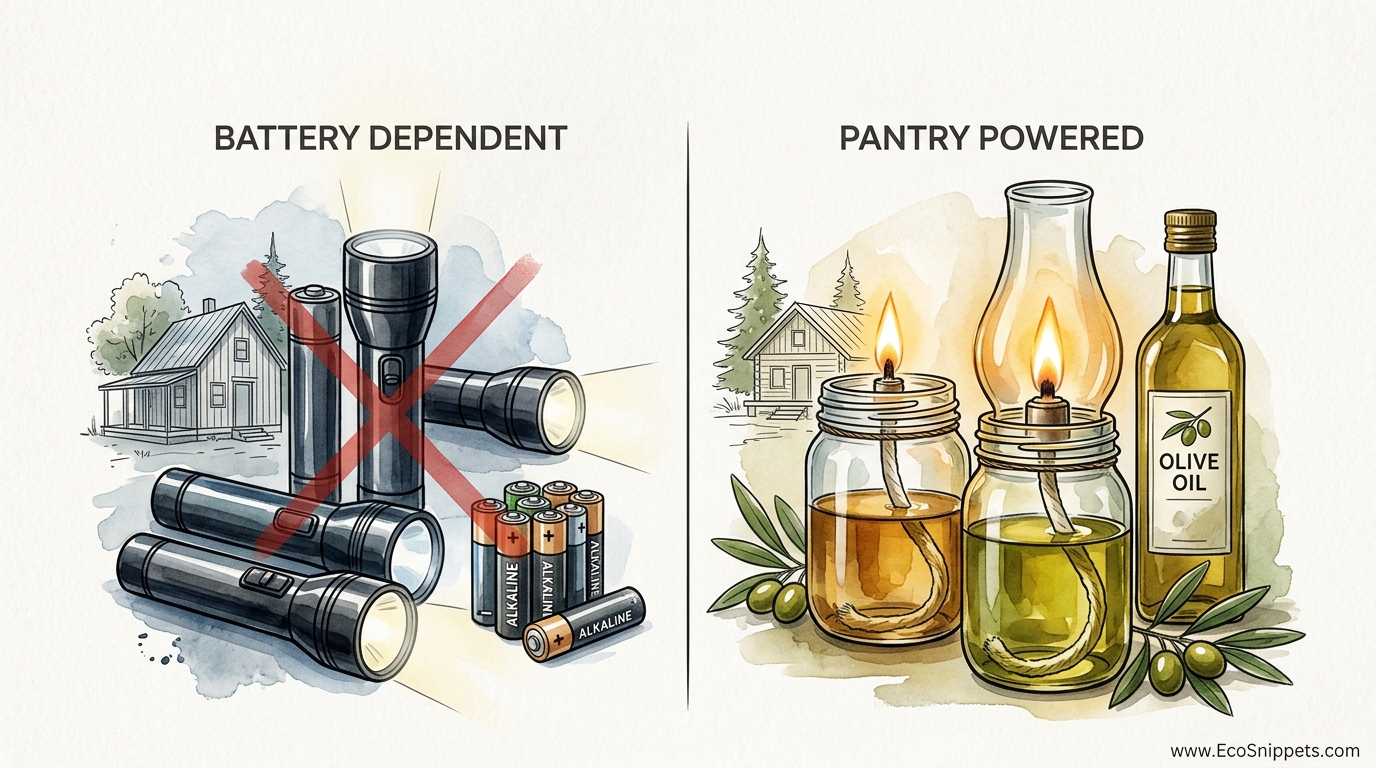
The Great Divide: Battery Dependent vs. Pantry Powered
| Factor | Battery Dependent (LED) | Pantry Powered (Oil Lamp) |
|---|---|---|
| Reliability | High (until batteries die) | Infinite (renewable source) |
| Safety | Excellent (no flame) | Good (stable flame) |
| Brightness | High (Adjustable) | Low (Soft ambient) |
| Shelf Life | 3-10 years (alkaline vs lithium) | 2 years (perishable fuel) |
| Maintenance | None until failure | Periodic wick trimming |
The comparison reveals that neither system is “better,” but rather they serve different roles. Battery-powered lights are superior for search-and-rescue or moving through a dark house. However, for “static” lighting—the kind that keeps a family together in the living room for hours—the olive oil lamp is far more sustainable. In a long-term grid-down scenario, batteries eventually become expensive paperweights. Your pantry, however, can be restocked or even produced on the land.
Practical Tips for Maximum Efficiency
To get the most out of your lighting setup, start by choosing the right oil. While extra-virgin olive oil is often touted for its purity, “Pomace” oil or refined “Light” olive oil actually works exceptionally well for lamps. These are often cheaper and contain fewer particulates, which can lead to a more consistent draw through the wick.
You can improve the brightness of your lamp significantly by using a reflector. Placing a small mirror or even a piece of polished tin behind the jar will bounce the light back into the room rather than letting it be absorbed by a wall. This simple addition can effectively double the perceived light in a small area.
Maintain your wicks by soaking them in vinegar for 30 minutes and then letting them dry completely before use. This ancient trick helps the cotton burn more slowly and reduces carbon buildup on the tip. When you are ready to extinguish the lamp, do not blow it out; use a pair of tweezers or a stick to gently submerge the lit wick into the oil. This prevents the “after-smoke” that occurs when a wick smolders.
Storing your supplies is just as important as knowing how to use them. Keep a “Lamp Kit” in an easy-to-reach location. This should include several glass jars, a bag of pre-cut cotton wicks, a few wine corks, and a dedicated liter of olive oil. By having everything in one place, you won’t be fumbling through drawers with a flashlight between your teeth when the power suddenly cuts out.
Advanced Techniques for the Serious Practitioner
For those who want to move beyond the basic floating wick, you can experiment with “Standing Wick” designs. Using a piece of 12-gauge copper wire, you can create a coil that sits at the bottom of a jar and extends upward. The coil holds the wick vertically, allowing you to use a much larger reservoir of oil without needing a float. This design is sturdier and allows for thicker wicks, which produce more light.
Multiple-wick lamps are another way to scale your lighting. Ancient Roman lamps often had three or four “nozzles” for wicks. In a modern DIY version, you can float three corks in a single wide-mouthed bowl. This increases the lumen output enough to light a kitchen counter for food preparation. Just be mindful that more wicks mean higher fuel consumption.
Temperature control of the oil can lead to a cleaner burn. If you find your lamp is sputtering, it might be because the oil is too cold and viscous. Using a shallower dish can help the heat of the flame slightly warm the oil in the reservoir, making it easier for the wick to draw the fuel. This is a delicate balance, as you never want the oil itself to reach its flash point, but a slight warming improves the capillary efficiency.
You can also create your own “wick floats” from thin sheet metal if you don’t have cork. A small piece of aluminum from a soda can, punched with a hole and bent into a tripod shape, can float on the surface of the oil (provided it is light enough) or sit on the rim of a shallow dish. This is a more permanent solution than cork, which will eventually degrade after weeks of constant submersion.
Scenario: The Seven-Day Blackout
Imagine a severe winter storm has knocked out the power lines in your region. It is night three, and your flashlight batteries are starting to dim. The house is cold, and the darkness feels heavy. You head to the kitchen and pull out a pint jar, a bottle of olive oil, and a spare wine cork.
Within five minutes, you have a steady, warm flame dancing on the dining room table. You fill two more jars—one for the bathroom and one for the hallway. The soft light instantly changes the atmosphere from one of anxiety to one of calm. Because you know a single liter of oil will last the entire week, you don’t have to ration your light. You can read to your children, prepare a meal on the wood stove, and maintain a sense of normalcy. This is the power of ancestral knowledge applied to modern survival.
In this scenario, the olive oil lamp isn’t just a backup; it is the primary system that allows you to conserve your precious battery power for high-priority tasks. It provides a psychological anchor, a “hearth fire” that signals to your brain that the situation is under control.
Final Thoughts
The transition from battery dependence to pantry power is a hallmark of true self-reliance. By mastering the DIY olive oil lamp, you are opting out of a fragile system that requires a constant influx of disposable goods. You are choosing instead to work with the materials that are already part of your daily life.
This method is simple, safe, and deeply rooted in human history. It reminds us that light doesn’t have to come from a factory halfway around the world. Sometimes, the most effective solutions are the ones that have been sitting in our cupboards all along.
Encourage yourself to experiment with these designs today, while the lights are still on. Build a lamp, test different wick thicknesses, and see how the light changes with different oils. The time to learn the rhythm of the flame is now, so that when the dark eventually comes, you will be ready to meet it with a steady hand and a bright light.
