How To Become More Self-Sufficient Without Starting a Full-Blown Farm…
Want to start preserving your harvest, making your own soap, or building a backyard root cellar — but not sure where to begin? “Homesteading Advice” gives you instant lifetime access to 35+ practical homesteading books on food preservation, veggie gardening, DIY natural cleaning products (save over $250 per year with this skill alone), brewing, off-grid energy, and a whole lot more…
Click Here To Check It Out Now!
Stop paying for the earth beneath your feet – your next bowl is hiding six inches under your garden. Commercial clay is refined in a factory and shipped across the country. But with a bucket and a screen, you can turn your ‘bad soil’ into heirloom ceramics that literally belong to your land.
For thousands of years, every vessel ever made came from the ground directly beneath a potter’s feet. Those ancestral artisans didn’t have a catalog or a plastic-wrapped block of homogenized minerals. They had eyes that could spot a seam of grey in a dry creek bed and hands that knew how to separate rock from silt. Today, we call it “wild clay,” but to the people who built civilizations, it was just the earth offering up its bones.
Modern hobbyists often feel tethered to the craft store, believing that “real” pottery requires expensive, lab-tested materials. This mindset ignores the rich geology of your own backyard. Digging your own material creates a connection to the landscape that no commercial product can replicate. It forces you to learn the language of the soil, the rhythm of the seasons, and the unpredictable fire of the kiln.
Learning this skill is an act of self-reliance. It transforms a muddy patch of land from a nuisance into a resource. Whether you want to make a simple pinch pot or a full set of dinnerware, the process starts with a shovel and a bit of pioneer grit. Let’s walk through the steps of reclaiming this ancient wisdom.
How To Find And Refine Wild Clay
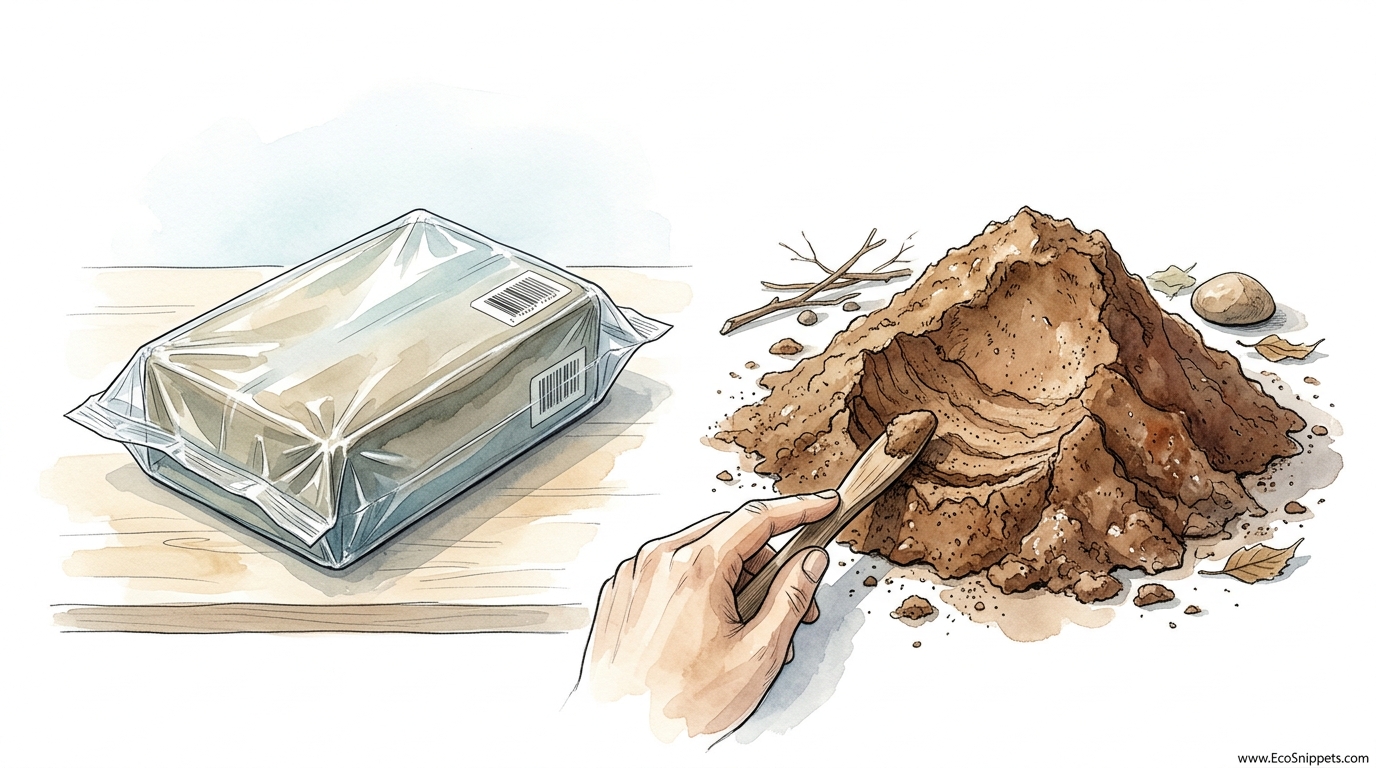
Wild clay is simply any clay harvested directly from the earth without industrial processing. In a world of PLASTIC WRAPPED STORE CLAY vs REFINED BACKYARD EARTH, the wild variety represents the raw, unadulterated character of a specific geographic location. It is the “terroir” of ceramics, carrying the minerals, iron, and grit of the place where it formed.
Clay is not just “dirt.” It is a specific mineral stew resulting from the erosion of feldspar in igneous rocks like granite over millions of years. This weathering process breaks rocks down into microscopic, plate-like particles. When these particles get wet, they slide over one another, creating the “plasticity” or moldability that defines clay.
You can find these deposits in almost every corner of the globe. From the deep red clays of the American South to the grey-blue silts of the Pacific Northwest, the earth is layered with usable material. Knowing how to identify it is the first step in the journey from ground to gallery.
Identifying Primary and Secondary Deposits
Geology categorizes clay into two main types: primary and secondary. Primary clay remains at the site of its parent rock. It is often white (kaolin), contains large chunks of unweathered stone, and is less “plastic” because its particles haven’t been ground down by travel. It is rare and highly prized for porcelain.
Secondary clay is what most of us will find. This material has been carried by water, wind, or ice away from its source. During its journey, the particles become smaller, smoother, and more uniform. It also picks up “impurities” like iron and organic matter, which give it the rich browns, reds, and oranges we associate with traditional earthenware and stoneware.
The Hunt: Where to Look for Raw Earth
Finding clay requires looking for “low energy” environments where fine particles have had time to settle. Look for areas where water has done the work for you. Riverbanks, especially after a flood, often reveal thick seams of slick, sticky mud that feels distinctly different from the surrounding soil.
Construction sites and road cuts are modern treasure troves. When a developer digs a foundation or a highway crew carves through a hill, they often expose layers of the earth that have been buried for millennia. Look for color transitions—if the topsoil is dark and loamy, but the layer three feet down is a uniform grey, ochre, or rust, you’ve likely found a clay bed.
Your own garden is the most accessible source. If you find a patch of ground that holds puddles long after a rain, or if your shovel comes up with a heavy, waxy clod that sticks to the blade, you are standing on your next project. Clay is expansive; it swells when wet and shrinks when dry. Look for “alligator skin” cracks in dried mud puddles as a sure sign of high clay content.
How to Do It: The Wet Refinement Process
Refining wild clay is an exercise in patience. The goal is to remove the “overburden”—the sticks, roots, rocks, and sand—leaving behind only the fine clay particles. The wet method, often called “slaking,” is the most effective way for a beginner to achieve a clean, workable body.
- Step 1: The Dry-Out. Spread your harvested clods in the sun until they are bone-dry. This may seem counterintuitive, but dry clay “slakes” or dissolves in water much more aggressively than damp clay. Dry particles want to drink, and they will shatter into a slurry once submerged.
- Step 2: The Slaking. Drop the dry chunks into a five-gallon bucket of water. Leave them undisturbed for at least 24 hours. Don’t stir it yet; let the water penetrate the core of every lump.
- Step 3: Creating the Slurry. Use a sturdy stick or a paint-mixer attachment on a drill to blend the mixture into a thick, heavy cream. If it’s too thick to stir, add more water. It should be the consistency of a milkshake.
- Step 4: The First Screening. Pour the slurry through a window screen or a 30-mesh sieve into a second bucket. This removes the large rocks, roots, and pebbles. Most “pioneer” potters stop here if they want a rustic, textured finish.
- Step 5: The Fine Screening (Optional). For a smoother body, pass the slurry through an 80-mesh or 100-mesh screen. This removes fine sand and silt. Be careful: removing too much grit can make the clay “short” and prone to cracking.
- Step 6: Settling and Siphoning. Let the bucket sit for 48 hours. The heavy clay will settle to the bottom, and a layer of clear water will form on top. Siphon or pour off the excess water carefully.
- Step 7: Dewatering. Pour the remaining thick sludge into an old pillowcase or a “gravity bag” made of heavy fabric. Hang it from a tree or a porch rafter. The water will drip out over several days, leaving behind a soft, plastic lump of clay.
The Benefits of Mining Your Own Material
The most immediate benefit is the cost. Commercial clay can be expensive, especially when you factor in shipping weights. When you harvest your own, the only investment is your labor. This freedom allows you to experiment boldly without worrying about “wasting” expensive supplies.
Beyond the financial aspect, wild clay possesses a unique aesthetic. Most commercial clays are a blend of minerals from different states, designed to be perfectly uniform. Wild clay has “soul.” It may fire to a variegated orange, or have tiny speckles of manganese that a machine would have filtered out. These “imperfections” are what make handmade pottery look truly artisanal.
There is also a functional advantage. Many local clays are naturally suited to the climate of their origin. If you live in an area with high-heat traditional firings, you may find your local clay is a high-fire stoneware. If you are in a sedimentary basin, you might have a beautiful terracotta that works perfectly for low-fire garden pots.
Challenges and Common Mistakes
The most frequent error is skipping the “rainbow test” before harvesting. If you spend three days refining a bucket of mud only to find it has no plasticity, you’ve wasted your time. Always grab a small handful in the field, add water, and roll it into a thin “worm.” If you can bend it into a circle without it snapping, it’s worth taking home.
Ignoring the “thermal shock” potential is another pitfall. Wild clay often contains high amounts of silica or calcium. If your clay contains tiny bits of limestone (common in many regions), those bits will expand after firing and cause “pot-pop,” where small craters explode out of your finished work. Adding a splash of vinegar during the slaking process can help neutralize some of these minerals.
Over-refining is a hidden danger. New potters often want their clay to be as smooth as store-bought butter. However, removing all the sand and grit can lead to massive shrinkage and warping. A bit of “tooth” or grit helps the clay hold its shape during the drying process and prevents the piece from collapsing on the wheel or in the kiln.
Limitations: When This Method May Not Work
Environmental constraints play a huge role. In some urban areas, the “wild clay” might actually be contaminated with heavy metals or industrial runoff. Avoid harvesting near old factories, gas stations, or high-traffic roadways where lead or oil may have leached into the subsoil. Safety is paramount when you are working with raw earth.
Firing temperature is the ultimate boundary. Most wild clay is earthenware, meaning it matures at lower temperatures (around 1900°F). If you put a low-fire wild clay into a high-fire stoneware kiln (2300°F), it will literally melt into a puddle of glass and ruin your kiln shelves. You must test every new batch in a “safety bowl” of known clay to see how it handles heat.
Consistency is also a trade-off. A bag of commercial clay will behave exactly the same way every time. Wild clay varies from one end of the trench to the other. If you are a production potter who needs 100 identical mugs, the variability of backyard earth may be more of a headache than a benefit. It is a material for the explorer, not the assembly line.
Comparison: Wild Clay vs. Commercial Clay
Understanding the differences helps you choose the right tool for the job. While both are “clay,” they serve different purposes in a modern studio.
| Feature | Wild (Backyard) Clay | Commercial (Store) Clay |
|---|---|---|
| Cost | Free (plus labor) | $30–$60 per 50lb box |
| Consistency | High variability; “Soulful” | Perfectly uniform |
| Refining Time | 1–2 weeks | Instant (ready to use) |
| Firing Range | Unknown; must be tested | Predetermined (Cone 06 to 10) |
| Plasticity | Variable (often very high) | Optimized for the wheel |
Practical Tips for Success
Keep a detailed logbook. Note exactly where you dug the sample, how many times you screened it, and what temperature you fired it to. Without records, you cannot replicate a “lucky” batch of beautiful clay. Mark your test tiles with a needle tool before they dry so you don’t mix them up.
Incorporate “temper.” Pure clay is often too plastic and shrinks too much (sometimes over 20%). Traditional potters almost always add a “non-plastic” material to the mix. Fine sand, ground-up fired pottery (grog), or even crushed shells can act as a skeleton for the clay. A common starting ratio is 4 parts clay to 1 part temper.
Slow down the drying process. Wild clay is notoriously temperamental during the drying stage. If the outside dries faster than the inside, it will crack. Cover your pieces with plastic and let them dry over a week or two. The slower the water leaves the clay, the more the particles can settle into their permanent home without tension.
Advanced Considerations: Glazing with the Same Earth
Once you master the clay body, the next step is “single-source” ceramics. The same minerals that make up your clay can often be used to create a glaze. Iron-rich clays, when mixed with wood ash and a bit of glass-former like silica, can create stunning Celadon or Tenmoku glazes.
Consider the chemistry of vitrification. This is the process where clay turns into a non-porous, glass-like state. Most wild clays have a very narrow “window” of vitrification. Testing involves firing several small rings of clay at different temperatures and measuring their water absorption. If a fired ring sucks up water like a sponge, it isn’t vitrified. If it leaks, it’s just a pot; if it’s vitrified, it’s a vessel.
Scaling up requires thinking about your landscape. If you find a truly superior clay, you might consider a dry-processing setup. This involves grinding the dry clods into a fine powder using a hammer mill or a heavy mortar and pestle, then sifting the dry dust. This allows you to mix in your temper and other additives (like bentonite for plasticity or ball clay for strength) with mathematical precision.
Example: The Backyard Pinch Pot Project
Imagine you’ve found a promising grey vein of earth behind your shed. You harvest five pounds and let it dry on a piece of plywood. After slaking it in a bucket and siphoning the water, you end up with a smooth, heavy mass. You decide to make a simple tea bowl.
First, you perform the “shrinkage test.” You roll out a 10cm bar of clay and mark exactly 10cm on it. After it dries and you fire it, you measure the marks. If the 10cm line is now 8.5cm, you know your clay has a 15% shrinkage rate. This tells you to build your bowl 15% larger than you want the finished product to be.
Next, you add 20% fine sand from a nearby creek to the wet clay and wedge it thoroughly. You form the bowl using a simple pinch technique, keeping the walls even. You let it dry under a bucket for five days to ensure it doesn’t crack. Finally, you fire it in a small pit or a kiln to “bisque” temperatures. The result is a vessel that carries the literal weight and color of your home.
Final Thoughts
Stop looking at your garden as a collection of plants and start seeing it as a geological archive. The dirt under your fingernails is the same material that held the wine of the Romans and the water of the Anasazi. By learning to find and refine your own clay, you are stepping back into a lineage of makers that spans the history of our species.
Success with wild clay doesn’t come from a lab report; it comes from observation and repetition. You will have pots that crack, and you will have batches that melt. Each failure is a lesson in how the earth behaves under pressure. Over time, you will develop a “feel” for the soil that no book can teach.
Take your shovel outside. Dig a small hole, find the transition layer, and perform a ribbon test. You might just find that your next great work of art has been waiting for you, six inches down, for the last ten thousand years.
