How To Become More Self-Sufficient Without Starting a Full-Blown Farm…
Want to start preserving your harvest, making your own soap, or building a backyard root cellar — but not sure where to begin? “Homesteading Advice” gives you instant lifetime access to 35+ practical homesteading books on food preservation, veggie gardening, DIY natural cleaning products (save over $250 per year with this skill alone), brewing, off-grid energy, and a whole lot more…
Click Here To Check It Out Now!
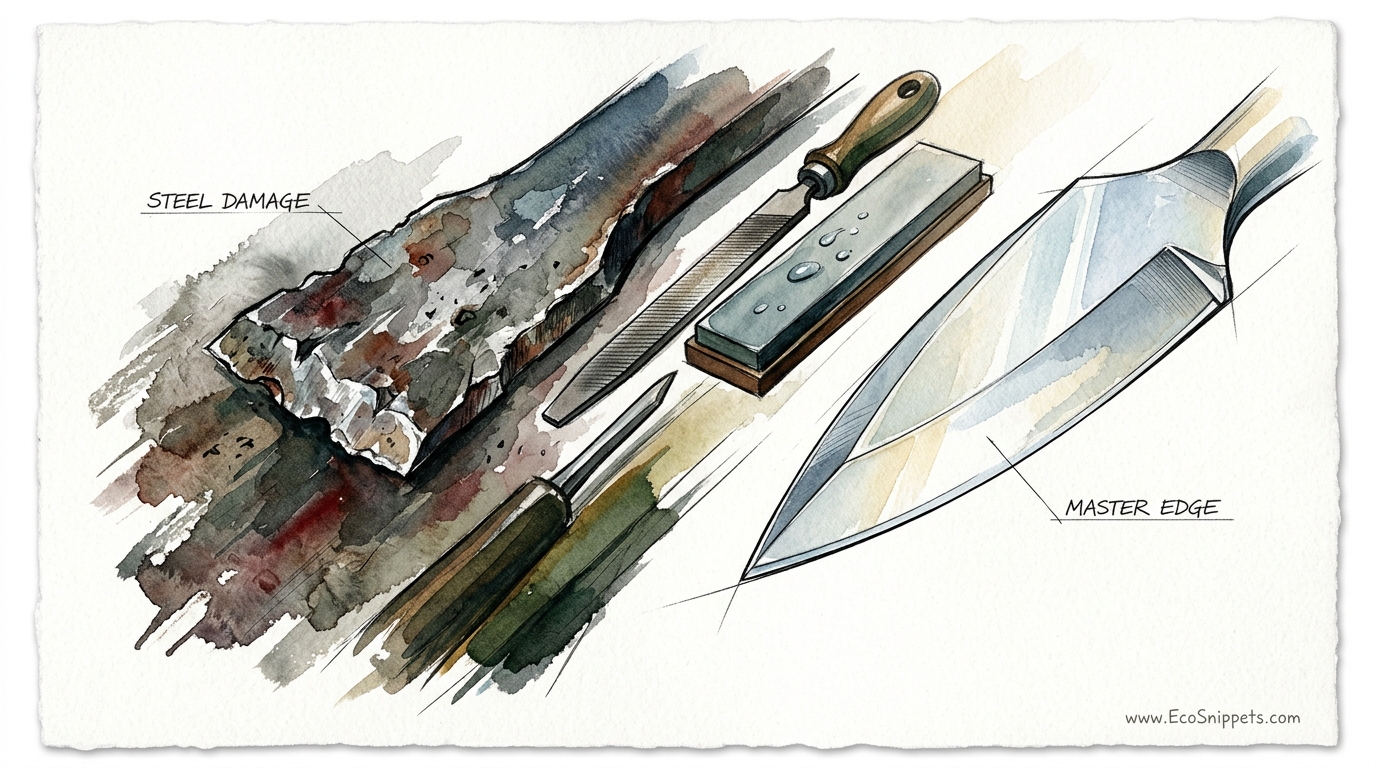
One tool uses heat and speed to destroy your blade’s temper; the other uses patience to create an edge sharper than a razor. Most people think ‘fast’ is better, but an electric grinder can ruin the temper of your high-carbon steel in seconds. True precision sharpening happens on the stone.
Learning the art of the whetstone means you aren’t just sharpening a tool—you’re preserving a legacy. Here is why your best blades deserve the manual touch. Returning to the basics of metalcraft connects you to generations of makers who understood that a sharp edge is the difference between a job well done and a dangerous struggle.
How To Sharpen Tools Without Electricity
Manual sharpening is the process of using abrasive materials like stones, plates, or sandpaper to remove microscopic layers of steel until two planes meet at a perfect, crisp line. It is an ancient practice that predates the industrial age, relying on human touch rather than high-RPM motors. From the sandstone blocks of Mesopotamia to the natural water stones of the Japanese Jomon period, craftsmen have always known that the best edges are built slowly.
This method exists because it offers unparalleled control over the geometry of a blade. You can feel the metal responding to the abrasive, adjusting your pressure and angle in real-time. Modern artisans, woodworkers, and survivalists still rely on these techniques because they work anywhere—from a backcountry camp to a quiet basement workshop.
Real-world situations often demand this self-reliance. If you are deep in the woods with a dull felling axe or in a kitchen during a power outage, your ability to restore an edge manually is a critical skill. It transforms a useless piece of blunt iron into a high-performance instrument through nothing more than friction and intent.
The Mechanics of the Edge: How It Works
The core principle of sharpening is the removal of metal to create a “burr” or “wire edge.” This occurs when the abrasive wears away the steel on one side until it reaches the very tip of the edge and folds over to the other side. Feeling this burr is the only way to know for certain that you have sharpened all the way to the apex.
Grit progression is the systematic movement from coarse abrasives to fine ones. You start with a low grit, perhaps 220 to 400, to repair nicks or establish a new bevel. Once the shape is correct, you move to medium grits around 1000 to refine the surface and remove the deep scratches left by the coarse stage.
Honing and polishing happen at the higher end of the spectrum, typically from 3000 to 8000 grit and beyond. These stages do not remove much metal but instead align the steel fibers and polish the surface to a mirror shine. This reduces friction during cutting, allowing the blade to glide through wood or food with minimal resistance.
Choosing Your Abrasives
Selecting the right abrasive is a matter of preference and the type of steel you are working with. Traditionalists often reach for oil stones made of aluminum oxide or silicon carbide. These are durable, inexpensive, and use oil to float away the “swarf”—the mixture of metal filings and stone dust that can clog the surface.
Water stones are the choice for those seeking the ultimate edge. They are usually softer than oil stones, meaning fresh abrasive particles are constantly being exposed as the stone wears down. This makes them cut faster, though they require regular flattening because they “dish” or hollow out in the center over time.
Diamond plates have become popular for their speed and permanence. These are metal plates with industrial diamond dust electroplated to the surface. They stay perfectly flat forever and can cut through even the hardest modern “super steels” that would wear out a traditional natural stone.
The “Scary Sharp” Method
A common alternative for those on a budget is using wet-dry sandpaper adhered to a flat surface like a piece of float glass or a granite slab. This provides an incredibly flat reference surface. You simply work through the grits from 400 up to 2000 or more, replacing the paper as it wears out.
Step-by-Step Manual Sharpening Process
Preparation is the first step in any successful sharpening session. If you are using water stones, they may need to be soaked for 10 to 20 minutes until they stop bubbling. Oil stones simply need a light coating of honing oil or mineral oil to lubricate the surface and prevent the pores from clogging.
Establish your angle by resting the blade on the stone and tilting it until the factory bevel is flush with the surface. For most kitchen knives, this is between 15 and 20 degrees; for chisels and axes, a steeper 25 to 30 degrees is standard. Maintaining this angle consistently throughout the stroke is the most difficult part of the process to master.
Move the blade across the stone in a sweeping motion. You can use a “push-pull” stroke or a “trailing edge” stroke depending on your comfort level. Ensure you use the entire surface of the stone to prevent uneven wear. Repeat this on one side until you can feel a continuous burr along the entire length of the opposite side.
Flip the blade and repeat the process on the second side. Once you have established a burr on that side, move to a finer grit stone. At the very end of the process, use a leather strop—a strip of leather often loaded with a polishing compound—to remove the final micro-burr and give the edge a razor finish.
Benefits of Manual Sharpening
The most significant advantage is the preservation of the steel’s temper. Electric grinders generate intense friction heat that can easily exceed the temperature at which the steel was hardened. If the edge turns blue or straw-colored, the temper is blown, and the steel becomes soft and unable to hold an edge. Manual sharpening keeps the steel cool and the molecular structure intact.
Control over metal removal is another major benefit. Electric sharpeners often “eat” the blade, removing 2 to 3 millimeters of steel in a single session. Manual sharpening removes only what is necessary, often just 0.5 millimeters or less. This can extend the life of a cherished family heirloom tool by decades.
Precision is the final hallmark of the manual touch. You can adjust the bevel for specific tasks, such as putting a more durable 30-degree edge on an outdoor knife or a surgical 12-degree edge on a sushi slicer. This level of customization is impossible with the fixed-angle slots of most electric devices.
Challenges and Common Mistakes
Inconsistent angles are the most common pitfall for beginners. Even a slight wobble during the stroke can round over the edge, making it feel dull even after hours of work. Using a “marker trick”—painting the edge with a permanent marker—allows you to see exactly where the stone is removing metal and adjust your angle accordingly.
Dished stones are another frequent issue. Because we tend to use the middle of a stone more than the ends, the surface eventually becomes concave. Trying to sharpen a flat chisel on a curved stone is an exercise in frustration. You must “lap” or flatten your stones regularly using a diamond plate or a dedicated flattening stone to keep them true.
Applying too much pressure can also ruin an edge. While you need some downward force on the coarse grits to remove metal, you should lighten your touch as you move to finer stones. Heavy pressure on a finishing stone can actually deform the delicate apex of the blade you are trying to create.
Limitations of Manual Sharpening
Time is the primary constraint of the manual approach. Repairing a chipped axe or a broken chisel tip by hand can take thirty minutes or more, whereas a powered grinder could do it in five. For professionals who need to sharpen dozens of tools a day, the time investment of manual stones can be a bottleneck.
The learning curve is also steeper than modern alternatives. It requires developing muscle memory and a “feel” for the steel. Someone using a pull-through electric sharpener can get a “good enough” edge in seconds without any training, while a whetstone user might spend weeks practicing before they can consistently achieve hair-shaving sharpness.
Manual vs. Electric: Master Edge vs. Steel Damage
Comparing these two approaches reveals a fundamental difference in philosophy. One prioritizes the tool’s longevity and performance, while the other prioritizes convenience.
| Feature | Manual (Master Edge) | Electric (Steel Damage) |
|---|---|---|
| Heat Risk | Zero – Preserves temper | High – Can ruin steel hardness |
| Metal Removal | Minimal – Extends tool life | Aggressive – Shortens tool life |
| Precision | High – Total angle control | Low – Fixed factory angles |
| Portability | Works anywhere | Requires power outlet |
| Skill Level | High – Requires practice | Low – Plug and play |
Practical Tips and Best Practices
Keep your stones clean. Metal particles and slurry can build up and stop the abrasive from cutting efficiently. Rinse water stones frequently during use and wipe oil stones clean with a rag after every session.
Label your stones if the grit numbers wear off. It is easy to confuse a 1000 grit stone with a 3000 grit stone when they are wet and covered in grey slurry. Using a waterproof marker on the side of the stone ensures you always know which stage of the progression you are in.
Bevel the corners of your sharpening stones. Sharp 90-degree corners on a stone can easily catch the edge of a blade and cause a chip or a deep scratch. Gently rubbing the edges of the stone against a coarser surface to create a small chamfer prevents this and makes the stone more comfortable to handle.
Advanced Considerations
Serious practitioners often explore micro-bevels. This involves sharpening the main bevel at one angle, then finishing the very tip at a slightly steeper angle (2-3 degrees higher). This creates a “shoulder” that supports the edge, making it much more resistant to chipping without sacrificing the slicing ability of a thin blade.
Understanding the “friability” of your stones is another advanced concept. Friability refers to how easily the abrasive particles break down to reveal new, sharp edges. High-friability stones cut faster but wear out more quickly, while low-friability stones like Arkansas natural stones are incredibly hard and slow-wearing, making them ideal for final finishing.
Working with specific tools like the “Scandi grind” on bushcraft knives requires a different approach. These blades have no secondary bevel, meaning the entire flat side of the edge must be rested on the stone. This provides a very easy reference for the angle but requires removing much more metal to sharpen, making a fast-cutting diamond plate or coarse water stone essential.
Examples in Practice
Imagine a kitchen knife that has been used for years without maintenance. It no longer slices tomatoes; it crushes them. You start with a 400 grit diamond plate to remove the rounded “shoulders” of the dull edge. Within ten minutes, you have established a clean V-shape and a heavy burr on both sides.
Moving to a 1000 grit water stone, you spend five minutes refining those scratches. The burr becomes smaller and finer. Finally, you move to a 6000 grit stone for a few light strokes on each side, followed by twenty passes on a leather strop. The knife can now slice through a piece of hanging paper with no effort.
A felling axe with a nicked edge from hitting a rock provides another scenario. You would secure the axe head in a vice and use a mill file to “draw file” the edge until the nick is gone. Then, using a “puck”—a round, handheld sharpening stone—you work in circular motions along the edge to refine it for the next day’s work in the woods.
Final Thoughts
Mastering how to sharpen tools without electricity is more than a practical necessity; it is a gateway to better craftsmanship. It forces you to understand the relationship between metal, angle, and abrasive. This knowledge stays with you long after the power goes out or the latest sharpening gadget breaks.
Relying on your own hands to restore an edge brings a sense of quiet satisfaction that no machine can replicate. You become part of a tradition that values quality over speed and longevity over disposability. An honest day’s work is always easier when your tools are as sharp as your mind.
Practice these techniques on an old, inexpensive knife before moving to your prized blades. Every stroke on the stone is a lesson in patience and precision. Once you have felt the “bite” of a truly hand-sharpened edge, you will never want to go back to the sparks and heat of a grinder again.
