How To Become More Self-Sufficient Without Starting a Full-Blown Farm…
Want to start preserving your harvest, making your own soap, or building a backyard root cellar — but not sure where to begin? “Homesteading Advice” gives you instant lifetime access to 35+ practical homesteading books on food preservation, veggie gardening, DIY natural cleaning products (save over $250 per year with this skill alone), brewing, off-grid energy, and a whole lot more…
Click Here To Check It Out Now!
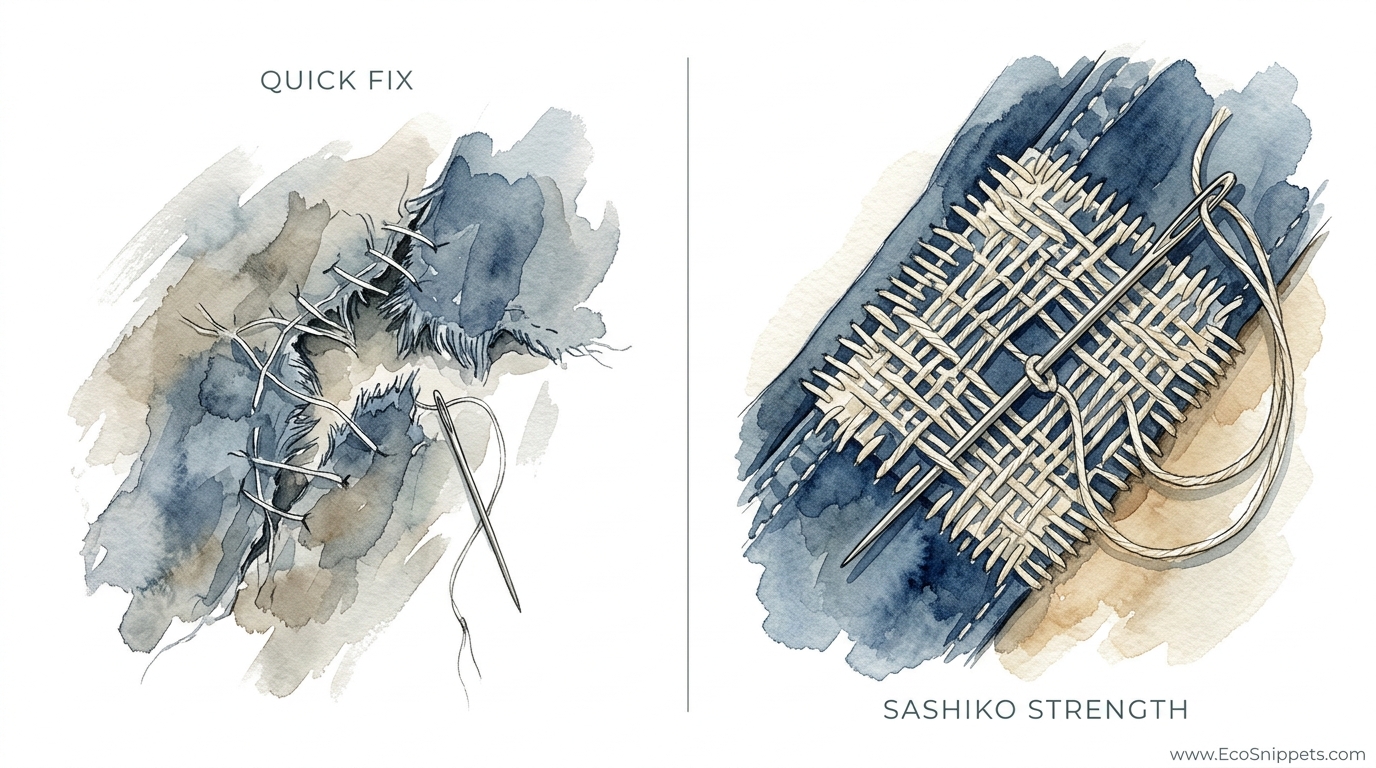
Most people hide their holes; the self-sufficient producer turns a weakness into a beautiful, unbreakable strength. In a consumer world, a tear means a trip to the mall. For the producer, it’s an opportunity to practice Sashiko—the Japanese art of functional reinforcement. Learn how to mend your gear so it actually gets better with every repair.
Traditional mending isn’t about hiding a mistake. It is about acknowledging that a garment has lived, worked, and earned its place in your kit. When you reach for a needle instead of a credit card, you reclaim a small piece of your independence from the cycle of disposable goods.
This practice is more than just thread and fabric. It is a mindset that values longevity over novelty and grit over gloss. Through the rhythmic “little stabs” of the needle, you are not just fixing a pair of pants; you are building a legacy of self-reliance that our ancestors would have recognized instantly.
Sashiko Mending For Self-sufficient Clothing
Sashiko, which translates literally to “little stabs,” is a traditional Japanese stitching technique that originated during the Edo period (1603–1867). In rural Japan, fabric was a precious commodity, often hand-woven from hemp or linen and dyed with indigo. Commoners were often forbidden from wearing silk or elaborate patterns, so they turned to Sashiko as a way to make their humble garments last for generations.
Historically, this was a survival skill. Farmers and fishermen used a simple running stitch to quilt layers of old, tattered cloth together to create warmth and structural integrity. This process of continuous layering and repair created what is known as Boro—textiles that are so heavily mended they become a mosaic of history and hard work.
In a modern self-sufficiency context, Sashiko serves as the ultimate tool for “pioneer-grit” clothing maintenance. It isn’t just a patch; it is a structural upgrade. By adding a grid of dense stitches over a thinning knee or a frayed elbow, you are essentially “re-weaving” the garment, making that specific area stronger than it was when it left the factory.
This technique is most at home on heavy, non-stretch natural fibers. Think of your 14oz raw denim, your heavy canvas work jackets, or your thick linen shirts. These materials respond to the needle with a satisfying resistance, and the thick Sashiko thread eventually nests into the weave, becoming a permanent part of the fabric’s DNA.
The Tools of the Trade: Equipping for Longevity
To repair gear that lasts, you cannot rely on the flimsy polyester threads found in a grocery store sewing kit. You need tools that can handle the stress of daily labor. The producer’s toolkit for Sashiko is minimal but specific.
Sashiko Thread (Sashiko-ito)
Authentic Sashiko thread is the backbone of this craft. Unlike standard sewing thread, which is thin and often coated in wax or silicone, Sashiko thread is a thick, matte, 100% cotton cord. It is composed of multiple strands twisted together into a single, non-divisible unit. Its thickness—usually around 20 to 40 weight—allows it to stand proud of the fabric, providing a tactile reinforcement that takes the brunt of abrasion so the garment doesn’t have to.
The Needle (Sashiko-bari)
A Sashiko needle is significantly longer and sturdier than a standard embroidery needle. It features a large, elongated eye to accommodate the thick thread and a sharp point that can pierce multiple layers of heavy denim. The length is crucial for the Unshin technique, where you load several stitches onto the needle at once before pulling it through.
The Thimble (Naka-nuki)
In Sashiko, you don’t use a fingertip thimble. You use a ring or palm thimble, often made of leather or metal, which sits at the base of your middle finger. You use the fleshy part of your palm or the base of your finger to push the needle through the fabric. This allows for much greater force and control when working through heavy seams or multiple layers of canvas.
The Marking Tools
Accuracy is the difference between a messy patch and a professional reinforcement. Use a hera marker (a plastic tool that creates a temporary crease), tailor’s chalk, or a water-soluble pen to mark your grids. For the self-sufficient producer, a simple sliver of dried soap works remarkably well on dark denim to mark out a 1cm grid.
The Mechanics of the Repair: Step-by-Step Strength
Mastering Sashiko requires unlearning the delicate “up-and-down” motion of standard sewing. Instead, you focus on rhythm and tension. Follow these steps to execute a functional repair on a high-wear area like a work pant knee.
1. Assessment and Preparation
Identify the “danger zone” before the hole actually forms. If you see the white “weft” threads of your denim showing through, it is time to mend. Trim away any long, frayed “whiskers” from the area to keep the repair clean. Iron the garment flat so you aren’t fighting wrinkles.
2. Selecting the Patch
Choose a patch fabric that matches the weight and fiber of the original garment. Patching heavy denim with a thin cotton scrap will only lead to the patch tearing away under stress. Cut your patch at least one inch larger than the damaged area on all sides. For maximum strength, align the grain of the patch with the grain of the garment.
3. Securing the Patch
Place the patch on the underside (the “inside”) of the garment for a traditional look, or on the outside for a bold “visible mending” aesthetic. Secure it with safety pins or a loose “tacking stitch” around the perimeter. Do not rely on iron-on adhesives; they stiffen the fabric and eventually peel, ruining the breathability of the repair.
4. Marking the Grid
For structural reinforcement, a 1/2 inch (1cm) grid is standard. Use a ruler to mark horizontal and vertical lines across the entire patch area. This grid acts as your roadmap, ensuring your stitches are even and your reinforcement is uniform.
5. The Unshin Movement
Thread your needle with a length of Sashiko thread about the distance from your fingertips to your elbow. Avoid longer lengths, as they tend to fray and tangle. Do not tie a knot at the end; instead, leave a small tail on the inside of the garment.
Start at one corner of your grid. Push the needle through the fabric and use your other hand to “pleat” the fabric onto the needle. Aim to get 5 or 6 stitches on the needle at once. Use your thimble to push the needle through. This creates the characteristic “grain of rice” look where the stitches are slightly longer than the gaps between them.
6. The Itokoki Smoothing
This is the most critical step for success. After pulling the needle through, hold the fabric firmly and run your thumb and forefinger along the row of stitches to smooth the thread. This process, called Itokoki, prevents the fabric from puckering. If you skip this, the repair will be tight and uncomfortable, and it will eventually cause the surrounding fabric to tear.
7. Finishing the Row
When you reach the end of a row and need to turn back, leave a tiny loop of thread (about 2-3mm) on the backside. This “insurance loop” allows the fabric to stretch and move without snapping the thread. To finish the entire repair, weave the thread back through the last three or four stitches on the underside and clip it close. No knots are required, which keeps the repair smooth against the skin.
The Practical Benefits of Functional Mending
Choosing Sashiko over a “quick fix” or a replacement provides several measurable advantages for anyone pursuing a self-reliant lifestyle.
* Extreme Durability: A Sashiko-mended knee is often 3-4 times thicker than the original fabric. It creates a “shield” of thread that protects the underlying material from further abrasion.
* Thermal Insulation: In colder climates, the layering of fabric and the dense grid of cotton thread trap air, making mended work jackets significantly warmer.
* Economic Independence: High-quality workwear is an investment. Extending the life of a $150 pair of pants by five years using $5 worth of thread is a massive return on investment.
* Resourcefulness: Learning to utilize scraps of old gear to fix new gear is a core pillar of the circular economy. It reduces the need for constant consumption and honors the materials you already own.
* Tactile Feedback: Unlike a stiff iron-on patch, a Sashiko repair remains flexible. It moves with your body, making it ideal for gear used in active labor, like gardening, carpentry, or hiking.
Common Mistakes and How to Avoid Them
Even the most determined producer can run into trouble if they rush the process. Understanding these pitfalls will save you from a repair that fails prematurely.
Improper Tension: The most frequent error is pulling the thread too tight. This causes the fabric to “scrunch” or pucker, creating a lump that will rub against your skin and look sloppy. Always perform the Itokoki smoothing after every single needle pass.
Using the Wrong Thread: Standard polyester thread is designed for machines. It is very thin and has a high “tensile strength,” which sounds good, but it actually acts like a tiny saw. Under stress, polyester thread will cut through old, soft cotton fibers. Always use 100% cotton Sashiko thread; it is designed to “nest” and wear down alongside the garment, rather than against it.
Ignoring the Grain: If you place a patch so the fabric threads run diagonally while the garment’s threads run vertically, the two layers will pull in different directions when washed. This leads to distortion and eventual tearing. Always align your patch grain with the garment grain.
Crossing Stitches at Intersections: In traditional grid patterns, you should avoid having two threads cross directly over each other in the same hole. This creates a “bump” that wears out faster. Instead, leave a small “valley” or gap at the intersection points of your grid.
Limitations of the Technique
While Sashiko is a powerhouse for woven fabrics, it is not a universal solution for every repair scenario. Knowing when to use it—and when not to—is a sign of a true craftsman.
Sashiko is generally poor for stretchy fabrics like Lycra, spandex, or highly elastic modern “performance” gear. The rigid cotton thread does not stretch, so the surrounding elastic fabric will eventually pull away and create new holes. For these items, a darning technique or a stretch-specific patch is a better choice.
Very thick materials like heavy felt or thick shearling can also be a challenge. While you can technically stitch through them, the “Unshin” pleating technique becomes impossible, and you are forced to do one “stab” at a time, which is incredibly slow and hard on the hands.
Environmental conditions also matter. If you are mending gear that is constantly submerged in water or mud, the cotton Sashiko thread may rot if not properly dried and cared for. In these extreme cases, synthetic heavy-duty threads might be the necessary compromise over tradition.
Sashiko Strength vs. Quick Fix Alternatives
To understand why the extra effort of Sashiko is worth it, we can compare it against the most common modern repair methods.
| Feature | Iron-On Patch | Adhesive Glue | Sashiko Mending |
|---|---|---|---|
| Durability | Low (Peels over time) | Temporary | Extreme (Reinforces structure) |
| Breathability | None (Plastic barrier) | None | High (All natural fibers) |
| Flexibility | Stiff | Brittle | High (Moves with body) |
| Skill Level | Zero | Zero | Low to Moderate |
| Aesthetic | Utilitarian/Ugly | Messy | Artistic/Custom |
Practical Tips for the Self-Sufficient Maker
If you are ready to start mending your own gear, keep these “boots-on-the-ground” tips in mind to improve your efficiency and results.
- The Soap Trick: When working on dark fabrics, don’t buy expensive chalk. A small, dried-out piece of white bar soap creates sharp, clear lines that disappear the first time you wash the garment.
- Safety Pins are Essential: Standard straight pins will fall out as you manipulate heavy fabric. Use small safety pins to hold your patch in place; they stay secure through the entire stitching process.
- Pre-Wash Your Scraps: If you are using a new piece of denim as a patch, wash it once before sewing it on. New denim shrinks, and if it shrinks while attached to an old, pre-shrunk garment, the whole repair will warp.
- Corner Loops: When turning a corner at the edge of your patch, always leave a small loop of extra thread on the inside. This is where most tension builds up, and the loop prevents the thread from snapping when you squat or bend.
- Maintain Your Needle: If your Sashiko needle starts to feel “sticky” or hard to push through, run it through a strawberry emery bag or even just through your hair. The natural oils or the abrasive sand will smooth the surface for easier passage.
Advanced Considerations: Patterns of Resilience
Once you have mastered the basic straight-line grid, you can move into Hitomezashi (one-stitch) patterns. These are not just for show; different patterns offer different types of reinforcement.
Asanoha (Hemp Leaf)
The Asanoha pattern is a geometric star shape that mimics the hemp leaf. Historically, it was used on children’s clothing to symbolize fast, strong growth. Practically, this is one of the strongest patterns because it involves stitches running in multiple directions—horizontal, vertical, and diagonal—effectively creating a “web” of reinforcement that is nearly impossible to tear.
Seigaiha (Blue Ocean Waves)
The Seigaiha pattern consists of overlapping concentric circles. It is excellent for areas that need to remain highly flexible, such as the elbow or the seat of your pants. Because the lines are curved, they allow for more “give” in the fabric than a rigid square grid.
Kakinohanazashi (Persimmon Flower)
This pattern creates a dense, blocky reinforcement that is perfect for the very center of a hole where the original fabric is completely gone. It essentially “builds” a new piece of cloth out of thread. Serious practitioners often use this on the heels of socks (if woven) or the palms of work gloves.
Scenario: Saving a Pair of Blow-Out Work Jeans
Imagine you have a pair of heavy-duty duck canvas pants used for fencing. A snag on a barbed wire has left a 2-inch jagged L-shaped tear on the thigh. Most people would toss them. A producer sees a thirty-minute project.
First, the producer irons the tear flat and trims the loose threads. They find a scrap of matching canvas from an old bag. They place the patch on the inside because they want the original look to remain mostly intact. They mark a 1cm grid over the area, extending 1.5 inches past the tear in every direction.
They begin with horizontal lines, using the Unshin rhythm. After each row, they perform Itokoki to ensure the fabric stays relaxed. Then, they come back with vertical lines. Where the lines meet the tear, they add an extra stitch to “staple” the edges down.
Thirty minutes later, the pants are not just fixed—they are reinforced. The thigh is now double-thick, and the white Sashiko thread provides a subtle, rugged detail that signals to the world: “This person knows how to take care of their gear.”
Final Thoughts
Learning Sashiko is an act of quiet rebellion against the disposable nature of modern life. It forces you to slow down, to look closely at the things you own, and to take responsibility for their maintenance. Every stitch is a commitment to the idea that something broken can be made better than it was before.
The strength of your clothing is a reflection of your own self-reliance. When you can repair your own gear with nothing but a needle, some thread, and a bit of patience, you are no longer a victim of the “planned obsolescence” that plagues the modern economy. You become a producer—someone who can sustain themselves regardless of what is available on a store shelf.
Start small. Find an old pair of jeans or a work shirt that has seen better days and try your hand at a simple grid. You will find that the process is not just practical, but meditative. With every “little stab” of the needle, you are weaving a more resilient future for yourself and your belongings. Reclaim the craft of your ancestors and turn your repairs into your greatest strengths.
