How To Become More Self-Sufficient Without Starting a Full-Blown Farm…
Want to start preserving your harvest, making your own soap, or building a backyard root cellar — but not sure where to begin? “Homesteading Advice” gives you instant lifetime access to 35+ practical homesteading books on food preservation, veggie gardening, DIY natural cleaning products (save over $250 per year with this skill alone), brewing, off-grid energy, and a whole lot more…
Click Here To Check It Out Now!
Modern engineering tries to get water off the land as fast as possible; ancestral wisdom knows how to make it stay and heal the soil. Concrete drains are a failure of imagination. They cause downstream flooding and dehydrate the landscape. Returning to ancestral ‘check dams’ allows us to slow the flow, recharge the groundwater, and turn a seasonal gully into a year-round oasis.
You likely see the scars of modern drainage every time it rains. Deep gullies form where water used to spread gently across the meadow. These trenches act like a puncture wound in the earth, bleeding away precious moisture that should be soaking into our aquifers. We have been taught to fear standing water, but the old-timers and the indigenous stewards of this land understood that water is wealth.
This guide serves as a manual for those who want to reclaim that wealth. You will learn how to read the terrain like a pioneer and use simple, local materials to heal the hydration cycle of your land. We are moving away from the era of “drainage” and entering the era of “infiltration.”
Ancestral Water Management Techniques
Ancestral water management is the practice of using low-tech, nature-based structures to interrupt the destructive speed of runoff. These techniques were perfected by civilizations living in arid and semi-arid environments, such as the Zuni and Anasazi of the American Southwest, and the builders of “johads” in India. These people knew that a flash flood is not a disaster; it is a delivery of life-giving water and fertile silt.
The primary tool in this kit is the check dam. A check dam is a small, porous barrier built across a drainage ditch or gully. Unlike a massive concrete dam meant to hold back a lake, a check dam is designed to let water through while stripping it of its erosive energy. It functions like a speed bump for a mountain stream.
Trincheras are another common ancestral technique, consisting of stone terraces built across small, ephemeral streams. These structures catch sediment, eventually creating flat, fertile “step” fields that stay moist long after the rains have stopped. The Zuni bowl is a more specialized structure used to heal “headcuts,” which are the steep drops where a gully is actively eating its way uphill.
These methods exist because they work with the physics of the landscape rather than trying to overpower them. You find them in places where survival depends on capturing every drop of moisture. Today, these techniques are being rediscovered by permaculturists and regenerative farmers who realize that a hydrated landscape is more resilient to both drought and fire.
How the “Slow, Spread, Sink” Method Works
The underlying principle of all ancestral water work is a simple three-word mantra: slow, spread, and sink. When rain falls on compacted or bare soil, it gains velocity. High-velocity water carries away topsoil and carves deep trenches. Slowing that water down is the first step toward healing the land.
Check dams achieve this by creating a series of small “pools” or “steps” in the gully. As water enters the pool behind a dam, it must level out and lose speed before it can spill over to the next level. This reduction in speed causes the water to drop the sediment it was carrying. This sediment fills the gully over time, effectively “raising the floor” of the trench.
Spreading the water is the next goal. A deep gully keeps water confined in a narrow, fast-moving “fire hose.” By building structures that encourage the water to spread out onto the surrounding floodplain, we increase the surface area available for infiltration. This prevents the water from becoming a destructive force and instead turns it into a gentle soak.
Sinking the water is the final and most important phase. Water that stays on the surface eventually evaporates or runs into the sea. Water that sinks into the soil recharges the shallow and deep aquifers. This underground reservoir keeps trees alive during the dry season and can even cause long-dried springs to start flowing again.
Step-by-Step: Building a Rock Check Dam
Constructing a check dam requires more than just throwing rocks into a hole. You must build with the mindset of a mason and the heart of a hydrologist. Follow these steps to ensure your structure survives the first big storm.
Siting and Spacing
Start at the very top of the watershed. It is a common mistake to try and stop a massive gully at its deepest point. The pressure there is often too great for hand-built structures. Instead, find the “fingers” at the top of the drainage where the water first begins to concentrate.
Space your dams so that the top of the lower dam is at the same elevation as the “toe” or base of the dam above it. This creates a continuous staircase of water. When the pools are full, the water from one dam reaches back to the base of the next, preventing any section of the gully floor from being exposed to high-velocity flow.
Excavation and Keying
Dig a shallow trench, known as a “keyway,” into the floor and the sides of the gully. This trench should be about six to twelve inches deep. Keying the dam into the banks ensures that water cannot simply flow around the sides or underneath the structure. Many failures happen because the water finds a path of least resistance through the soft soil at the edges.
Selecting and Placing Materials
Use local, angular rocks if possible. Round river stones tend to roll and shift under pressure, whereas angular rocks lock together like a puzzle. Place the largest “foundation stones” in the keyway first. These will anchor the entire structure.
Hand-place each stone rather than dumping them from a bucket. Ensure that the stones on the downstream face of the dam are slanted back toward the upstream side. This creates a stable, gravity-fed wall. Fill the interior of the dam with smaller gravel and “fines” to help act as a filter, but remember that the dam should remain somewhat porous.
The Spillway and Apron
Every check dam must have a “low point” in the center. This is the spillway. It ensures that when the water overflows, it does so in the middle of the gully where the structure is strongest, rather than at the fragile edges. The center of the dam should be at least six to twelve inches lower than the sides where they meet the banks.
Install a “splash apron” on the downstream side. This is a flat bed of rocks where the water will land as it falls over the spillway. Without an apron, the falling water will carve a “plunge pool” at the base of your dam, eventually undermining the foundation and causing the structure to collapse.
The Practical Benefits of Rehydrating the Soil
Healing a gully provides immediate and measurable benefits to the land. The most obvious change is the retention of topsoil. Instead of watching your most fertile earth wash away into the local river, you will see it accumulate behind your check dams. This new soil is rich in organic matter and moisture, making it a perfect nursery for native grasses and shrubs.
Groundwater recharge is the invisible victory. As water sinks into the soil, it moves horizontally through the landscape. This raises the water table across your entire property. You may notice that the grass stays green for weeks longer into the summer, or that your well levels remain higher during a drought.
Biodiversity flourishes in these revived “oases.” Slow-moving water and moist soil attract insects, birds, and small mammals. Riparian plants like willows or sedges may spontaneously appear in a gully that was once a barren scar. These plants further stabilize the soil with their roots, creating a self-reinforcing cycle of health.
Flood mitigation for your downstream neighbors is a significant community service. By holding water on your land, you are reducing the “peak flow” of the local creek. This helps prevent the flash floods that wash out roads and bridges in town. You are essentially turning your land into a massive sponge.
Challenges and Common Pitfalls to Avoid
Building with nature requires humility. The most common mistake is building the dam too high. A dam that is too tall creates too much head pressure. If the water behind it is three feet deep, that pressure is much more likely to find a weak spot and “blow out” the structure. Keep your check dams low—usually no more than eighteen to twenty-four inches high—and build more of them.
Failing to maintain the structures is another frequent error. You must inspect your dams after every significant rainfall event. Look for signs of “piping,” which is when water starts to tunnel under or around the rocks. Catching these small leaks early allows you to pack them with clay or smaller stones before they become catastrophic failures.
Ignoring the “headcut” is a recipe for long-term failure. Even if you stabilize the bottom of a gully, the “waterfall” at the very top will continue to eat its way uphill. You must address the headcut specifically using a Zuni bowl or a similar armored structure that allows the water to drop down without eroding the soil.
Using the wrong materials can also lead to trouble. Straw bales and silt fences are temporary construction measures, not long-term restoration tools. They eventually rot or get undercut. Stick to rock, logs, and biological materials like live willow stakes if you want a structure that lasts for decades.
Limitations and Environmental Constraints
Ancestral water management is not a universal solution. These techniques are best suited for ephemeral channels—those that only flow during and after rain. Placing check dams in a permanent, perennial river requires significant engineering and often violates environmental regulations regarding fish passage and sediment transport.
Steepness is a major constraint. On slopes greater than 10 or 15 percent, the energy of the water becomes significantly harder to manage. In these high-gradient areas, you may need to use gabions (wire baskets filled with rock) or professional engineering to ensure the structures stay put.
Legal constraints are a reality in many regions. In some western states, “water rights” are strictly governed. Legally, the water that falls on your land might belong to someone downstream. While check dams generally don’t “consume” water—they just slow it down—some jurisdictions have strict rules about anything that looks like a dam. Always check your local regulations before starting a large-scale project.
Soil type also plays a role. In very sandy soils, water may move through the ground so fast that it undercuts your rocks almost immediately. In these cases, you might need to use “filter fabric” or geotextiles beneath your rock work to prevent the soil from being washed out from between the stones.
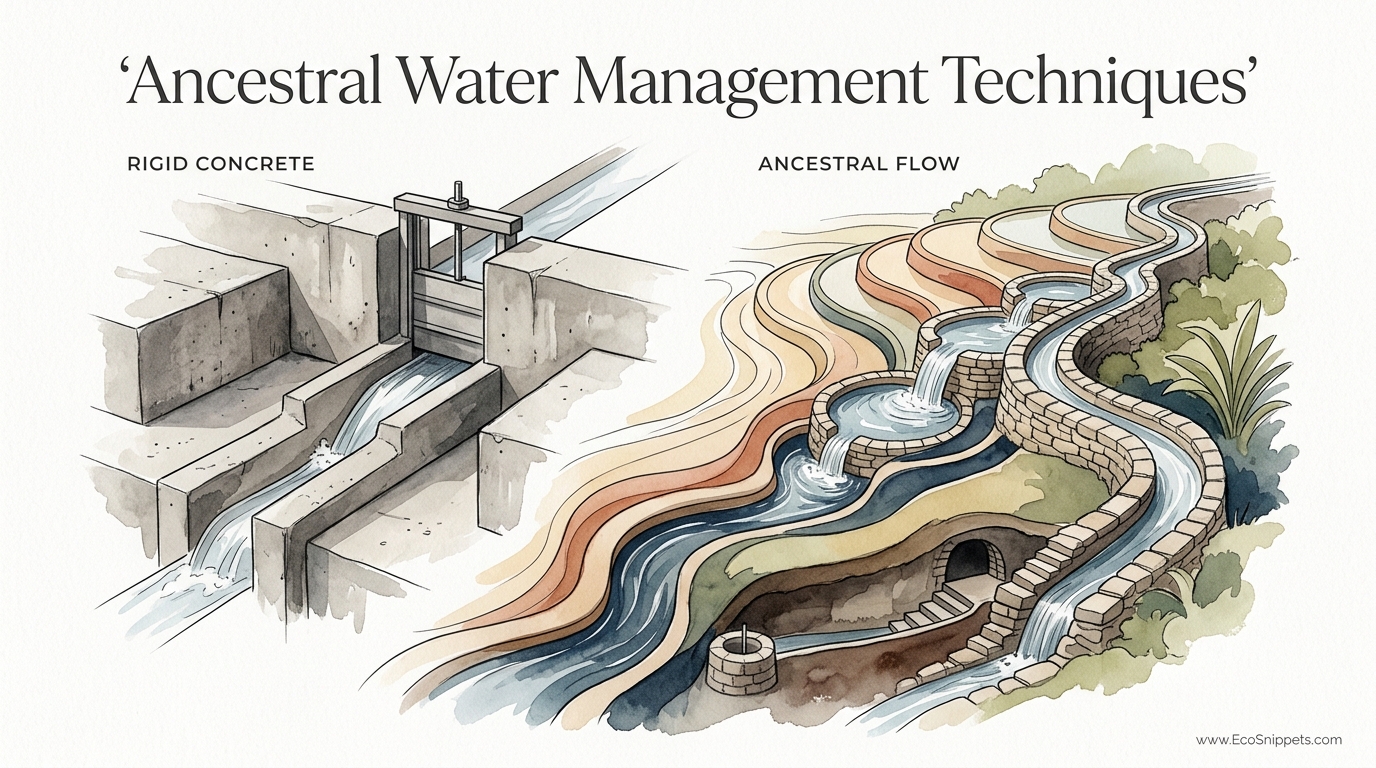
Rigid Concrete vs Ancestral Flow
Modern gray infrastructure and ancestral green infrastructure represent two different philosophies of land management. Understanding the trade-offs between them helps you choose the right approach for your project.
| Factor | Rigid Concrete (Gray) | Ancestral Flow (Green) |
|---|---|---|
| Cost | High (Materials & Labor) | Low (Local materials) |
| Lifespan | Fixed (Cracks over time) | Renewable (Self-healing with plants) |
| Hydraulic Goal | Evacuation (Speed) | Infiltration (Slow) |
| Maintenance | Professional / Mechanical | Manual / Seasonal |
| Ecology | Degrading (Heat & Scour) | Restorative (Habitats) |
Concrete is effective for protecting specific, high-value assets like a house or a highway in a high-risk flood zone. However, for general land health and agricultural resilience, the ancestral approach offers a much better return on investment.
Practical Tips for Success
Start small and observe. The best way to learn how water moves on your land is to go out in your raincoat during a storm. Watch where the water bubbles, where it carves, and where it naturally wants to pool.
Use “One Rock Dams” for subtle erosion. This technique, championed by Bill Zeedyk, involves placing a single layer of rocks across a very shallow flow. It is often enough to tip the scales back toward stability without requiring a major construction effort.
Plant into the silt. Once your check dam has caught a few inches of sediment, don’t wait for nature to provide the seeds. Plant native grasses or willow cuttings directly into that moist, new soil. The roots will bind the sediment and the rock structure together, eventually turning the dam into a living part of the landscape.
Think like a beaver. Beavers are the ultimate ancestral engineers. They don’t build a single perfect dam; they build a complex system of leaky structures that work together. If one dam fails, the others are there to catch the slack. Your goal is not a “perfect” dam, but a “resilient” watershed.
Advanced Considerations: Biological Integration
For those who have mastered the basic rock work, the next step is integrating biology. This is often called “bio-engineering.” Using living plant material as a structural component creates a system that actually gets stronger over time as the plants grow.
Fascines are bundles of live branches (usually willow or dogwood) tied together and buried in a shallow trench. These act like a biological check dam. They sprout roots that anchor deep into the gully floor and branches that grow upward to slow the water.
Log-and-brush weirs are another advanced option. By using fallen timber and packing the upstream side with brush and small woody debris, you mimic the “debris jams” that occur naturally in healthy forests. These structures are excellent at trapping very fine sediment and creating a nutrient-rich “sponge” for new growth.
Always consider the “roughness” of your channel. A smooth, clear gully is a fast gully. By adding “roughness” in the form of rocks, plants, and woody debris, you are creating friction. Friction is the enemy of erosion and the friend of infiltration.
Example: Healing the Arid Gully
Imagine a property in the high desert of New Mexico. A deep arroyo has formed, ten feet wide and six feet deep. It has been there for forty years, and every year it gets a little deeper, draining the moisture out of the surrounding pasture.
The landowner begins at the headcut, where the water first drops into the trench. They build a Zuni bowl, lining the “fall” with large rocks and creating a deep plunge pool at the bottom that is armored with heavy stones. This stops the gully from getting any longer.
Moving downstream, they install a series of rock check dams every twenty feet. They use local basalt, keying the stones eighteen inches into the banks. After the first monsoon season, the landowner finds that six inches of silt have accumulated behind every dam.
Within three years, the floor of the arroyo has risen by eighteen inches. Native grasses like blue grama have taken root in the new silt. The surrounding pasture, once dry and brittle by July, now stays green until late August because the “water bank” in the soil is full.
Final Thoughts
Healing the land through ancestral water management is an act of quiet rebellion against a “fast-and-fragile” world. It requires a shift in perspective—viewing a gully not as a problem to be paved over, but as a dehydration wound that needs to be stitched back together.
Slowing the flow and sinking the water into the earth is the most effective way to build long-term resilience for your homestead or farm. These structures are simple to build, yet they perform a complex dance with the local hydrology that no concrete pipe can replicate.
Take the first step by finding a small drainage on your property this weekend. Lay a few stones, watch the next rain, and begin the process of turning your land back into the oasis it was meant to be. The wisdom of the ancestors is written in the flow of the water; we only need to learn how to read it.
