How To Become More Self-Sufficient Without Starting a Full-Blown Farm…
Want to start preserving your harvest, making your own soap, or building a backyard root cellar — but not sure where to begin? “Homesteading Advice” gives you instant lifetime access to 35+ practical homesteading books on food preservation, veggie gardening, DIY natural cleaning products (save over $250 per year with this skill alone), brewing, off-grid energy, and a whole lot more…
Click Here To Check It Out Now!
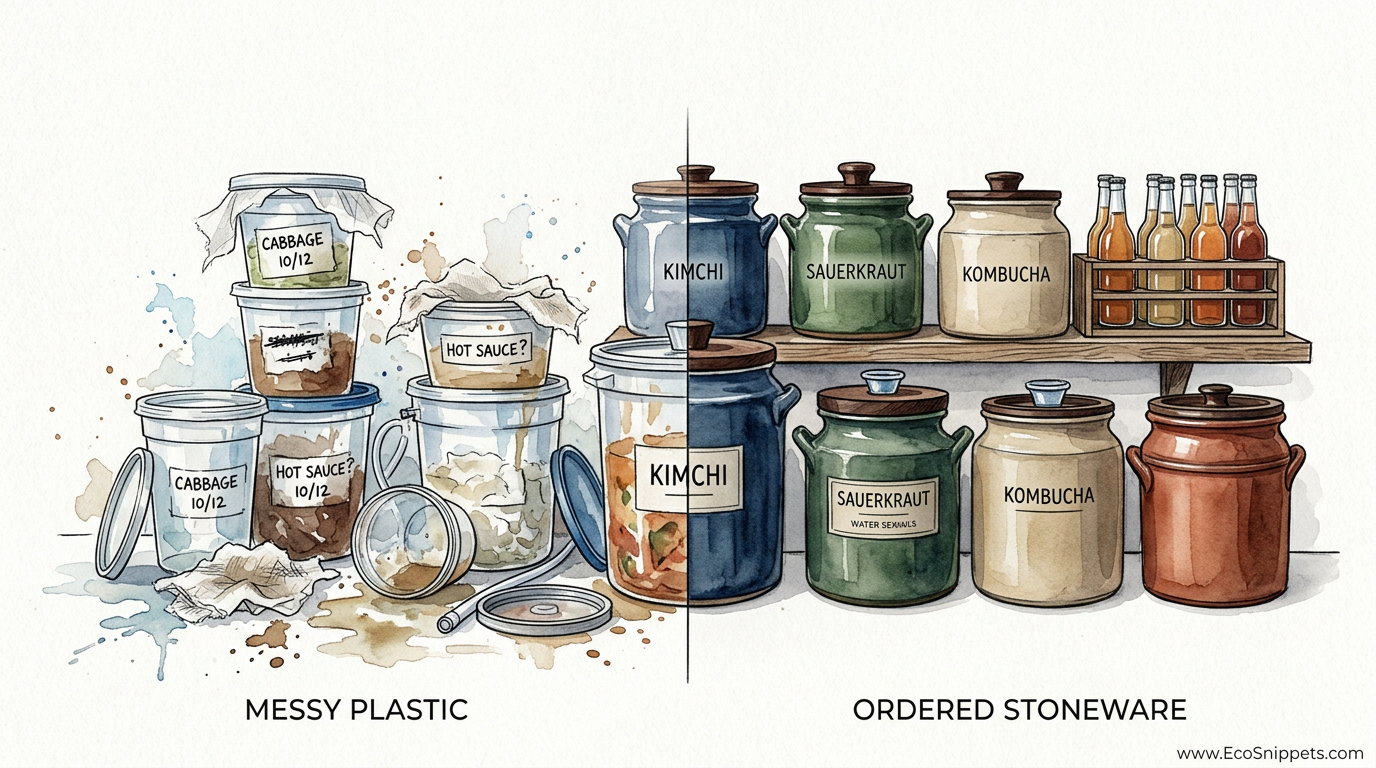
Is your current kitchen setup secretly inviting mold and bacteria into your family’s winter food supply? Most people start fermenting because they want health, but they end up with a sticky, fruit-fly-infested mess. The secret to long-term success isn’t just the recipe—it is the system. Switching from mismatched plastic to an organized stoneware station isn’t just for looks; it ensures your probiotics stay alive and your kitchen stays clean.
Modern convenience has made us forget the steady rhythms of the larder. We often try to force ancient biological processes into flimsy plastic tubs tucked behind the toaster, only to wonder why the kraut turned soft or the kombucha grew a fuzzy coat of blue mold. A true fermentation station is more than a shelf; it is a controlled environment where you partner with microscopic allies to preserve the harvest.
To master this craft, you must move beyond the “one-off” jar mentality. You need a dedicated space that respects the needs of the bacteria: stable temperatures, protection from light, and the right materials to hold the brine. Whether you are aiming for a row of bubbling crocks or a high-tech temperature-controlled chamber, building this station is the first step toward true food self-reliance.
How To Build A Home Fermentation Station
A home fermentation station is a designated area in your living space specifically outfitted to manage the environmental variables required for safe, successful food preservation. It exists to bridge the gap between the wild fluctuations of a modern kitchen and the stable, cool conditions of a traditional root cellar. In the real world, this could be as simple as a sturdy wooden hutch in a cool corner or as advanced as a repurposed refrigerator equipped with digital thermal sensors.
The primary purpose of a station is consistency. Fermentation is an exothermic process, meaning it generates its own heat as the bacteria consume sugars. Without a dedicated station to dissipate or regulate this heat, your ferments can “run away,” leading to off-flavors or spoilage. By centralizing your tools—your scales, crocks, weights, and salt—you also minimize the risk of cross-contamination that occurs when you scramble to find equipment mid-prep.
Think of your station as a laboratory for the living. It provides a sanctuary for Lactic Acid Bacteria (LAB) to do their work without being disturbed by UV light, which can skunk fermented beverages, or excessive vibrations, which can disrupt the formation of certain cultures. When you build this system, you are no longer just “making pickles”; you are managing a biological succession that has sustained human health for millennia.
Designing Your System: From Environment to Vessel
The first step in building your station is selecting the right location. You want a spot that is “low and slow”—away from the oven, the dishwasher, and the afternoon sun. A dark pantry, a basement landing, or a North-facing corner of the kitchen are ideal. The environment needs to be breathable but protected from extreme drafts that can carry wild molds or dust into your open-air ferments like kombucha.
Once you have the spot, you must consider the “bones” of the station. This includes the shelving and the containers themselves. While many beginners reach for plastic buckets because they are cheap and lightweight, experienced practitioners often return to the wisdom of stoneware and glass.
The Role of Temperature and Light
Temperature is the gas pedal of fermentation. Most vegetable ferments thrive between 60°F and 75°F (15°C to 24°C). If the station is too cold, the bacteria go dormant; if it is too hot, they work too fast, resulting in mushy vegetables and a sharp, unpleasant acidity. Light is equally critical; UV rays can penetrate glass jars and kill the very microbes you are trying to cultivate. If your station isn’t naturally dark, you must use opaque stoneware crocks or cover your glass jars with heavy linen.
Stoneware vs. Plastic: The Material Choice
The choice of vessel is where many home systems fail. Plastic is porous in a way that is detrimental; it develops micro-scratches over time that harbor “bad” bacteria even after cleaning. Furthermore, plastic is often permeable to oxygen, which is the enemy of anaerobic fermentation. Stoneware, particularly the traditional German-style water-seal crock, is the gold standard. It provides thick insulation against temperature swings and a complete block against light.
Essential Tools for the Station
To make your station functional, you need a set of “workhorse” tools kept in one place. This includes a high-quality digital scale for measuring salt by weight rather than volume, ensuring consistent salinity. You also need weights—either glass or ceramic—to keep your produce submerged under the brine. An airlock system, whether built into a crock or fitted to a jar lid, is the final piece of the puzzle, allowing carbon dioxide to escape while preventing oxygen and insects from entering.
How to Set Up Your Station Step-by-Step
Building your station doesn’t require a professional contractor, but it does require a bit of pioneer-style ingenuity. You can choose between a “Passive Station” for traditionalists or an “Active Station” for those who want absolute precision.
The Passive Stoneware Station
This setup relies on the thermal mass of ceramic and the natural cool of your home. Start by installing a sturdy, level shelf. Fermentation crocks filled with cabbage and brine are heavy; a 10-liter crock can easily weigh 25 pounds. Place your stoneware crocks on the lowest shelves where the air is coolest. Use a simple analog thermometer nearby to monitor the ambient temperature. Organize your salt, tamper, and labels on the shelf above so you aren’t searching for them when your hands are covered in cabbage juice.
The DIY Active Fermentation Chamber
For those in warmer climates or those wanting to brew consistent batches of beer or kombucha, an active chamber is the answer. You can build this using a secondhand refrigerator or a large insulated cooler.
- The Controller: Plug a dual-stage temperature controller (like an Inkbird) into the wall.
- The Cooling: Plug the refrigerator into the “cooling” outlet of the controller.
- The Heating: Place a small seedling heat mat or a greenhouse tube heater inside the fridge and plug it into the “heating” outlet.
- The Sensor: Tape the thermal probe to the side of your primary fermentation vessel, covering it with a piece of foam insulation to ensure it measures the internal liquid temp, not just the air.
This system will automatically kick on the fridge if the ferment gets too hot from its own activity and turn on the heater if the winter chill sets in.
The Benefits of an Organized Station
The primary advantage of a dedicated station is the dramatic increase in your success rate. When you have a system, you stop guessing. You know exactly what the temperature was for the last three weeks, and you know your jars were protected from the sun. This leads to a higher concentration of beneficial probiotics and a much more complex flavor profile.
Another measurable benefit is hygiene. By centralizing your fermentation, you keep the “sticky mess” in one place. A station allows you to implement a “clean-as-you-go” workflow. You are less likely to experience fruit fly infestations or cross-contamination from other kitchen activities, like baking bread (where wild yeasts can interfere with your vegetable ferments).
Finally, there is the psychological benefit of ancestral wisdom. There is a deep satisfaction in seeing a row of stoneware crocks standing like sentinels in your pantry. It turns a chore into a ritual. You become a steward of your family’s health, moving away from the disposable culture of plastic and toward a more permanent, reliable way of living.
Challenges and Common Mistakes
The most common pitfall in setting up a station is ignoring “The Oxygen Gap.” Many people leave too much headspace in their jars or fail to keep their weights properly positioned. Oxygen is the fuel for mold and kahm yeast. Even in a perfect station, if your food isn’t submerged, it will spoil.
Another frequent error is the “Set It and Forget It” trap. While a station provides stability, it does not replace the need for observation. You must check the water seals on your crocks weekly. If the water evaporates, the seal is broken, and your batch is at risk. Similarly, in an active chamber, a sensor that slips off the jar can cause the system to either freeze or cook your ferment.
Sanitation misunderstandings also plague many beginners. People often think they need to “sterilize” everything with harsh chemicals. In reality, a thorough cleaning with hot, soapy water is usually sufficient for vegetable fermentation. Over-sanitizing can actually kill the beneficial bacteria you want. The key is to avoid using rags or sponges that have been used for other kitchen tasks, as these are hotbeds for unwanted microbes.
Limitations: When This May Not Be Ideal
A dedicated fermentation station requires space and a degree of permanence. If you are living in a temporary rental or a very small studio apartment, a large-scale stoneware setup might be impractical. In these cases, you are better off using a “modular” approach with smaller glass jars that can be tucked into a dark cabinet.
Environmental constraints also play a role. If your home has no air conditioning and reaches 90°F in the summer, a passive station will fail. You cannot fight biology; at those temperatures, your kraut will turn to mush within days. In extreme climates, you must either invest in an active cooling chamber or limit your fermenting to the cooler months of the year.
There is also the matter of cost. High-quality stoneware crocks and digital controllers are investments. For someone who only wants to make one jar of pickles a year, a full station is overkill. This system is designed for the serious practitioner who intends to make fermentation a foundational part of their food supply.
Comparison: Plastic vs. Glass vs. Stoneware
Understanding the measurable differences between materials can help you decide where to invest your money.
| Factor | Mismatched Plastic | Standard Glass | Ordered Stoneware |
|---|---|---|---|
| Oxygen Barrier | Low (Permeable) | High (Inert) | Excellent (Dense) |
| Thermal Insulation | Poor | Moderate | Excellent (Thick Walls) |
| Microbial Safety | Low (Scratches easily) | High (Smooth) | Highest (Encourages LAB) |
| Light Protection | None | None (Clear) | Total (Opaque) |
| Longevity | Short (Degrades) | Medium (Fragile) | Lifetime (Durable) |
As the table shows, stoneware offers the most significant advantages for long-term probiotic health and stability, though glass remains a viable and useful tool for smaller, faster batches where visibility is a plus.
Practical Tips and Best Practices
If you want to optimize your station for maximum efficiency, start by implementing a “Rotation Label” system. Never assume you will remember what is in a jar or when you started it. Use masking tape and a permanent marker to record the start date, the salt percentage, and the expected “check date.”
To improve the air quality of your station and reduce the risk of surface mold, ensure there is gentle airflow. A station shouldn’t be “stuffy.” If you are using a closed closet, consider installing a louvered door or a small, low-powered fan to keep the air moving. This prevents the buildup of humidity that can encourage mold growth on the outside of your crocks.
When it comes to cleaning, avoid the dishwasher for your stoneware. The high heat and harsh detergents can eventually degrade the glaze or leave a chemical residue. Instead, use hot water and a dedicated stiff brush. For glass weights and airlocks, a quick soak in a no-rinse sanitizer like Star San is a best practice that ensures your batches start with a clean slate.
Advanced Considerations for the Serious Practitioner
For those who have mastered the basics, the next level involves “Precision Monitoring.” Modern stations can be equipped with WiFi-enabled sensors that send alerts to your phone if the temperature drifts outside of your specified range. This is particularly useful for sensitive ferments like Koji or Tempeh, which require much higher temperatures and strict humidity control.
Another advanced technique is the use of “Thermowells.” These are stainless steel tubes that sit inside your fermentation vessel, allowing you to slide a temperature probe directly into the center of the fermenting mass. Because fermentation is exothermic, the temperature at the core of a large crock can be 5 to 8 degrees higher than the ambient air temperature. A thermowell gives you the most accurate data possible.
Finally, consider the concept of “Microbial Succession.” Experienced fermenters often “backslop”—using a small amount of brine from a successful previous batch to inoculate a new one. In an organized station, you can maintain “mother” cultures for various ferments, effectively domesticating the specific strains of bacteria that thrive in your unique home environment.
Example Scenario: The Winter Kraut Batch
Imagine it is November, and you have just harvested twenty pounds of cabbage. In a “messy plastic” setup, you might chop the cabbage, toss it with a random amount of salt, and stuff it into three different plastic buckets with loose lids. Within a week, the house smells like sulfur, fruit flies are hovering near the kitchen sink, and a white film has appeared on the surface.
Now, imagine the same scenario with an “Ordered Stoneware Station.” You weigh your cabbage and add exactly 2% salt by weight. You pack it into a 10-liter stoneware crock, place the weighted stones on top, and fill the water seal. You place the crock on the bottom shelf of your cool pantry station.
Because the stoneware insulates the cabbage, the initial “heat spike” of fermentation is managed. The water seal prevents a single fly from entering and keeps all oxygen out. Three weeks later, you open the crock to find crisp, bright, probiotic-rich kraut with a clean, acidic tang. No mold, no mess, and no guesswork. This is the power of the system.
Final Thoughts
Building a home fermentation station is a return to a more intentional way of living. It is about acknowledging that the food we eat is alive and that we have a responsibility to provide the best environment for that life to flourish. By moving away from mismatched plastic and toward organized, high-quality materials like stoneware, you ensure the health of your family and the success of your seasonal preservation.
This system provides more than just better-tasting pickles; it provides security. When you know how to manage the variables of temperature, light, and oxygen, you unlock the ability to store the abundance of summer for the lean months of winter. It is a skill that pays dividends in both health and self-reliance.
Do not feel you must build a high-tech lab overnight. Start with a clean, dark shelf and one good stoneware crock. Learn the rhythm of the bubbles and the smell of a healthy ferment. As your confidence grows, so can your station. Before long, you will find that your kitchen is no longer a place of “sticky messes,” but a reliable hub of ancestral wisdom and probiotic strength.
