How To Become More Self-Sufficient Without Starting a Full-Blown Farm…
Want to start preserving your harvest, making your own soap, or building a backyard root cellar — but not sure where to begin? “Homesteading Advice” gives you instant lifetime access to 35+ practical homesteading books on food preservation, veggie gardening, DIY natural cleaning products (save over $250 per year with this skill alone), brewing, off-grid energy, and a whole lot more…
Click Here To Check It Out Now!
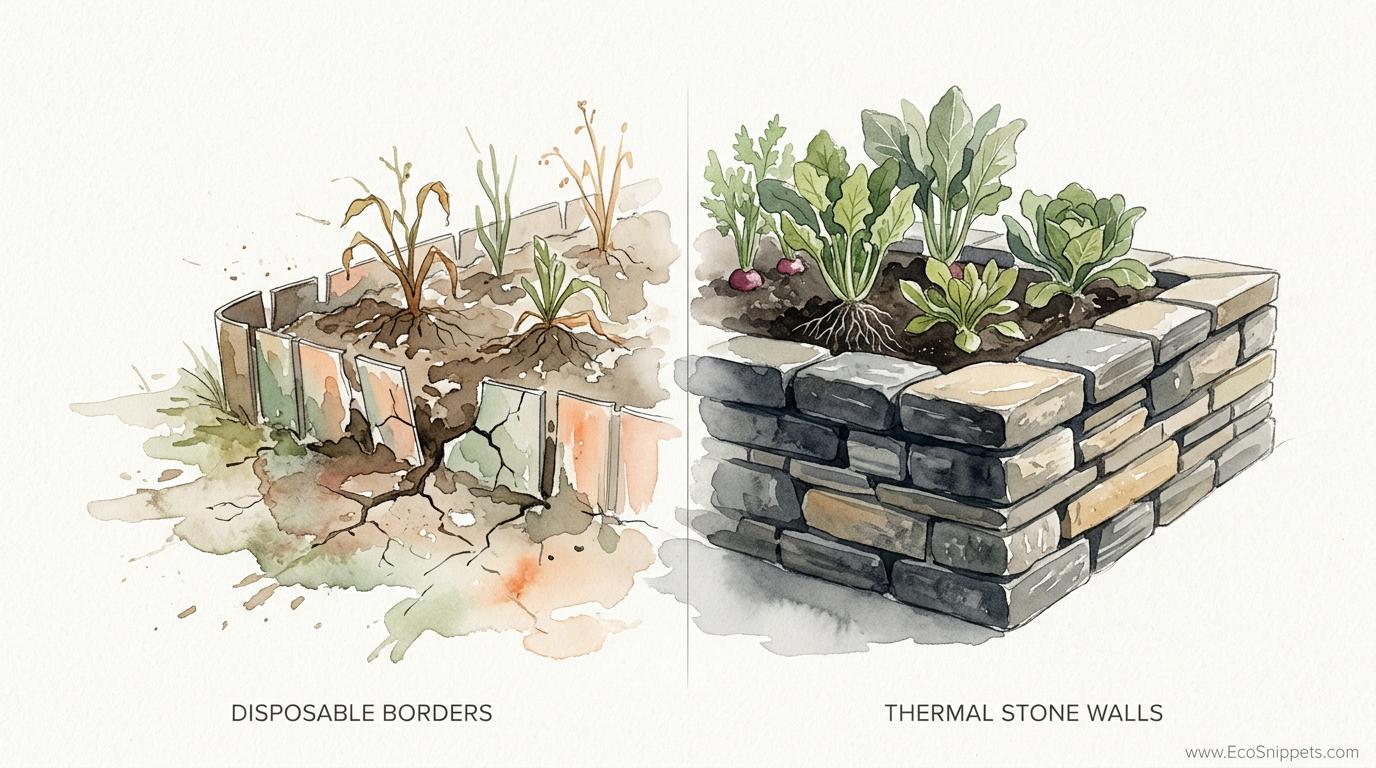
Will your garden infrastructure be a pile of microplastics in five years, or a historical landmark for your grandchildren? We have been conditioned to buy ‘disposable’ garden solutions that fail after two seasons of UV exposure. A legacy backyard farm uses the materials the earth provides. Fieldstone doesn’t just last forever; it acts as a thermal battery, keeping your soil warm through the night and extending your growing season for free.
There is a specific kind of satisfaction that comes from moving weight. When you wrap your hands around a piece of granite or limestone that has sat in the earth for ten thousand years, you aren’t just gardening; you are engaging in an act of stewardship. You are choosing a path that rejects the flimsy and embraces the unyielding. Building with stone requires patience, grit, and a bit of a sweat-equity investment, but the return is a garden that grows stronger with every passing winter.
In the world of modern homesteading, we often talk about sustainability, but rarely do we talk about permanence. A permanent stone garden bed is the ultimate expression of a self-reliant lifestyle. It is a structure that ignores the cycles of the hardware store and instead honors the cycles of the sun. As you guide your shovel into the dirt to set your first foundation course, you are starting a project that will likely outlive the house you inhabit.
Building Permanent Stone Garden Beds
Building permanent stone garden beds is the practice of using natural, locally sourced stones—often referred to as fieldstone—to create raised growing environments without the use of chemical binders or synthetic materials. These structures are “dry-stacked,” meaning they rely on gravity, friction, and the careful interlocking of shapes rather than mortar or glue. This method is an ancient one, utilized by farmers for millennia to clear their fields while simultaneously creating durable boundaries and livestock enclosures.
In a real-world setting, stone beds serve as more than just a decorative edge. They are functional retaining walls on a miniature scale. Because they are built from the earth itself, they breathe and shift with the seasons. Unlike a rigid concrete wall that might crack during a heavy freeze, a dry-stacked fieldstone wall is a living thing. It allows water to weep through its gaps, preventing the hydrostatic pressure that causes so many garden walls to buckle and fail.
Think of fieldstone as the skeletal system of your backyard farm. It provides the structure that holds your precious topsoil in place, shielding it from the erosive forces of wind and heavy rain. In regions where the soil is thin or rocky, building up with stone is often the only way to create enough depth for deep-rooted heirloom vegetables to thrive. It is a solution born of necessity that happens to be breathtakingly beautiful.
The Architecture of the Stack: How to Build It
The process of building a stone garden bed is as much about what you do underground as what you do above it. You cannot simply pile rocks on the grass and expect them to stay. To build a wall that will stand for a century, you must follow the laws of physics and the wisdom of the old-timers.
First, you must establish a foundation. This begins with a trench. Dig down at least six to eight inches along the perimeter of your planned bed. The trench should be slightly wider than the stones you intend to use for the base. Fill this trench with four inches of crushed stone or coarse gravel. This “footing” provides a stable, well-draining base that prevents the wall from sinking or tilting as the ground settles.
The most critical rule in dry-stacking is the “one-over-two” principle. Every stone you place should bridge the gap between two stones beneath it. This creates a staggered bond, similar to bricklaying, which prevents vertical seams from running up the wall. A vertical seam is a “running joint,” and it is the fastest way to invite a structural collapse. By breaking the joints, you ensure that the weight of the wall is distributed evenly across the entire structure.
As you build upward, you must incorporate a “batter.” This is a slight inward lean toward the center of the garden bed. For every foot of height, the wall should step back about half an inch to an inch. This use of gravity pulls the stones into the soil they are holding, rather than allowing the weight of the wet soil to push the stones outward. A wall that leans slightly in is a wall that will never fall down.
The Power of the Thermal Battery
One of the most overlooked advantages of using stone is its ability to act as a thermal battery. This is a concept rooted in the physics of thermal mass. High-density materials like granite, fieldstone, and basalt have a high heat capacity, meaning they can absorb and store a significant amount of solar energy during the day.
When the sun beats down on your garden, the stones soak up that warmth. Instead of the soil baking and drying out instantly, the stone absorbs the brunt of the heat. Then, as the sun sets and the air temperature drops, the stones slowly release that stored energy back into the soil and the immediate air surrounding your plants. This creates a microclimate that can be several degrees warmer than the rest of the yard.
This thermal regulation is a game-changer for early spring and late fall gardening. It can protect sensitive seedlings from a light overnight frost and keep the root zones of heat-loving crops like tomatoes and peppers active even when the nights turn chilly. You are essentially using the sun to “power” a natural heating system for your vegetables, extending your growing season by weeks without spending a dime on electricity or plastic row covers.
Benefits of the Stone-Built Legacy
Choosing stone over “disposable” materials offers a suite of practical, measurable benefits that extend far beyond aesthetics.
- Unmatched Longevity: Stone does not rot, rust, or degrade under UV light. While cedar beds might last ten years and plastic borders five, a stone bed is effectively permanent.
- Superior Drainage: The gaps in a dry-stack wall allow excess water to escape naturally. This prevents the “bathtub effect” where soil becomes waterlogged, leading to root rot.
- Chemical-Free Growing: Unlike pressure-treated lumber or some recycled plastics, natural fieldstone does not leach chemicals into your organic soil.
- Pest Resistance: Stone offers no food for termites or carpenter ants, and it provides a sturdy barrier against burrowing rodents that might easily chew through wood.
- Increased Property Value: Hardscaping with natural stone is considered a high-value home improvement. It adds a level of “curb appeal” and permanence that temporary garden structures cannot match.
Beyond these metrics, there is the benefit of local sourcing. In many parts of the country, fieldstone is a byproduct of excavation or can be found on your own land. Using what is already there is the ultimate form of self-reliance. It reduces the carbon footprint associated with transporting heavy materials and connects your garden to the geological history of your specific region.
Challenges and Common Pitfalls
The most common mistake beginners make is skipping the site preparation. It is tempting to start stacking immediately, but a wall built on soft, uncompacted topsoil will inevitably shift. If the ground heaves during a winter freeze, the lack of a gravel foundation will cause the stones to “pop” out of alignment, requiring a total rebuild in the spring.
Another frequent error is the use of mortar in an attempt to make the wall “stronger.” For a small garden bed, mortar is often a liability. Because garden beds are subject to constant moisture from irrigation and rain, water will eventually find its way into the tiny cracks in the mortar. When that water freezes, it expands with immense force, shattering the bond and leaving you with a mess of broken concrete and loose stones. Dry-stacking is superior because it allows for movement without destruction.
Finally, watch out for “hearting” issues. Hearting is the process of filling the center of a thick wall with small, loose rubble. If you don’t pack this rubble tightly or if you use soil instead of small stones for the interior core of the wall, the structure will eventually bulge. The internal “fill” should be angular stone that locks together, providing a solid backbone for the larger face stones.
Limitations: When Stone May Not Be Ideal
While stone is the king of garden materials, it is not without its constraints. The most obvious is the physical labor involved. Moving several tons of rock is a grueling task that requires a certain level of physical fitness and the right tools. If you have back issues or lack the time for a slow, methodical build, stone might feel like a burden rather than a blessing.
Weight is another consideration. If you are building on a balcony, a deck, or an area with buried utility lines, the immense pressure of a stone bed could be dangerous. Always call your local “diggers hotline” before excavating your trench, and ensure the ground can support the thousands of pounds you are about to concentrate in a small area.
Lastly, stone is a permanent choice. If you are a renter or if you like to rearrange your garden layout every few years, the labor of dismantling and moving a stone bed is significant. Stone is for the gardener who has found their “forever” spot and is ready to sink deep roots into the land.
Disposable Borders vs. Thermal Stone Walls
To understand the value of stone, it helps to see it compared to the “standard” solutions offered at most big-box retailers.
| Feature | Disposable Borders (Plastic/Thin Wood) | Thermal Stone Walls (Fieldstone) |
|---|---|---|
| Lifespan | 2–7 years | 100+ years |
| Thermal Properties | Negligible (Heats up/Cools down rapidly) | High (Acts as a thermal battery) |
| Maintenance | High (Frequent replacement) | Low (Occasional re-stacking) |
| Environmental Impact | High (Non-biodegradable waste) | Low (Natural, local material) |
| Initial Cost | Low | Moderate to High (unless self-sourced) |
While the upfront cost or effort of stone is higher, the “cost per year” is drastically lower. When you buy plastic, you are buying a future problem. When you build with stone, you are buying a legacy.
Practical Tips for the Modern Stone-Builder
If you are ready to start your first bed, begin by sourcing your material. Look for “pallatized” fieldstone at local quarries, or check online marketplaces for people looking to get rid of “rock piles” on their property. Often, you can get the material for free if you are willing to haul it away.
Always use a level. You don’t need the wall to be perfectly level to the horizon if you are on a slope, but you need each individual course of stone to be level across its own span. This prevents the “slumping” look that happens when stones are stacked haphazardly. A four-foot bubble level is your best friend during the foundation and first two courses.
Keep a “deadman” stone in mind. If you are building a bed taller than two feet, every few feet you should place a long stone that runs perpendicular to the wall, sticking back into the soil. This “ties” the wall into the earth, making it nearly impossible for the soil pressure to push the wall over. It is an old masonry trick that adds immense structural integrity.
Advanced Considerations: Microclimates and Solar Design
For the serious practitioner, the placement of stone beds can be used to manipulate the very environment of the backyard. A stone bed oriented on a north-south axis will provide even heating on both sides throughout the day. However, a bed with a high back wall facing south acts as a “solar collector,” creating a pocket of intense warmth perfect for growing figs or citrus in zones that might otherwise be too cold.
You can also integrate “weep holes” intentionally into the lower courses. While dry-stacking naturally allows for drainage, placing a few intentional gaps near the base of the wall ensures that even during a “hundred-year rain,” your soil remains aerated. In very wet climates, you might even wrap the interior of the stone wall with a heavy-duty landscape fabric (only on the inside) to prevent fine soil particles from washing out through the cracks over time.
Consider the “capstone” as well. The final layer of stone should be the flattest and most uniform. These “capstones” protect the layers beneath them from direct rain impact and provide a comfortable place to sit while you weed or harvest. A garden bed that doubles as a stone bench is the height of functional design.
Example Scenario: The 4×8 Heirloom Bed
Imagine you want to build a standard 4-foot by 8-foot raised bed that stands 18 inches high. Using the fieldstone method, you would start by excavating a 5×9 foot area to allow for the thickness of the stone. After laying your four inches of compacted gravel, you would select your largest, flattest “base stones.”
You would lay the first course, ensuring each stone is settled firmly into the gravel with a few strikes of a rubber mallet. For an 18-inch wall, you might have three or four “courses” or layers. As you reach the second layer, you would focus on the one-over-two rule, ensuring no vertical seams. By the time you reach the 18-inch mark, you will have moved approximately 2,000 to 3,000 pounds of stone.
Once the structure is complete, you would line the bottom with a layer of cardboard to suppress grass and then fill it with a high-quality mix of compost, topsoil, and peat. The resulting bed is not just a place to grow carrots; it is a thermal mass that will keep those carrots growing long after your neighbor’s plastic-shrouded garden has gone dormant for the winter.
Final Thoughts
Building with stone is a rejection of the “fast-fashion” mentality that has seeped into our modern food systems. It is an acknowledgment that the best things take time, weight, and a bit of a struggle to achieve. When you stand back and look at a finished fieldstone bed, you aren’t just looking at a garden; you are looking at a piece of the earth that you have reorganized into a vessel for life.
The thermal battery you have created will pay dividends every year in the form of earlier harvests and later frosts. The soil you have protected will remain rich and untainted by synthetic leachates. Most importantly, you have built something that does not require a replacement parts list or a trip to the landfill in five years.
Take the long view. Start small, find your rhythm with the stone, and build something that will serve as a testament to your stewardship long after the latest “disposable” garden trend has crumbled into the dirt. Experiment with the different types of stone available in your region, and let the natural shapes of the earth dictate the final form of your legacy backyard farm.
