How To Become More Self-Sufficient Without Starting a Full-Blown Farm…
Want to start preserving your harvest, making your own soap, or building a backyard root cellar — but not sure where to begin? “Homesteading Advice” gives you instant lifetime access to 35+ practical homesteading books on food preservation, veggie gardening, DIY natural cleaning products (save over $250 per year with this skill alone), brewing, off-grid energy, and a whole lot more…
Click Here To Check It Out Now!
The forest hasn’t been fertilized in 10,000 years, yet it’s more productive than your garden – here’s why…
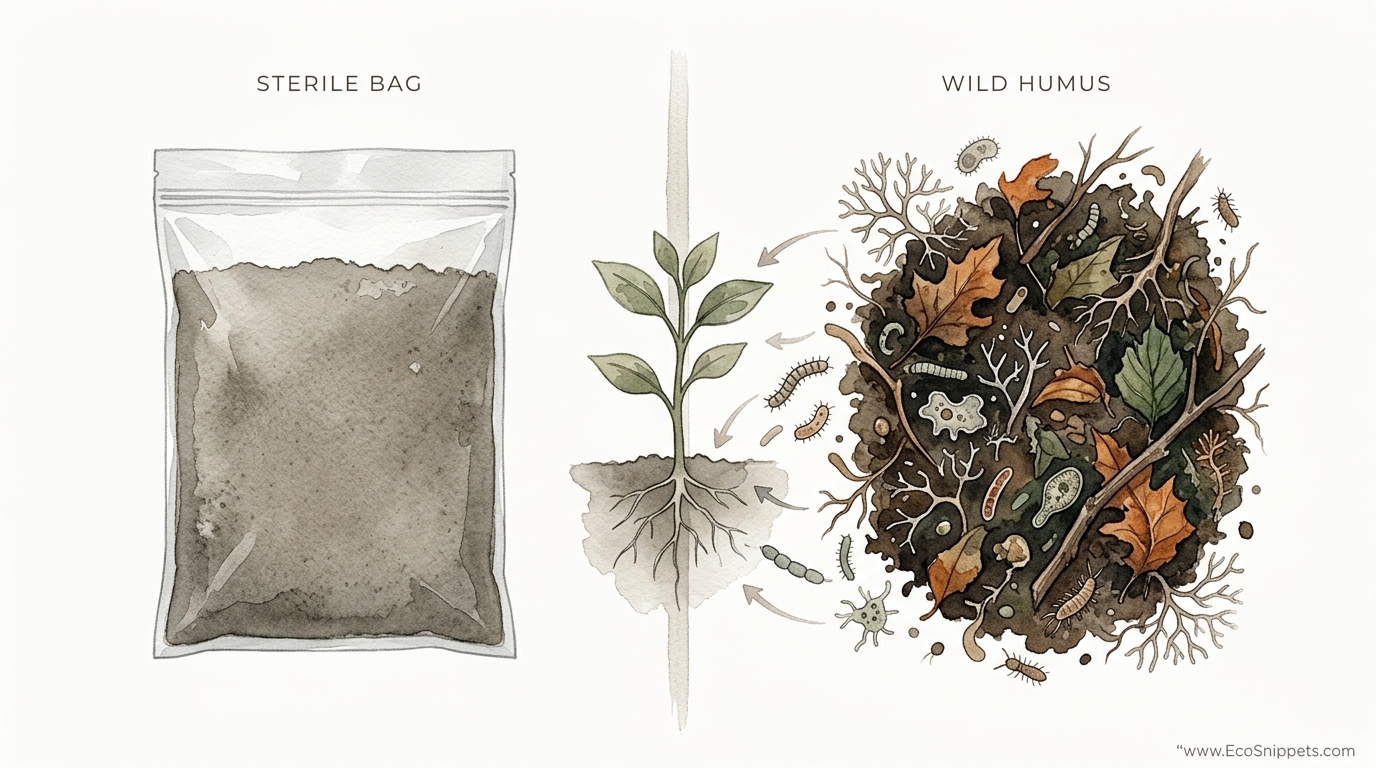
Store-bought soil is often pasteurized, meaning it’s biologically dead. To create a truly resilient homestead, you need the ‘Wild’ microbes from your local ecosystem. Through the use of Native Microbes (IMO), you can inoculate your garden with the survival wisdom of the trees around you.
Modern agriculture has taught us to fear the dirt and rely on the laboratory. We have been told that a sterile environment is a safe environment. This couldn’t be further from the truth. A sterile garden is a vulnerable garden, waiting for the first pathogen to arrive and claim the empty space.
When you walk into an old-growth forest, you aren’t just walking past trees. You are walking over a massive, invisible intelligence network. This network of fungi, bacteria, and protozoa has spent centuries learning how to thrive in your specific climate. They have survived the same droughts, freezes, and pests that your garden faces today.
Learning to harvest these microbes is more than just a gardening technique. It is a return to stewardship. It is a way to stop fighting nature and start partnering with the forces that already know how to win.
Native Microbial Soil Inoculation
Native microbial soil inoculation is the practice of capturing and cultivating the beneficial biology found in undisturbed local ecosystems. This method, popularized by the Korean Natural Farming (KNF) movement and its founder, Master Han Kyu Cho, centers on the concept of Indigenous Microorganisms (IMO). Instead of buying a generic bottle of bacteria from a store, you go to the source.
At its core, this process involves providing a “house” for local microbes to move into. You then preserve them, multiply them, and eventually introduce them to your garden beds. These microbes include a diverse consortium of fungi, yeasts, and bacteria that are already adapted to your soil’s pH, your region’s rainfall, and your local temperature swings.
In the real world, these microbes act as the “digestive system” of the earth. They break down organic matter into forms that plants can actually absorb. Fungi, in particular, form symbiotic relationships with plant roots. They extend the reach of those roots by hundreds of feet, mining for phosphorus and water that the plant could never reach on its own.
Think of it like an ancestral lineage. The microbes under a 200-year-old oak tree have a heritage of resilience. When you bring that heritage into your vegetable patch, you aren’t just adding nutrients. You are adding the “software” that runs the soil.
The Path of Five Stages: How to Cultivate IMO
Creating your own soil inoculant is a journey of five distinct stages. Each step requires patience and an observant eye. You are transitioning from a hunter-gatherer of microbes to a master breeder.
Stage 1: The Collection (IMO-1)
You begin by preparing a wooden box filled with partially cooked white rice. Use a small wooden box made of untreated cedar or bamboo. The box should be breathable but sturdy. Cook the rice so it is slightly firm, not mushy.
Take this box to a local forest, preferably one with old-growth trees or a healthy floor of leaf mold. Look for white, fuzzy strands of mycelium under the leaves. This is the “gold” you are seeking. Dig a small hole, place the box inside, and cover it with a piece of paper or breathable cloth.
Leave the box for three to five days. When you return, the rice should be covered in a thick, white, fuzzy mold. This is IMO-1. If you see black or green mold, the collection has likely gone anaerobic or been contaminated, and you should start over.
Stage 2: Preservation (IMO-2)
Fresh microbes are hungry and active. To keep them for long-term use, you must put them into a state of “sleep.” Weigh your rice collection and mix it with an equal weight of brown sugar.
Sugar acts as an osmotic stabilizer. It draws the water out of the microbes, causing them to go dormant. Place this mixture into a glass jar and cover it with a breathable lid like a paper towel. After a few days, the mixture will turn into a dark, syrupy liquid. This is your foundation stock, known as IMO-2.
Stage 3: Multiplication (IMO-3)
Now you need to turn that small jar of microbes into a large pile of inoculant. Mix your IMO-2 liquid with water and a carbon-rich carrier, usually wheat bran or rice bran. The moisture level should be about 60 to 70 percent—wet enough to form a ball in your hand, but dry enough to crumble when poked.
Heap this mixture into a pile and cover it with straw. Within 24 hours, the pile will begin to heat up as the microbes wake up and start eating the bran. You must monitor the temperature closely. If it goes above 120 degrees Fahrenheit, the heat will kill the very fungi you are trying to grow. Turn the pile daily to cool it down. After about a week, the pile will be covered in white mycelium and smell like fresh earth or bread.
Stage 4: Integration (IMO-4)
Microbes that thrive on wheat bran need to learn how to live in soil. To do this, mix your IMO-3 with an equal volume of soil from your own garden or homestead. This “hardens” the microbes to the environment where they will eventually live. Keep the pile covered and moist for another week. This transition ensures that the microbes don’t go into “culture shock” when they hit your garden beds.
Stage 5: Final Maturation (IMO-5)
In the final stage, you mix your IMO-4 with a nitrogen source, such as high-quality compost or manure. This creates a powerful, bio-active fertilizer that is teeming with life. Once this mixture has matured and cooled, it is ready to be spread across your fields or mixed into your potting soil.
Benefits of Native Microbial Inoculation
Using local biology offers measurable advantages over synthetic or store-bought alternatives. The primary benefit is adaptation. A microbe from a laboratory in another state might not survive a sudden frost in your backyard, but the microbes from the forest down the road certainly will.
Disease suppression is another massive win. When your soil is fully colonized by beneficial fungi and bacteria, there is no “real estate” left for pathogens. Many native microbes also produce natural antibiotics and antifungal compounds that protect your plants from common issues like root rot or powdery mildew.
Nutrient efficiency increases dramatically through this process. You will find that you need less fertilizer over time. The microbes act as a bridge, pulling minerals out of the silt and clay and delivering them directly to the plant in exchange for sugars. This creates a closed-loop system where the soil builds itself.
Finally, the cost is nearly zero. Aside from the price of a bag of brown sugar and some grain bran, the inputs are free. This promotes the self-reliance that is the hallmark of any true homestead.
Challenges and Common Mistakes
Working with living organisms is a skill that takes time to develop. The most frequent error is ignoring the weather. Collecting IMO-1 during a heavy rainstorm usually results in a soggy, anaerobic mess. Excessive moisture encourages the growth of “bad” bacteria and water molds, which often appear as black, slimy, or foul-smelling patches.
Temperature control during the IMO-3 stage is another common pitfall. Beginners often get excited when their pile starts heating up and let it run too hot. If the center of the pile starts to smell like ammonia or looks “charred,” you have cooked your microbes. You must stay diligent and turn the pile as soon as it feels hot to the touch.
Another mistake is using the wrong collection site. Avoid areas near chemical runoff, busy roads, or places where the soil has been heavily compacted. You want “wild” wisdom, not “distressed” survivors. Look for the most pristine, undisturbed patch of woods you can find.
Limitations: When This May Not Be Ideal
While native microbes are powerful, they are not a magic wand for every situation. In highly urban environments, finding a truly “wild” source of microbes can be difficult. If the only soil available is contaminated with heavy metals or industrial pollutants, the microbes inhabiting that soil may not be the ones you want to bring into your food garden.
Time is also a constraint. This process takes weeks, not hours. If you are in the middle of a planting crisis and need an immediate fix, the long path of IMO cultivation might be too slow. In those cases, a quick compost tea or a commercial inoculant might serve as a temporary bridge.
Environmental factors like extreme drought can also make collection difficult. If the forest floor is bone-dry, the microbes will be deep underground and won’t colonize your rice box. You may have to wait for the “shoulder seasons” of spring or autumn when moisture and temperature are in perfect balance.
Comparison: Commercial Inoculants vs. Native Microbes
The following table breaks down the differences between the two primary ways of introducing biology to your garden.
| Factor | Store-Bought Inoculants | Native Microbes (IMO) |
|---|---|---|
| Cost | High ($30–$100 per bottle) | Negligible (Sugar and Bran) |
| Diversity | Low (3–10 specific strains) | Extreme (Thousands of local strains) |
| Adaptability | Limited to lab conditions | Perfectly suited to your climate |
| Skill Level | Beginner (Pour and go) | Intermediate to Advanced |
| Longevity | Short (often requires re-application) | Long (establishes permanent colonies) |
Practical Tips for Success
Start small before you try to inoculate an entire acre. A single gallon-sized batch of IMO-2 can eventually produce enough IMO-4 to cover a large garden. Mastering the nuances of the rice “doneness” and the moisture of the bran pile takes practice.
Use Calrose or another short-grain white rice for your collection box. These types of rice hold moisture well without becoming a liquid mush. If you live in a very dry climate, you might need to cook the rice slightly longer to provide enough initial hydration for the fungi to take hold.
When collecting in the woods, disguise your boxes. Curious animals like raccoons or squirrels will happily dig up a box of rice. Covering the box with a heavy wire mesh and then piling leaves over it will keep the “critters” out and the microbes in.
Store your finished IMO-2 in a cool, dark place. Never put it in direct sunlight. Sunlight contains UV rays that are lethal to many types of soil bacteria. Treat your microbial stock like a fine wine or a sourdough starter—it is a living legacy that needs protection.
Advanced Considerations
Serious practitioners often move beyond the basic steps and start experimenting with Liquid IMO (LIMO). This involves taking a portion of your IMO-3 or IMO-4 and bubbling it in a tank of dechlorinated water with molasses and sea salt. This creates a microbial “tea” that can be sprayed directly onto leaves or injected into irrigation lines.
Another advanced technique is the use of “site-specific” collections. If you are struggling with a specific crop, such as tomatoes, you might go into the wild and look for healthy wild relatives of that plant. Collecting microbes from the rhizosphere of a healthy wild nightshade can provide your garden tomatoes with the specific biological partners they need to thrive.
Scaling this process for a farm requires a dedicated “IMO bunker” or a covered shed. Large-scale piles generate significant heat and require mechanical turning. However, the investment in infrastructure pays for itself within a few seasons through reduced fertilizer costs and increased crop resilience.
A Practical Scenario: Reviving a “Dead” Garden Bed
Imagine you have a garden bed where nothing seems to grow well. The soil is hard, the plants are stunted, and pests seem to find it every year. You have added chemical fertilizer, but the results are fleeting.
First, you stop the chemicals. Next, you collect IMO from the nearest healthy forest. You process it through the stages until you have a bucket of IMO-4. In the autumn, you clear the bed and spread a thin layer of the IMO-4, followed by a thick mulch of straw or fallen leaves.
By the following spring, the “dead” soil has changed. It is darker, crumblier, and smells like the forest floor. When you pull back the mulch, you see white threads weaving through the dirt. You plant your seedlings, and for the first time, they don’t wilt in the afternoon sun. They have a native support system under the surface, mining for water and fighting off the pathogens that used to plague them.
Final Thoughts
The transition from a sterile gardening mindset to a biological one is a profound shift. It requires you to stop seeing soil as a dead medium that merely holds a plant upright. Instead, you begin to see it as a living, breathing community that requires your stewardship and respect.
Native microbial soil inoculation is the most direct way to rebuild the broken link between our modern homesteads and the ancient wisdom of the wild. It is a practice rooted in observation and patience, rather than consumption and extraction.
If you are ready to stop buying bags of dead dirt and start building a legacy of life, head into the woods. Find a healthy tree, look under the leaves, and bring home the microbes that have been waiting 10,000 years to help you grow.
