How To Become More Self-Sufficient Without Starting a Full-Blown Farm…
Want to start preserving your harvest, making your own soap, or building a backyard root cellar — but not sure where to begin? “Homesteading Advice” gives you instant lifetime access to 35+ practical homesteading books on food preservation, veggie gardening, DIY natural cleaning products (save over $250 per year with this skill alone), brewing, off-grid energy, and a whole lot more…
Click Here To Check It Out Now!
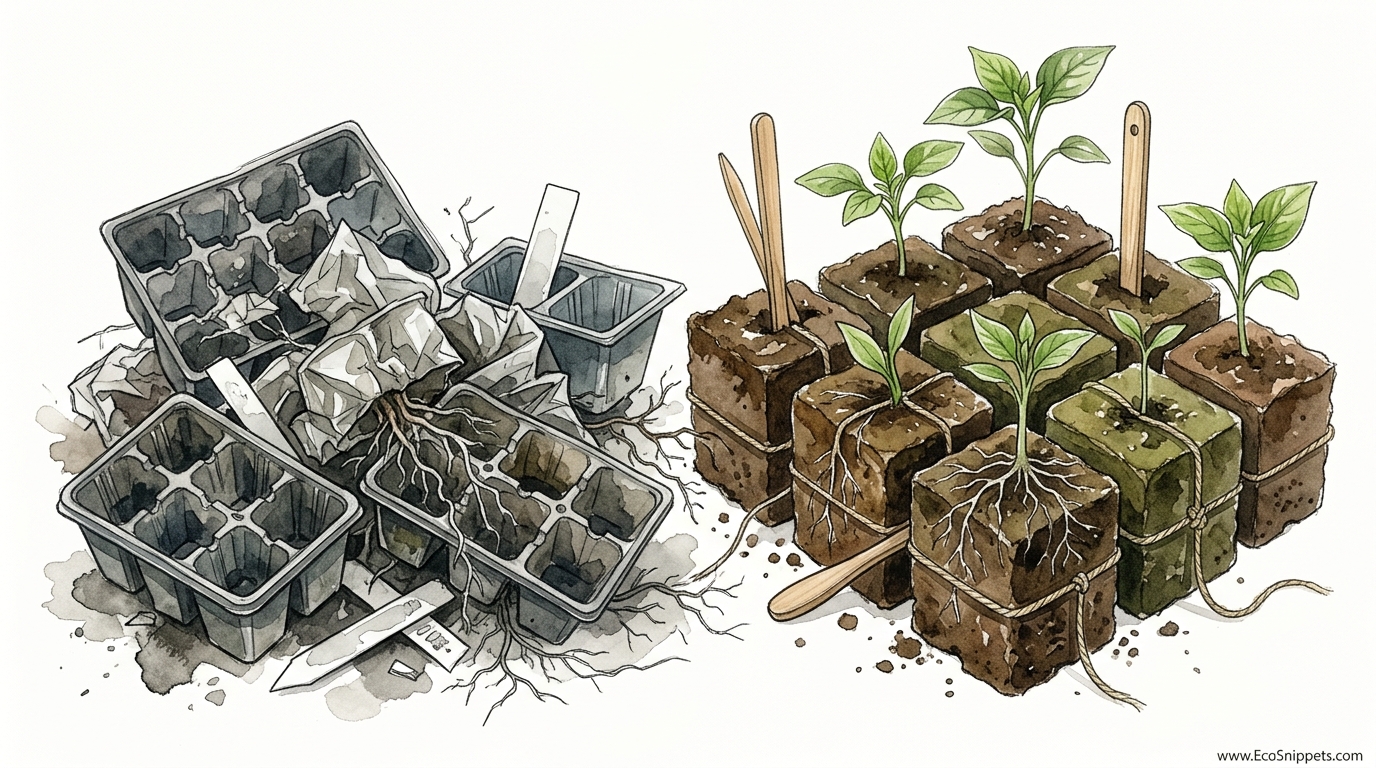
The ‘Green Industry’ has a dirty plastic secret; here is the 100-year-old steel tool that deletes the need for nursery pots forever. Every spring, millions of single-use plastic pots are sold and discarded. They break, they leach, and they clutter our sheds. Soil blocking is the professional homesteader’s answer. By compressing your potting mix into self-contained cubes, you create healthier ‘air-pruned’ roots and eliminate the need for plastic trash. Buy the tool once, use it for a lifetime.
A simple metal press, often passed down through generations, holds the power to transform how we interact with the earth. This method ignores the modern obsession with disposable convenience. It focuses instead on the biological needs of the plant and the long-term health of our soil. You are not just starting seeds; you are building a resilient foundation for your future harvest.
Ancient wisdom often surfaces in the form of simple tools. This heavy-duty zinc-coated steel press is no exception. It represents a shift back to a time when gear was made to last a century, not a season.
Sustainable Seed Starting Techniques
Sustainable seed starting is the practice of raising young plants using methods that minimize environmental harm while maximizing biological vigor. At its heart lies the soil block, a freestanding cube of growing medium that requires no external container. This technique emerged in Europe during the early 20th century, long before the petrochemical industry flooded our gardens with flimsy plastic trays.
Dutch market gardeners perfected this art to ensure their seedlings remained robust during the damp, cool transitions of spring. They realized that a plant’s potential is dictated by its roots. Traditional plastic pots force roots to spiral around a hard wall, eventually strangling the plant in a phenomenon known as being root-bound. Soil blocks solve this by using the air itself as a barrier.
Market gardeners and serious homesteaders use these techniques because they value efficiency and plant health above all else. In a world where we are told to buy more, this method asks us to buy less and understand more. It is a system built on the principles of mechanical cohesion and biological feedback.
Visualization is easy when you think of these blocks as “brownies” for your plants. Each one is a perfectly measured serving of nutrition, moisture, and oxygen. There are no plastic walls to navigate, only a rich, porous environment where life can thrive.
How the Steel Press Creates Life
The process begins with the tool itself, often a Ladbrooke soil blocker or a similar professional-grade press. These tools are manufactured with heavy-duty springs and solid metal plates designed to withstand thousands of compressions. You are essentially using a precision mold to create a temporary home for a living organism.
Preparation of the medium is the most critical step in the entire journey. Standard potting soil from a big-box store rarely works because it lacks the structural integrity required for a freestanding cube. You need a mix that is fibrous enough to bond under pressure but light enough to allow delicate roots to penetrate.
Watering the mix to the consistency of heavy oatmeal or wet cement is essential. When you squeeze a handful of the medium, water should glisten between your knuckles. If the mix is too dry, the blocks will crumble upon release. If it is too wet, they will slump into a muddy heap on your tray.
The act of blocking involves a rhythmic, physical connection to the soil. You push the blocker into a deep pile of the wet mix, twisting it slightly to ensure every corner of the square chamber is packed tight. Then, you place it on a flat tray and engage the spring-loaded plunger. The resulting blocks are uniform, sturdy, and ready for a single seed to be placed in the pre-molded “dibot” or indentation at the top.
Biological Benefits of the Earth Block
Air pruning is the primary advantage of this system, and its impact on plant health is profound. When a root reaches the edge of a soil block, it encounters a gap of air rather than a plastic wall. The tip of the root naturally “burns off” or stops growing in response to the oxygen exposure.
This process triggers the plant to send out hundreds of secondary lateral roots from the center of the stem. Instead of one long, weak root circling a pot, you develop a dense, fibrous web of roots. This root system is primed for the garden, ready to explode into growth the moment it touches the ground.
Transplant shock becomes a thing of the past with this method. Traditional seedlings often lose a week or more of growth as they struggle to unfurl their cramped roots and adjust to a new environment. Earth blocks are simply placed into a hole in the garden bed. The roots never stop growing; they simply transition from the block into the surrounding soil without ever realizing they have been moved.
Space efficiency is another major win for the homesteader. Using a micro-blocker, you can start hundreds of seeds in a single 10×20 tray. This allows you to keep more plants under your grow lights or on a heat mat during those crucial early weeks of spring.
Common Mistakes and Pitfalls
Crumbly blocks are the most frequent complaint among beginners, and the culprit is almost always moisture or sifting. Using a mix with large chunks of bark or un-sifted compost creates “fault lines” in your blocks. These chunks prevent the mechanical cohesion needed to keep the cube together. Always sift your compost through a quarter-inch mesh before mixing.
Insufficient compression also leads to failure. You must press the tool into the soil with enough force to expel excess air. A loose block will fall apart the first time you try to water it. Think of it like packing a snowball; it needs pressure to maintain its shape.
Surface drying can kill a seedling before it even breaks the soil. Because these blocks are exposed to air on all sides, they lose moisture faster than plastic cells. Neglecting the daily check of your trays can lead to disaster. The blocks should always look dark and feel heavy; if they turn a light tan color, they are dangerously dry.
Top-watering is a mistake that ruins blocks instantly. Pouring water directly over the cubes will cause them to erode and eventually melt into a single mass of mud. You must always water from the bottom, allowing the blocks to wick up moisture through capillary action.
Limitations and Realistic Constraints
Peat moss has traditionally been the backbone of soil blocking due to its incredible binding properties, but its harvest raises environmental concerns. While coconut coir is a popular alternative, it can be more difficult to manage. Coir lacks the natural acidity and some of the structural “stickiness” of peat, requiring more careful tuning of your recipe to ensure the blocks hold together.
Large-scale operations may find the labor-intensive nature of hand-blocking a challenge. While it is faster than filling individual pots by hand once you find your rhythm, it still requires a significant physical effort. For a market gardener starting 10,000 onions, a motorized or larger stand-up blocker may be necessary.
Direct-sown crops like carrots or parsnips still perform better in the ground. While you can technically start them in blocks, the risk of disturbing their sensitive taproot remains. It is usually wiser to reserve your soil blocking efforts for crops like tomatoes, peppers, brassicas, and greens.
Cost can be a barrier for those used to “free” recycled plastic. A professional soil blocking kit can represent a significant upfront investment. However, when viewed over a 20-year horizon, the cost of the steel tool is far lower than the repeated purchase of plastic trays and the hidden cost of stunted, diseased plants.
Comparison: Plastic Waste vs Earth Blocks
| Feature | Single-Use Plastic Pots | Earth Blocks (Steel Tool) |
|---|---|---|
| Root Health | Prone to root-binding and circling. | Naturally air-pruned for fibrous roots. |
| Waste Production | High; plastic breaks and ends up in landfills. | Zero waste; no containers used. |
| Transplant Shock | Common; requires “teasing” roots out. | Minimal to none; roots remain intact. |
| Tool Longevity | 1–3 years before cracking. | 30+ years; essentially a lifetime tool. |
| Initial Cost | Low per unit, high over time. | Moderate upfront investment. |
Practical Tips for the Modern Pioneer
Success with soil blocking relies on the “suction” of the tool. When you pull the blocker out of your soil bin, you should feel a slight resistance. This indicates that the soil is packed tight enough to stay in the mold. If it slides out too easily, your mix is likely too dry.
Temperature management is easier with blocks. Because there is no plastic barrier, the soil temperature fluctuates more naturally with the ambient air. Using a heat mat is highly recommended for peppers and tomatoes, as the direct contact between the tray and the block allows for even heat distribution.
Maintaining your tool will ensure it lasts for the next generation. After each session, rinse the blocker thoroughly with a hose to remove all soil particles. Dry it completely and occasionally wipe the springs with a small amount of food-grade oil to prevent any surface rust.
Lighting is just as important as the soil itself. Since you can pack so many blocks into a small area, ensure your grow lights provide uniform coverage. Leggy seedlings are often a result of too many plants competing for a single light source. Keep the lights just two inches above the tops of the seedlings.
The Master Soil Blocking Recipe
Finding the right mix is a rite of passage for every gardener. While you can buy pre-mixed soil, making your own is more satisfying and cost-effective. The following recipe is a variation of the one popularized by Eliot Coleman, adapted for the modern homestead.
Start with 3 buckets of high-quality peat moss or finely screened coconut coir. This provides the bulk of the structure. Add half a cup of lime if using peat moss to balance the acidity. Next, mix in 2 buckets of coarse sand or perlite for drainage and aeration.
Incorporate 1 bucket of garden soil to introduce native microbes and 2 buckets of well-decomposed, finely sifted compost for nutrition. Finally, add a “base fertilizer” consisting of equal parts blood meal, rock phosphate, and greensand. This blend ensures that as the roots expand, they find a steady supply of nutrients.
Mixing these dry ingredients thoroughly before adding water is vital. Once combined, slowly add water while mixing with a shovel or your hands. You are looking for a consistency that holds its shape when squeezed but doesn’t drip like a sponge. Let the mix sit for an hour before blocking to allow the fibers to fully hydrate.
Advanced Considerations for Scaling
Up-potting without pots is a unique feature of the soil blocking system. You can start seeds in tiny 3/4-inch “micro-blocks” to save space on heat mats. Once the first true leaves appear, these mini-cubes are tucked into a special square hole molded into a larger 2-inch or 4-inch block. This allows the plant to continue growing without ever experiencing root disturbance.
Customizing your mix for specific crops can yield even better results. For heavy feeders like tomatoes, increasing the percentage of compost or adding a boost of worm castings can give them the nitrogen they crave. For Mediterranean herbs like rosemary or lavender, increasing the sand portion of the mix ensures the drainage they need.
Monitoring the electrical conductivity (EC) of your soil blocks can help advanced growers manage nutrient delivery. Because the volume of soil is small, nutrients can be used up quickly. Some practitioners use a weak compost tea for bottom-watering once the plants are several weeks old to maintain vigor.
Choosing the right tray is often overlooked. Avoid using flimsy plastic trays that flex when moved, as this will cause your blocks to crack. Heavy-duty fiberglass or metal trays are preferred. Some old-school growers even use wooden flats, which help regulate moisture but require more maintenance to prevent rot.
Scenario: The Journey of a Heritage Tomato
Imagine starting a “Brandywine” tomato seed in late February. You press out a tray of 20 mini-blocks, each the size of a sugar cube. The seed is dropped into the center and placed on a heat mat. Within five days, the sprout emerges, its roots already hitting the air and branching out.
Three weeks later, the seedling is three inches tall. You press out a 2-inch block with a “cubic insert” that leaves a 3/4-inch square hole in the top. You simply drop the mini-block into the larger one. There is no pulling, no squeezing, and no broken roots. The tomato continues to grow as if nothing happened.
By May, the tomato is a robust, dark green plant with a thick stem. When you carry the tray to the garden, you don’t have to tip it upside down or struggle with a plastic container. You dig a small hole, set the block inside, and walk away. That tomato plant will be ahead of its pot-grown neighbors by weeks, simply because its roots never had to stop and restart.
This isn’t just theory; it is the practical application of biological principles. The strength of the plant comes from the strength of the system you provided. You have saved the planet from another piece of plastic, and you have saved yourself from the frustration of a stunted harvest.
Final Thoughts
Soil blocking is a return to form and function. It rejects the idea that a garden must be a collection of petrochemical byproducts. Instead, it invites the gardener to participate in the physical creation of the growing environment. Using a steel tool to press the earth into service is a profound act of self-reliance.
The benefits of air pruning and the elimination of transplant shock result in a garden that is more productive and resilient. While the initial learning curve and the labor of mixing your own medium may seem daunting, the results speak for themselves. You will see healthier plants, deeper roots, and a shed free of plastic clutter.
Embracing this 100-year-old method is more than just a gardening choice; it is a commitment to a sustainable legacy. As you watch your seedlings thrive in their earthen cubes, you will realize that the best tools are often the ones that have been with us all along. Start your blocks this spring and watch the difference that a little steel and a lot of grit can make.
