How To Become More Self-Sufficient Without Starting a Full-Blown Farm…
Want to start preserving your harvest, making your own soap, or building a backyard root cellar — but not sure where to begin? “Homesteading Advice” gives you instant lifetime access to 35+ practical homesteading books on food preservation, veggie gardening, DIY natural cleaning products (save over $250 per year with this skill alone), brewing, off-grid energy, and a whole lot more…
Click Here To Check It Out Now!
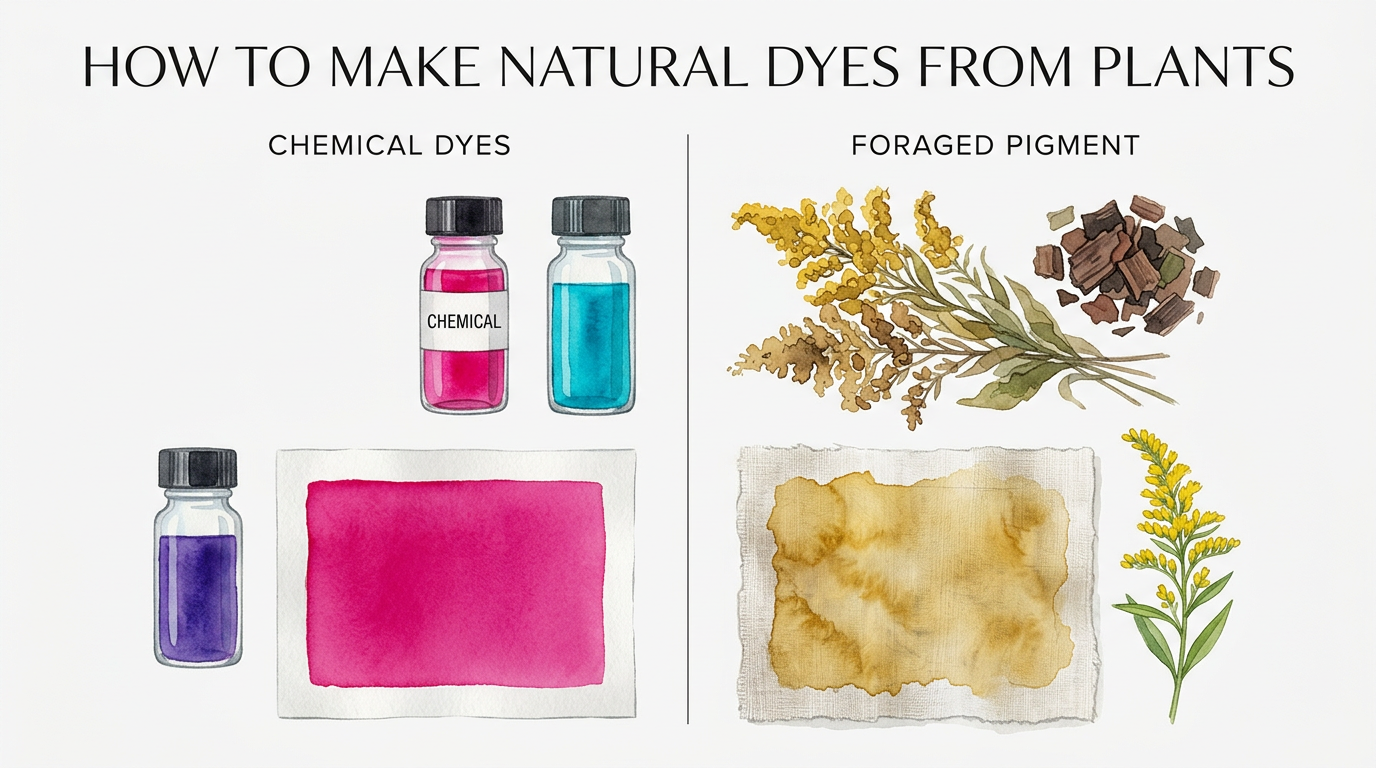
Your backyard is full of vibrant colors that don’t come with a toxicity warning. Synthetic dyes are a cocktail of heavy metals and chemicals that poison our waterways. But the homestead is a palette of infinite beauty. From goldenrods to black walnuts, we’re harvesting our colors directly from the earth. The result? Soft, living tones that age beautifully and keep your home truly organic.
Stepping away from the convenience of store-bought pigments requires a shift in mindset. You are no longer just a consumer; you are a forager, a chemist, and a keeper of ancestral wisdom. This process is slow, deliberate, and deeply rewarding. It connects your wardrobe and your linens to the very soil you walk upon.
When you choose to dye with plants, you choose a path of self-reliance. You learn to see a “weed” like goldenrod or a kitchen scrap like an onion skin as a valuable resource. This guide will walk you through the grit and the glory of natural dyeing, from the first simmer to the final rinse.
How To Make Natural Dyes From Plants
Natural dyeing is the art of extracting pigment from organic materials—roots, bark, leaves, flowers, and even hulls—and fixing that color onto fiber. It is a practice as old as civilization itself, used long before the industrial revolution introduced coal-tar derivatives. In a modern world filled with “fast fashion” and disposable goods, making your own dye is an act of quiet rebellion.
This craft exists at the intersection of biology and chemistry. You aren’t just staining a fabric; you are facilitating a chemical bond between a plant’s molecules and a fiber’s structure. Whether you are working with wool from your own sheep or linen for a new set of curtains, understanding this bond is the key to success.
Real-world application ranges from small-batch artisanal clothing to functional homestead textiles. In the past, every region had its own signature colors based on local flora. Today, you can recreate that localized beauty by looking at the plants thriving in your own hardiness zone.
The Fundamental Process: From Earth to Fiber
The journey of a natural dye involves several critical stages. Skipping a step usually leads to color that washes out or fades in the sun. Follow this sequence to ensure your colors have the longevity of a family heirloom.
Step 1: Scouring the Fiber
You cannot dye dirty fabric. Even new “ready-to-dye” cloth often contains oils, waxes, or sizing from the mill that will block the pigment. Scouring is a deep-cleaning process that prepares the “pores” of the fiber to accept the dye.
For protein fibers like wool or silk, use a gentle pH-neutral soap and simmer the fiber for about an hour. For cellulose fibers like cotton or linen, you need a stronger approach using soda ash. This alkaline bath strips away the natural pectins and waxes inherent in plant-based threads.
Step 2: Mordanting for Permanence
Most plant dyes are “adjective,” meaning they require a bridge to stay attached to the fabric. This bridge is called a mordant—derived from the Latin word mordere, meaning “to bite.” Without a mordant, your beautiful yellow might turn into a dull beige after the first wash.
Alum (potassium aluminum sulfate) is the most common and safest mordant for home use. It keeps colors bright and clear. Iron (ferrous sulfate) is another powerful option, often used to “sadden” or darken colors, turning a bright yellow into an earthy olive green.
Step 3: Extracting the Pigment
Extraction is like making a very strong tea. You chop your plant material into small pieces to increase the surface area. Cover the plants with water in a non-reactive pot—stainless steel or enamel is best—and simmer.
Do not boil the life out of your plants. High heat can “cook” the pigment, turning a vibrant red into a muddy brown. Slow and steady wins the race. Most dyers simmer for at least an hour, then let the pot sit overnight to coax out every last drop of color.
Step 4: The Dye Bath
Once you strain out the plant solids, you are left with a concentrated dye liquor. Submerge your pre-mordanted, wet fabric into the bath. Ensure there is enough water for the fabric to move freely; crowding leads to splotchy, uneven color.
Heat the bath slowly and maintain a gentle simmer. Move the fabric frequently with a wooden spoon to ensure even distribution. The longer it sits, the deeper the shade will become. Remember that wet fabric always looks several shades darker than it will once it is dry.
Benefits of Foraged Pigments
Choosing foraged pigments over chemical alternatives offers practical and environmental advantages that align with the homesteading lifestyle.
Safety and Health: Synthetic dyes often contain lead, mercury, and formaldehyde. These chemicals can be absorbed through the skin or inhaled during the dyeing process. Natural dyes, when handled with basic common sense, are safe for your family and your pets.
Environmental Stewardship: When you finish a natural dye bath, the leftover water (the “exhaust”) is often safe to pour onto your compost pile or garden, depending on the mordant used. It doesn’t poison the local water table or kill the beneficial microbes in your soil.
Aesthetic Depth: Natural colors have a “living” quality. Because plant extracts contain multiple pigment molecules rather than a single synthetic one, the resulting colors have a complexity and harmony that chemicals cannot replicate. Two different plant dyes almost always look good together because they share the same organic chemistry.
Challenges and Common Mistakes
The path of the dyer is filled with trial and error. Understanding where others have stumbled will save you time and precious materials.
Using the Wrong Fiber: One of the most frequent errors is trying to dye synthetic fabrics like polyester or nylon with plant extracts. Natural dyes only bond effectively with natural fibers. If your fabric is a “poly-blend,” the dye will only take to the natural portion, resulting in a faded or “heathered” look.
Skipping the Mordant: It is tempting to throw fabric into a colorful pot of beet juice and call it a day. However, without a mordant, these colors are “fugitive.” They will look great for an hour and then disappear the moment they hit the wash or the sunlight.
Poor Record Keeping: Because every plant harvest is different, you will never get the exact same shade twice. Serious practitioners keep a dye journal, including swatches of the fabric, the weight of the plant material, the type of mordant used, and even the pH of the water. Without notes, your best results remain a happy accident you can’t repeat.
Limitations and Realistic Constraints
While beautiful, natural dyeing has its boundaries. It is important to approach the craft with a balanced understanding of what it can and cannot do.
Lightfastness: Some plants provide “fugitive” colors that fade quickly when exposed to UV light. Beets, turmeric, and berries are notorious for this. While they are fun for temporary projects, they aren’t ideal for garments you plan to wear in the sun. Stick to “grand-mordant” dyes like madder, indigo, and walnut for long-term projects.
Seasonal Availability: You are at the mercy of the seasons. If you want the bright yellows of goldenrod, you must harvest in late summer. If you want the deep browns of black walnut, you wait for the autumn drop. This requires planning and often means drying or freezing your dyestuffs for later use.
Water Sensitivity: The minerals in your water (pH levels) significantly impact the final color. Hard water with high calcium content might turn a red dye into a purple one, while acidic water might shift it toward orange. This variability is part of the charm, but it can be frustrating if you are seeking precision.
Comparison: Chemical Dyes vs. Foraged Pigments
The choice between these two methods often comes down to your values and the intended use of the final product.
| Feature | Synthetic Chemical Dyes | Foraged Plant Dyes |
|---|---|---|
| Environmental Impact | High; petrochemical-based and toxic runoff. | Low; biodegradable and often compostable. |
| Color Consistency | Predictable; exact repeats are easy. | Variable; influenced by soil, season, and water. |
| Skill Level | Low; simple “pour and stir” methods. | Moderate; requires knowledge of mordants and fibers. |
| Safety | Requires gloves/ventilation for toxic fumes. | Generally food-safe (with some exceptions). |
Practical Tips for the Homestead Dyer
Success in the dye shed comes from a combination of patience and technique. Here are some best practices to elevate your work.
- Use Separate Equipment: Never use your kitchen stockpots for dyeing. Even though many dyes are natural, some mordants like copper or chrome (rarely used today) can be toxic. Establish a dedicated “dye kit” for your homestead.
- Rainwater is King: Tap water often contains chlorine or heavy minerals that interfere with the dye. Rainwater is naturally soft and provides a neutral canvas for your colors to shine.
- Weight of Fiber (WOF): Always calculate your recipes based on the dry weight of the fabric. A common ratio is 1:1—meaning if you have 100g of wool, you need 100g of dried plant material to get a strong color.
- The Two-Week Rule: After dyeing and rinsing, let your fabric “cure” in a dark place for two weeks before the first real wash. This allows the bonds between the mordant and the pigment to fully set.
Advanced Considerations: Modifiers and pH Shifts
Once you master the basics, you can begin to play with “modifiers” to expand your color palette without harvesting more plants. A single dye bath can produce three or four different colors through the use of pH shifts.
Alkaline Modifiers: Adding an alkaline substance like baking soda or wood ash water to your dye bath can shift colors dramatically. For example, red cabbage dye (which is naturally purple) will turn a bright, vivid teal in an alkaline environment.
Acidic Modifiers: Using white vinegar or lemon juice will shift the pH in the other direction. This usually moves colors toward the warmer end of the spectrum. Many yellows will brighten, and some pinks will shift toward orange or coral.
Iron “Saddening”: Dipping a dyed piece of fabric into a “rust bath” (water simmered with old rusty nails) will darken the tone. This is an excellent way to turn a bright, “cheerful” color into something more sophisticated and muted, perfect for rugged workwear.
Example Scenario: The Black Walnut Harvest
Let’s look at one of the most reliable dyes for the self-reliant homesteader: the Black Walnut. This tree is a “substantive” dye source, meaning it is so rich in natural tannins that it requires no mordant to stay permanent.
In the fall, gather the green hulls that have fallen from the tree. Wear gloves, as they will stain your skin instantly. Place the hulls in a bucket of water and let them ferment for a few days to a week. The water will turn a deep, dark espresso brown.
Simmer your fabric in this “walnut liquor” for an hour. The result will be a rich, lightfast brown that is nearly impossible to wash out. This is the perfect dye for heavy canvas bags, garden aprons, or wool socks that need to withstand the rigors of homestead life.
Final Thoughts
Harvesting color from the earth is more than just a hobby; it is a way to reclaim your connection to the seasons and the soil. Your home becomes a living reflection of your landscape, filled with the soft, organic tones of the forest and the field.
As you experiment, remember that perfection is not the goal. The slight variations in shade and the way the color mellows over time are the hallmarks of a truly natural product. They tell a story that a synthetic dye never could.
Embrace the slow pace of the simmer. Let the steam fill your shed and the colors of the earth fill your home. Every time you wear a piece of clothing you’ve dyed yourself, you are carrying a piece of the homestead with you.
