
How To Become More Self-Sufficient Without Starting a Full-Blown Farm…
Want to start preserving your harvest, making your own soap, or building a backyard root cellar — but not sure where to begin? “Homesteading Advice” gives you instant lifetime access to 35+ practical homesteading books on food preservation, veggie gardening, DIY natural cleaning products (save over $250 per year with this skill alone), brewing, off-grid energy, and a whole lot more…
Click Here To Check It Out Now!
They say that a well-trodden path is the key to a successful journey. And when it comes to creating garden paths with wood chips, the same holds true. But how exactly do you go about it?
In this discussion, we’ll explore the steps to take in order to transform your outdoor space with these natural and cost-effective pathways. From choosing the right wood chips to maintaining their pristine condition, we’ll guide you through the process, leaving you with a garden that is both functional and visually appealing.
So, let’s get started on this path to garden perfection.
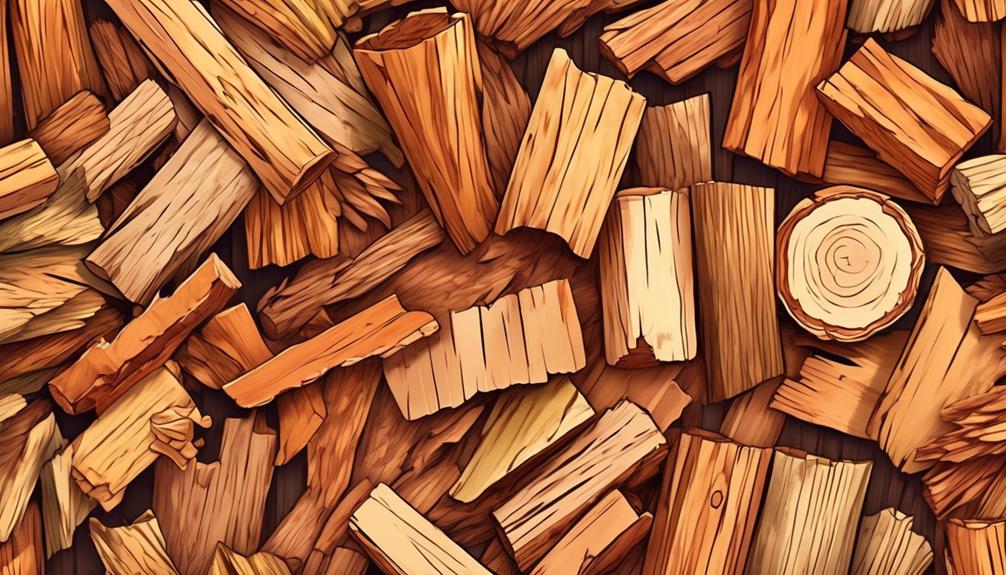
Wood Chip Paths
- Wood chip paths offer numerous benefits such as preventing soil erosion, retaining moisture in the soil, and suppressing weed growth.
- Choosing the right wood chips is important, including using hardwood chips for durability and avoiding treated wood chips near edible plants.
- Proper preparation of the pathway area is essential, including clearing existing paths, using weed suppressant material, and spreading wood chips at least an inch thick.
- Installing and maintaining wood chip paths involves spreading a layer of wood chips, avoiding piling them against plants, regularly replenishing the chips, and removing weeds to keep the path clean and tidy.
Benefits of Wood Chip Paths

Wood chip paths offer a multitude of benefits that can greatly enhance the functionality and beauty of your garden.
One of the key advantages of using wood chip paths is their ability to prevent soil erosion. By creating a layer of wood chips on the pathway, you can effectively protect the soil from being washed away during heavy rainfall or strong winds. This is especially important if your garden is situated on a slope or has loose soil.
In addition to preventing soil erosion, wood chip paths also provide a natural and aesthetically pleasing pathway in your garden. The earthy tones and texture of the wood chips can complement the surrounding plants and create a harmonious atmosphere.
Wood chips also act as a mulch, helping to retain moisture in the soil. This means less frequent watering and reduced water consumption, which isn’t only beneficial for the environment but also for your water bill.
Wood chips can also help suppress weed growth, reducing the need for herbicides. The layer of wood chips acts as a barrier, blocking sunlight and preventing weed seeds from germinating. This saves you time and effort in weed control, allowing you to focus on other gardening tasks.
Finally, as the wood chips decompose over time, they improve soil fertility and promote beneficial soil organisms, creating a healthy and thriving garden ecosystem.
Choosing the Right Wood Chips
When selecting wood chips for your garden paths, it is important to consider several factors to ensure the best results.
The type of wood chips you choose can make a big difference in the longevity and functionality of your paths. Here are some key points to keep in mind when choosing the right wood chips:
| Factors to Consider | Recommendations |
|---|---|
| Use hardwood chips | Hardwood chips are more durable and will last longer than softwood chips. They are also less likely to break down quickly, reducing the need for frequent replacement. |
| Avoid treated wood chips near edible plants | Treated wood chips may contain chemicals that could seep into the soil and potentially harm your edible plants. Opt for untreated wood chips in areas where you plan to grow fruits, vegetables, or herbs. |
| Check local sources | Look for local sources such as tree surgeons or arborists who may have excess wood chips. Using local sources not only supports your community but also reduces transportation costs and carbon emissions. |
| Consider size and texture | Choose wood chips that are small enough to provide a stable walking surface but large enough to prevent excessive compaction. Additionally, consider the texture of the wood chips to ensure they are comfortable to walk on. |
| Check for pests and diseases | Before spreading the wood chips, inspect them carefully to ensure they are free from pests and diseases. This will help prevent the spread of any unwanted visitors or potential plant diseases throughout your garden. |
Preparing the Pathway Area
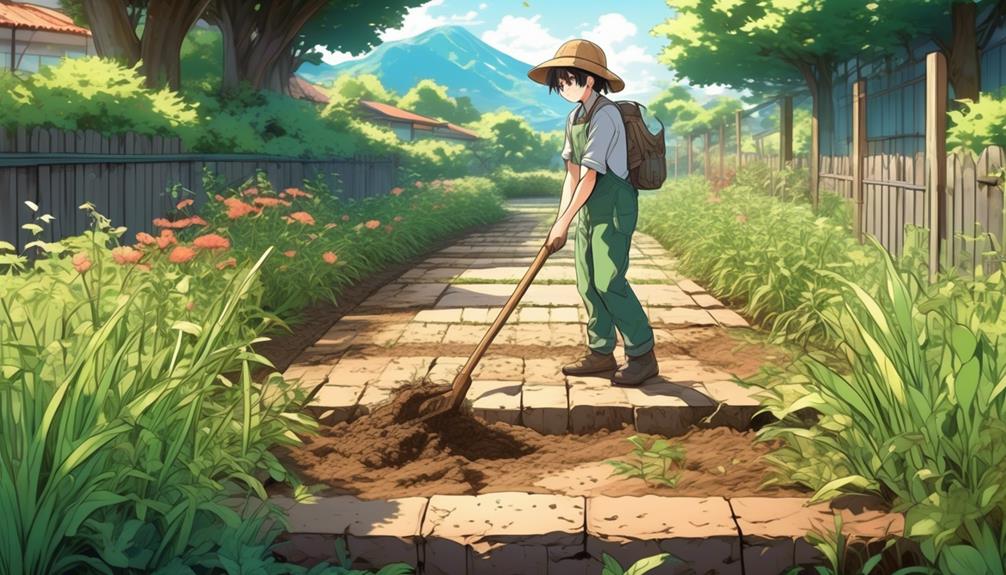
To properly prepare the pathway area, you’ll need to clear any existing paths of debris, measure the width of the paths, and lay down a weed suppressant material before spreading wood chips.
- Clear the existing paths: Mow the area and remove any stones or perennial weeds to help create a clean and even surface for your wood chip paths’
- Measure the width of the paths: Use a measuring tape to determine the desired width of your paths. Consider the size of your garden and the amount of foot traffic it will receive. This will help you determine the amount of wood chips needed.
- Lay down a weed suppressant material: Before putting wood chips, it’s important to lay down a weed suppressant material such as landscaping fabric. This will prevent weeds from growing through the wood chips and keep your path looking neat and tidy.
Once you have cleared the path, measured its width, and laid down the weed suppressant material, you can now put wood chips on top. Spread them at least an inch thick to ensure a durable and long-lasting path. Use stones or other weights to secure the fabric in place while you work.
‘Did you know? Wood chips not only add a natural and rustic look to your garden pathways, but they also help retain moisture in the soil, reduce weed growth, and provide a cushioned surface for walking.’
Installing Wood Chip Paths

Once you have prepared the pathway area with landscape fabric, it’s time to add the wood chips. Begin by pouring the wood chips onto the fabric, making sure to cover the entire area evenly. Use a rake or shovel to spread the wood chips to a thickness of about 2-3 inches.
When spreading the wood chips, be mindful of any existing plants or trees along the path. Avoid piling the wood chips against the base of plants or tree trunks, as this can cause rot or attract pests. Instead, create a small gap around the plants to allow for proper airflow and moisture drainage.
As you spread the wood chips, take the time to compact them slightly. This will help them settle and prevent them from shifting or blowing away in strong winds. You can do this by walking on the wood chips or using a tamper tool to gently press them down.
Once you have evenly spread and compacted the wood chips, take a step back and admire your newly installed wood chip path. Not only will it add a natural and rustic touch to your garden, but it will also provide a comfortable and inviting pathway for you and your guests to enjoy.
Maintaining Wood Chip Paths

To properly maintain wood chip paths, regular replenishment of the wood chips is necessary as they naturally decompose over time.
Here are some tips to help you maintain your wood chip paths and keep them looking their best:
- Replenish the wood chips: As the wood chips decompose, they’ll start to thin out. To maintain a consistent and attractive appearance, make sure to add a new layer of wood chips on top. This will also help to maintain the path’s effectiveness in preventing weed growth.
- Fluff the wood chips: Use a rake or pitchfork to fluff the wood chips regularly. This will prevent compaction and ensure a stable walking surface. Fluffing the wood chips also helps to distribute moisture evenly and prevent the growth of mold or fungus.
- Remove weeds: Keep your wood chip path clean and tidy by removing any weeds that may grow through the wood chips. This won’t only improve the appearance of the path but also prevent the weeds from competing with your plants for nutrients and water.
Remember to water the pathway during dry periods to maintain moisture levels and prevent excessive dust. Avoid using herbicides or chemicals near the wood chip paths to preserve the natural environment.
Enhancing Wood Chip Paths With Landscaping

Enhance the visual appeal and create a natural, inviting atmosphere by integrating low-maintenance plants along your wood chip paths.
Landscaping plays a crucial role in enhancing the beauty of your garden paths. By strategically placing plants along the edges of the paths, you can create a seamless transition between the wood chips and the surrounding garden.
Consider using plants that require minimal care, such as ornamental grasses, sedges, or native wildflowers. These plants not only add color and texture to your paths but also attract butterflies and birds, making your garden feel like a vibrant oasis.
To add variety and break the monotony of the wood chip paths, incorporate stepping stones or decorative gravel. These elements not only create visual interest but also provide a practical function by allowing you to navigate through the garden easily.
Additionally, you can use natural materials like rocks or logs to create borders along the paths. This helps define the edges and prevents the wood chips from spreading into garden beds or other areas.
Illuminate your wood chip paths in the evenings by installing solar-powered pathway lights. These lights not only enhance safety by providing visibility but also add an enchanting ambiance to your garden. They create a warm and inviting atmosphere, making your garden paths a welcoming space even after sunset.
To further enhance your wood chip paths, utilize mulch and ground cover plants.
Mulch helps suppress weed growth and maintains moisture in the soil, while ground cover plants add color and variety. Opt for low-maintenance ground cover plants like creeping thyme or moss, which can create a lush carpet-like effect along the paths.
Did you know? Integrating plants along wood chip paths not only enhances their visual appeal but also provides important ecological benefits. The plants help improve soil health, reduce erosion, and provide habitat for beneficial insects and wildlife.
Troubleshooting Common Issues With Wood Chip Paths

One common issue that can arise with wood chip paths is the need for regular reapplication of wood chips to prevent weed growth. Over time, the wood chips may break down and turn into compost, providing a fertile environment for plants to take root.
To troubleshoot this issue, follow these steps:
- Clear the path: Remove any existing weeds or plants that have grown in the wood chip path. This will create a clean slate for the reapplication of wood chips.
- Add fresh wood chips: Apply a new layer of wood chips to the path, making sure to cover the entire surface area. This will help suppress weed growth and maintain the path’s appearance.
- Maintain the path: Regularly inspect the wood chip path and reapply wood chips as needed. Depending on the rate of decomposition, this may need to be done every few months to a year.
Enjoy Your Pathway
Creating garden paths with wood chips is a practical and cost-effective way to enhance your outdoor space. By following the simple steps outlined in this article, you can create a natural and aesthetically pleasing addition to your garden. So, why settle for a plain garden path when you can create a beautiful and functional pathway with wood chips?
