How To Become More Self-Sufficient Without Starting a Full-Blown Farm…
Want to start preserving your harvest, making your own soap, or building a backyard root cellar — but not sure where to begin? “Homesteading Advice” gives you instant lifetime access to 35+ practical homesteading books on food preservation, veggie gardening, DIY natural cleaning products (save over $250 per year with this skill alone), brewing, off-grid energy, and a whole lot more…
Click Here To Check It Out Now!
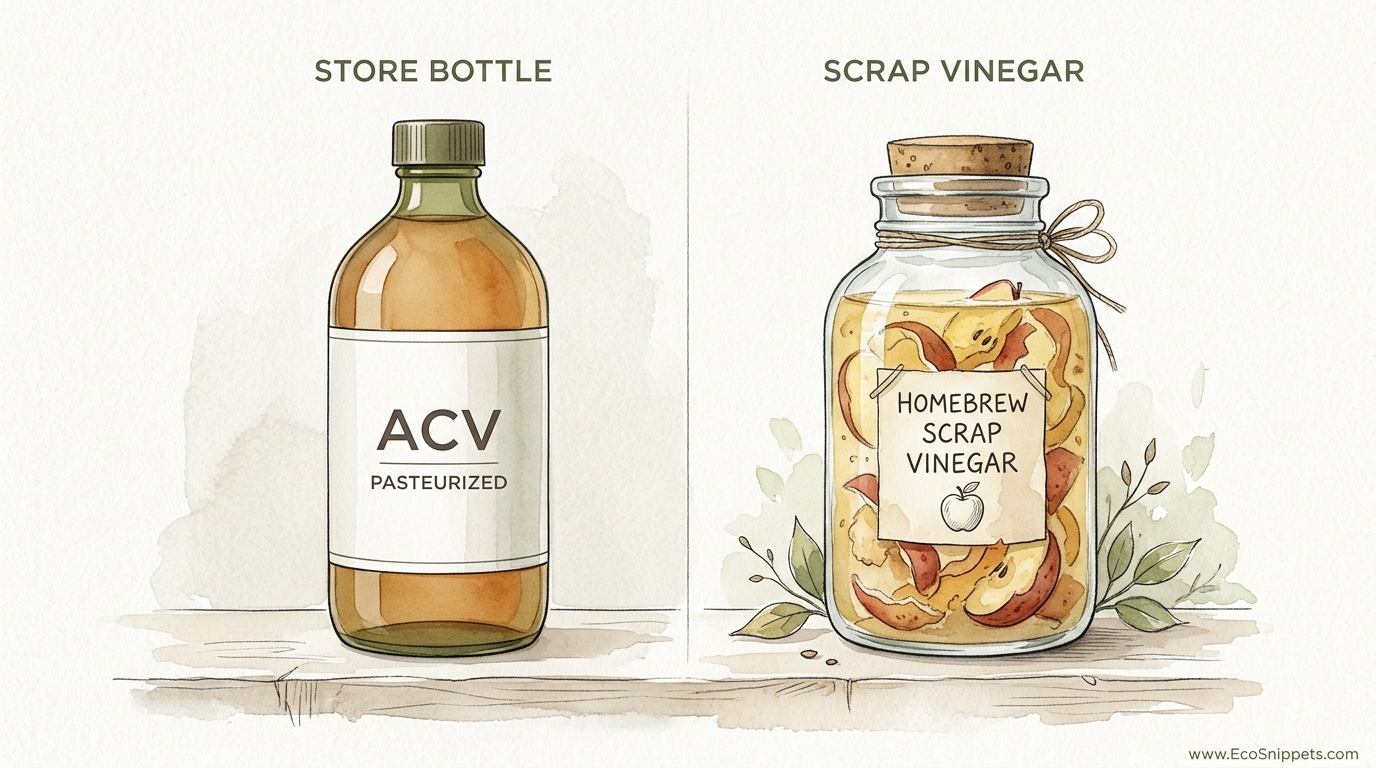
You are literally throwing away the world’s most versatile preservation tool every time you peel an apple. Why pay $12 for a ‘mother’ when you can grow your own for free? Most people see apple cores as trash, but a homesteader sees the foundation for next year’s pickles, cleaning supplies, and health tonics. Turn your kitchen waste into liquid gold.
Making your own vinegar is an act of defiance against the convenience-store culture that has severed our connection to the microbial world. It is a return to a time when every scrap of food was a resource and every jar on the shelf told a story of patience and stewardship. This process is not just about saving a few dollars; it is about reclaiming the ancestral wisdom of fermentation.
In the following guide, you will learn how to harness the invisible workers of the atmosphere to transform simple fruit waste into a powerful, multi-purpose liquid. Whether you are a seasoned homesteader or a curious beginner looking to reduce your footprint, the journey from apple peel to acidic treasure is one of the most rewarding skills you can master.
How To Make Vinegar From Apple Scraps
Apple scrap vinegar is a raw, unfiltered liquid created through a two-stage aerobic fermentation process. Unlike commercial white vinegar, which is often derived from grain-based alcohols or even petroleum-based sources, this homemade version is built from the natural sugars and wild yeasts found on the skins of fresh apples. It represents the ultimate zero-waste kitchen practice, transforming what would be compost into a shelf-stable acid.
In the real world, this vinegar serves as a bridge between waste and utility. It acts as a gentle household cleaner, a digestive aid, and a supplement for livestock. Because it is made from the leftovers of pies, sauces, and snacks, the cost of production is nearly zero, yet the value of the final product—rich with enzymes and beneficial bacteria—far exceeds that of the clear, dead bottles found in the grocery aisle.
Visualizing the concept is simple: think of it as “controlled souring.” You are creating a hospitable environment for the “good” microbes to thrive while outcompeting the “bad” ones. This biological competition results in a liquid that is naturally preserved and packed with the characteristic tang that has made vinegar a staple of human civilization for over 5,000 years.
How the Fermentation Process Works
The transformation of apple scraps into vinegar is a two-act play performed by two different types of microorganisms. Understanding this sequence is vital for troubleshooting and ensuring a successful harvest. Without these invisible partners, your apple water would simply rot.
The first act is alcoholic fermentation. When you submerge apple scraps in sugar water, wild yeasts present on the fruit skins (or in the air) begin to consume the sugars. These yeasts convert the glucose into ethanol (alcohol) and carbon dioxide. This is why you will see bubbles and foam in the first week of the process. At this stage, you are essentially making a very weak, wild apple cider.
The second act is acetic acid fermentation. This is where the magic happens. Once the yeasts have produced enough alcohol, a genus of bacteria called Acetobacter takes over. These bacteria are aerobic, meaning they require oxygen to do their work. They consume the ethanol and oxidize it into acetic acid—the compound that gives vinegar its signature sourness and preservative qualities.
This process is a slow walk, not a sprint. It requires a balance of warmth, air, and time. If you seal the jar too tightly, the Acetobacter will suffocate, and the process will stall at the alcohol stage. If you leave it too open without a protective cover, fruit flies will move in and introduce unwanted pathogens. Mastery of vinegar making is simply the mastery of maintaining this delicate environment.
The Step-by-Step Instruction Guide
Creating your own vinegar requires more patience than equipment. Follow these steps to ensure your kitchen waste transforms into a healthy, vibrant ferment.
1. Prepare Your Vessels
Cleanliness is the foundation of successful fermentation. Use a large glass jar, such as a half-gallon Mason jar or a ceramic crock. Avoid using reactive metals like aluminum or copper, as the acid will eventually leach metallic compounds into your vinegar. Sterilize your jar with hot, soapy water and a thorough rinse.
2. Gather and Prep the Scraps
Fill your jar about three-quarters of the way with apple scraps. This includes peels, cores, and even bruised pieces of fruit. Avoid using any parts that show signs of mold or rot, as these will ruin the entire batch. Using organic apples is highly recommended, as conventional apples often carry pesticide residues that can inhibit the growth of beneficial microbes.
3. Mix the Sweetened Brine
Dissolve one tablespoon of organic sugar (or honey) into one cup of non-chlorinated water. You will need enough of this mixture to completely submerge the apple scraps. Sugar acts as the primary fuel for the yeast to begin the alcoholic phase. While the apples have natural sugar, the added tablespoon ensures a strong enough fermentation to prevent spoilage.
4. Submerge and Cover
Pour the sugar water over the scraps, leaving about two inches of headspace at the top. It is crucial that the apples stay beneath the surface of the liquid to prevent mold. You can use a fermentation weight or a small glass saucer to keep them down. Cover the mouth of the jar with a breathable material like a coffee filter or a tight-weave flour sack towel, secured with a rubber band.
5. The First Fermentation (Stage 1)
Place the jar in a warm, dark spot—ideally between 70°F and 80°F. For the first 7 to 14 days, stir the mixture once or twice daily with a wooden spoon. This introduces oxygen and prevents mold from forming on the surface. You will notice the water turning cloudy and bubbles forming as the yeast works.
6. Strain and Age (Stage 2)
Once the scraps have sunk to the bottom and the bubbling has slowed, strain the solids out through a fine-mesh sieve. Compost the spent apple bits. Pour the remaining liquid back into the jar, recover with the breathable cloth, and let it sit undisturbed for another 3 to 6 weeks. During this time, the Acetobacter will finalize the conversion to acetic acid.
Benefits of Homemade Scrap Vinegar
Choosing to brew your own vinegar offers rewards that extend far beyond the kitchen pantry. It is an exercise in self-reliance that provides tangible benefits for your health and your home.
* Waste Reduction: In a world where food waste is a global crisis, turning cores and peels into a valuable resource is a powerful environmental statement. You are closing the loop in your kitchen.
* Probiotic Richness: Homemade vinegar is “alive.” Because it is unpasteurized, it contains the “mother”—a colony of beneficial bacteria and enzymes that support gut health. Most store-bought vinegars are heat-treated, which kills these health-promoting elements.
* Financial Savings: Raw, organic apple cider vinegar can be expensive. By using scraps that were destined for the bin, you are creating a premium product for the cost of a few tablespoons of sugar.
* Chemical-Free Living: Homemade vinegar is a powerhouse for natural cleaning. It can replace harsh chemical sprays for windows, countertops, and floors, keeping your home environment safer for children and pets.
* Livestock Support: Many homesteaders add a splash of raw vinegar to the drinking water of their chickens. This helps regulate the birds’ internal pH and keeps their digestive systems healthy, especially during times of stress.
Challenges and Common Mistakes
Even the most seasoned fermenters encounter hurdles. Understanding why mistakes happen is the first step toward avoiding them in your next batch.
Mold Growth: This is the most common failure. It usually happens because the apple scraps were allowed to float above the surface of the water, exposed to air. If you see fuzzy patches of blue, green, or black, the batch is compromised and must be tossed. To prevent this, ensure everything stays submerged and stir frequently during the first week.
Chlorinated Water: Using tap water treated with chlorine or chloramine can kill the wild yeasts and bacteria necessary for fermentation. This leads to a “dead” jar that simply grows mold. Always use filtered, spring, or well water.
Temperature Fluctuations: Fermentation is temperature-sensitive. If the room is too cold (below 60°F), the microbes will go dormant. If it is too hot (above 85°F), the fermentation can happen too fast, resulting in an “off” flavor or the development of unwanted bacterial strains.
Kahm Yeast: Often mistaken for mold, Kahm yeast is a white, wavy, filmy layer that forms on the surface. It is harmless but can impart a funky or yeasty taste to the vinegar. You can gently scrape it off, but if it becomes overwhelming, it may be a sign that your liquid isn’t acidic enough.
Limitations: When This May Not Be Ideal
While apple scrap vinegar is a wonderful tool, it is important to recognize its limitations, particularly concerning food safety.
The primary constraint is acidity level. For safe room-temperature canning and pickling, vinegar must have an acetic acid concentration of at least 5%. Homemade vinegar is notoriously variable; one batch might be 4% while the next is 6%. Without a professional titration kit, you cannot accurately measure the acidity of your brew. Consequently, you should never use homemade vinegar for shelf-stable canning.
Environmental factors also play a role. If you live in an area with high humidity and significant airborne mold, keeping an open-air ferment can be challenging. In these cases, you may need to use a jumpstart (like a splash of raw store-bought ACV) to acidify the environment quickly and protect the batch from local pathogens.
Additionally, scrap vinegar is generally milder than “true” cider vinegar made from pressed apple juice. If you are looking for a sharp, aggressive bite for a specific culinary recipe, the scrap version might feel a bit thin or mellow in comparison.
Practical Comparison: Store-Bought vs. Scrap Vinegar
To understand the value of your homemade brew, it helps to compare it against the standard options available in the marketplace.
| Feature | Store-Bought (Distilled) | Raw Store-Bought (ACV) | Homemade Scrap Vinegar |
|---|---|---|---|
| Cost | Low | High ($6-$12/quart) | Near Zero |
| Microbial Activity | None (Sterile) | High (The Mother) | High (Wild Mother) |
| Acidity | Standardized (5%+) | Standardized (5%) | Variable (3-6%) |
| Sustainability | Low (Industrial) | Medium | High (Zero Waste) |
| Flavor Depth | Sharp/Neutral | Complex/Fruity | Mellow/Complex |
Practical Tips and Best Practices
If you want to move from accidental success to consistent mastery, consider these professional homesteading tips.
* Use a “Starter”: While not strictly necessary, adding two tablespoons of raw, unfiltered vinegar (with the mother) to your new batch will speed up the process and lower the pH instantly, providing a safety net against mold.
* The Freeze Trick: If you don’t have enough scraps to fill a jar at once, keep a “vinegar bag” in the freezer. Add cores and peels as you go. Once the bag is full, thaw them and start your batch. The freezing process also breaks down the cell walls of the apples, releasing sugars more easily.
* Avoid Honey Initially: While honey is a wonderful natural sweetener, it has antimicrobial properties that can sometimes slow down a wild fermentation. For beginners, plain organic cane sugar is more reliable. Once you are experienced, honey-based vinegars (known as oxymels when mixed with herbs) are a great next step.
* The “Sniff Test”: Your nose is your best tool. During stage one, it should smell like sweet apples and slightly like beer or wine. During stage two, it should transition into a sharp, vinegary punch. If it ever smells like rotting trash or sulfur, something has gone wrong.
* Record Keeping: Label your jars with the date and the variety of apple used. You will find that Granny Smith scraps produce a much sharper vinegar than Gala or Fuji.
Advanced Considerations for Serious Practitioners
Once you have mastered the basics, you can begin to treat vinegar making as a craft rather than a chore. Serious practitioners often look toward secondary flavoring. After straining the apple scraps, you can add herbs like rosemary, thyme, or peppercorns to the aging liquid. This creates artisanal infused vinegars that are perfect for dressings and marinades.
Another advanced technique is acidity testing. If you intend to use your vinegar for any kind of preservation, you should invest in a titration kit. This involves adding a base (like sodium hydroxide) to a sample of your vinegar until a color indicator changes, allowing you to calculate the exact percentage of acetic acid. This bridges the gap between “homestead hobby” and “scientific preservation.”
Scaling up is also a consideration. If you have an orchard, you may find that quart jars are insufficient. Moving to five-gallon food-grade buckets or even small oak barrels can allow you to produce enough vinegar to last a year, covering all your cleaning, livestock, and culinary needs in one seasonal push.
Examples and Scenarios
Let’s look at a realistic scenario for a family of four during apple season. Suppose you are making three apple pies and a large batch of applesauce. You end up with approximately two quarts of peels and cores.
Instead of tossing them, you place the scraps in a half-gallon jar. You add eight cups of filtered water mixed with eight tablespoons of sugar. You stir it every morning for ten days while the kitchen smells faintly of fermenting cider. On day eleven, you strain the solids and give them to your backyard chickens—who benefit from the fermented fruit.
Three weeks later, you have nearly two quarts of raw apple scrap vinegar. You use one cup to make a natural window cleaner (diluted with water). You use another cup to create a soothing hair rinse that removes soap buildup. The rest goes into a jar in the pantry, where a beautiful, gelatinous “mother” begins to form on top. You now have a starter for every future batch of vinegar you will ever make.
Final Thoughts
Mastering the art of apple scrap vinegar is more than a culinary trick; it is a gateway into the world of biological stewardship. You are taking something that the modern world considers worthless and, through the simple application of time and air, transforming it into a vital resource.
This liquid gold serves as a reminder that nature is inherently productive. When we align ourselves with the processes of fermentation, we reduce our dependence on industrial supply chains and increase the resilience of our homes. The bubbles in your jar are the sound of a system working exactly as it was designed to do for millennia.
Start your first batch today. Don’t wait for the perfect equipment or a specialized ‘mother.’ Use the scraps from your next snack, a clean glass jar, and a bit of sugar. By the time the leaves have fallen, you will have a pantry full of the most versatile tool a homesteader can own. Experiment, observe, and enjoy the tang of self-reliance.
