How To Become More Self-Sufficient Without Starting a Full-Blown Farm…
Want to start preserving your harvest, making your own soap, or building a backyard root cellar — but not sure where to begin? “Homesteading Advice” gives you instant lifetime access to 35+ practical homesteading books on food preservation, veggie gardening, DIY natural cleaning products (save over $250 per year with this skill alone), brewing, off-grid energy, and a whole lot more…
Click Here To Check It Out Now!
You are literally sitting on the most important soap-making ingredient every time you clean out your wood stove. Every winter, homesteaders throw away gallons of high-grade lye in their ash buckets. Our ancestors didn’t have a local hardware store; they had a fireplace. Leaching water through hardwood ashes allows you to produce pure, liquid lye for absolutely zero dollars. Here is how to master the ‘float an egg’ test for perfect lye concentration.
Living off the land requires more than just growing food; it requires reclaiming the chemical knowledge our grandparents took for granted. Before the era of plastic bottles and chemical beads, every farmstead had a dedicated corner for the ash hopper. This simple system turned waste into a powerful cleaning agent. It is the ultimate form of recycling, turning the ghost of a winter fire into the foundation of a clean home.
Learning this skill connects you to a lineage of self-reliant makers. You will find that homemade lye is not only effective but carries a certain pioneer-grit satisfaction that store-bought chemicals cannot match. This guide will walk you through the nuances of wood selection, the physics of the leaching barrel, and the ancient tests used to ensure your brew is strong enough to turn fat into soap.
How To Make Lye From Wood Ash For Soap
Wood ash lye is a liquid alkaline solution technically known as potassium hydroxide, or “caustic potash.” This substance forms when water filters through the white ashes left behind by a hot wood fire. It serves as the critical catalyst in the saponification process, which is the chemical reaction that transforms oils and animal fats into soap.
Historically, this was the primary method for making soap in North America and Europe for centuries. While modern commercial lye is typically sodium hydroxide (soda lye), wood ash lye produces a distinct type of soap. It naturally results in a liquid or soft “paste” soap, which was the standard for laundry and general cleaning in the 18th and 19th centuries.
The chemistry is fascinating in its simplicity. When you burn hardwood, the potassium the tree absorbed from the soil remains in the ash as potassium carbonate. Pouring water over these ashes dissolves the carbonate and carries it out of the ash. If you add slaked lime to this mixture, it converts the potassium carbonate into the more potent potassium hydroxide, creating a “sharp” lye capable of aggressive cleaning and efficient soap making.
The Science of the Hearth: Selecting Your Wood
Not all wood is created equal when it comes to the lye barrel. The quality of your lye begins with the species of tree you throw into your stove. Hardwoods are the gold standard for this process because they contain significantly higher levels of potassium than softwoods.
White oak is often called the “King of Lye Production” due to its exceptional mineral content and clean-burning properties. Hickory, sugar maple, and beech are also top-tier choices that yield a potent, high-quality ash. These woods burn slowly and leave behind a fine, white powder that is rich in the carbonates needed for a strong alkaline solution.
Softwoods like pine, fir, and cedar should generally be avoided for serious lye making. These resinous woods produce a sootier ash that is lower in potassium and can introduce unwanted oils and resins into your lye water. If you must use softwood ash, expect to spend much more time concentrating the liquid through boiling to reach the necessary strength.
Building the Traditional Leaching Barrel
You need a system that allows water to move slowly through a large volume of ash while filtering out solid particles. The most common setup is the leaching barrel, also known as an ash hopper. This can be as simple as a wooden barrel or a heavy-duty plastic bucket with a small hole near the bottom.
First, place a layer of clean river stones or large pebbles at the very bottom of your container. This prevents the drainage hole from clogging and creates a reservoir for the liquid to collect. On top of the stones, add a two-inch layer of clean straw or dried grass. This acts as your primary filter, ensuring the lye water that exits the barrel is clear and free of charcoal bits.
Fill the rest of the barrel with sifted, bone-dry hardwood ash. Sifting is an important step; you want to remove large unburnt chunks of carbon that can discolor the lye. Pack the ash down firmly as you go. Packing the ash tightly ensures the water moves through the barrel at a slow “trickle” rather than a fast “run,” which maximizes the amount of potassium extracted during the process.
The Leaching Process Step-by-Step
Once your barrel is packed and positioned over a collection vessel—ideally a wooden, glass, or stainless steel bucket—you are ready to start the leach. Never use aluminum containers for this process. Lye reacts violently with aluminum and will eat through the metal, ruining your batch and potentially causing a dangerous spill.
Soft water is the best choice for this task. Rainwater is the traditional favorite because it is free of the minerals found in well water that can interfere with the chemistry of the lye. Slowly pour the water onto the top of the ashes. You want the water to saturate the ash completely without creating a standing pool on top.
Patience is the most important tool in this phase. It can take six to eight hours for the first drops of lye to appear at the bottom of the barrel. The resulting liquid will be a dark, tea-colored “liquor.” This first run is usually the strongest. As you continue to add water, the lye will become progressively weaker. You can choose to collect these weak runs and pour them back through the barrel to strengthen them.
How to Master the “Float an Egg” Test
Determining the strength of your lye is the most difficult hurdle for the beginner. Without modern pH strips or hydrometers, our ancestors relied on the density of common objects to gauge concentration. The “float an egg” test remains the most reliable traditional method for verifying that your lye is ready for the soap kettle.
Gently place a fresh, raw egg into a container of your room-temperature lye. If the egg sinks to the bottom, the lye is too weak and will not be able to saponify the fats. You must either boil the liquid down to concentrate it or run it through a fresh batch of ashes. If the egg floats so high that it tips over, the lye is too strong and needs to be diluted with a small amount of soft water.
The “perfect” strength is achieved when the egg floats with an area roughly the size of a nickel or a quarter visible above the surface. Some old-timers prefer using a small potato; the goal remains the same. You are looking for the lye to be dense enough to support the weight of the object, which indicates a high enough concentration of potassium hydroxide to trigger the chemical change into soap.
Concentrating and Purifying Your Lye
If your leaching process yields a weak solution, do not despair. You can easily increase the potency of your lye by boiling it down. Place your lye water in a stainless steel or cast iron pot—again, never aluminum—and bring it to a gentle simmer. This evaporates the excess water and leaves behind a more concentrated alkaline solution.
During the boiling process, you may notice a white crust forming on the sides of the pot. This is often referred to as “potash” or “pearl ash.” You can boil the lye all the way down to a dry powder if you wish to store it for future use. For most soap making, however, stopping when you reach the desired “egg float” density is the most practical approach.
Clarifying the lye is another hallmark of a master maker. If your lye water is murky or contains floating debris, let it sit undisturbed for twenty-four hours. The impurities will settle to the bottom of the container, allowing you to carefully pour off the clear, amber-colored lye from the top. This results in a much cleaner, more professional-looking soap.
Benefits of Making Your Own Lye
Choosing to manufacture your own lye offers several advantages that go beyond simple cost savings. It is a fundamental step toward true self-reliance. When you can produce your own cleaning agents from the waste of your wood stove, you have broken a significant link in the chain of industrial dependency.
- Zero Cost: Hardwood ash is a waste product for most people, and rainwater is free. This makes the chemical foundation of your soap essentially $0.00.
- Natural Purity: Unlike industrial lye, which may contain anti-caking agents or trace heavy metals from the electrolysis process, your wood ash lye is a pure mineral extract.
- Superior Soft Soap: Potassium-based soaps made from wood ash are famously gentle on the skin. They are ideal for liquid hand soaps, shampoos, and delicate laundry.
- Historical Connection: Practicing this craft preserves a vital piece of human history. You are using the same methods that kept households clean for thousands of years.
Challenges and Common Mistakes
Working with wood ash lye requires respect and a steady hand. The most common mistake beginners make is underestimated the caustic nature of the liquid. Even though it comes from “natural” ashes, it is a strong base that can cause chemical burns on the skin and permanent damage to the eyes.
Another frequent error is using the wrong wood species. Softwoods like pine create a lye that is often too weak or too resinous to work correctly. If your soap refuses to “trace” or remains a greasy mess, the culprit is often a low-quality ash source or lye that wasn’t concentrated enough during the leaching process.
Inconsistency is the final major challenge. Every batch of wood ash is slightly different depending on the tree’s age, the soil it grew in, and the temperature of the fire. This means you cannot rely on fixed recipes. You must become comfortable with the “sensory” side of the craft—watching the color, testing the density, and adjusting as you go.
Limitations: Potassium vs. Sodium
It is vital to understand that lye from wood ash (potassium hydroxide) is chemically different from the lye beads you buy at the hardware store (sodium hydroxide). This difference dictates the physical properties of the finished soap. Potassium soap is naturally soft and will not harden into a solid bar like modern commercial soaps.
Traditional wood ash soap is usually stored in crocks or jars as a thick, translucent paste. This paste is then scooped out and dissolved in water for washing. If you are determined to make a hard bar of soap using wood ash lye, you will need to add an extra step: “salting out.”
Adding a significant amount of common table salt (sodium chloride) to the boiling soap mixture triggers a chemical exchange. The sodium ions from the salt displace the potassium ions in the soap. This transforms the potassium soap into sodium soap, which will then float to the surface and can be skimmed off to be molded into hard bars. This was the traditional “hard soap” method, but it requires more skill and resources.
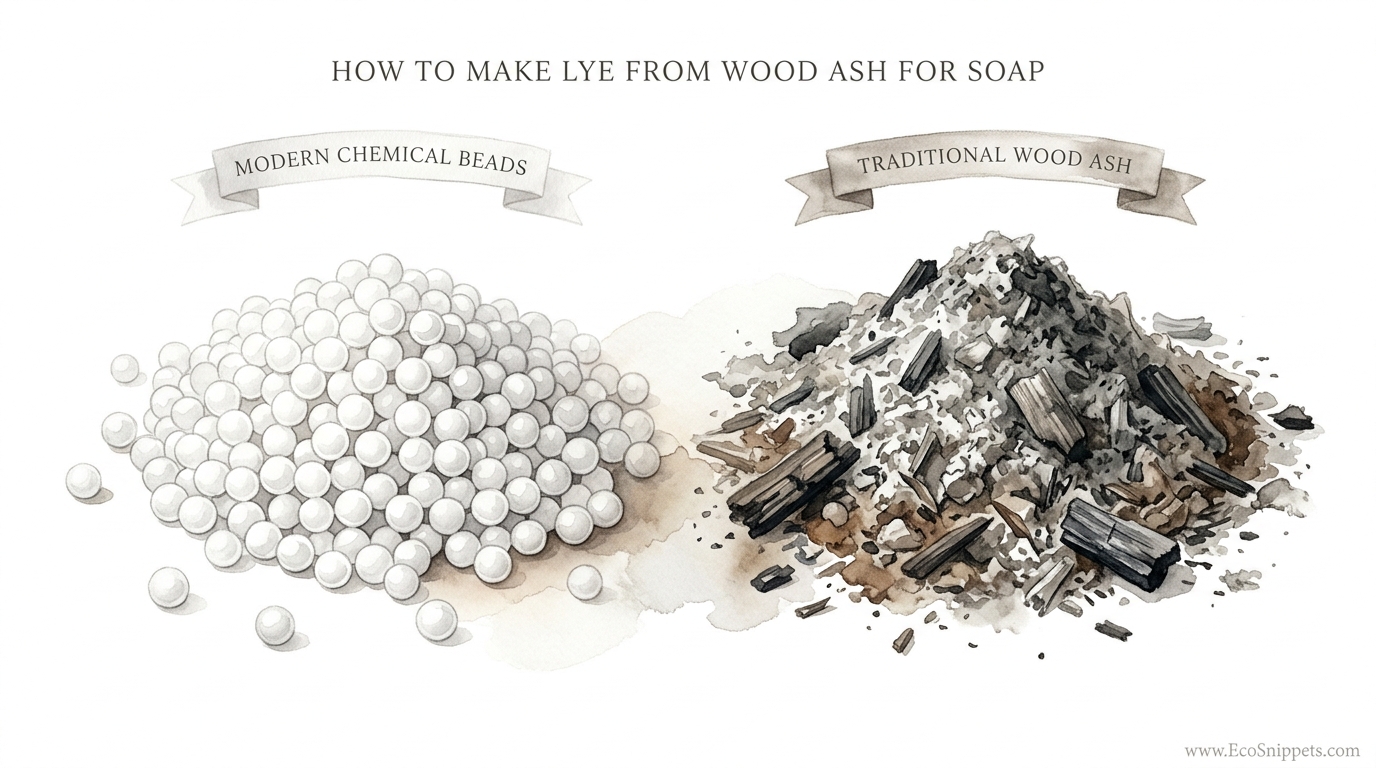
Wood Ash Lye vs. Chemical Beads
Deciding whether to use traditional wood ash lye or modern sodium hydroxide beads depends on your goals as a maker. Each has its place in the homestead workshop.
| Factor | Wood Ash Lye (Potassium) | Chemical Beads (Sodium) |
|---|---|---|
| Cost | Free (Time intensive) | $15 – $30 per container |
| Consistency | Variable; requires testing | Extremely precise |
| Final Product | Soft, liquid, or paste soap | Hard, solid bars |
| Skill Level | Intermediate to Advanced | Beginner friendly |
| Sustainability | High (Renewable waste) | Low (Industrial manufacturing) |
Practical Tips and Best Practices
Success in the lye-making process comes down to attention to detail. Small adjustments in your technique can lead to much more consistent results and safer handling.
- Keep Vinegar Handy: Always have a bottle of white vinegar nearby. If lye splashes on your skin, the acetic acid in the vinegar will neutralize the base. However, for a major splash, cold water is still the best first-line defense.
- Use Only White Ash: When cleaning your stove, look for the fluffy, bone-white ash. This is the result of complete combustion and contains the highest concentration of minerals. Dark grey or black “ash” still contains too much carbon and will yield weaker lye.
- Avoid Metal Interaction: Stainless steel and cast iron are the only metals that should touch your lye. Tin, zinc, and aluminum will all react poorly and contaminate your batch.
- Monitor Temperature: Boiling your lye to concentrate it is effective, but be careful not to let it boil over. A lye boil-over is a hazardous mess that can ruin your stovetop.
Advanced Considerations: The Role of Lime
Experienced soap makers often “sharpen” their lye by adding slaked lime (calcium hydroxide) to the mixture. This is an advanced technique that shifts the chemical balance of the solution. Adding lime causes the potassium carbonate in the lye water to react, forming potassium hydroxide and calcium carbonate.
The calcium carbonate is insoluble and will sink to the bottom as a white sludge, leaving behind a much stronger, clearer lye. This “hydroxide lye” is far more efficient at saponifying fats and produces a cleaner soap. If you find your wood ash soap is always too oily or takes days to set, experimenting with a small amount of lime can be the solution.
This process requires even greater safety precautions, as the reaction can generate heat and the resulting “sharpened” lye is much more aggressive. Mastering this chemical conversion was the secret of the professional soap boilers of the past and is a worthy goal for any serious practitioner of the craft.
A Realistic Example: The One-Gallon Batch
Imagine you have a five-gallon bucket of clean oak ash from your winter heating. You pack it into your leaching barrel with the stone and straw filter. After slowly adding three gallons of rainwater over twelve hours, you collect roughly two gallons of dark brown lye water.
You test the liquid with a fresh egg, and it sinks immediately. This tells you the lye is too weak for soap. You transfer the liquid to a large stainless steel pot and simmer it on your outdoor stove for several hours until the volume is reduced by half. You test it again. This time, the egg floats, showing a circle the size of a dime.
You decide to concentrate it just a bit further. After another thirty minutes of simmering, the egg floats with a nickel-sized patch visible. You now have one gallon of high-grade, traditional wood ash lye. This gallon is ready to be mixed with rendered tallow or lard to create several pounds of high-quality homestead soap.
Final Thoughts
Mastering the art of wood ash lye is a transformative experience for the modern homesteader. It turns a chore—cleaning the wood stove—into a resource-gathering mission. It reminds us that our ancestors were not merely surviving; they were sophisticated chemists who understood how to extract value from every corner of their environment.
The “float an egg” test is more than just a quaint historical curiosity. It is a functional, reliable tool that allows you to bypass the need for industrial supply chains. While the process takes time and patience, the reward is a deeper understanding of the materials that sustain your life.
Start with a small batch and observe the changes in the liquid. Pay attention to the wood you burn and the color of the ash you produce. With practice, you will develop an intuition for the “sharpness” of the lye and the feel of the soap. You aren’t just making a cleaning product; you are reclaiming a piece of ancestral wisdom that is as relevant today as it was two centuries ago.
