How To Become More Self-Sufficient Without Starting a Full-Blown Farm…
Want to start preserving your harvest, making your own soap, or building a backyard root cellar — but not sure where to begin? “Homesteading Advice” gives you instant lifetime access to 35+ practical homesteading books on food preservation, veggie gardening, DIY natural cleaning products (save over $250 per year with this skill alone), brewing, off-grid energy, and a whole lot more…
Click Here To Check It Out Now!
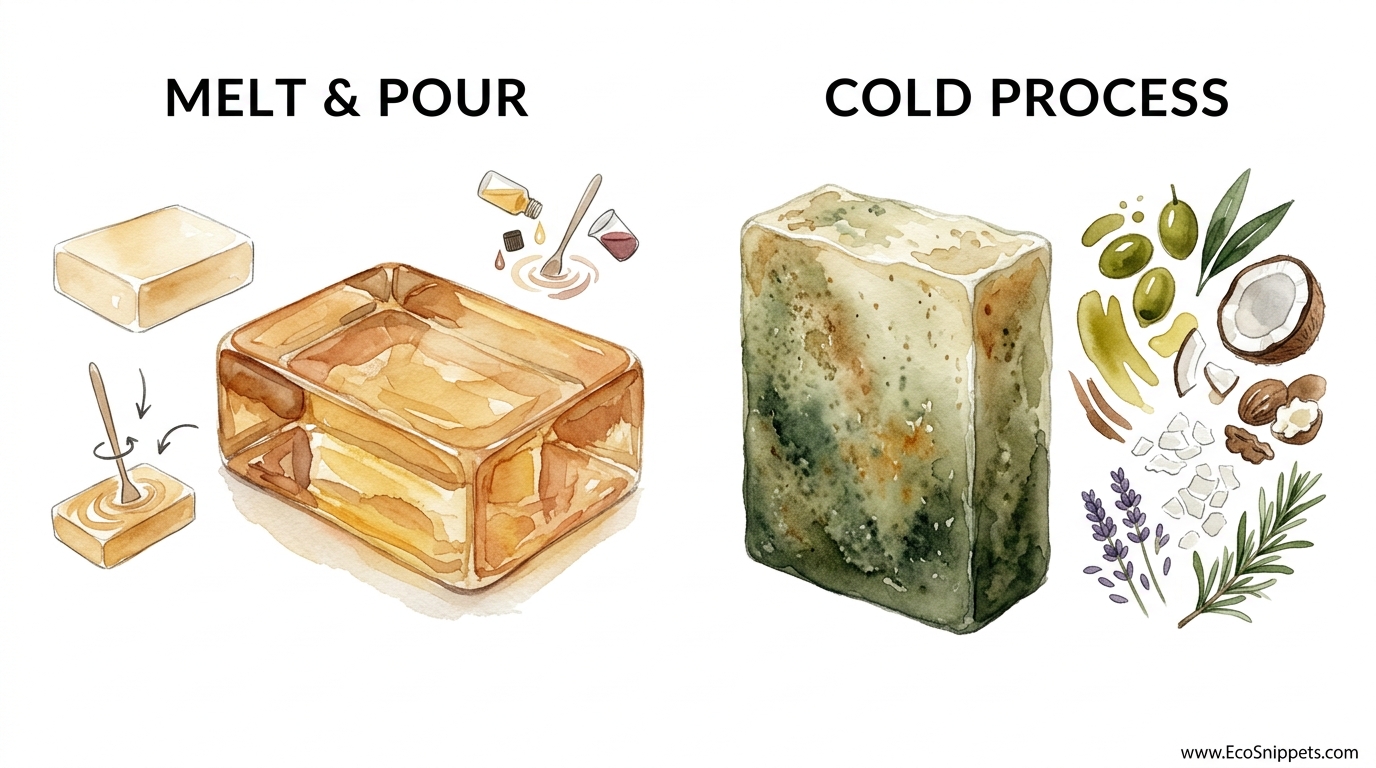
Most ‘easy’ soap kits are designed to be replaced; real soap is designed to endure. Melt and pour kits are a fun ‘temporary’ craft, but they lack the molecular structure of a ‘legacy’ cold process bar. Because they are high in glycerin, they attract moisture and melt away in days. Learn the ancestral cold process method to create a bar that stays firm, cleans deeper, and lasts for months in the shower.
Creating soap from scratch is an act of self-reliance. It transforms raw, simple ingredients into a functional tool for the home. You are not just following a hobby; you are mastering a chemical reaction that has sustained households for millennia. This guide will walk you through the grit and grace of the cold process method, ensuring you create a bar worthy of your heritage.
Practical knowledge of soap making allows you to control exactly what touches your skin. You can ditch the synthetic detergents and industrial surfactants found in modern store-bought “beauty bars.” Instead, you will use the same principles your ancestors used to forge a product that actually works. Let us begin the journey of making a bar that truly lasts.
The Difference Between Glycerin Soap And Real Soap
Glycerin soap, often found in craft store kits as “melt and pour,” is essentially a pre-manufactured industrial base. It exists for convenience and speed, not for longevity or deep skin health. Manufacturers create these bases using a high concentration of solvents like alcohol and sugar water to ensure the soap remains meltable. This high glycerin content makes the soap a humectant, meaning it draws moisture from the air.
This moisture-attracting quality leads to “sweating,” where beads of water form on the surface of the bar. Because it is so soluble, a glycerin bar dissolves rapidly when exposed to the humidity of a modern shower. It is a temporary solution for those who want a quick gift without the commitment of the craft. It lacks the dense, crystalline structure of a true cold process bar.
Real soap is the result of a complete chemical transformation. It is not “melted” into existence; it is forged through saponification. This process occurs when a strong alkali, like sodium hydroxide, reacts with fats and oils to create a completely new substance. In this legacy method, the glycerin is a natural byproduct that stays locked within the bar’s structure.
The cold process bar is far more durable than its glycerin counterpart. It requires a curing period to allow water to evaporate, which tightens the molecular bonds and hardens the bar. Where a melt and pour bar might vanish in a week of heavy use, a well-cured cold process bar will stand firm for months. It provides a deeper, cleaner lather that modern synthetics struggle to replicate.
The Science of the Saponification Forge
Saponification is the heart of the ancestral method. It is the chemical reaction where an ester—in this case, your fats or oils—is heated by its own reaction with an alkali. This creates two things: soap and glycerin. You do not need external heat once the process starts, which is why we call it the “cold” process. The energy for the transformation comes entirely from the ingredients themselves.
You must first prepare your lye solution. Sodium hydroxide crystals are dissolved into distilled water, creating a caustic liquid that reaches high temperatures almost instantly. This solution is the “spark” that ignites the fats. You must treat it with respect, as it is powerful enough to break down organic matter—which is exactly how it cleans your skin once the reaction is finished.
The fats and oils represent the “fuel” for your soap. Different fats provide different qualities to the finished bar. Saturated fats like tallow, lard, or coconut oil provide hardness and a bubbly lather. Unsaturated fats like olive oil or sunflower oil provide conditioning properties and a silkier feel. Balancing these oils is the key to a legacy recipe.
Once the lye and oils are combined, you must reach “trace.” This is the point of no return where the oil and water-based lye have emulsified and will no longer separate. You will recognize it when the mixture thickens to the consistency of a heavy pudding. If you drizzle a spoonful over the surface, it should leave a visible “trail” or trace. At this point, the mixture is poured into a mold to finish its transformation.
The Lasting Benefits of the Legacy Bar
The primary advantage of the cold process method is total control over your ingredients. You decide which fats go into the pot, allowing you to tailor the bar to your specific environment. If you live in a dry climate, you can increase the conditioning oils. If you need a bar for heavy labor, you can formulate it to be exceptionally hard and cleansing.
Skin health is another significant benefit of this ancestral approach. Most commercial soaps are actually detergents that strip the skin of its natural protective oils. Cold process soap maintains a natural balance. It leaves a thin, protective layer of oils behind, especially if you “superfat” the recipe by adding a small excess of oils that remain unsaponified.
Durability is where the legacy bar truly shines. The curing process, which typically lasts four to six weeks, allows the bar to become incredibly dense. Water evaporates from the center, leaving behind a concentrated cleaning tool. This density prevents the soap from turning into mush in the soap dish, saving you money and resources over the long term.
There is also a deep sense of satisfaction in the ritual of the craft. You are engaging in a practice that links you to the pioneers and homesteaders of the past. Using a tool you made with your own hands provides a connection to your daily life that a store-bought plastic bottle never can. It is an investment in your home’s self-reliance.
Navigating the Hazards of the Soap Room
Working with lye is the most significant challenge for the beginner. Sodium hydroxide is a caustic substance that can cause severe chemical burns if it touches your skin or eyes. You must wear protective gear, including goggles, gloves, and long sleeves. Always add the lye to the water, never the reverse, to avoid a “lye volcano” caused by a sudden heat reaction.
“Seizing” is a common pitfall where the soap batter hardens almost instantly. This often happens because the fragrance oils react poorly with the lye or because the temperatures were too high during mixing. If your soap seizes, you cannot pour it into a smooth mold. You must quickly “mash” it into the mold, which creates a rustic, chunky appearance. It is still soap, but it lacks the refined finish of a successful batch.
Soda ash is another cosmetic frustration. This is a white, powdery film that forms on top of the soap when unsaponified lye reacts with carbon dioxide in the air. While it is harmless and washes off with the first use, it can dull the colors of your bar. You can prevent this by spraying the top of your freshly poured mold with high-percentage isopropyl alcohol or by covering the mold to limit air exposure.
Measuring by volume instead of weight is a frequent mistake that leads to ruined batches. Soap making is a precise chemical equation. A cup of olive oil does not weigh the same as a cup of coconut oil. You must use a digital scale to measure every ingredient to the gram. Even a small error in the lye-to-fat ratio can result in a bar that is either too greasy or dangerously “lye heavy” and caustic.
The Patience of the Pioneer: Limitations
The most obvious limitation of the cold process method is the time required for curing. You cannot use the soap immediately after you pour it. It must sit in the mold for 24 to 48 hours to complete saponification, and then it must cure on a rack for at least a month. If you need a bar of soap today, this method will not satisfy you. It is a slow craft for those who think in seasons, not hours.
Environmental factors play a massive role in your success. High humidity can slow down the curing process and may lead to “dreaded orange spots” or DOS. These spots are the result of oils going rancid within the bar. You must store your curing soap in a cool, dry place with plenty of airflow. This requires a dedicated space in your home that remains undisturbed for weeks.
The equipment requirement can also be a barrier. You should not use the same pots and spatulas for soap making that you use for cooking food. Lye can linger in the scratches of plastic or react with certain metals like aluminum. You must invest in dedicated stainless steel or heavy-duty plastic tools. This initial setup cost and storage requirement make it less accessible than a simple hobby kit.
Finally, there is a learning curve to formulating recipes. You cannot simply swap one oil for another without recalculating the lye amount. Each oil has a specific “saponification value” (SAP value) that dictates how much lye is needed to turn it into soap. This requires the use of a lye calculator and a basic understanding of oil chemistry, which can be intimidating for those who prefer more “creative” and less “scientific” crafts.
Cold Process vs. Melt and Pour: A Hard Look
| Feature | Cold Process (Legacy) | Melt and Pour (Hobby) |
|---|---|---|
| Longevity | Lasts 4–8 weeks in use. | Lasts 1–2 weeks in use. |
| Control | Total control of oils and fats. | Locked into pre-made base ingredients. |
| Wait Time | 4–6 weeks cure time. | Ready as soon as it cools. |
| Safety | Requires lye handling and gear. | Safe for children and beginners. |
| Moisture | Naturally moisturizing via glycerin. | Prone to “sweating” in humidity. |
Wisdom for the Worktable
Temperature management is the secret to a smooth, professional bar. You should aim to have your lye solution and your melted oils within 10 degrees of each other when you combine them. Mixing at a cooler temperature (around 90 to 110 degrees Fahrenheit) slows down the reaction and gives you more time to work. This is essential if you want to create intricate designs or swirls.
Using an immersion blender, or “stick blender,” is a modern luxury that saves hours of labor. In the old days, pioneers stirred their soap pots for hours by hand. A stick blender can bring a batch to trace in less than five minutes. Use it in short bursts rather than running it continuously to avoid introducing air bubbles into your batter.
Always use distilled water for your lye solution. Tap water contains minerals like calcium and magnesium that can react with the lye to create “soap scum” before the soap even hits the mold. Distilled water ensures a pure reaction and a cleaner finished product. It is a small expense that prevents significant headaches during the curing process.
Keep a bottle of vinegar nearby—but not for the reason you think. Many people believe vinegar neutralizes lye burns on the skin, but the reaction itself produces heat which can make a burn worse. If you spill lye on yourself, the best course of action is to flush the area with cold running water for several minutes. Use the vinegar only to clean up lye spills on your work surfaces or tools.
Deepening the Craft: Advanced Considerations
“Superfatting” is the practice of adding more oil than the lye can technically process. Most modern soap makers aim for a 5% superfat. This ensures that every molecule of caustic lye finds a fat molecule to react with, leaving no “active” lye in the bar. The leftover 5% of oil stays in the soap as a free-floating moisturizer for your skin.
Water discounting is another technique for the serious practitioner. This involves reducing the amount of water used to dissolve the lye. By using less water, you create a more concentrated lye solution that speeds up the saponification process. This results in a bar that hardens faster in the mold and requires less time to cure, as there is less water that needs to evaporate.
The fatty acid profile of your oils should be your primary focus during formulation. Lauric acid, found in coconut oil, provides the “big bubbles” and high cleansing power. Oleic acid, found in olive oil, provides the conditioning feel. Palmitic acid, found in tallow or palm oil, provides the structural hardness. A master soap maker learns to balance these three to create the perfect “all-purpose” bar.
Natural additives can elevate your soap from a simple cleanser to a functional treatment. Clays like kaolin or bentonite add “slip” for shaving soaps and help draw out impurities. Botanicals like dried lavender or calendula add texture, though they often turn brown during the lye reaction. If you want to maintain the color of herbs, consider “infusing” them into your oils weeks before you start the soap making process.
The Homestead Bastille Bar
The “Bastille” bar is a classic example of a legacy recipe that balances simplicity with performance. It is a variation of the traditional Castile soap, which is made from 100% olive oil. Pure Castile is famous for its gentleness but notorious for its “slimy” lather and long cure time of nearly a year. The Bastille bar fixes this by adding a small amount of coconut oil.
For a standard batch, you might use 70% olive oil for conditioning and 30% coconut oil for hardness and bubbles. This combination produces a bar that is exceptionally gentle on sensitive skin but still has the “scrub” necessary for a working household. You would calculate your lye for a 5% superfat to ensure maximum safety and skin protection.
Imagine a batch with 700 grams of olive oil and 300 grams of coconut oil. This requires approximately 135 grams of sodium hydroxide and 330 grams of distilled water. Once mixed and poured, this bar will be ready to unmold in 24 hours. After a six-week cure, it becomes a firm, white bar that outperforms any commercial “glycerin” soap you could buy at a boutique.
This scenario demonstrates the efficiency of the cold process. With just two oils and a lye solution, you have created enough soap to last a single person six months. The cost per bar is a fraction of what you would pay for artisan soap at a market. This is the practical application of ancestral wisdom: high quality, low cost, and total independence.
Final Thoughts
The transition from “easy” kits to the cold process method is a journey of reclaiming a lost skill. While the convenience of melt and pour soap is tempting, it cannot compare to the durability and integrity of a bar forged through true saponification. By choosing to handle the lye and balance the oils yourself, you are stepping into a lineage of makers who value quality over speed.
Mastering the cold process is not just about hygiene; it is about understanding the materials of the earth. Every bar you cure is a testament to your patience and your respect for the chemical laws of nature. This craft rewards the diligent and provides a tangible, useful product that your family can rely on for years to come.
Do not be intimidated by the science or the safety requirements. Approach the work with a steady hand and a curious mind. Start with a simple recipe, respect the lye, and give your bars the time they need to cure. You will soon find that once you have used a real, legacy bar of soap, the “easy” alternatives will never satisfy you again.
