Quick Facts…
- Some annuals are best seeded directly in the garden in spring.
- Cold frames allow starting plants as much as six weeks before planting-out time.
- Do not start plants too soon — they may become crowded and spindly before they can be planted safely outdoors.
- Plants grown early indoors or in cold frames need to be exposed to the outdoors gradually to avoid shock.
Preparation…
Before seeding, spade the garden area 6 to 10 inches deep. Thoroughly mix in coarse peat, compost or aged manure if the soil is too heavy (clay type) or too sandy. Use 3 cubic yards of organic matter per 1,000 square feet or enough to cover to a depth of 1 inch.
The organic matter helps keep the soil from becoming too compact and holds moisture needed for seed germination. Rake the surface smooth and remove or break down clods larger than the size of a pea. Plant seeds in rows and cover with a fine soil to the depth indicated on the seed packet. Mark the seeded rows with identifying labels.
Use good, viable seed. Seed saved from last year’s garden rarely results in the flower colors desired because of interbreeding of varieties. Old seed, unless carefully stored in a cool, dry location, often germinates poorly. It is usually more satisfactory to buy fresh, new seed when growing garden annuals and vegetables. Most seed packets are dated using phrases such as ‘Packed for (Year)’.
Sow seed directly in the garden for the simplest way to start plants. It is usually safe to sow the seed outdoors when trees are beginning to produce leaves. See Table 1 for when to start seeds of specific plants.
Keep the seedbed moist at all times. When seedlings appear, thin plants to half the height they are supposed to attain, except for tall, spike-like annuals such as snapdragons, larkspur and foxglove. Thin these to one-fourth their mature height for a fuller, more showy effect.
Cold Frames…
For an early start, sow seed in a cold frame and transplant it into the garden later (see Figure 1). Seed may be started as much as six weeks earlier than outdoors.
Locate the cold frame on the south side of a garage or dwelling. If built with a tight-fitting lid, the cold frame will hold sufficient heat from the sun to keep seed and seedlings warm at night. On warm, sunny days (50F or warmer), prop the lid open to prevent buildup of excessive heat. Close the lid in the late afternoon to trap enough heat for cold evenings…
As the season progresses, gradually expose the plants to longer periods of outside temperatures, as long as the air temperature does not go below 50F. Treated in this way, they develop into sturdier plants that are better able to adapt to fully-exposed garden conditions at transplant time. This is particularly true of the hardy annuals and biennials that prefer to develop in cooler temperatures: petunia, ageratum, lobelia, verbena, cabbage, broccoli and lettuce. Use Table 1 to determine when to start seed in the cold frame…
| Table 1: Starting times for seeds grown indoors and in cold frames. | ||
|
Number of weeks to start seed
before average frost-free date. |
||
| Plant name |
In cold frame
|
Indoors
|
| Ageratum |
6
|
8
|
| *Amaranthus (summer poinsettia) |
4
|
6
|
| *Bachelor’s button |
4
|
4
|
| Broccoli |
6
|
4a
|
| Cabbage |
6
|
4a
|
| *Calendula |
4
|
4
|
| *California poppy |
4
|
4
|
| Calliopsis |
4
|
6
|
| Cauliflower |
6
|
4a
|
| China aster |
4
|
6
|
| *Cosmos |
4
|
4
|
| Dahlia |
6
|
8
|
| Dimorphotheca (African daisy) |
4
|
4
|
| *Gaillardia |
4
|
4
|
| *Gomphrena |
4
|
4
|
| Larkspur |
4
|
6
|
| Lettuce (head and semihead) |
6
|
4b
|
| Lobelia |
6
|
8
|
| *Marigold |
4b
|
4
|
| *Morning glory |
4
|
4
|
| *Nasturtium |
4b
|
4
|
| Pepper |
4b
|
6
|
| Petunia |
6
|
8
|
| Phlox (annual) |
4
|
6
|
| *Poppy (Shirley) |
4
|
4
|
| Salvia |
4
|
6
|
| *Scabiosa |
4
|
4
|
| Snapdragon |
6
|
8
|
| Statice |
4
|
6
|
| *Straw flower |
4
|
4
|
| *Sweet alyssum (lobularia) |
4
|
6
|
| Tomato |
4b
|
6
|
| Verbena |
6
|
8
|
| Vinca (annual) |
4
|
6
|
| *Zinnia |
4
|
4
|
| *Plants best suited for direct seeding in garden two weeks prior to the average frost-free date.a Should be kept in coolest room. Best at 55F to 60F. b If outside temperatures are below 20F at night, delay planting or use artificial heat to keep temperatures above 50F. | ||
Starting Seed Indoors…
If space is available near a sunny window, start seeds four to eight weeks before the plant-out date in your area (average date of last killing frost). Starting too early usually results in spindly plants due to crowding and lack of sufficient light.
Almost any container with drainage holes in the bottom will work for planting. Paper milk cartons cut in half, Styrofoam cups, tin cans, plastic trays and pots are common containers used. For convenience, however, you may wish to start plants in the plastic trays and pots available at garden supply centers.
Use a rich, well-drained soil. Potting soils made for African violets and other house plants usually are suitable and do not have weed seeds. They are, however, more expensive than soil mixes you can make at home. If you use soil from the yard, it should be top soil that is well drained and not high in clay.
The best soils are often found around established shrubs and trees. Add sphagnum peat and sharp sand to the soil in a ratio of about one-half volume of each, and mixed thoroughly.
To kill weed seeds and some damaging soil fungi, place the soil mix in shallow trays or baking pans in an oven for 45 minutes at 250F. For best results, the soil should be moist.
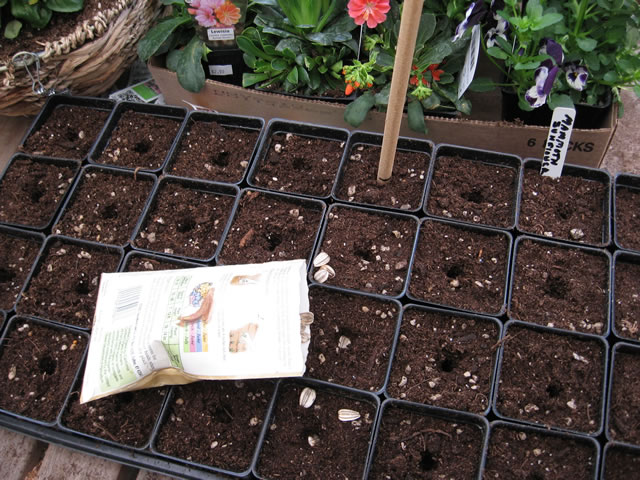
After the soil has cooled, fill containers firmly but do not pack. Allow about 3/4 inch from the soil surface to the rim of the container. Place seeds on the soil surface. Use a piece of window screen or old flour sifter to sift soil over the seeds to the depth indicated on the seed packet.
If you use compartmentalized trays or individual peat pots, place two or three seeds in each pot. Do not cover too deeply, as this may reduce or prevent seed germination. As a general rule, cover no more than four times the diameter of the seed.
Apply a fine spray of water to avoid washing the seed, causing them to float to the soil surface. Household window sprayers are suitable. Cover the containers with plastic sheets or panes of glass and place in a cool room (60 to 65F) away from direct sunlight until germination.
When seeds germinate, move them gradually (over two or three days) into brighter light. When the seedlings have developed the first true leaves (the leaves above the cotyledons or ‘seed leaves’), thin to one plant per container if using partitioned trays or peat pots. Use tweezers to pinch off unwanted seedlings rather than pulling them, to avoid disturbing the remaining seedling.
If seeds were planted in larger containers, transplant into individual peat pots or other small containers. An alternative is to thin the seedlings so they are spread about 1 1/2 to 2 inches apart and leave them in the larger containers. This method, however, makes inefficient use of seed and space.
Water seedlings carefully. Small containers used for starting plants dry out quickly. On the other hand, soil kept soaking wet inhibits seedling growth and may kill the plants.
About one week prior to planting-out time, gradually expose seedlings to longer periods outdoors unless temperatures are below 50F. At the same time, reduce watering to a minimum as long as plants do not wilt. This will help the plants adjust to full exposure without undergoing undue shock at planting time (via ColoState)
If you like this idea, be sure to share it with your friends and inspire someone you know. Anything becomes possible with just a little inspiration…
