How To Become More Self-Sufficient Without Starting a Full-Blown Farm…
Want to start preserving your harvest, making your own soap, or building a backyard root cellar — but not sure where to begin? “Homesteading Advice” gives you instant lifetime access to 35+ practical homesteading books on food preservation, veggie gardening, DIY natural cleaning products (save over $250 per year with this skill alone), brewing, off-grid energy, and a whole lot more…
Click Here To Check It Out Now!
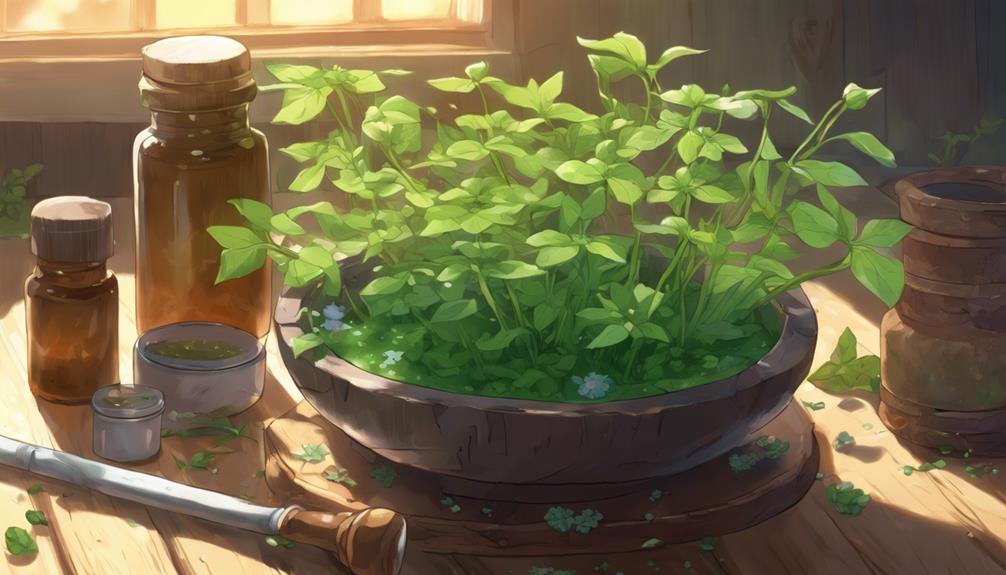
If you make your own homemade healing salves (or are interested in doing so), then it makes sense to also grow your own herbs and healing plants that you can use to make them.
Calendula, Comfrey, and Chamomile aren’t just plants; they’re the cornerstone of homemade salves that can revolutionize your approach to skin care and healing.
By integrating these into your garden, along with many other healing plants useful for homemade salves, you’re not just cultivating plants; you’re preparing a natural pharmacy at your fingertips.
The question now isn’t whether you should start growing them, but which plant to plant first.
Let’s explore the unique benefits of each of these and several others and how they can transform your well-being through simple, yet powerful, homemade remedies.
DIY Herbal Salves
- Herbal salves leverage natural properties of plants like calendula and chamomile for anti-inflammatory and healing benefits.
- Growing your own healing plants, such as yarrow and lemon balm, promotes sustainability and personal self-sufficiency in skincare.
- Plants like plantain, St. John’s Wort, and yarrow are specifically beneficial for making salves due to their skin healing and regenerative properties.
- Historical use of plants like calendula, arnica, and chickweed in traditional medicine underscores their proven effectiveness in skin care and healing.
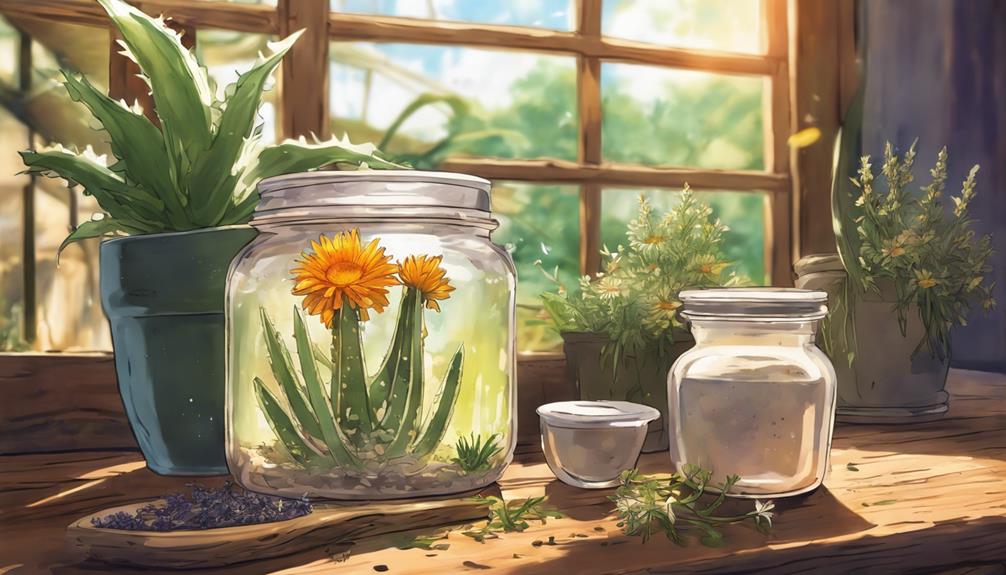
Starting With Calendula
One of the most popular healing plants for homemade salves is Calendula.
Calendula offers a treasure trove of healing benefits for your skin.
This beautiful flower, with its edible petals, isn’t just pleasing to the eye; it’s a powerhouse of healing properties. Known for its anti-inflammatory and antimicrobial qualities, calendula is a versatile healing plant that can address a variety of skin ailments from cuts to scrapes with gentle efficacy.
Incorporating calendula into your homemade salves means you’re enriching your skincare products with skin-nourishing compounds. The process of infusing calendula petals into oils unlocks a potent healing ingredient, transforming your salves into a must-have item in your skincare routine.
Not only does this practice elevate the therapeutic value of your products, but it also fosters a deeper connection with the ingredients you use, ensuring they’re both effective and pure.
Growing calendula in your garden is a sustainable step towards self-sufficiency. It guarantees a constant supply of this beneficial herb, allowing you to craft homemade salves that aren’t only natural and effective but also rooted in the love and care of your own gardening efforts.
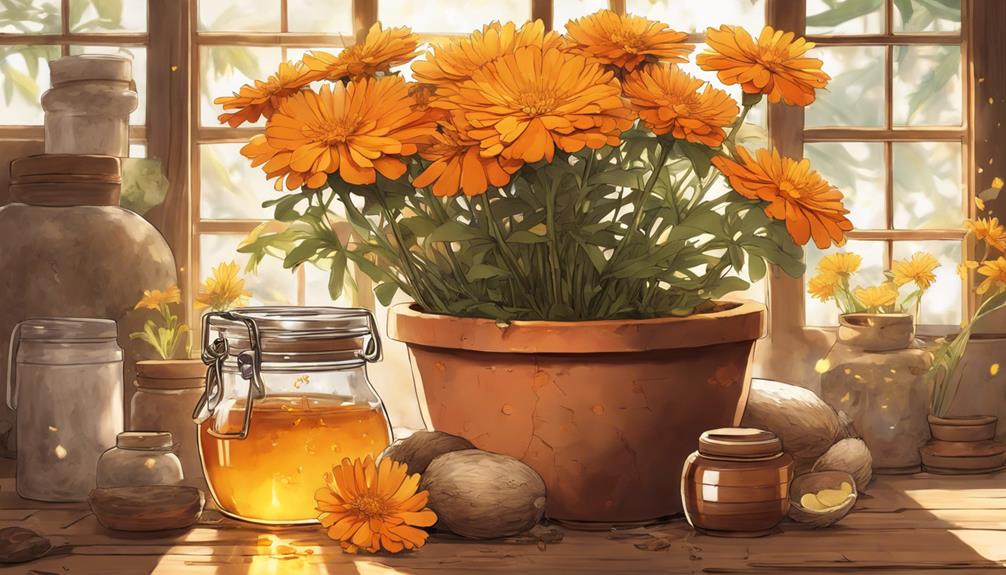
How To Grow Calendula
Here’s how to grow Calendula for your homemade healing salves…
- Choose a location: Calendula plants prefer full sun but can tolerate some light shade. Choose a spot in your garden that receives at least 6 hours of sunlight per day.
- Prepare the soil: Calendula plants thrive in well-draining soil with a pH between 6.0 and 7.0. Work the soil to loosen it and add compost or well-rotted manure to improve its fertility.
- Planting: Calendula can be grown from seeds or seedlings. If planting seeds, sow them directly into the garden after the last frost date in your area. Cover the seeds lightly with soil and water gently. If using seedlings, plant them at the same depth as they were in the container.
- Watering: Keep the soil consistently moist but not waterlogged. Water the plants at the base to avoid getting the foliage wet, which can lead to disease.
- Fertilizing: Calendula plants are not heavy feeders but can benefit from a balanced fertilizer applied once a month during the growing season.
- Mulching: Adding a layer of mulch around the plants can help retain moisture, suppress weeds, and regulate soil temperature.
- Deadheading: To encourage continuous blooming, deadhead (remove spent flowers) regularly. This will also prevent the plant from self-seeding everywhere.
- Pests and diseases: Calendula is relatively resistant to pests and diseases, but keep an eye out for aphids, slugs, and powdery mildew. If necessary, treat with organic pest control methods.
- Harvesting: You can harvest Calendula flowers as soon as they start to bloom. Cut the flowers in the morning when the dew has dried but before the sun gets too hot. Use the flowers fresh or dry them for later use.
Homemade Calendula Salve Recipe:
To make a healing calendula salve, you will need the following ingredients:
Ingredients:
- 1 cup dried calendula petals
- 1 cup olive oil
- 1/4 cup beeswax pellets
- Optional: a few drops of lavender essential oil for fragrance (optional)
Instructions:
- Place the dried calendula petals in a clean, dry glass jar.
- Pour the olive oil over the calendula petals, making sure they are completely covered. Stir to ensure all petals are coated in oil.
- Seal the jar and place it in a sunny spot for 4-6 weeks to allow the oil to infuse with the healing properties of the calendula petals. Shake the jar gently every day or so.
- After 4-6 weeks, strain the oil through a fine mesh strainer or cheesecloth into a clean glass bowl, pressing the petals to extract as much oil as possible.
- In a double boiler, melt the beeswax pellets over low heat. Once melted, add the calendula-infused oil and stir well to combine.
- If desired, add a few drops of lavender essential oil for fragrance.
- Pour the mixture into clean, dry containers (such as small jars or tins) and allow it to cool and solidify.
How to use:
- Apply the calendula salve to clean, dry skin as needed for soothing and healing properties.
- This salve can be used on minor cuts, scrapes, burns, insect bites, dry skin, and more.
- Store the salve in a cool, dry place for up to 6 months.
Note: Before using any new skincare product, it’s always a good idea to do a patch test to check for any potential allergic reactions.
‘Did You Know? Calendula has been used since ancient times for its medicinal properties and was a staple in ancient Egyptian, Roman, and Greek cultures for treating various skin conditions and wounds.’
The Benefits of Comfrey
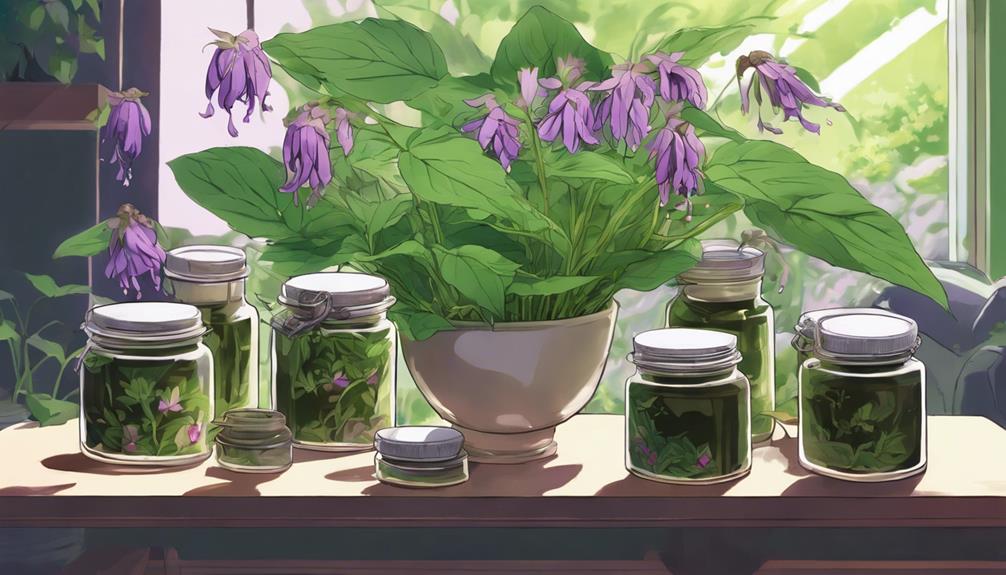
Comfrey, another remarkable plant known for its ability to support skin health and accelerate healing. As a medicinal herb, comfrey stands out for its rich composition, including high levels of Calcium and Vitamin C, which are crucial for maintaining and repairing skin integrity.
Incorporating comfrey into your homemade salve can offer a holistic approach to healing, thanks to its potent properties:
- Skin Repair: Comfrey’s ability to promote cell growth and reduce inflammation makes it an ideal ingredient for salves aimed at healing wounds, bruises, and even broken bones.
- Anti-inflammatory: The anti-inflammatory properties of comfrey not only soothe the skin but also help in reducing swelling and pain, providing comfort and speeding up the healing process.
- Caution Advised: While comfrey is a powerhouse for wound healing, it’s important to use it with caution. Due to potential liver toxicity, ensure that you’re applying it topically and not ingesting it.
How To Grow Comfrey
Here’s how to grow comfrey for your homemade healing salves…
- Choose a suitable location: Comfrey prefers full sun but can also tolerate partial shade. Make sure to choose a spot with well-draining soil.
- Planting method: Comfrey can be grown from seeds or root cuttings. Root cuttings are the preferred method as they establish faster. If planting from root cuttings, simply plant the cuttings horizontally in the soil with the buds facing upwards. Space the cuttings about 2-3 feet apart. If planting from seeds, sow the seeds thinly on the surface of the soil and cover lightly with a thin layer of soil.
- Watering: Water the comfrey plants regularly, especially during dry spells. However, be careful not to overwater as comfrey prefers slightly moist soil.
- Fertilizing: Comfrey is a nutrient accumulator and does not require much additional fertilization. However, you can add some compost or organic fertilizer to the soil in the spring to give the plants a boost.
- Pruning: Comfrey grows quickly and can become quite bushy. Prune the plants back to the ground in the fall or early spring to promote new growth.
- Harvesting: You can start harvesting comfrey leaves once the plants are well established. Cut the leaves back to the base of the plant, leaving a few inches of growth to allow the plant to regrow.
- Propagation: Comfrey can easily be propagated by dividing the root clumps in the spring or fall. Simply dig up a clump of roots and separate them into smaller pieces, then replant in the desired location.
- Pest and disease control: Comfrey is generally pest and disease resistant. However, keep an eye out for slugs and snails, which may feed on the leaves. You can handpick these pests or use organic controls if necessary.
Homemade Comfrey Salve Recipe:
To make a healing comfrey salve, you will need the following ingredients:
Ingredients:
- 1 cup dried comfrey leaves
- 1 cup dried comfrey root
- 1 cup olive oil (or another carrier oil of your choice)
- 1/4 cup beeswax pellets
- Optional: essential oils like lavender or tea tree (for added scent and benefits)
Instructions:
- Place the dried comfrey leaves and root in a clean, dry glass jar.
- Cover the herbs with olive oil, making sure they are completely submerged. Stir well to ensure even coverage.
- Seal the jar tightly and place it in a warm, sunny spot for 4-6 weeks to allow the herbs to infuse into the oil. Shake the jar gently every few days.
- After the infusion period, strain the oil using a cheesecloth or fine mesh strainer to remove the herbs. Squeeze out as much oil as possible.
- In a double boiler, melt the beeswax pellets over low heat. Once melted, add the comfrey-infused oil and stir well to combine.
- Optional: Add a few drops of your chosen essential oils for fragrance and additional benefits.
- Pour the mixture into clean, dry containers, such as small tins or jars.
- Allow the salve to cool and solidify before sealing the containers.
How to use:
- Apply the comfrey salve topically to minor cuts, bruises, scrapes, burns, insect bites, dry skin, eczema, and other skin irritations.
- Gently massage a small amount of the salve onto the affected area as needed.
- Store the salve in a cool, dark place to extend its shelf life.
Note: Comfrey should not be used on deep wounds or broken skin, as it promotes cell regeneration and could potentially seal in bacteria. Consult with a healthcare professional before using comfrey salve, especially if you are pregnant, nursing, or have any medical conditions.
‘Did You Know? Comfrey has been used for centuries in traditional medicine to treat a variety of ailments, earning it the nickname ‘knitbone’ for its remarkable ability to heal bone fractures and wounds.’
Chamomile: A Gentle Healer

Turning our focus to Chamomile, you’ll find it’s a gentle healer, renowned for its anti-inflammatory properties that effectively treat inflamed skin conditions and soothe itchiness.
When you incorporate chamomile into your homemade salves, you’re not just crafting a natural healing product; you’re weaving a tapestry of skin health and comfort.
The soothing touch of chamomile is especially beneficial for those pesky rashes and irritations, offering a blanket of calm to distressed skin.
Here’s a quick overview as to why chamomile should be one of your go-to plants for salves:
| Benefit | Skin Conditions | How It Helps |
|---|---|---|
| Anti-inflammatory | Rashes | Reduces redness and swelling |
| Soothing | Irritations | Calms and provides comfort |
| Healing Properties | Inflamed Skin | Promotes faster healing |
| Skin Comfort | General Discomfort | Enhances skin’s overall feeling |
| Homemade Salves | DIY Care | Personalizes your skincare routine |
Embracing chamomile in your salves means embracing a tradition of healing and care. Its gentle nature makes it a universal ally for skin health, ensuring that your homemade concoctions are not just effective but are imbued with the essence of nurturance. In this community of holistic wellness, chamomile stands out as a beacon of soothing relief and profound healing properties.
How To Grow Chamomile
Here’s how to grow chamomile for your homemade healing salves…
- Choose a sunny location: Chamomile plants thrive in full sunlight, so choose a spot in your garden that receives at least 6 hours of direct sunlight each day.
- Prepare the soil: Chamomile grows best in well-draining soil with a pH level between 5.6 and 7.5. You can improve the soil by adding compost or well-rotted manure before planting.
- Planting seeds: Chamomile can be grown from seeds or seedlings. If planting from seeds, sow them directly into the soil in early spring after the last frost date. Scatter the seeds lightly on the soil surface and lightly press them into the soil.
- Watering: Keep the soil consistently moist but not waterlogged. Water the plants when the top inch of soil feels dry to the touch.
- Thin the seedlings: Once the chamomile seedlings have grown a few inches tall, thin them out to about 6-12 inches apart to allow room for growth.
- Mulching: Mulch around the chamomile plants to help retain moisture in the soil and suppress weed growth.
- Harvesting: Chamomile flowers can be harvested once they are fully open. Cut the flowers with a pair of scissors, leaving some stem attached. You can use fresh chamomile flowers for tea, dried for later use, or to make chamomile oil.
- Care: Chamomile is generally low maintenance, but you may need to deadhead the flowers regularly to encourage more blooms. It’s also a good idea to divide the plants every few years to maintain their vigor.
Homemade Chamomile Salve Recipe:
To make a healing chamomile salve, you will need the following ingredients:
Ingredients:
- 1/2 cup dried chamomile flowers
- 1 cup carrier oil (such as olive oil, coconut oil, or sweet almond oil)
- 1/4 cup beeswax
- 10-15 drops of chamomile essential oil (optional for added fragrance and therapeutic benefits)
Instructions:
- In a double boiler or a heat-safe bowl placed over a pot of simmering water, combine the dried chamomile flowers and carrier oil.
- Heat the mixture on low heat for 1-2 hours, stirring occasionally. This will infuse the oil with the healing properties of chamomile.
- Strain the oil using a fine mesh strainer or cheesecloth to remove the chamomile flowers. Discard the flowers.
- Return the infused oil to the double boiler or heat-safe bowl and add the beeswax.
- Heat the mixture on low heat until the beeswax is completely melted, stirring occasionally.
- Remove the mixture from heat and let it cool slightly. If desired, add the chamomile essential oil and stir well to combine.
- Pour the mixture into clean, dry containers (such as small jars or tins) and let it cool completely before sealing the containers.
How to use:
- Apply the chamomile salve to dry, irritated, or inflamed skin as needed.
- It can be used on minor cuts, scrapes, burns, bug bites, rashes, or dry patches of skin.
- Gently massage the salve into the skin until fully absorbed.
- Store the salve in a cool, dark place when not in use to prolong its shelf life.
This chamomile salve is gentle and soothing, making it ideal for sensitive skin and for promoting healing.
‘Did you know? Chamomile has been used for centuries in traditional medicine for its calming effects, both internally and externally, making it a versatile herb for overall well-being.’
Growing Arnica for Salves
Arnica is well known for its potential in healing bruises and sprains, making it an essential component for your homemade salves. Known for its impressive healing properties, Arnica not only stimulates tissue healing but also significantly reduces inflammation. Growing this perennial herb in your garden is straightforward, as it thrives in well-drained soil and full sun.
How To Grow Arnica
Here’s how to grow Arnica for your homemade healing salves…
- Climate: Arnica plants prefer cool climates with moist, well-draining soil. They are native to mountainous regions and thrive in areas with partial shade.
- Soil: Arnica plants prefer slightly acidic to neutral soil. Make sure the soil is well-draining to prevent waterlogged conditions, as Arnica does not like to sit in water.
- Planting: Arnica plants can be grown from seeds or transplanted as young seedlings. Plant them in a location with partial shade and space them about 12 inches apart.
- Watering: Keep the soil consistently moist, but not waterlogged. Water the plants regularly, especially during dry periods.
- Fertilizing: Arnica plants do not require much fertilization. A light application of a balanced fertilizer in the spring can help promote growth.
- Pruning: Trim back any dead or damaged foliage to promote healthy growth. You can also deadhead spent flowers to encourage more blooms.
- Pests and Diseases: Arnica plants are generally resistant to pests and diseases. However, keep an eye out for aphids, slugs, and snails, and treat them promptly if necessary.
- Harvesting: Arnica flowers can be harvested when they are in full bloom. Cut the flowers with a pair of scissors, leaving some foliage behind for the plant to continue growing.
Remember that Arnica is a wildflower and may not be suitable for all garden settings. It is important to research and understand the specific growing conditions in your area before planting Arnica.
Homemade Arnica Salve Recipe:
To make a healing arnica salve, you will need the following ingredients:
Ingredients:
- 1 cup arnica-infused oil (you can make this by infusing dried arnica flowers in a carrier oil such as olive oil or coconut oil for several weeks)
- 1/4 cup beeswax
- 20 drops of lavender essential oil (optional, for added scent and soothing properties)
Instructions:
- In a double boiler, melt the beeswax over low heat.
- Once the beeswax is fully melted, add the arnica-infused oil and stir well to combine.
- Remove the mixture from heat and add the lavender essential oil if desired. Stir well.
- Carefully pour the mixture into clean, sterilized containers (such as glass jars or tins) and allow it to cool and solidify.
How to use:
- Apply the arnica salve to the affected area as needed for pain relief, bruising, or inflammation.
- Gently massage the salve into the skin until fully absorbed.
- Do not apply the salve to broken skin or open wounds.
- Store the salve in a cool, dark place when not in use.
Note: Arnica should not be used on open wounds or broken skin, and it is always recommended to do a patch test before applying any new product to your skin. If you are pregnant or nursing, consult with a healthcare professional before using arnica.
Chickweed for Skin Relief
Just as Arnica serves as an essential component for healing bruises and sprains in your homemade salves, Chickweed emerges as a remarkable herb for skin relief, offering soothing properties for conditions like eczema and psoriasis.
This soothing herb, known for its ability to reduce inflammation and itching, becomes a beacon of hope for those struggling with persistent skin conditions. With its pronounced anti-inflammatory qualities, Chickweed not only addresses eczema and psoriasis but also aids in the healing of cuts, bruises, and minor skin irritations.
The cooling effect of Chickweed makes it an ideal candidate for soothing sunburns, bringing immediate relief to distressed skin. Its gentle nature ensures that your skin finds solace without any harsh reactions, making it a staple in homemade salve recipes.
You’ll find that incorporating Chickweed into your salves not only enhances their healing capabilities but also fosters a sense of belonging to a community that values natural, effective remedies.
Easy to grow and harvest, Chickweed’s presence in your garden promises a readily available source for your salve-making endeavors. Embracing Chickweed in your homemade salves ensures that relief is never far from reach, providing a nurturing touch to skin in need.
How To Grow Chickweed
Here’s how to grow Chickweed for your homemade healing salves…
- Location: Chickweed thrives in partial shade to full sun. Choose a location in your garden that receives some sunlight but also has some shade during the day.
- Soil: Chickweed grows best in moist, well-draining soil. Prepare the soil by adding compost or well-rotted manure to improve its fertility and texture.
- Planting: Chickweed can be grown from seeds or from cuttings. If planting from seeds, sow them directly into the soil in early spring or fall. If planting from cuttings, simply place them in the soil and they will root and grow.
- Watering: Keep the soil consistently moist but not waterlogged. Water the chickweed regularly, especially during dry periods.
- Maintenance: Chickweed is a fast-growing plant that can spread quickly. To control its growth, you can regularly harvest the leaves for culinary use or trim the plant back to prevent it from taking over your garden.
- Harvesting: You can start harvesting chickweed as soon as it reaches a few inches in height. Simply cut the leaves and stems as needed for salads, soups, or teas.
- Pests and Diseases: Chickweed is generally resistant to pests and diseases. However, keep an eye out for aphids or slugs, which may occasionally feed on the plant. You can manually remove these pests or use organic pest control methods if needed.
By following these steps, you can successfully grow chickweed in your garden and enjoy its fresh and nutritious leaves throughout the growing season.
Homemade Chickweed Salve Recipe:
To make a healing chickweed salve, you will need the following ingredients:
Ingredients:
- 1 cup fresh chickweed leaves
- 1/2 cup olive oil
- 1/4 cup coconut oil
- 2 tablespoons beeswax
- 10-15 drops of lavender essential oil (optional for added scent)
Instructions:
- Clean the fresh chickweed leaves thoroughly by rinsing them under cold water and patting them dry with a clean towel.
- Coarsely chop the chickweed leaves and place them in a heatproof glass jar.
- Pour the olive oil over the chickweed leaves, making sure they are completely submerged.
- Place the jar in a sunny spot, like a windowsill, and let it infuse for about 2 weeks. Shake the jar gently every day to help the infusion process.
- After 2 weeks, strain the infused oil through a cheesecloth or fine-mesh strainer into a double boiler or heatproof bowl.
- Add the coconut oil and beeswax to the infused oil and gently heat the mixture over low heat until the beeswax is completely melted.
- Remove the mixture from heat and stir in the lavender essential oil, if desired.
- Pour the salve into clean, sterilized jars or tins and let it cool and solidify before sealing.
How to use:
- Apply the healing chickweed salve to minor cuts, scrapes, insect bites, rashes, or other skin irritations.
- Use clean fingers or a cotton swab to apply a small amount of salve to the affected area.
- Reapply the salve as needed throughout the day to promote healing and soothe the skin.
Store the chickweed salve in a cool, dark place when not in use to preserve its potency.
Cultivating Lemon Balm
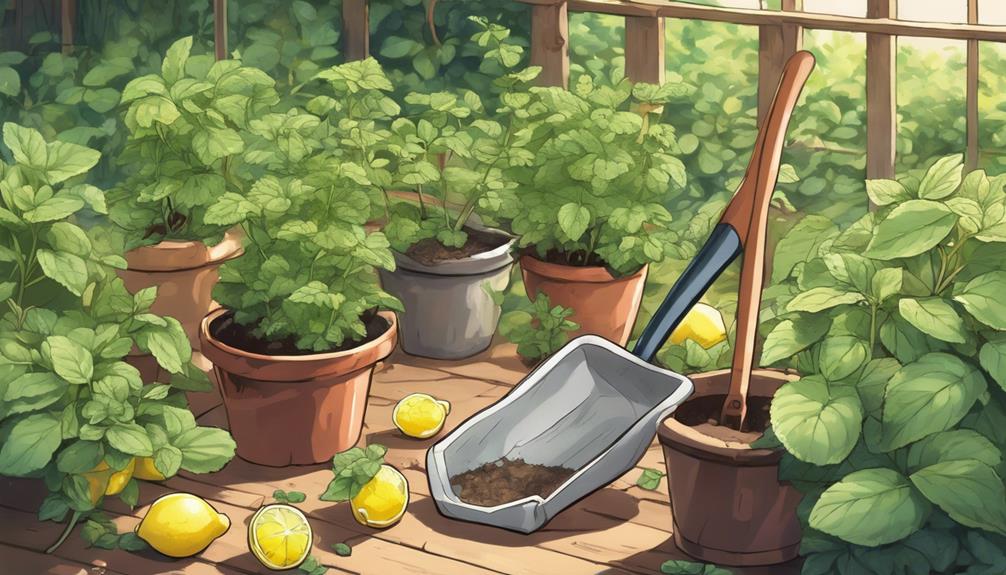
Lemon Balm has been used since ancient times for its calming effects and as a symbol of longevity and love. Lemon Balm, also known as Melissa officinalis, is a perennial herb belonging to the mint family. Its distinctive lemon scent and flavor make it a popular ingredient in teas, culinary dishes, and herbal remedies.
Beyond its calming properties, Lemon Balm is also believed to have antiviral and antioxidant effects, making it a versatile herb with a wide range of potential health benefits. Its historical use as a symbol of longevity and love reflects the reverence and admiration that cultures throughout history have held for this humble yet powerful herb.
Whether enjoyed in a soothing cup of tea or incorporated into personal care products, Lemon Balm continues to be cherished for its soothing qualities and aromatic charm.
How To Grow Lemon Balm
Here’s how to grow Lemon balm for your homemade healing salves…
- Choose the right location: Lemon balm thrives in full sun to partial shade. Select a location with well-draining soil that receives at least 6 hours of sunlight per day.
- Planting: Lemon balm can be grown from seeds, cuttings, or transplants. Plant seeds in the spring after the last frost date. If using transplants, space them about 12-18 inches apart.
- Watering: Lemon balm prefers consistently moist soil. Water the plants regularly, especially during dry periods. Avoid overwatering to prevent root rot.
- Fertilizing: Lemon balm is a light feeder and does not require heavy fertilization. You can add compost or a balanced fertilizer in the spring to help promote healthy growth.
- Pruning: Regularly prune lemon balm to encourage bushy growth and prevent it from becoming leggy. You can harvest the leaves for culinary or medicinal use while pruning.
- Pests and diseases: Lemon balm is generally resistant to pests and diseases. However, keep an eye out for common issues like aphids and powdery mildew. You can treat these problems with insecticidal soap or neem oil.
- Harvesting: You can start harvesting lemon balm leaves once the plant reaches about 6-8 inches in height. Cut the stems just above a leaf node to encourage new growth. You can use the leaves fresh or dry them for later use.
Homemade Lemon Balm Salve Recipe:
To make a healing Lemon Balm salve, you will need the following ingredients:
Ingredients:
- 1 cup fresh lemon balm leaves
- 1 cup olive oil
- 1/4 cup beeswax pellets
- 10-15 drops of essential oil (such as lavender or tea tree) for added scent and benefits
Instructions:
- Wash the lemon balm leaves and allow them to dry completely.
- Chop the leaves into small pieces.
- In a double boiler, combine the chopped lemon balm leaves and olive oil. Heat over low heat for 1-2 hours, stirring occasionally.
- Strain the oil through a cheesecloth or fine mesh strainer into a clean bowl to remove the lemon balm leaves.
- Return the infused oil to the double boiler and add the beeswax pellets. Heat until the beeswax is completely melted, stirring to combine.
- Remove from heat and add the essential oil drops. Stir well to combine.
- Pour the mixture into clean containers, such as tins or jars, and allow it to cool and solidify.
How to use:
- Apply a small amount of the lemon balm salve to the affected area and gently massage it in.
- Use as needed for dry skin, minor cuts, scrapes, insect bites, or to help calm and soothe irritated skin.
- Store the salve in a cool, dark place when not in use.
Remember to do a patch test before applying the salve to a larger area to check for any allergic reactions. Enjoy your homemade healing lemon balm salve!
‘Did You Know? Lemon Balm was known as the ‘elixir of life’ by the ancient Greeks and Romans, who believed it could promote longevity and even attract love,’.
Common Plantain Uses
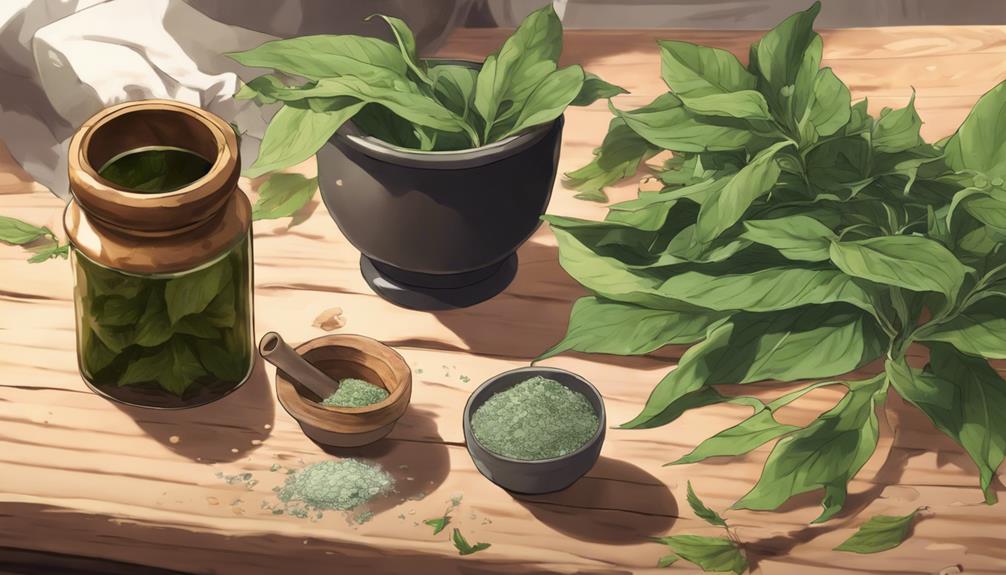
Common plantain has been used for centuries in traditional medicine for its remarkable healing properties. Native Americans, for example, utilized this powerful herb to treat a variety of skin ailments, showcasing its longstanding reputation as a go-to remedy for skin healing.
Scientifically known as Plantago major, Common plantain is a versatile herb that can be found growing in many different regions around the world. Its leaves contain medicinal compounds such as allantoin, which has anti-inflammatory and wound-healing properties.
Common plantain is commonly used topically to soothe insect bites, burns, cuts, and other minor skin irritations. This herb is also known for its astringent properties, which can help to reduce swelling and promote faster healing of wounds.
With its long history of use in traditional medicine and its scientifically proven benefits, common plantain continues to be a popular choice for natural skin healing remedies.
How To Grow Common Plantain
Here’s how to grow Common Plantain for your homemade healing salves…
- Choose a planting location: Common plantain can thrive in a variety of soil types and light conditions, but it prefers well-drained soil and full sun to partial shade.
- Planting Seeds: You can sow common plantain seeds directly into the soil in spring or fall. Scatter the seeds on the soil surface and lightly press them into the soil.
- Watering: Keep the soil consistently moist, but not waterlogged, especially during the germination period. Once established, common plantain is fairly drought-tolerant.
- Maintenance: Common plantain is a low-maintenance plant. You may need to weed around the plants to prevent competition for nutrients.
- Harvesting: Common plantain leaves can be harvested at any time during the growing season. You can use the leaves fresh or dry them for later use.
- Propagation: Common plantain can also be propagated by dividing the plant or by transplanting young plants.
- Pests and Diseases: Common plantain is generally resistant to pests and diseases, making it a great choice for a low-maintenance garden.
Remember that common plantain can be considered a weed in some areas, so make sure to check local regulations before planting it in your garden.
Homemade Common Plantain Salve Recipe:
To make a healing common plantain salve, you will need the following ingredients:
Ingredients:
- 1 cup of dried common plantain leaves
- 1 cup of olive oil
- 1/4 cup of beeswax pellets
- Optional: a few drops of lavender essential oil for added soothing benefits
Instructions:
- Start by infusing the plantain leaves into the olive oil. Place the dried plantain leaves in a clean, dry glass jar and cover them with the olive oil. Make sure the leaves are fully submerged in the oil. Close the jar tightly and let it sit in a warm, sunny spot for 2-4 weeks to allow the oil to infuse with the plantain properties. Shake the jar gently every day to help with the infusion process.
- After the infusion period, strain the oil using a fine mesh strainer or cheesecloth to remove the plantain leaves. Make sure to squeeze out as much oil as possible from the leaves.
- In a double boiler, melt the beeswax pellets into the infused plantain oil. Stir continuously until the beeswax is completely melted and well combined with the oil.
- If desired, add a few drops of lavender essential oil for fragrance and added healing benefits. Stir well to combine.
- Pour the mixture into clean, dry containers, such as small jars or tins. Let the salve cool and solidify at room temperature.
How to use:
- Apply the common plantain salve topically to minor cuts, scrapes, insect bites, rashes, dry skin, or minor burns.
- Gently massage a small amount of the salve onto the affected area and allow it to absorb into the skin.
- Reapply as needed throughout the day for continued healing and soothing benefits.
Store the plantain salve in a cool, dry place away from direct sunlight. It should last for several months if stored properly. Enjoy the healing properties of this natural salve!
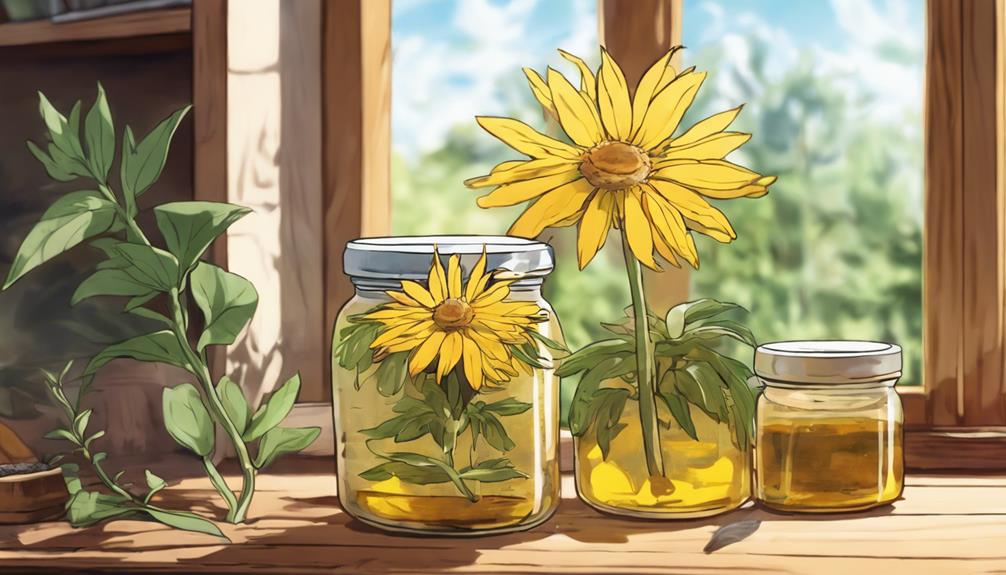
St Johns Wort for Healing
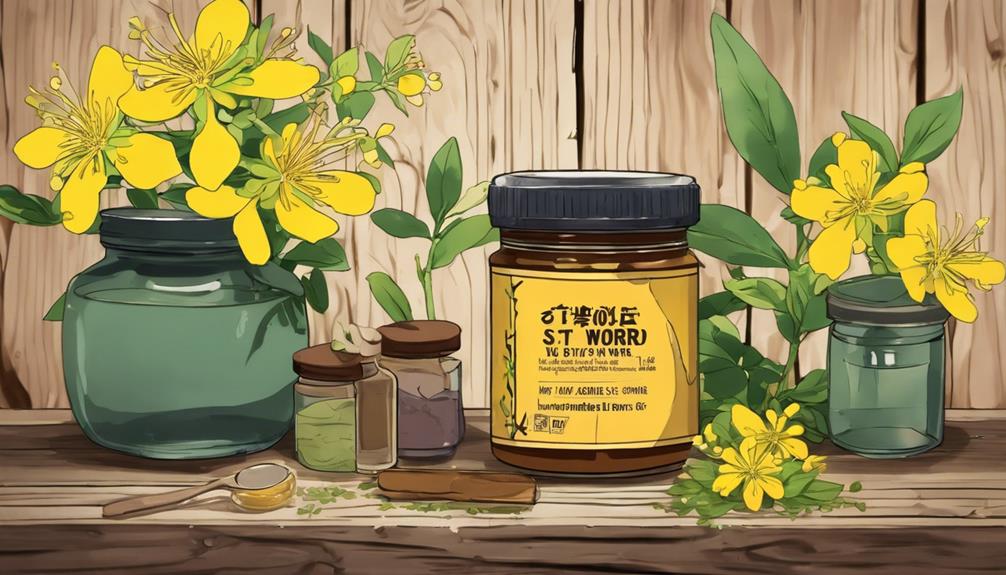
St. John’s Wort, a flowering plant revered for its wound-healing and nerve pain-relieving properties, offers a natural remedy for various skin conditions. Its rich content of hypericin and hyperforin has been celebrated in the realm of herbal medicine for centuries, providing a cornerstone for anti-inflammatory and antiviral treatments.
When you’re seeking a holistic approach to skin care, St. John’s Wort emerges as a powerful ally, especially when infused into salves for topical application.
Incorporating St. John’s Wort into your homemade salves can offer you:
- Enhanced Healing: Thanks to hypericin and hyperforin, this herb can significantly reduce inflammation and promote skin regeneration, speeding up the healing process of burns, bruises, and cuts.
- Nerve Pain Relief: Its traditional use in alleviating nerve pain is backed by its ability to soothe the affected area, offering a natural solution to muscle aches and discomfort.
- Antiviral Properties: The antiviral effects of St. John’s Wort make your salves not just healing but also protective against potential infections.
How To Grow St. John’s Wort
Here’s how to grow St. John’s Wort for your homemade healing salves…
- Choose the right location: St. John’s Wort plants thrive in well-drained soil and full sunlight. Select a spot in your garden that receives at least 6 hours of sunlight per day.
- Prepare the soil: Before planting, make sure the soil is well-drained and loamy. You can amend the soil with compost or well-rotted manure to improve its quality.
- Planting: St. John’s Wort can be propagated by seeds, cuttings, or by dividing existing plants. Plant seeds in the spring after the last frost. If you’re planting cuttings or divisions, do so in the spring or fall.
- Watering: Water newly planted St. John’s Wort regularly to help establish the roots. Once established, they are drought-tolerant and do not require frequent watering.
- Fertilizing: St. John’s Wort typically does not require fertilization. However, if your soil is poor, you can apply a balanced fertilizer in the spring.
- Pruning: Trim back the plants in the spring to encourage new growth and maintain a compact shape.
- Pests and Diseases: St. John’s Wort is relatively pest and disease-resistant. However, keep an eye out for aphids, scale insects, and root rot. Treat any issues promptly to prevent them from spreading.
- Harvesting: Harvest the flowers and leaves when they are in full bloom. Dry them in a well-ventilated area and store in a cool, dark place for later use.
Homemade St. John’s Wort Salve Recipe:
To make a healing St. John’s Wort salve, you will need the following ingredients:
Ingredients:
- 1 cup of St. John’s Wort infused oil (dried St. John’s Wort flowers infused in a carrier oil like olive oil)
- 1/4 cup of beeswax
- Optional: essential oils for added fragrance and therapeutic benefits (such as lavender or tea tree)
Instructions:
- Start by making the St. John’s Wort infused oil. To do this, fill a glass jar with dried St. John’s Wort flowers and cover them with oil, making sure all the flowers are submerged. Let the jar sit in a warm, sunny spot for about 4-6 weeks, shaking it occasionally.
- Once the oil is infused, strain out the flowers using a cheesecloth or fine mesh strainer, and measure out 1 cup of the infused oil.
- In a double boiler, melt the beeswax over low heat. Once melted, add the St. John’s Wort infused oil and stir well to combine.
- If desired, add a few drops of essential oils for fragrance and added benefits.
- Pour the mixture into clean containers or tins and allow it to cool and solidify.
How to use:
- Apply the St. John’s Wort salve to clean, dry skin as needed.
- It can be used to soothe and heal minor wounds, cuts, burns, bruises, and skin irritations.
- Simply rub a small amount of the salve onto the affected area and allow it to absorb into the skin.
Please note that St. John’s Wort can cause photosensitivity in some individuals, so it’s advisable to avoid sun exposure on areas where the salve has been applied. If you are pregnant, nursing, or taking any medications, it’s recommended to consult with a healthcare professional before using St. John’s Wort products.
Fun fact: St. John’s Wort was named after St. John the Baptist, and its bright yellow flowers were believed to bloom around his feast day on June 24th.
Yarrow: Nature’s Astringent
Building on the healing prowess of St. John’s Wort, Yarrow emerges as another formidable herb in your natural skincare arsenal, renowned for its antiseptic and astringent qualities. This perennial herb, cherished for its medicinal properties, plays a crucial role in homemade salves, particularly for its ability to nurture skin health and promote healing.
Yarrow thrives in full sun, making it a resilient addition to your home garden. Its ease of growth and propagation means you’ll have a steady supply of this potent plant at your fingertips. When incorporated into skincare products, Yarrow’s astringent properties work wonders, helping to tighten and tone the skin. This makes it an invaluable ingredient in your homemade salves, offering a natural solution to maintaining a healthy complexion.
With a rich history of traditional medicinal use, Yarrow stands out for its effectiveness in supporting skin health. Its antiseptic qualities make it a reliable ally in your quest for natural skincare solutions, ensuring that you’re equipped with the best nature has to offer for your skin’s healing and care.
How To Grow Yarrow
Here’s how to grow Yarrow for your homemade healing salves…
- Planting: Yarrow can be grown from seeds, cuttings, or by dividing existing plants. Plant yarrow in well-draining soil with full sun exposure. Space plants about 12-24 inches apart, depending on the variety.
- Watering: Yarrow is drought-tolerant once established, so it does not require frequent watering. Water newly planted yarrow regularly until it becomes established. After that, water only during prolonged dry spells.
- Fertilizing: Yarrow is not a heavy feeder, so it generally does not require fertilization. If your soil is poor, you can add a balanced fertilizer in the spring.
- Pruning: Yarrow plants do not require much pruning. Deadhead spent flowers to encourage continuous blooming and cut back the foliage in late fall or early spring to promote healthy growth.
- Pests and Diseases: Yarrow is generally resistant to pests and diseases. In some cases, powdery mildew might occur, especially in humid conditions. Ensure good air circulation around the plants to prevent this.
- Division: Yarrow can become overcrowded over time. Divide the plants every few years in the spring or fall to maintain their vigor and prevent overcrowding.
- Propagation: Yarrow can be easily propagated by dividing existing plants, taking stem cuttings, or sowing seeds.
- Uses: Yarrow is a versatile plant that can be used in various ways. It attracts pollinators, makes a great addition to flower gardens, and can also be used in dried flower arrangements or as a herb in cooking and for medicinal purposes.
Homemade Yarrow Salve Recipe:
To make a healing yarrow salve, you will need the following ingredients:
Ingredients:
- 1 cup of yarrow-infused oil (made by infusing dried yarrow in a carrier oil like olive or coconut oil)
- 1/4 cup of beeswax
- Optional: a few drops of essential oils like lavender or tea tree for added benefits and fragrance
Instructions:
- Begin by making the yarrow-infused oil. Place dried yarrow in a clean, dry glass jar and cover with the carrier oil. Make sure the yarrow is fully submerged. Let the jar sit in a sunny spot for 4-6 weeks, shaking it occasionally.
- After the oil is infused, strain out the yarrow using a cheesecloth or fine mesh strainer, and measure out 1 cup of the infused oil.
- In a double boiler, melt the beeswax over low heat. Once melted, add the yarrow-infused oil and stir to combine. If you choose to add essential oils, do so at this stage.
- Once everything is well mixed, pour the mixture into clean, sterilized containers like small jars or tins. Let the salve cool and harden before sealing the containers.
How to use:
- Apply the yarrow salve topically to minor cuts, scrapes, bruises, insect bites, or dry skin. Simply scoop out a small amount of the salve and massage it gently into the affected area.
- Use as needed for soothing and healing properties.
- Store the yarrow salve in a cool, dark place to prolong its shelf life.
Your Natural Pharmacy
You’ve now discovered the power of cultivating healing plants like Calendula, Comfrey, Chamomile, Arnica, Chickweed, Lemon Balm, Plantain, St John’s Wort, and Yarrow for your homemade salve.
Each plant offers unique benefits, from soothing skin irritations to healing wounds.
By growing these in your garden, you’re not just nurturing plants; you’re fostering a natural pharmacy at your fingertips. Embrace this holistic approach to well-being, blending tradition with nature’s gifts to support your bodys health, healing and resilience.
