How To Become More Self-Sufficient Without Starting a Full-Blown Farm…
Want to start preserving your harvest, making your own soap, or building a backyard root cellar — but not sure where to begin? “Homesteading Advice” gives you instant lifetime access to 35+ practical homesteading books on food preservation, veggie gardening, DIY natural cleaning products (save over $250 per year with this skill alone), brewing, off-grid energy, and a whole lot more…
Click Here To Check It Out Now!
Delicious and packed with nutrition, sweet potatoes are a wonderful addition to any garden. Their ease of growth and the generous harvest they offer make them a top choice for both novice and seasoned gardeners. For those confronted with limited garden space or less-than-ideal soil conditions, cultivating sweet potatoes in soil bags presents an attractive solution. In this all-encompassing guide, we’ll lead you through a systematic process for growing sweet potatoes in soil bags.
Required Materials:
Before you embark on your sweet potato growing journey, make sure to assemble the following materials:
- Sweet potato slips (young, rooted plants)
- Soil bags (or spacious grow bags)
- Premium potting soil or a blend of compost and garden soil
- Watering can or garden hose with a gentle spray nozzle
- Fertilizer suitable for root vegetables
- Garden trowel or hand spade
- Stakes or trellises (optional)
- Mulch (straw or leaves)
Step 1: Opt for an Ideal Location
Choose a sunny spot in your garden that receives a minimum of 6-8 hours of sunlight daily. Ensure the chosen location has proper drainage to avoid waterlogging since sweet potatoes thrive in well-drained soil.
Step 2: Prepare the Soil Bags
If you’re using commercial soil bags or grow bags, fill them with high-quality potting mix, leaving a small gap at the top. Alternatively, you can concoct your own mix by blending equal parts of compost and garden soil. Sweet potatoes flourish in loose, well-aerated soil, so make certain that your mix meets this requirement.
Step 3: Plant Your Sweet Potato Slips
Sweet potato slips, which are young rooted plants, can be procured from a nursery or propagated from homegrown sweet potatoes. Plant these slips approximately 4-6 inches deep in the soil bags, spacing them around 12-18 inches apart. Position each slip vertically with the roots facing downwards and the leafy portion above the soil surface.
Step 4: Adequate Watering
Sweet potatoes require consistent moisture, so ensure they receive regular watering to maintain even soil moisture without causing waterlogging. It is advisable to water them early in the morning to permit the leaves to dry during the day, minimizing the risk of fungal diseases.
Step 5: Proper Fertilization
Fertilize your sweet potatoes with a balanced, slow-release fertilizer. Follow the manufacturer’s instructions, typically applying it a few weeks after planting and periodically throughout the growing season. Be cautious not to over-fertilize, as this can lead to excessive foliage growth and smaller tubers.
Step 6: Optional Support and Trellising
For those working with limited garden space or aiming for larger sweet potatoes, consider utilizing stakes or trellises. As the vines grow, you can gently secure them to these supports, which also simplifies the harvesting process.
Step 7: Mulch Application
To retain soil moisture and suppress weed growth, add a layer of mulch around your sweet potato plants. Suitable mulch materials include straw, leaves, or even black plastic. Ensure that the mulch doesn’t come into direct contact with the stems to prevent rot.
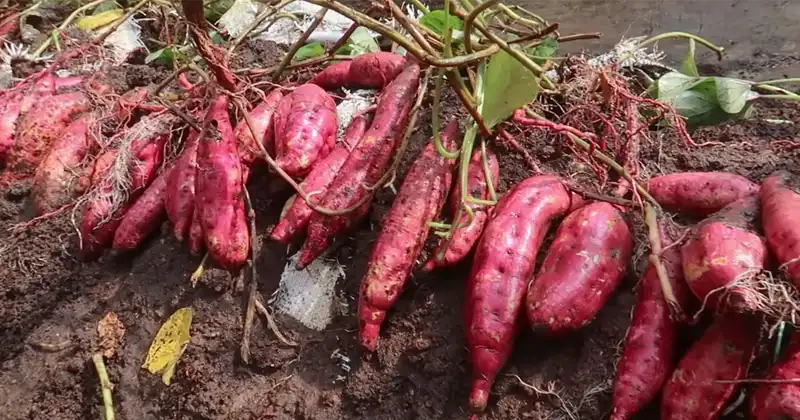
Step 8: Harvesting Sweet Potatoes
Typically, sweet potatoes are ready for harvesting in about 100-120 days after planting, depending on the variety and growing conditions. Carefully excavate around the base of the plant and gently unearth the tubers from the soil, being cautious not to damage them during the harvesting process.
Step 9: Curing and Storage
After harvesting, it’s essential to cure sweet potatoes to enhance their flavor and heal minor injuries. Place them in a warm, humid location (80-90°F or 27-32°C) for approximately 10-14 days. After curing, store your sweet potatoes in a cool, dark area with proper ventilation to extend their shelf life.
If you require additional guidance, consider watching this video tutorial…
Cultivating sweet potatoes in soil bags provides an excellent method for savoring this nutritious and delectable root vegetable, even in compact spaces or suboptimal soil conditions. With the right materials and care, you can successfully nurture your own sweet potatoes at home. Happy gardening!
