How To Become More Self-Sufficient Without Starting a Full-Blown Farm…
Want to start preserving your harvest, making your own soap, or building a backyard root cellar — but not sure where to begin? “Homesteading Advice” gives you instant lifetime access to 35+ practical homesteading books on food preservation, veggie gardening, DIY natural cleaning products (save over $250 per year with this skill alone), brewing, off-grid energy, and a whole lot more…
Click Here To Check It Out Now!
Why use solar panels to make electricity for a bulb when you can just move the sun indoors for free? We’ve been trained to think that light must come from a wire. But every time we convert sunlight to electricity and then back into light, we lose energy. ‘Natural’ light pipes bypass the middleman, piping 100% full-spectrum sunlight into your home for zero monthly cost. Better for your eyes, your plants, and your battery bank.
Reliance on the grid has a way of making us forget the simplest solutions. We often spend thousands of dollars on complex battery arrays and high-efficiency LED fixtures just to illuminate a windowless room. While those systems have their place, there is a certain rugged elegance in using the sun directly. A solar light pipe is essentially a straw for sunlight, sucking the brightness from your roof and blowing it into the dark corners of your dwelling.
This technology is not just for off-grid enthusiasts or survivalists. It is a practical return to a more intuitive way of building. Modern homes are often deep, cavernous structures where the center remains dim even on the brightest afternoons. Instead of flipping a switch, you can install a system that breathes life into these spaces using the very source of energy that sustains the planet. It is efficient, it is permanent, and once installed, it asks for nothing in return.
Free Natural Light For Dark Basements
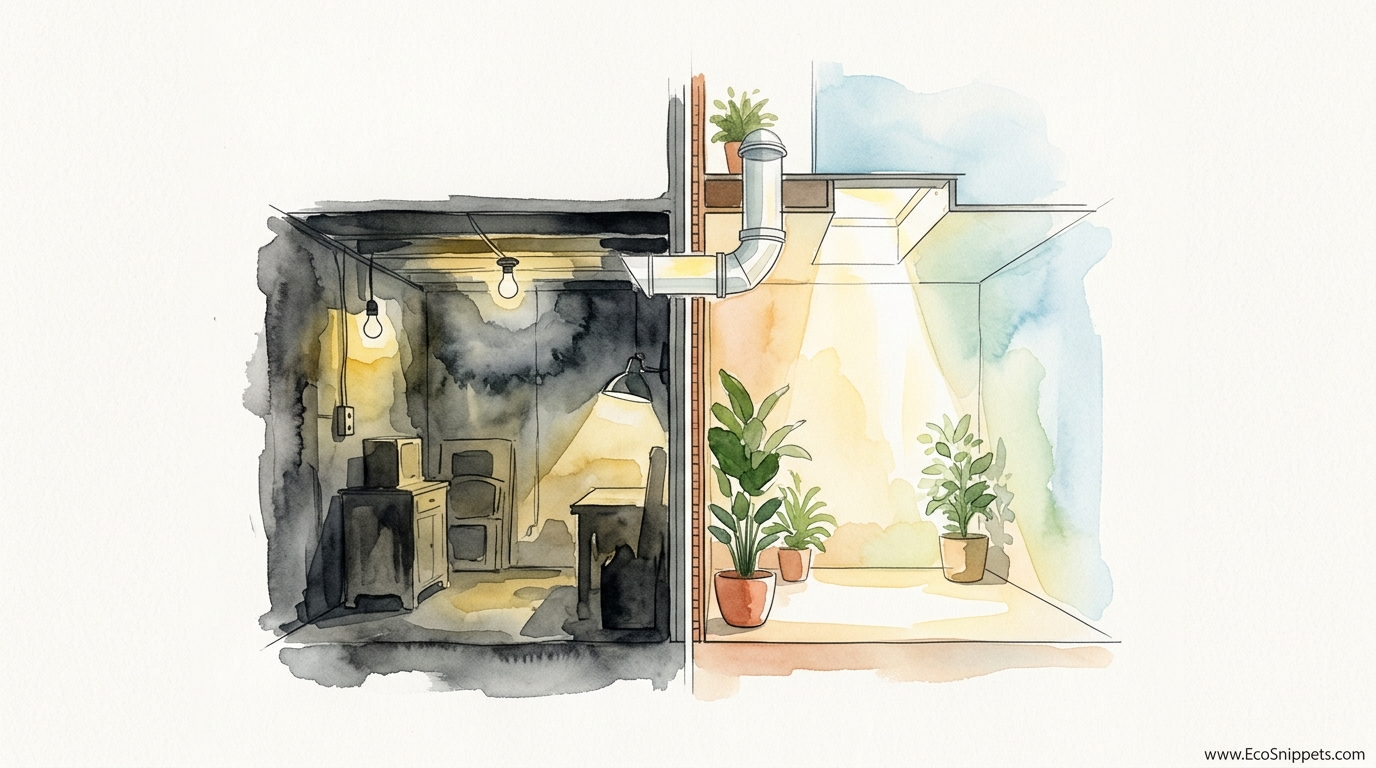
A dark basement can feel like a tomb, isolated from the world above. Most people solve this with fluorescent tubes or recessed LEDs, but those “synthetic” solutions lack the vibrance of the real thing. Natural light pipes, also known as tubular daylighting devices (TDDs), are designed specifically to solve this problem. They capture light at the roofline and funnel it down through the guts of your home to reach spaces that windows can never touch.
Think of it as a periscope for illumination. On your roof, a weather-resistant dome—typically 10 to 22 inches (25 to 55 cm) in diameter—acts as a collector. This dome is often made of high-impact acrylic or polycarbonate, designed to withstand hailstorms and extreme temperatures. Inside the house, a highly reflective tube carries that light down, sometimes through multiple floors, to a diffuser on your ceiling that looks exactly like a standard light fixture.
These systems are used in everything from residential workshops to deep-underground bunkers. Because the light is “piped,” you don’t need a direct line of sight to the sky. The tube can navigate around roof rafters, plumbing stacks, and electrical wiring. In a basement, this means you can finally have a bright, cheerful workspace or a thriving indoor garden in a room that previously required a flashlight to navigate at noon.
How It Works: The Physics of Reflection
Harnessing the sun without a wire requires a mastery of reflection. The heart of a light pipe is the internal coating of the tube. Manufacturers use specialized materials, often silver-backed films or multi-layer polymers, that offer up to 99.7% reflectivity. This means that every time a ray of light bounces off the wall of the tube, it loses less than 0.3% of its energy. This efficiency is what allows the light to travel 30 feet (9 meters) or more and still emerge with enough intensity to read by.
At the roof level, the dome isn’t just a cover; it is a lens. Many modern domes use “Raybender” technology—tiny prisms molded into the plastic that redirect low-angle sunlight (early morning or winter sun) down into the tube. This ensures that the light remains consistent throughout the day. Without these prisms, the system would only be effective when the sun is directly overhead, leaving you in the dark during the crucial hours of the morning and evening.
Once the light reaches the ceiling of your basement or room, it hits the diffuser. This component is critical because raw sunlight is too harsh and directional for comfortable indoor use. The diffuser spreads the light in a 160-degree arc, softening it and removing the “hot spots” that a traditional window or skylight might create. This results in a room that feels naturally bright, as if the entire ceiling were glowing with the soft radiance of a clear afternoon sky.
The Component Breakdown
- The Collector: A roof-mounted dome that captures direct and ambient light.
- The Flashing: A metal base that secures the dome to the roof and provides a watertight seal.
- The Reflective Tubing: Rigid or flexible pipes lined with a mirror-finish material.
- The Diffuser: An interior fixture that scatters light evenly into the living space.
The Biological Bounty: Benefits of Full-Spectrum Light
Living under artificial lights is a recent experiment in human history, and our bodies often pay the price. Standard LED or fluorescent bulbs typically only provide a narrow “spike” of color wavelengths. Sunlight, however, is full-spectrum. It contains the entire rainbow of visible light plus infrared and ultraviolet rays that our biological systems rely on to function correctly. Bringing this light into your home has measurable effects on your health and your environment.
Human circadian rhythms—the internal clock that regulates sleep, mood, and hormone production—are triggered by specific blue wavelengths found in morning sunlight. When you spend your day in a windowless office or basement, your body loses its “anchor.” Natural light pipes deliver these specific triggers, helping to combat Seasonal Affective Disorder (SAD) and improving sleep quality. It is a form of passive therapy that happens simply by existing in your home.
Plants also respond differently to piped sunlight. While most “grow lights” try to mimic the sun, they often fail to provide the exact balance of red and blue light needed for different stages of growth. A light pipe allows you to grow herbs, vegetables, or tropical plants in your basement without the heat or electricity cost of high-intensity discharge lamps. For the self-reliant individual, this means a year-round food source in a protected indoor environment.
Step-by-Step: Bringing the Sun Home
Installing a light pipe is a task that an experienced DIYer can handle in a single afternoon. It does not require structural reframing or the complex drywall work associated with traditional skylights. You are essentially installing a large vent, which is a manageable project if you respect the integrity of your roof.
1. Planning and Sizing
Determine which room needs light and locate the best path to the roof. For a small bathroom or closet, a 10-inch (25 cm) tube is usually sufficient. Larger living areas or basements often benefit from 14-inch (35 cm) or 22-inch (55 cm) systems. Measure the distance from the ceiling to the roof deck to ensure you have enough tubing and extension pieces.
2. The Ceiling Cut
Start inside. Use a stud finder to locate a spot between your ceiling joists. Mark the center and cut a hole matching the diameter of your system. A keyhole saw or drywall saw is the best tool for this. Once the hole is open, you can peek into the attic or chase to verify that your path to the roof is clear of obstructions like HVAC ducts or heavy electrical lines.
3. The Roof Penetration
From the attic, drive a long screw or a small drill bit through the roof at the center of your planned dome location. This gives you a reference point on the outside. Head up to the roof, find your marker, and cut the roof hole. For asphalt shingles, a reciprocating saw works well. For metal or tile roofs, you will need specialized cutting tools. Always wear a harness and follow safety protocols when working at height.
4. Seating the Flashing
The flashing is what keeps your house dry. Slide the top edge of the flashing under the shingles on the high side of the roof to create a “shingle effect” for water runoff. Apply a generous bead of high-quality roofing sealant between the flashing and the roof deck. Secure it with the provided roofing screws and apply more sealant over the screw heads.
5. Assembling the Tube
Connect the reflective tube sections. If you have a straight shot, rigid tubing is superior as it preserves more light. If you must navigate an angle, use the adjustable elbows. Seal every joint with heavy-duty foil tape to prevent dust and moisture from entering the tube. Any dust inside the tube will significantly degrade the reflectivity over time.
6. Final Connections
Drop the tube down through the roof flashing until it meets the ceiling ring. Snap the diffuser into place from below. On the roof, attach the dome to the flashing. Most domes have a locking mechanism or a series of screws that secure it in place. Ensure all seals are tight and that no gaps exist where insects could crawl in.
Challenges and Common Mistakes
The most common error is choosing a tube run that is too long or has too many bends. Every 90-degree turn can reduce light output by as much as 15% to 20%. If your basement is deep and you need to travel 20 feet (6 meters) or more, you must use a larger diameter tube to compensate for the light loss. A 10-inch (25 cm) tube might work for a 5-foot (1.5 m) run, but for a 20-foot (6 m) run, you will want at least a 14-inch (35 cm) diameter.
Condensation is another potential pitfall. In cold climates, the temperature difference between the interior of the house and the exterior roof can cause moisture to form inside the tube. This moisture can drip onto your ceiling or cause mold. To prevent this, ensure that the tube is well-insulated where it passes through unconditioned spaces like attics. Many kits include insulation wraps specifically for this purpose.
Orientation matters more than people realize. While the domes are designed to capture light from all angles, a south-facing roof (in the Northern Hemisphere) or north-facing (in the Southern Hemisphere) will always provide the most intense and consistent light. Placing a dome on a steep north-facing slope in the Northern Hemisphere will result in much lower performance, especially during the winter months when the sun stays low in the sky.
Limitations: When the Sun Stays Outside
A light pipe is not a total replacement for artificial lighting. Its biggest limitation is obvious: it does not work at night. If you are designing a space that will be used primarily after dark, you will still need a secondary light source. Some manufacturers offer “hybrid” kits that include a small LED strip inside the light pipe diffuser, allowing the fixture to double as a standard light at night.
Structural constraints can also be a deal-breaker. If your house has a concrete slab between floors, or if the only path to the roof is blocked by massive structural beams, the cost and complexity of the installation may skyrocket. While the tubes are flexible, they are not magical; they cannot pass through solid steel or concrete without significant engineering work.
Weather and environmental factors also play a role. If you live in an area with heavy snow, the dome can become buried, cutting off the light until it melts or is cleared. Similarly, if you live under a dense canopy of old-growth trees, the ambient light may not be sufficient to justify the cost of the system. A light pipe needs “sky view” to function at its peak.
Solar Pipes vs. PV-Powered LEDs
Many modern homeowners consider whether it is better to install solar panels on the roof and run wires to LEDs. While that is a valid approach, it is inherently less efficient for the single purpose of providing light. The table below highlights the trade-offs between these two methods.
| Factor | Natural Light Pipe | PV Panel + LED System |
|---|---|---|
| Energy Conversion | Direct (Light to Light) | Multi-step (Light to Elec to Light) |
| Light Quality | Full-Spectrum (100 CRI) | Synthetic (80-95 CRI) |
| Maintenance | Very Low (Cleaning dome) | Medium (Batteries, Electronics) |
| Efficiency | ~99% per reflection | ~15-22% (PV efficiency) |
| Night Use | No (without hybrid kit) | Yes (if battery equipped) |
The “CRI” mentioned above stands for Color Rendering Index. Sunlight is the gold standard (100). Even the best LEDs struggle to replicate how the sun reveals the true color of wood, fabric, and skin. If you are an artist, a gardener, or someone who values the “feel” of a room, the natural pipe is the clear winner.
Practical Tips and Best Practices
Before you commit to a location, perform a “light check.” Go onto your roof at various times of the day—specifically 9:00 AM, 12:00 PM, and 3:00 PM—to see which areas are in shadow from trees or neighboring buildings. A spot that looks sunny at noon might be in deep shade for the rest of the day.
Cleaning the dome should be part of your annual home maintenance ritual. Dust, pollen, and bird droppings can accumulate on the exterior, reducing the amount of light entering the system. A simple wipe with a soft cloth and mild soap is all it takes. Inside the house, the diffuser can sometimes collect dead insects; most diffusers twist off easily for cleaning.
If you are building new construction, plan your light pipes early. It is much easier to create a “chase”—a small vertical closet or walled-in area—to hide the tubing as it passes through the second floor to the first floor or basement. In an existing home, you can often run the tube through the back of a closet or a pantry to keep it out of sight.
Advanced Considerations: Heliostats and Fiber Optics
For those who want to push the boundaries of natural lighting, advanced systems like heliostats can be integrated. A heliostat is a mirror that tracks the sun across the sky, reflecting a concentrated beam of light into a fixed target—in this case, your light pipe’s collector dome. This can increase light output by 200% to 300%, making even a small 10-inch (25 cm) tube feel like a massive skylight.
Fiber optic daylighting is another step up. Instead of a large reflective tube, these systems use bundles of fiber optic cables to transport sunlight. This allows the “pipes” to be as small as an inch in diameter and to bend around almost any corner. While significantly more expensive, fiber optic systems can bring sunlight into the deepest parts of a high-rise building or a multi-level underground structure where traditional tubes cannot reach.
Thermal management is also an advanced concern. In extremely hot climates, the infrared part of the spectrum can carry unwanted heat into the home. Advanced diffusers and “cool-light” domes can filter out the infrared (heat) wavelengths while allowing the visible light to pass through. This keeps your basement bright without turning it into a sauna during a summer heatwave.
Example Scenario: The Basement Workshop
Consider a typical 1,200-square-foot (111-square-meter) basement with no windows. The owner uses it as a woodshop and seed-starting area. Normally, this space would require ten 4-foot (1.2-meter) LED shop lights, drawing approximately 400 watts of power. Over a year of daily use, that is a significant energy drain.
By installing three 14-inch (35 cm) light pipes, the owner can achieve a light level of 50 to 100 foot-candles on the work surfaces during the day. This is enough light for detailed carpentry and more than enough for healthy plant growth. The total investment for the kits was approximately $1,200, but the monthly operating cost is exactly zero. Furthermore, the shop feels more spacious and inviting, leading to longer, more productive sessions without the eye strain common under flickering artificial lights.
In this scenario, the light pipes also provide a safety benefit. In the event of a daytime power outage, the workshop remains fully illuminated, allowing the owner to safely shut down machinery and navigate the stairs. It is a simple, mechanical form of redundancy that a battery-backed system cannot match for long-term reliability.
Final Thoughts
Natural light pipes are a bridge between the high-tech world of modern construction and the ancient wisdom of building with the sun. They remind us that the most powerful energy source in our solar system doesn’t always need to be converted, stored, and regulated. Sometimes, it just needs a clear path to follow.
By choosing to move the sun indoors, you are making a commitment to a simpler, healthier, and more resilient way of living. Whether you are brightening a dark hallway or turning a windowless basement into a vibrant living space, the results are immediate and profound. It is one of the few home improvements that pays for itself not just in energy savings, but in the psychological well-being that only a sun-drenched room can provide.
Experiment with one unit in a small room first. Once you see the difference between the flat, sterile glow of an LED and the dancing, vibrant character of real sunlight, you will likely find yourself looking at every dark corner of your home as an opportunity to invite the outside in. The sun is up there, waiting to work for you—all you have to do is give it a way to get inside.
