How To Become More Self-Sufficient Without Starting a Full-Blown Farm…
Want to start preserving your harvest, making your own soap, or building a backyard root cellar — but not sure where to begin? “Homesteading Advice” gives you instant lifetime access to 35+ practical homesteading books on food preservation, veggie gardening, DIY natural cleaning products (save over $250 per year with this skill alone), brewing, off-grid energy, and a whole lot more…
Click Here To Check It Out Now!
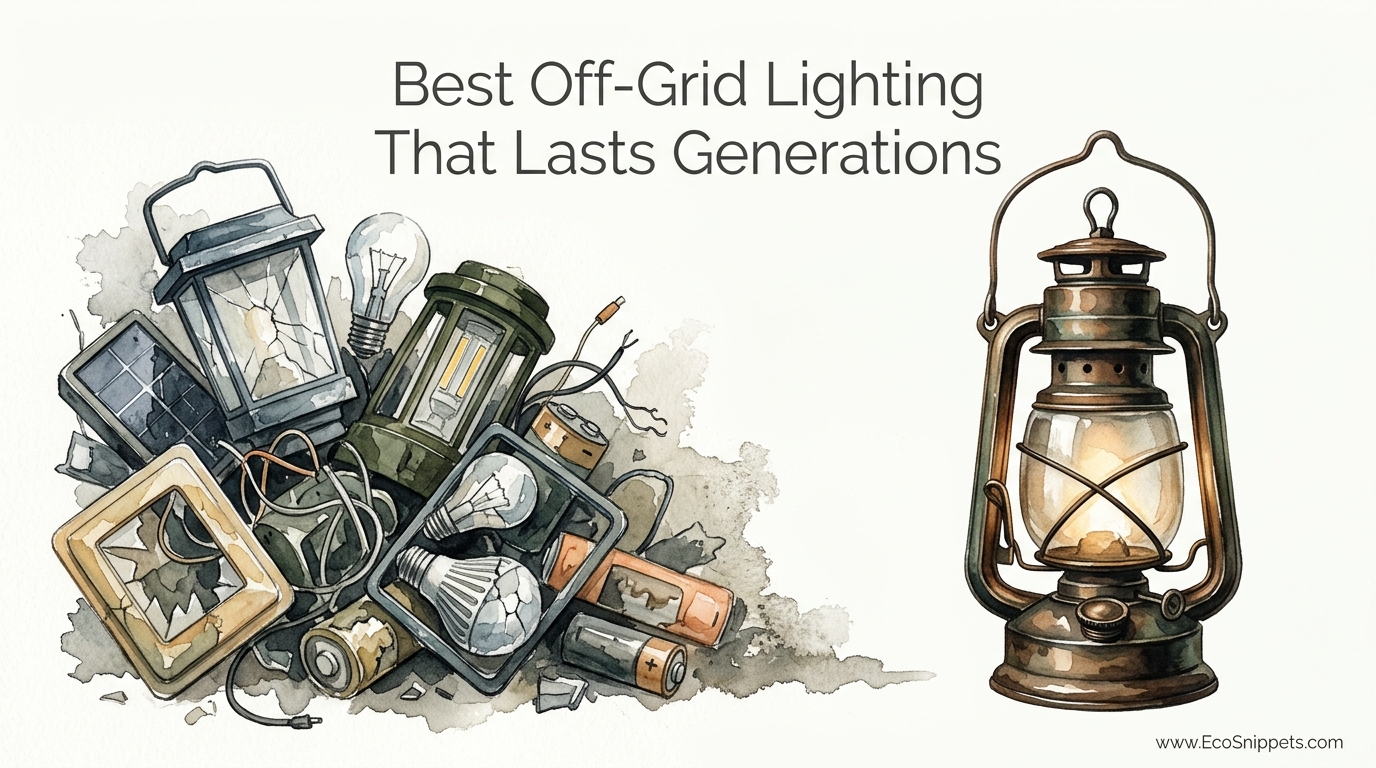
Are you buying ‘landfill lights’ every year, or are you building a lighting system your grandkids will use? Most homesteaders buy the 10-pack of solar lights from the big box store. These units are usually dead, cloudy, or cracked within two winters. True resilience means investing in a ‘one-and-done’ system that harvests energy centrally and distributes it through hardware that can actually survive the elements. This approach shifts the focus from temporary plastic waste to a forged legacy of reliable illumination.
Building a permanent lighting system requires a shift in mindset. It is not about the cheapest upfront cost, but the lowest lifetime cost. A high-quality off-grid system functions as a miniature utility, using professional-grade components that mirror the systems used in maritime or heavy industrial applications. This guide will show you how to design a lighting infrastructure that outlasts the house it illuminates.
Best Off-Grid Lighting That Lasts Generations
The best off-grid lighting system for longevity is a centralized low-voltage Direct Current (DC) system. Unlike individual solar stakes that rely on tiny, cheap batteries and fragile plastic housings, a centralized system uses a single, robust battery bank connected to hardwired fixtures. This configuration allows you to place solar panels in the best possible sun and batteries in a protected environment, while the lights themselves are installed wherever they are needed.
These systems typically operate at 12V or 24V DC. High-quality fixtures made of solid brass, copper, and tempered glass are the backbone of a generational setup. These materials do not degrade under UV exposure or crack in the freezing cold of winter. While the initial investment is higher, these fixtures are often repairable, allowing you to replace a single LED bulb or a glass pane rather than throwing away the entire unit when one component fails.
Modern LED technology has revolutionized off-grid lighting. Current LED bulbs can provide 50,000 hours or more of light while consuming 90% less energy than old incandescent versions. This efficiency means your battery bank can be smaller and more affordable while still providing ample light for a barn, workshop, or full homestead compound.
How a Centralized DC Lighting System Works
A permanent lighting system consists of four primary stages: harvesting, storage, distribution, and illumination. Each stage must be built with durability in mind to ensure the system lasts for decades. Understanding these steps allows you to troubleshoot and maintain the system without needing outside help.
1. Harvesting Energy: Professional-grade solar panels with tempered glass and aluminum frames are the standard. These panels are often rated for 25 years of service. For a simple lighting system, one or two 100-watt panels are usually sufficient to keep the batteries topped off, even during the shorter days of winter.
2. Storing Energy: The battery is the heart of the system. Traditional lead-acid batteries are prone to failure if discharged too deeply and require frequent replacement every 2 to 3 years. Modern Lithium Iron Phosphate (LiFePO4) batteries are the superior choice, offering between 3,000 and 7,000 charge cycles. This translates to 10 to 20 years of daily use. These batteries are also much safer and more efficient, allowing you to use nearly 100% of their rated capacity without damage.
3. Distributing Power: Thick copper wiring carries the power from the central battery to the fixtures. Because low-voltage systems (12V/24V) are sensitive to resistance, choosing the correct wire gauge is critical. Using direct-burial rated cable or running wire through PVC conduit protects the distribution lines from moisture and pests. This ensures the “veins” of your lighting system remain intact for generations.
4. Illumination: The end of the line features the fixtures. Solid brass path lights or nautical-style wall sconces provide the physical protection needed for the LED bulbs. These fixtures develop a natural patina over time but never lose their structural integrity, unlike the “landfill lights” that crumble under the sun’s rays.
Benefits of a Hardwired Off-Grid System
Choosing a hardwired system over individual solar “pucks” offers several practical and financial advantages. These benefits center around reliability, quality of light, and the reduction of long-term waste.
- Unmatched Reliability: Centralized batteries stay warm in a basement or shed, allowing them to charge and discharge efficiently even when outside temperatures drop to -20°C (-4°F). Individual solar lights often fail in the winter because their tiny batteries cannot handle the cold or the lack of direct sun at ground level.
- Superior Light Quality: Hardwired systems provide consistent, bright light. Because the power comes from a large, stable source, the lights do not dim as the night goes on. High-quality LED bulbs also offer better “Color Rendering Index” (CRI), making the homestead look natural and inviting after dark.
- Repairability: If a wire is cut or a bulb burns out, you can fix it. Standard off-grid fixtures use common parts that can be swapped out. This is a far more sustainable approach than the “buy-and-toss” cycle of consumer-grade solar gadgets.
- Reduced Electronic Waste: Avoiding the purchase of cheap solar lights prevents hundreds of pounds of plastic and toxic heavy metals from ending up in landfills over the lifetime of a single home.
Common Challenges and Mistakes
Setting up a permanent system is not without its hurdles. Most failures in DIY off-grid lighting stem from poor planning or cutting corners on the electrical side. Awareness of these common pitfalls can save you hours of frustration.
Voltage Drop: This is the most common issue in low-voltage systems. Electrical “pressure” is lost as current travels through long stretches of wire. If the wire is too thin, the lights at the end of the line will be dim or flicker. Many beginners use standard “zip cord” or thin 18-gauge wire for long runs, only to find the system barely functions. Always use a voltage drop calculator and err on the side of thicker wire, such as 12 AWG (3.3 mm²) or 10 AWG (5.2 mm²), for runs over 15 meters (50 feet).
Battery Neglect: While LiFePO4 batteries are “maintenance-free,” they still need protection from extreme heat and charging in sub-freezing temperatures without a built-in heater. Placing your battery bank in an uninsulated shed in a northern climate can lead to a “cold-soak” that prevents the system from charging during the day.
Inadequate Waterproofing: Even though the system is low-voltage, moisture can still cause corrosion at connection points. Wire nuts and standard electrical tape are not sufficient for outdoor use. Using heat-shrink connectors or gel-filled wire nuts is essential to keep the connections dry and functional for decades.
Limitations of Low-Voltage DC Systems
A 12V or 24V system is excellent for lighting, but it has realistic constraints. It is important to understand what these systems are not designed to do before you start your build.
Distance is the primary limitation. While a 120V AC system can send power hundreds of feet with little loss, a 12V DC system struggles beyond 30 meters (100 feet). If your homestead has outbuildings located very far apart, a 24V or 48V system is more appropriate as it reduces the current (Amps) needed, which in turn reduces the voltage drop. However, even with higher voltages, the cost of the thick copper wire required for long distances can become prohibitive.
Another limitation is the complexity of the initial setup. Unlike a solar stake that you simply push into the dirt, a hardwired system requires trenching, conduit work, and basic electrical knowledge. It takes significantly more time to install. If you are only looking for a temporary light for a single weekend camping trip, this level of infrastructure is overkill.
Comparison: Landfill Lights vs. Legacy Systems
| Feature | Big-Box Solar Stakes | Hardwired DC System |
|---|---|---|
| Main Material | Plastic / Thin Aluminum | Solid Brass / Copper / Glass |
| Battery Life | 6–12 Months | 10–20 Years (LiFePO4) |
| Light Output | Weak, Fades Quickly | Consistent, High-Lumen |
| Winter Performance | Often Fails | Excellent (Centralized) |
| Cost (10 Years) | High (Frequent Replacement) | Low (Upfront Only) |
Practical Tips for a Robust Setup
Planning your layout before you dig the first trench will save you a massive amount of labor. Follow these best practices to ensure your system is efficient and safe.
- Choose 24V for Larger Areas: If you are lighting a barn and multiple outbuildings, use a 24V battery bank. It allows you to use thinner wire while achieving the same power output, which can save you hundreds of dollars in copper costs.
- Install a Fuse Block: Safety is paramount. Every circuit leaving your battery bank should have an appropriate fuse. This prevents a short circuit from damaging your expensive batteries or starting a fire.
- Use Dusk-to-Dawn Sensors: A centralized photocell can turn the entire system on and off automatically. This ensures you never accidentally leave the lights on during the day, preserving your battery capacity for when it is actually needed.
- Seal Every Connection: Oxidation is the enemy of DC systems. Use dielectric grease on bulb sockets and in connector blocks to prevent moisture from creeping into the copper and causing high resistance.
Advanced Considerations for Practitioners
For those who want to take their lighting system to a professional level, consider segmenting your loads. Instead of putting all your lights on one giant circuit, break them into logical zones like “Security,” “Utility,” and “Ambience.” This allows you to prioritize power during periods of extreme weather. If your battery gets low after a week of clouds, you can turn off the decorative path lights while keeping the essential security lights active.
Lightning protection is another advanced step often overlooked. Because off-grid lighting involves outdoor wiring and solar panels, it can act as a lightning rod. Installing a simple DC surge protector at the entry point where the wires enter the house can save your charge controller and battery bank from a catastrophic surge.
Integrating PWM (Pulse Width Modulation) dimmers can also extend your battery life significantly. Many modern DC LED fixtures are dimmable. Running your lights at 50% brightness often provides plenty of illumination for moving around the homestead while cutting your energy consumption in half.
Example Scenario: The Off-Grid Barn
Consider a typical 10m x 12m (33ft x 40ft) barn located 20 meters (65 feet) from a solar-powered cabin. Instead of running a complex AC inverter system, the owner installs a dedicated 24V lighting circuit.
The system uses two 100Ah LiFePO4 batteries in series (creating a 24V bank) and a 40A MPPT charge controller. They run 10 AWG (5.2 mm²) direct-burial cable out to the barn inside a conduit. Inside the barn, they install six solid brass “vapor-tight” industrial fixtures with 10-watt LED bulbs. The total draw is only 60 watts. With a 24V battery bank, this setup can run the lights for over 30 hours continuously without any sun at all. The heavy brass fixtures handle the dust and humidity of the barn with ease, and the owner will likely never have to replace anything but a bulb for the next twenty years.
Final Thoughts
Building a lighting system for your grandkids means choosing durability over convenience. The cycle of buying cheap, disposable solar lights is a drain on both your wallet and the environment. By investing in a centralized DC system with LiFePO4 storage and high-quality brass fixtures, you create a permanent asset for your homestead.
This approach offers a level of security and peace of mind that plastic stakes simply cannot match. Whether you are illuminating a remote cabin or a suburban garden, the principles of solid materials and centralized power remain the same. Start with one well-built circuit and expand as your needs grow. Over time, you will have a forged legacy of light that stands the test of time and weather.
