How To Become More Self-Sufficient Without Starting a Full-Blown Farm…
Want to start preserving your harvest, making your own soap, or building a backyard root cellar — but not sure where to begin? “Homesteading Advice” gives you instant lifetime access to 35+ practical homesteading books on food preservation, veggie gardening, DIY natural cleaning products (save over $250 per year with this skill alone), brewing, off-grid energy, and a whole lot more…
Click Here To Check It Out Now!
Most homeowners see a property line; smart backyard farmers see 100 square feet of ‘lost’ vertical real estate waiting to be harvested. Every linear foot of your fence is a missed opportunity. Why settle for a wall that just stands there when you could build a deep-box system that feeds your family? Most ‘gutter gardens’ fail because they are too shallow for real crops, but these custom horizontal beds are the secret to vertical abundance. Turn your privacy into productivity.
How To Build A Diy Edible Fence For Backyard Farming
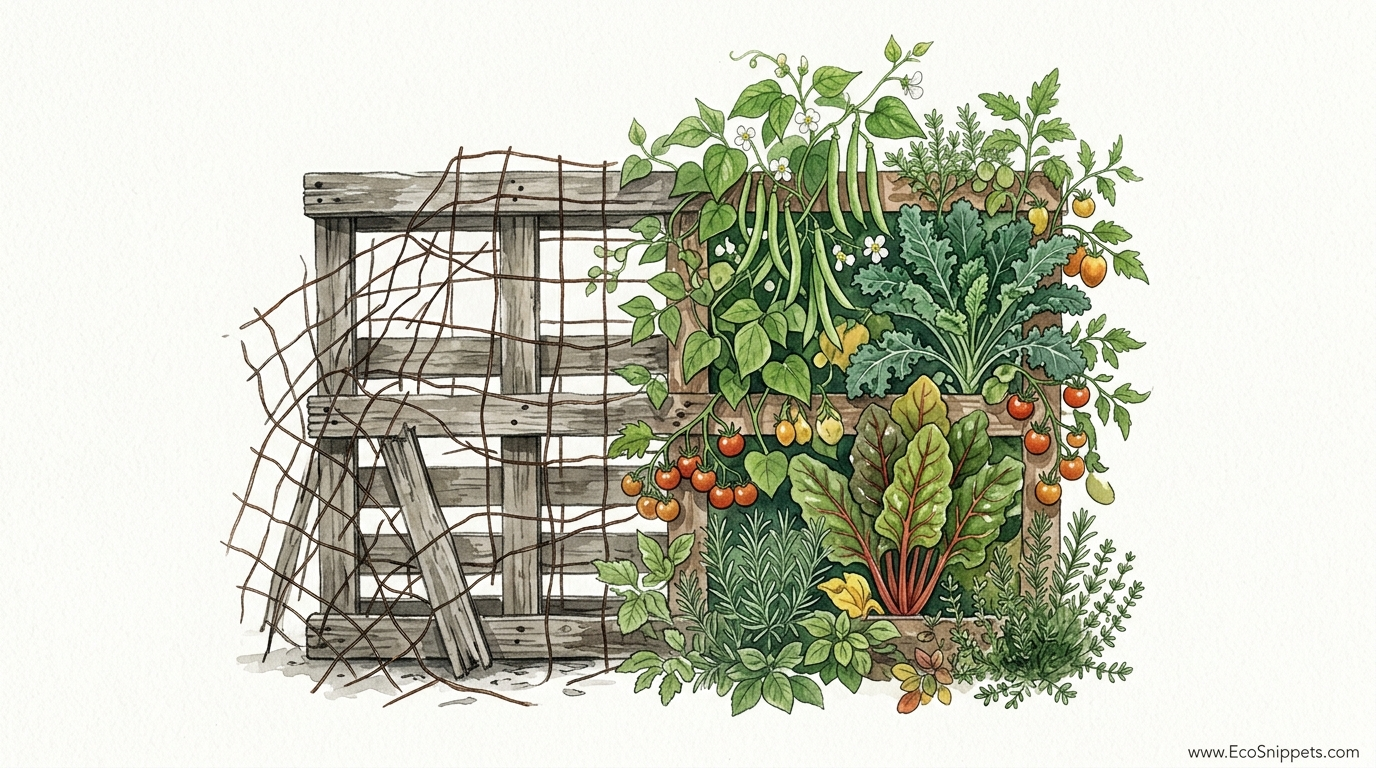
A DIY edible fence is a vertical farming system that transforms standard boundary structures into productive growing zones. Unlike traditional gardens that occupy precious ground space, this system utilizes the vertical plane to host horizontal planter boxes. These boxes are deep enough to support the root systems of substantial crops like peppers, bush beans, and even compact tomatoes.
In the real world, this approach is a cornerstone of urban homesteading and permaculture design. It moves the garden from the center of the yard to the periphery, maximizing sun exposure and creating a “Living Larder.” While a standard fence is often a “Dead Boundary” that provides nothing but separation, an edible fence creates a microclimate that benefits both the plants and the soil.
Think of it like a bookshelf for your backyard. Each “shelf” is a structural garden bed designed to hold a significant volume of soil—roughly 8 to 10 inches (20 to 25 cm) of depth. This depth is the critical difference between a decorative flower display and a serious food-production engine. Whether you have a small city lot or a sprawling rural property, the edible fence allows you to grow hundreds of pounds of food without sacrificing your lawn.
Engineering the Living Larder: How the System Works
Building an edible fence requires more than just hanging pots. You are creating a structural system that must support the combined weight of saturated soil, timber, and mature plants. A single 4-foot (1.2-meter) box filled with wet soil can weigh upwards of 60 to 80 pounds (27 to 36 kg).
The process begins with selecting the right support points. You should never attach heavy garden boxes directly to individual fence pickets. Instead, the load must be transferred directly to the 4×4 (10×10 cm) fence posts or the horizontal stringers. Using heavy-duty galvanized brackets or lag bolts ensures that the weight is distributed safely without causing the fence to lean or sag over time.
Once the mounting points are secured, you build the boxes using rot-resistant lumber like Western Red Cedar or pressure-treated pine. Cedar is naturally resistant to decay and insects, making it the premier choice for food-grade systems, though it comes at a higher initial cost. Each box is constructed with drainage holes at the bottom and often lined with a breathable landscape fabric to prevent soil from washing out while allowing excess water to escape.
Designing for Sun and Gravity
Positioning is everything in vertical farming. Because the fence itself can create a shadow, you must assess which side of the boundary receives the most sunlight throughout the year. South-facing fences (in the Northern Hemisphere) are prime real estate for sun-loving crops like peppers.
Gravity works both for and against you. While it makes drainage simple, it also means the top boxes will dry out faster than the bottom ones. Smart builders often design a staggered layout, where water from the top boxes can drip down to nourish the ones below, or they install a dedicated drip irrigation line that runs along the top rail and branches down to each level.
Benefits of Choosing a Deep-Box Vertical System
Choosing a deep-box system over traditional in-ground gardening or shallow gutter systems provides several measurable advantages. The primary benefit is ergonomics. By mounting beds at waist or chest height, you eliminate the need for bending and kneeling, making garden maintenance much easier on the back and joints.
Maximized Yield per Square Foot
In a traditional garden, you might plant one row of lettuce. On an edible fence, you can stack three or four levels of lettuce in the same horizontal footprint. This quadruples your potential yield. Additionally, vertical growth keeps the produce off the ground, which significantly reduces the risk of soil-borne diseases and rot.
Natural Pest Deterrence
Ground-dwelling pests like rabbits and slugs find it much harder to reach crops elevated three to five feet (0.9 to 1.5 meters) in the air. While you still have to contend with birds or climbing insects, the physical separation from the soil surface provides a natural barrier that reduces the need for chemical interventions.
Improved Microclimate Control
Fences act as thermal masses. During the day, wooden or stone boundaries absorb heat from the sun and slowly release it during the night. This can extend your growing season by keeping the soil in your boxes slightly warmer than the surrounding ground. In cooler regions, this thermal buffer can mean the difference between a successful harvest and a frost-bitten crop.
Common Mistakes and How to Avoid Them
Many DIY builders jump into the project without considering the long-term impact of moisture and weight. The most frequent error is underestimating the weight of wet soil. Never assume a standard privacy fence can hold ten full boxes without reinforcement.
Using the Wrong Soil Mix
Standard topsoil or garden soil is too heavy and compacts too easily for vertical boxes. If the soil becomes a dense brick, the roots will suffocate, and the drainage holes will clog. To avoid this, use a lightweight “soilless” mix consisting of one part compost, one part peat moss or coco coir, and one part perlite or vermiculite. This provides the necessary aeration and moisture retention while keeping the overall weight manageable.
Neglecting Drainage and Rot Protection
Even rot-resistant wood will eventually decay if it is constantly in contact with wet soil. Failing to use a liner or neglecting to drill enough drainage holes is a recipe for a collapsing fence. Ensure you have at least one 1/2-inch (1.25 cm) drainage hole every 6 inches (15 cm) along the bottom of the box. Additionally, applying a food-safe wood sealer to the interior of the boxes can add years to their lifespan.
Limitations of Fence-Based Farming
While the edible fence is a powerful tool, it is not a universal solution for every crop. Massive, heavy-feeding plants like pumpkins or full-sized watermelons are generally too heavy and have root systems too expansive for most fence-mounted boxes. These are better suited for ground-level beds with trellises.
Wind Exposure
Because plants on a fence are elevated, they are more exposed to high winds than plants tucked into the ground. This can lead to increased transpiration, meaning the plants dry out much faster. If you live in a particularly windy area, you may need to install windbreaks or focus on low-profile crops like herbs and leafy greens that aren’t as easily buffeted by gusts.
Structural Age
If your fence is already 15 years old and showing signs of rot at the base of the posts, adding a vertical garden will likely cause it to fail prematurely. Always inspect the structural integrity of your boundary before beginning construction. Sometimes, it is necessary to install independent 4×4 (10×10 cm) posts just inside the fence line to support the garden rather than relying on the existing structure.
Comparing Gutter Gardens vs. Deep-Box Systems
Understanding the differences between these two popular vertical methods is essential for setting realistic harvest expectations.
| Feature | Gutter Gardens | Deep-Box Systems |
|---|---|---|
| Soil Depth | 3–4 inches (7–10 cm) | 8–12 inches (20–30 cm) |
| Crop Versatility | Limited to lettuce, herbs, and small strawberries. | Peppers, kale, bush beans, and dwarf tomatoes. |
| Moisture Retention | Dries out very quickly; requires daily watering. | Higher soil volume holds moisture for 2–3 days. |
| Structural Requirement | Lightweight; can be hung on most sturdy fences. | Heavy; requires post-mounting and brackets. |
| Lifespan | Moderate (plastic or thin metal may degrade). | High (built with thick, rot-resistant lumber). |
Practical Tips for a Successful Harvest
To get the most out of your edible fence, follow these best practices for maintenance and planning.
- Install a Drip System: Hand-watering ten different boxes at varying heights is tedious and leads to uneven moisture. A simple 1/4-inch (6 mm) drip line with emitters for each box will save hours of labor and keep your plants thriving.
- Use Companion Planting: Plant marigolds or nasturtiums at the ends of your boxes. Not only are they edible, but they also act as a “trap crop” for aphids, keeping your main vegetables clean.
- Rotate Your Crops: Don’t grow the same plant in the same box every year. Move your heavy feeders (like kale) to a box that previously held nitrogen-fixers (like bush beans) to keep the soil healthy.
- Mulch the Surface: Even in a vertical box, a thin layer of straw or wood chips will significantly reduce evaporation and keep the soil temperature stable.
Advanced Considerations for Serious Practitioners
For those looking to scale their production, consider integrating a wicking system or a semi-hydroponic setup. A wicking bed uses a water reservoir at the bottom of the box with a fabric wick that pulls moisture up into the soil as the plants need it. This can reduce watering frequency to once a week, even in the height of summer.
Another advanced technique is the use of “Smart” sensors. Small, battery-operated moisture sensors can be placed in a representative box at each level. These sensors can trigger your irrigation system only when the soil reaches a certain dryness threshold, preventing overwatering and nutrient leaching.
Scaling up also means considering the aesthetics. By using different wood stains or architectural brackets, an edible fence can become a high-end landscape feature. Integrating LED grow lights or solar-powered accent lighting can turn the garden into a beautiful evening focal point while providing a slight boost to shorter winter days.
Example Scenario: The 20-Foot Fence Larder
Imagine a standard 20-foot (6-meter) section of cedar privacy fence. By installing three levels of 4-foot (1.2-meter) boxes on every other fence section, you create 15 separate planting zones.
In the top boxes, you plant heat-loving peppers and basil. In the middle tier, you grow Swiss chard and kale. In the bottom tier, which receives slightly more shade from the tiers above, you plant gourmet lettuces and spinach. This single 20-foot (6-meter) stretch can produce enough fresh salad greens and herbs to supply a family of four for the entire summer and autumn seasons. By using simple 2-inch (5 cm) decking screws and heavy-duty L-brackets, the entire project can be completed over a single weekend for less than the cost of a few months of organic groceries.
Final Thoughts
Building a DIY edible fence is one of the most effective ways to reclaim lost space in your backyard. It bridges the gap between traditional gardening and modern efficiency, turning a static boundary into a dynamic source of nutrition. By focusing on deep-box construction rather than shallow alternatives, you provide your plants with the foundation they need to reach their full potential.
Success in vertical farming comes down to respect for the fundamentals: structural integrity, soil quality, and consistent moisture. When you treat your fence as a living asset rather than a dead boundary, you unlock a level of self-reliance that few other backyard projects can match.
Take the first step by measuring your fence and checking the sun patterns. Whether you start with a single box or a full-scale “Living Larder,” the transition from consumer to producer starts exactly where your property ends. Experiment with different varieties, refine your irrigation, and enjoy the abundance of a garden that grows with you.
