How To Become More Self-Sufficient Without Starting a Full-Blown Farm…
Want to start preserving your harvest, making your own soap, or building a backyard root cellar — but not sure where to begin? “Homesteading Advice” gives you instant lifetime access to 35+ practical homesteading books on food preservation, veggie gardening, DIY natural cleaning products (save over $250 per year with this skill alone), brewing, off-grid energy, and a whole lot more…
Click Here To Check It Out Now!
Stop scrubbing your tomato seeds! Let biology do the heavy lifting and unlock the highest germination rates you’ve ever seen. Most people spend hours trying to manually wash the ‘goo’ off their tomato seeds, only to have them fail to sprout next spring. That gel is a germination inhibitor designed by nature. The strategic homesteader uses a 3-day ferment to break down that coating, mimicking the natural rot process and signaling to the seed that it’s time to wake up.
Saving seeds is one of the most foundational skills in self-reliant gardening. It allows you to preserve heirloom varieties that have adapted to your specific soil and microclimate over generations. While you can technically just smear seeds on a paper towel, you are leaving your success to chance. Fermentation is the gold standard for clean, pathogen-free seeds that remain viable for years to come.
How To Save Tomato Seeds Using Fermentation
Fermentation is the process of using beneficial microorganisms, specifically bacteria and yeast, to consume the placental tissue and protective gel sac surrounding a tomato seed. In the wild, a tomato falls to the ground and rots, allowing the seeds to undergo this exact process naturally before they eventually hit the soil. This “controlled rot” is essential because the gel contains chemicals that prevent the seed from sprouting inside the damp, warm environment of the fruit itself.
When we ferment seeds at home, we are simply accelerating and managing a biological cycle. This method is widely used by professional seed houses and serious heirloom collectors because it produces the cleanest possible result. It involves squeezing the seedy pulp into a container and allowing it to sit until a layer of mold forms, which effectively “eats” the slime away.
Visualizing this process helps: think of the seed as being trapped in a tiny, slippery balloon. Rinsing with water alone won’t pop that balloon. However, the acids and enzymes produced during a 3-day ferment act like a chemical key, dissolving the “balloon” and leaving behind a fuzzy, easy-to-dry seed that is ready for storage.
The Step-by-Step Fermentation Process
The process begins with selecting the right fruit. Always choose the most robust, true-to-type, and fully ripe tomatoes from your healthiest plants. If a tomato is under-ripe, the seeds may not be fully developed; if it is over-ripe to the point of black mold, the seeds may already be compromised.
Start by slicing the tomato along its “equator” rather than from stem to blossom end. This exposes the seed cavities, or locules, making it easier to squeeze the contents into a clean glass jar. You want the seeds and the surrounding juice, but you should try to keep large chunks of solid flesh out of the jar to prevent unnecessary mess.
Add a small amount of dechlorinated water—about 1/2 cup or 120 ml—if the mixture is too thick to stir. Cover the jar with a breathable material like a paper towel or a scrap of cloth secured with a rubber band. This allows gases to escape while keeping fruit flies from laying eggs in your fermenting “soup.”
Place the jar in a warm spot, ideally between 72°F and 86°F (22°C to 30°C). Higher temperatures speed up the process, while cooler temperatures may require an extra day or two. Stir the mixture once or twice a day to oxygenate the liquid and ensure all seeds are exposed to the fermenting action.
After 48 to 72 hours, a white or grey film of mold will likely form on the surface. This is a sign of success. To harvest, fill the jar with water and stir vigorously. The heavy, viable seeds will sink to the bottom, while the pulp, “scum,” and hollow, non-viable seeds will float. Carefully pour off the top layer, add more water, and repeat until only clean seeds and clear water remain.
The Biological Benefits of Fermentation
The most immediate benefit is the removal of the locular jelly. Without this gel, seeds dry faster and do not stick together in clumps. This makes them significantly easier to handle when it comes time to sow them into 72-cell trays or outdoor furrows in the spring.
Beyond physical cleanliness, fermentation is a powerful tool for disease management. It is known to significantly reduce or eliminate certain seed-borne pathogens, such as bacterial canker (*Clavibacter michiganensis*), which can devastate a tomato crop. The acidic environment and the presence of beneficial bacteria create a hostile setting for many harmful microbes that might otherwise hitch a hike into next year’s garden.
Furthermore, the fermentation process acts as a natural “quality control” filter. Only the densest, most nutrient-rich seeds sink to the bottom of the jar. By discarding the “floaters,” you are automatically selecting for the highest possible germination rates. This ensures that every inch of your seed starting tray is occupied by a strong, living plant.
Challenges and Common Pitfalls
The most common mistake is over-fermenting the seeds. If you leave the seeds in the liquid for too long—typically more than 4 or 5 days in warm weather—the seeds will interpret the breakdown of the gel as a signal to sprout. Once a seed germinates in the jar, it is no longer viable for storage and must be thrown out.
Another frequent error is using airtight lids. Fermentation produces carbon dioxide; if you seal a jar tightly, the pressure can build up, and the lack of oxygen can lead to anaerobic rot, which smells significantly worse and may harm the seeds. Always use a breathable cover like a coffee filter or a piece of cheesecloth.
Fruit flies are a constant challenge during tomato harvest season. These tiny pests are attracted to the smell of fermenting fruit and can quickly colonize your jars. If you find small white larvae in your seeds, it usually means your cover wasn’t secure enough. While they don’t necessarily destroy the seeds, they add an unpleasant layer of “gross factor” to the process.
When Fermentation May Not Be Ideal
Fermentation requires time and a specific temperature range to be effective. If you are in a survival situation or a race against an early frost and only have one or two tomatoes to save, the 3-day wait might be a luxury you can’t afford. In these cases, the “rinse and smear” method on a paper plate is better than nothing, even if the germination rate is lower.
In extremely humid environments, the drying phase after fermentation becomes the biggest hurdle. If the ambient humidity is above 60%, seeds may take too long to dry and could develop surface mold even after they have been cleaned. In these regions, you may need to use a fan or a dedicated drying screen to ensure moisture is removed within 24 to 48 hours.
Finally, do not bother fermenting seeds from F1 hybrid plants. While the seeds will grow, they will not “breed true.” This means the resulting plant might look like one of the parent varieties—potentially a flavorless commercial tomato—rather than the delicious hybrid you originally ate. Stick to open-pollinated and heirloom varieties for this process.
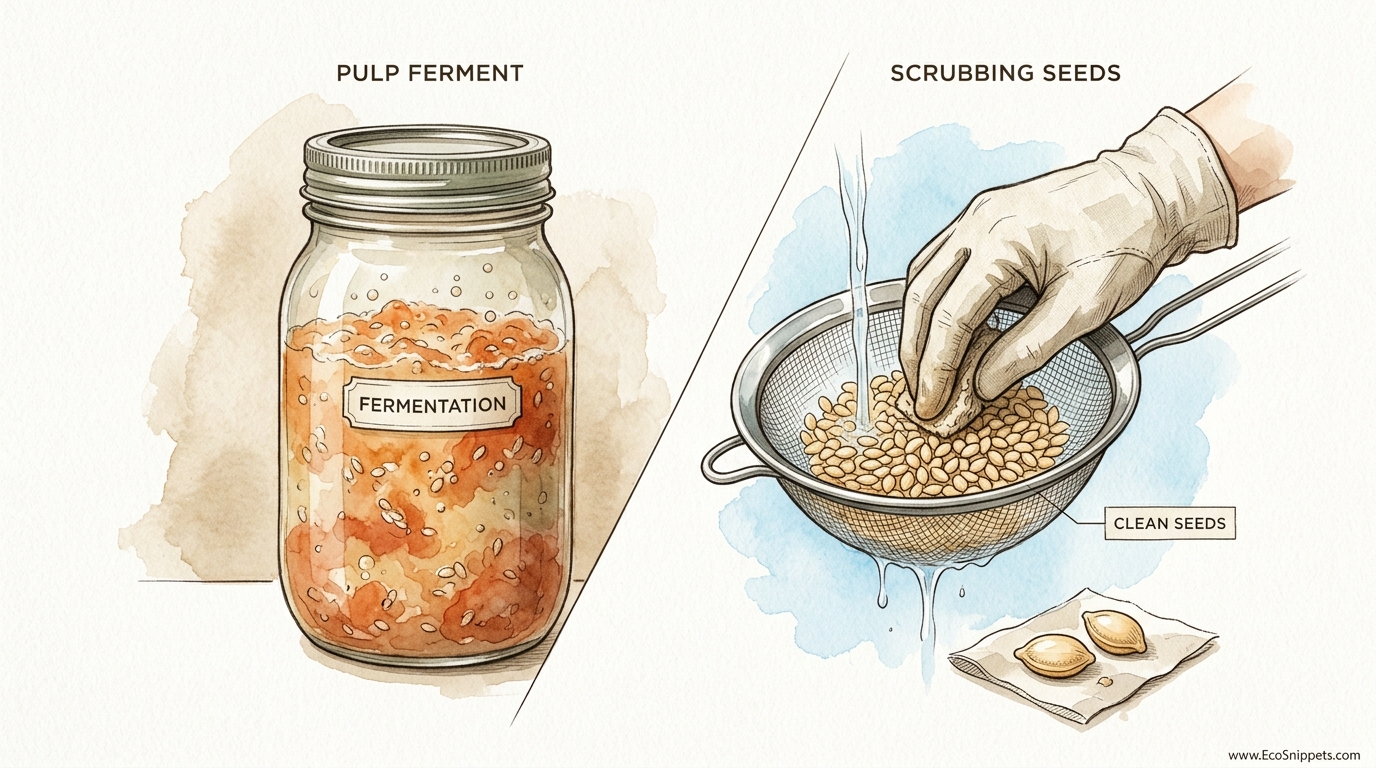
Comparison: Scrubbing vs. Pulp Ferment
Many beginners wonder if the extra work of fermentation is truly worth it compared to simply scrubbing seeds in a fine-mesh sieve. The following table highlights the key differences between these two common methods.
| Feature | Scrubbing Method | Fermentation Method |
|---|---|---|
| Total Effort | High manual labor | Low manual labor (wait time) |
| Disease Control | Minimal | Excellent (kills canker) |
| Germination Rate | 70% – 85% | 95% – 99% |
| Seed Storage Life | 2 – 4 years | 5 – 10 years |
| Ease of Sowing | Seeds clump together | Individual, clean seeds |
Best Practices for Drying and Storage
Once the seeds are clean, the drying stage is critical. Never dry your seeds on paper towels. The remaining microscopic bits of sugar and pectin will act like glue, bonding the seeds to the fibers of the paper. Removing them later becomes a frustrating chore that often results in damaged seed coats.
Instead, use a ceramic dinner plate, a glass pie dish, or a coffee filter. Spread the seeds in a single, thin layer so they aren’t touching. This maximizes airflow and ensures every seed dries at the same rate. If you are processing multiple varieties at once, place the label underneath the clear glass plate so there is no risk of mixing them up.
Keep the drying seeds out of direct sunlight. While seeds love warmth, high UV rays and intense heat can damage the delicate embryo inside. A cool, shady spot with a gentle breeze—perhaps from a nearby window or a low-power fan—is the ideal environment for the 5 to 7 days it takes for a seed to become fully “brittle.”
Test for dryness by trying to snap a seed or bite it gently. If it bends, it is still too wet. If it resists and feels like a tiny pebble, it is ready for storage. Store your finished seeds in paper envelopes placed inside an airtight glass jar. Keeping them in a cool, dark place like a basement or a dedicated seed fridge will extend their life significantly.
Advanced Considerations for the Serious Seed Saver
For those looking to scale up their seed saving, consider using an immersion blender for large batches. While it sounds violent, the dull blades of a blender at low speed will not harm the seeds but will quickly pulverize the flesh of several buckets of tomatoes at once. This “slurry” can then be fermented in larger 5-gallon (19-liter) buckets.
Another advanced tip involves the “Hot Water Treatment.” If you are dealing with a known outbreak of seed-borne disease in your area, you can follow up your fermentation with a 25-minute soak in 122°F (50°C) water. This precise temperature is high enough to kill bacteria inside the seed coat without killing the seed itself. This is a common practice for commercial organic growers who cannot risk a crop failure.
If you are saving seeds for the very long term—ten years or more—consider adding a small silica gel desiccant pack to your storage jar. Moisture is the number one enemy of seed longevity. Even a small amount of ambient humidity trapped in a jar can cause the seeds to “respire” and lose energy over time.
Real-World Scenario: Saving a Family Heirloom
Imagine you have been gifted a single “Mortgage Lifter” tomato from a neighbor whose family has grown them for fifty years. You want to ensure that this specific strain continues in your own garden next year.
You wait until the tomato is perfectly ripe, feeling slightly soft to the touch. You squeeze the seeds into a jelly jar, add 100 ml of filtered water, and cover it with a coffee filter. You place the jar on top of the refrigerator, where the ambient heat from the appliance keeps the jar at a steady 78°F (25°C).
By the morning of day three, you see a fuzzy grey mat on the surface and the jar smells like vinegar and old fruit. You perform the “sink test,” rinsing the seeds four times until the water is crystal clear. You spread them on a ceramic plate, and six days later, you have 200 perfectly clean, white, fuzzy seeds. These seeds represent the history of that neighbor’s family and the future of your own garden.
Final Thoughts
Learning how to save tomato seeds using fermentation is a rite of passage for any gardener moving toward true self-reliance. It transforms a messy, “gross” task into a sophisticated biological process that guarantees better results than any shortcut. By understanding the role of the germination inhibitor, you stop fighting nature and start working with it.
The beauty of this method lies in its simplicity and its ancestral roots. Long before we had laboratory-grade disinfectants, farmers used the power of fermentation to ensure their next harvest was healthy and abundant. It is a practice that connects you to the cycle of the seasons in a way that buying a packet of seeds never can.
Start small this season. Choose one variety you truly love, and give the 3-day ferment a try. Once you see those clean, professional-quality seeds sitting in your palm, you will never go back to scrubbing them again. Experiment with different temperatures and drying surfaces, and soon you will have a seed bank that is the envy of the neighborhood.
