How To Become More Self-Sufficient Without Starting a Full-Blown Farm…
Want to start preserving your harvest, making your own soap, or building a backyard root cellar — but not sure where to begin? “Homesteading Advice” gives you instant lifetime access to 35+ practical homesteading books on food preservation, veggie gardening, DIY natural cleaning products (save over $250 per year with this skill alone), brewing, off-grid energy, and a whole lot more…
Click Here To Check It Out Now!
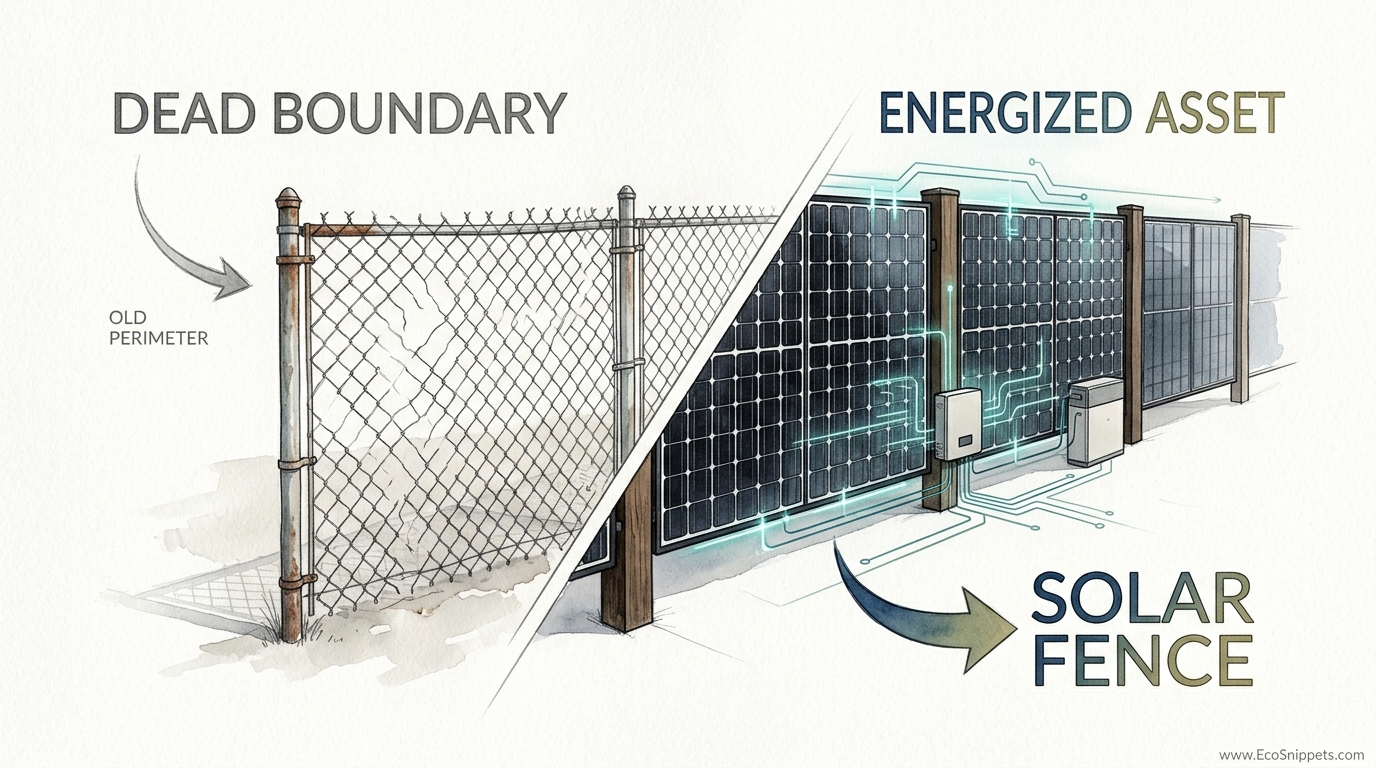
Your property line is a 100-foot-long power plant waiting to be activated. Why waste thousands on a fence that just sits there? Integrating vertical bifacial solar panels into your boundary design provides privacy, security, and a massive energy harvest. Vertical solar even sheds snow and catches low-angle winter sun better than your roof.
Traditional fences are a drain on your resources. They rot, they require painting, and they serve only one purpose. Transforming that boundary into an energized asset changes the math of home ownership. You shift from a consumer of power to a producer, using the very edge of your land to fuel your life.
This guide walks you through the transition from a dead boundary to a functional power station. We will cover the structural requirements, the electrical theory, and the specific physics of bifacial light capture. Whether you are protecting a suburban garden or a multi-acre homestead, the principles of vertical solar remain the same.
How To Build A DIY Solar Panel Fence
A solar panel fence is a vertical photovoltaic array designed to serve as a structural barrier while generating electricity. Unlike rooftop systems that sit at a fixed tilt, these fences stand upright, perpendicular to the ground. This orientation allows them to capture sunlight at low angles, making them exceptionally effective during the winter months and the edges of the day.
Most modern solar fences utilize bifacial modules. These panels have glass on both sides, allowing the internal cells to collect light from the front and the back. Light reflecting off the ground, known as the albedo effect, enters the rear of the panel. This secondary light source can increase total energy production by as much as 30% in high-reflectivity environments like snow or light-colored gravel.
Practical applications for these systems range from residential privacy screens to agricultural livestock containment. Farmers use them to divide pastures while powering well pumps or electric fencing energizers. In residential areas, they provide a sleek, high-tech aesthetic that performs best when oriented in an east-west direction, providing power peaks during breakfast and dinner hours.
The Mechanics of Vertical Light Capture
Understanding the physics of vertical solar is the first step toward a successful build. Traditional solar arrays aim for a single peak at high noon. Vertical fences, particularly those facing East and West, produce a “double-hump” daily yield curve. This matches the actual energy usage of most homes, providing power when you are waking up and when you return from work.
Bifaciality is the engine behind this performance. Standard monofacial panels have an opaque backsheet that blocks reflected light. Bifacial modules use a transparent back, capturing “diffuse” light scattered by the atmosphere and “reflected” light bouncing off the ground. This dual-sided harvesting makes the vertical orientation viable even though the sun is rarely perfectly perpendicular to the panel face.
Albedo plays a critical role in how much extra power you harvest. The color and texture of the ground around your fence determine the rear-side gain. Fresh snow has the highest albedo, reflecting up to 90% of incoming light. White gravel or specialized reflective membranes are also excellent choices for boosting year-round production.
How To Build A DIY Solar Panel Fence: Step-by-Step
Construction begins with a solid foundation. Because vertical panels act as massive sails, they face significant wind loads. You must sink your posts deep enough to resist the lateral force of a storm. A common rule of thumb is to place one-third of the post length underground, typically a minimum of 4 feet (1.2 meters) for a standard-height fence.
Layout planning is next. Select a path that minimizes shading from trees, buildings, or the neighbor’s property. Even a small shadow on one corner of a panel can significantly drop the output of an entire string. Use a site survey tool or a smartphone app to map the sun’s path across all four seasons.
Frame selection determines the longevity of the project. You can choose between treated wood 6×6 posts or galvanized steel conduit. While wood offers a traditional look, it is prone to twisting and shrinking. Steel provides a more stable platform for glass panels. If you use wood, ensure you leave adequate expansion gaps and use rubber gaskets to prevent the lumber from putting stress on the solar glass.
Mounting the panels requires specialized racking or DIY rails. High-strength aluminum rails (like Unistrut or dedicated solar racking) are bolted horizontally across your posts. Use mid-clamps and end-clamps to secure the panels to these rails. Ensure a minimum ground clearance of 18 inches (45 centimeters) to prevent mud splash and to allow light to reach the bottom edge of the rear cells.
Electrical Integration and Wiring
Wiring a long fence requires careful calculation of voltage drop. Resistance in the wires consumes power as it travels from the fence to your inverter. To combat this, wire your panels in series to increase the voltage. Higher voltage travels more efficiently over long distances than high amperage.
National Electrical Code (NEC) guidelines suggest keeping voltage drop under 2%. For a 100-foot (30-meter) run, you will likely need 10 AWG or 8 AWG copper wire. Always use solar-rated PV wire with XLPE insulation, as standard THHN wire will degrade under the UV exposure and temperature swings of an outdoor fence.
Microinverters are an excellent choice for fences with potential shading issues. These small units mount directly behind each panel, converting DC to AC on the spot. If one panel is shaded by a tree, the rest of the fence continues to produce at full capacity. For long, clear runs, a single high-voltage string inverter located near your main panel is often more cost-effective.
Benefits of a Vertical Solar Boundary
Space efficiency is the primary advantage. A roof has limited real estate, and ground mounts eat up valuable yard space. A fence uses the “dead space” of your property line. You get a secure boundary and a power plant in the same footprint.
Snow management is another major win. During winter storms, rooftop panels get covered and stop producing. Vertical panels shed snow immediately. Furthermore, the light reflecting off the white snow on the ground provides a massive boost to the rear side of the bifacial cells, often resulting in peak production on the coldest days of the year.
Thermal management keeps the panels efficient. Solar cells lose efficiency as they get hot. Roof-mounted panels often bake in the stagnant air above the shingles. Vertical fences enjoy constant airflow on both sides, keeping the cells significantly cooler and boosting their electrical output during the peak of summer.
Challenges and Common Pitfalls
Wind load is the most frequent point of failure for DIY solar fences. A 400-watt solar panel is roughly 20 square feet (1.8 square meters) of surface area. In a 70-mph (112-km/h) gust, that panel exerts hundreds of pounds of force on your posts. Failure to use deep concrete footings or heavy-duty racking will lead to a collapsed fence during the first major storm.
Shading from vegetation is often overlooked. Fast-growing hedges or weeds can quickly block the bottom of your panels. Since most panels are wired in series, a shadow on the bottom 5% of the glass can cut the power of the entire fence. Plan for a “weed-free” zone under the panels using gravel or landscaping fabric.
Lumber movement in wood-framed fences can shatter panels. Wet wood expands; dry wood shrinks. If you bolt a rigid glass panel directly to a green 4×4 post with no “float,” the moving wood will eventually twist the frame and crack the glass. Always use mounting hardware that allows for a small amount of independent movement between the post and the panel.
Limitations and Realistic Expectations
Orientation dictates your success. A solar fence facing North (in the Northern Hemisphere) will produce almost nothing. If your property line runs North-South, your fence will face East-West, which is ideal for “peak shaving” your morning and evening loads. If your property line runs East-West, your fence will face South, giving you a traditional midday peak but only on one side of the fence.
Total annual yield may be slightly lower than a perfectly tilted roof. While vertical panels excel in winter and at the edges of the day, they lose out on the high-angle sun of summer mid-days. You are trading maximum theoretical annual kilowatt-hours for a more useful daily power profile that matches your consumption.
Zoning and permitting can be a hurdle. Some municipalities classify a solar fence as an “accessory structure” rather than a simple fence. This might trigger stricter setback requirements, meaning you cannot place the fence exactly on the property line. Always check with your local building department before ordering thousands of dollars in glass.
Solar Fence vs. Traditional Alternatives
| Feature | Standard Wood Fence | Vertical Solar Fence | Traditional Ground Mount |
|---|---|---|---|
| Initial Cost | Low to Moderate | High | Moderate to High |
| Land Use | Dual (Boundary + Privacy) | Triple (Boundary + Power + Privacy) | Single (Power only) |
| Maintenance | Staining / Board Replacement | Cleaning / Electrical Checks | Mowing / Cleaning |
| Snow Performance | N/A | Excellent (Self-shedding) | Poor (Needs manual clearing) |
| Lifespan | 10–15 Years | 25–30 Years | 25–30 Years |
Practical Tips for Optimization
Enhance your albedo to squeeze more power from the back of the panels. If your fence is over grass, you will get a modest 5% gain. Replacing that grass with light-gray crusher run gravel or white decorative stones can push that gain toward 20%. The brighter the ground, the harder those bifacial cells work.
Use “Portrait” orientation for the panels. While mounting them “Landscape” (long side horizontal) might seem easier for a low fence, portrait orientation is better for shading tolerance. Most panels have bypass diodes divided along the long axis. If the bottom of a portrait panel is shaded by tall grass, the top two-thirds can often still produce power.
Protect the wiring from critters. Squirrels and rabbits love the taste of wire insulation. Run all your horizontal wire runs inside EMT (electrical metallic tubing) or PVC conduit. Ensure your junction boxes are weather-rated (NEMA 4X) and mounted high enough to stay out of the snowpack.
Advanced Considerations for Serious Builders
Structural damping is worth considering in high-wind plains. Vertical panels can vibrate or “flutter” in constant wind, which stresses the internal silicon cells over time. Adding a diagonal brace to every third post can significantly stiffen the entire line and prevent harmonic vibrations that lead to micro-cracking in the cells.
Micro-grid integration allows the fence to act as an emergency backup. If you use a hybrid inverter with a battery bank, your fence becomes a lifeline during a grid failure. Because the fence is easier to access and clean than a roof, it is often the most reliable power source you have during an extreme weather event that might damage or cover your rooftop array.
Consider the “Grip” of your fasteners. Standard wood screws are not sufficient for holding solar racking to posts. Use 3/8-inch (10-millimeter) galvanized lag bolts or through-bolts with large washers. The connection between the racking and the post is the most common failure point; over-engineer this joint to ensure the fence stays standing for its 30-year expected life.
A Practical Scenario: The Suburban Backyard
Imagine a homeowner with a 50-foot (15-meter) section of South-facing property line. A standard cedar fence would cost approximately $1,500 and provide only privacy. Instead, the owner installs ten 400-watt bifacial panels vertically.
The system cost, including posts, racking, and a microinverter for each panel, totals roughly $6,000 before tax credits. In the United States, a 30% federal tax credit drops the net cost to $4,200. This 4-kilowatt fence produces roughly 4,500 kilowatt-hours per year in a sunny climate. At an electricity rate of $0.15 per kWh, the fence generates $675 in value every year.
Within six to seven years, the “energy upgrade” has paid for itself. For the remaining 20 years of the panels’ warranted life, the fence provides free electricity and privacy. The traditional wooden fence, by contrast, would likely need its first major repairs or replacement in that same timeframe, offering zero return on investment.
Final Thoughts
Building a solar panel fence is an act of modern self-reliance. It turns an expensive necessity—a property boundary—into a productive tool that pays for its own existence. By understanding the wind loads and the physics of bifacial light, you can build a structure that outlasts any wooden alternative.
The double-peak generation of an East-West vertical array matches the rhythm of a working home. It provides the power for your morning coffee and your evening lights, reducing your reliance on a fragile and expensive grid. As energy prices continue to fluctuate, owning the means of production on your own property line provides a level of security that a standard fence never could.
Take the time to plan your footings and your wiring. Invest in quality bifacial modules and robust metal racking. Once the sun hits those vertical glass walls for the first time, you will realize that your property line is no longer just a limit—it is a source of limitless potential.
