How To Become More Self-Sufficient Without Starting a Full-Blown Farm…
Want to start preserving your harvest, making your own soap, or building a backyard root cellar — but not sure where to begin? “Homesteading Advice” gives you instant lifetime access to 35+ practical homesteading books on food preservation, veggie gardening, DIY natural cleaning products (save over $250 per year with this skill alone), brewing, off-grid energy, and a whole lot more…
Click Here To Check It Out Now!
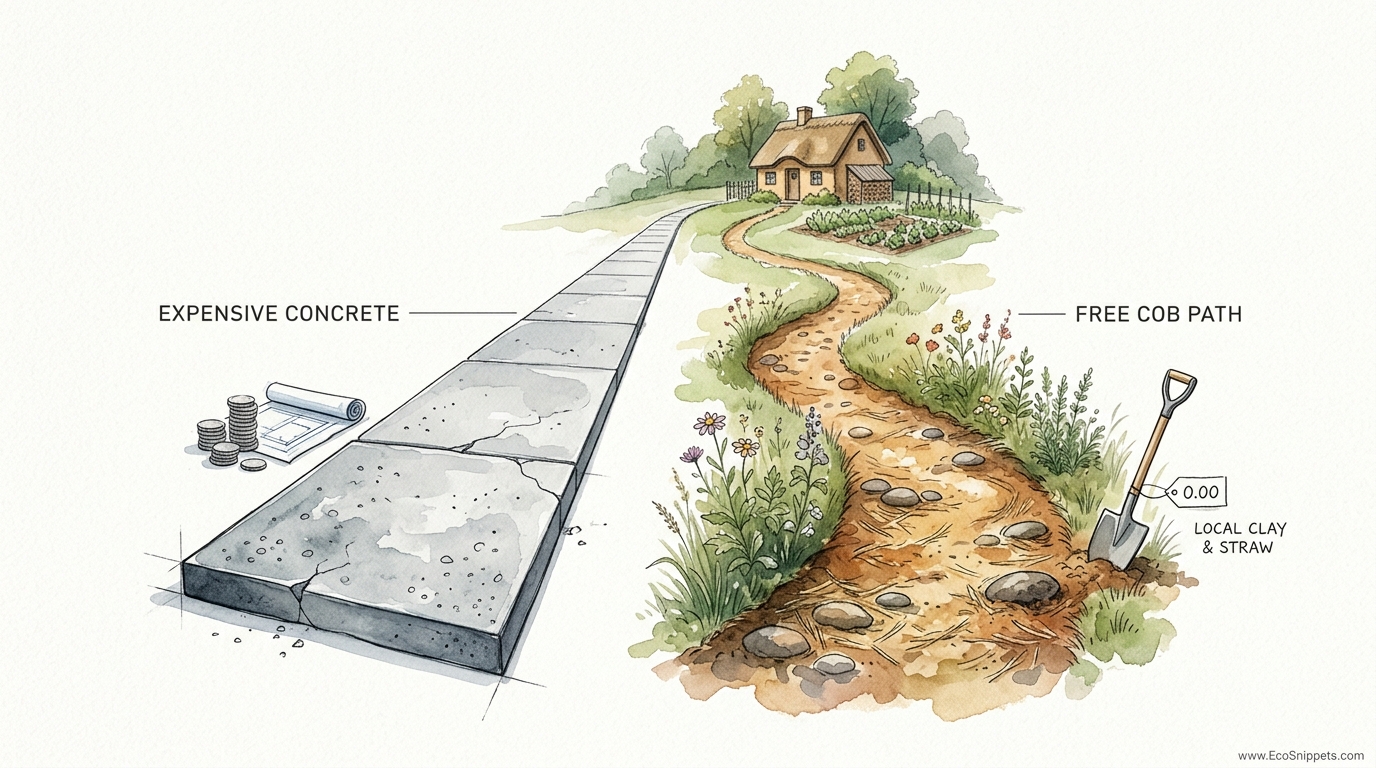
Why spend a month’s mortgage on concrete when the ground beneath your feet is trying to be your path? Stop funding the concrete industry. By mixing the subsoil from your pond dig with straw and sand, you can create ‘earth-stone’ paths that last a lifetime and cost nothing.
Most modern homeowners think of “dirt” as something to be paved over or carted away. They see the earth as an obstacle to progress, a muddy mess that requires a fleet of cement trucks and a massive bank loan to “fix.” This mindset has fueled a massive industry that produces one of the most carbon-intensive materials on the planet. Concrete production accounts for nearly 8% of global CO2 emissions, yet we continue to use it for simple garden paths that could be built with the very ground they sit upon.
Working with cob—a traditional mixture of clay-rich subsoil, sand, and straw—allows you to reclaim the ancestral wisdom of the “earth-stone.” People have built multi-story homes out of these materials for thousands of years, and many of those structures still stand today in the rain-swept hills of Devon, England, and the arid plains of the Middle East. If cob can support a roof and a family for five centuries, it can certainly handle the foot traffic of your morning garden stroll.
Creating a cob path is not just about saving money. It is a meditative process that connects you to the geology of your specific piece of land. Every region has a unique soil profile, meaning every path will have its own color, texture, and character. This article serves as a comprehensive guide for the modern homesteader who wants to stop fighting the earth and start building with it.
DIY Cob Garden Paths For Homesteads
Cob is an ancient building material composed of three primary ingredients: a binder (clay), an aggregate (sand), and a fiber (straw). Water acts as the catalyst that turns these raw elements into a workable, plastic mud that dries into a rock-hard surface. Unlike adobe, which is formed into bricks and dried in the sun before construction, cob is applied in its wet state and sculpted directly onto the landscape.
Garden paths made of cob offer a level of artistic freedom that rigid concrete cannot match. You can curve them around ancient tree roots, sculpt them into gentle hills, or inlay them with smooth river stones to create intricate mosaics. The “earth-stone” result is a surface that feels softer underfoot than concrete but remains durable enough to withstand the elements for decades when properly managed.
In the context of a homestead, cob is the ultimate “free” material. When you dig a pond, a cellar, or a post hole, you are excavating the raw materials for your infrastructure. Instead of paying to have this subsoil hauled away, you can use it to create a network of weather-resistant walkways that link your garden, orchard, and outbuildings. This cycle of self-reliance is the core of the pioneer spirit.
How It Works: The Science and the System
Success with cob begins with understanding the soil beneath your feet. You are not looking for the dark, crumbly topsoil where your vegetables grow. That material is full of organic matter that will rot and create air pockets. Instead, you must dig deeper into the subsoil, where the minerals and clays reside.
The Soil Jar Test
To determine if your subsoil is suitable, you need to conduct a simple jar test. Fill a straight-sided glass jar halfway with a sample of your subsoil. Add water until the jar is nearly full, along with a pinch of salt to help the particles settle. Shake the jar vigorously for several minutes until all clumps are broken apart, then set it on a level surface.
The contents will settle in layers based on particle size. Coarse sand and pebbles will fall to the bottom within seconds. Silt will settle over the next hour. The clay, being the smallest and lightest particle, may take several days to fully settle out, leaving the water clear. An ideal “ready-mix” subsoil for cob contains roughly 15% to 25% clay and 75% to 85% sand and aggregate. If your soil has too much clay, it will crack as it dries; if it has too much sand, it will crumble.
The Ribbon and Ring Tests
Field tests provide immediate feedback without the wait. Take a handful of damp subsoil and squeeze it into a ball. If it crumbles, it is too sandy. If it stays together, try to roll it into a “snake” or “ribbon” between your palms. A soil with high clay content will allow you to create a thin ribbon that hangs over your finger without breaking. You can also try the “ring test” by bending that soil snake into a circle; the fewer cracks that appear, the higher the clay content.
The Mixing Process: The Tarp Dance
Mixing large quantities of cob is traditionally done with the feet. Lay out a heavy-duty tarp and dump your measured piles of sand and clay-rich subsoil in the center. Start by mixing the dry materials together, then add water sparingly. Avoid making a soup; you want a stiff, workable dough. Use the tarp to roll the mixture over itself, then step onto the pile with your heels, “dancing” the clay into the sand. Once the mixture is homogenous, sprinkle in long-strand straw. The straw acts as the “rebar” of the cob, providing tensile strength that prevents the path from cracking during the drying process.
Benefits of Choosing Earth-Stone Over Concrete
Choosing cob over industrial materials provides immediate and long-term advantages. The most obvious is the financial saving. A standard 50-foot (15-meter) garden path made of poured concrete can cost thousands of dollars in materials and labor. A cob path costs nothing but your time and a few bales of straw. On a homestead where every dollar counts, this is a significant victory for self-reliance.
Environmental benefits are equally compelling. Concrete production is a leading source of industrial pollution. Cob, conversely, has a negative carbon footprint when straw is included, as the straw sequestered carbon during its growth. Using onsite materials also eliminates the fuel consumption associated with transporting heavy stone and cement. When the path eventually reaches the end of its life—perhaps centuries from now—it simply dissolves back into the earth without leaving behind toxic debris or rubble.
Cob also offers superior thermal properties. In a garden setting, these paths act as “thermal mass,” absorbing heat from the sun during the day and radiating it back at night. This can create a microclimate that protects nearby sensitive plants from light frosts. Furthermore, the breathable nature of earth-stone allows moisture to move through the material, which can prevent the “heaving” often seen when rigid concrete slabs crack due to underlying soil expansion.
Challenges and Common Mistakes
Water is both the creator and the destroyer of cob. The primary challenge with any earthen structure is moisture management. A common mistake is building a cob path in a low-lying area where water pools. Standing water will eventually saturate the clay binder, causing it to return to mud. You must ensure that the path is slightly crowned (higher in the middle) to shed water to the sides.
Cracking is another frequent hurdle for beginners. Cracks usually happen for two reasons: the mix was too wet or there was too much clay. As water evaporates, the clay shrinks. If the sand-to-clay ratio is incorrect, the shrinking will pull the material apart. You can avoid this by making small test bricks and letting them dry in the sun before committing to the full path. If the test brick cracks, add more sand to your next batch.
Labor intensity is a reality of natural building. You cannot simply pull a lever on a truck and watch the path appear. Mixing and laying cob is physically demanding work. Many homesteaders overcome this by turning the “tarp dance” into a social event, inviting friends or neighbors to help stomp the mud in exchange for a shared meal. Working in small sections over several weeks is also a sustainable strategy for the solo builder.
Limitations and Environmental Constraints
Cob paths are not a universal solution for every landscape. Regions that experience extreme, prolonged rainfall without a dry season may find that cob requires excessive maintenance. While cob is surprisingly durable, it performs best when it has a chance to dry out between rain events. In tropical rainforest environments, a stone-paved path with cob mortar might be more appropriate than a pure cob surface.
Heavy machinery traffic is another limitation. A cob path is designed for human feet, wheelbarrows, and perhaps the occasional small tractor. It does not have the compressive strength of reinforced concrete and will eventually rut or crack under the weight of a full-sized truck. If you need a driveway, consider rammed earth or stabilized gravel instead.
Frost heave can affect any outdoor structure, and cob is no exception. In regions where the ground freezes deep (the “frost line”), a cob path laid directly on topsoil will move and crack as the ground expands. This is why a proper drainage base is mandatory. Without a foundation of crushed stone or rubble, the moisture trapped beneath the cob will turn to ice and shatter the path from below.
Comparing Earthen Paths to Conventional Alternatives
Understanding the trade-offs between materials helps in making the right choice for your homestead. The following table compares cob to the most common alternatives.
| Feature | Cob (Earth-Stone) | Poured Concrete | Gravel / Crushed Stone |
|---|---|---|---|
| Material Cost | Near Zero | High | Moderate |
| Carbon Footprint | Negative to Neutral | Very High | Low |
| Skill Level | Low (Beginner Friendly) | High (Requires Speed) | Low |
| Durability | High (if dry) | Extreme | Moderate (shifts) |
| Repairability | Very Easy | Difficult / Ugly | Easy |
| Aesthetics | Natural / Artistic | Industrial / Cold | Rustic / Loose |
Practical Tips and Best Practices
Building a path that lasts requires attention to the “bones” of the structure. Always start by excavating a trench at least 6 to 8 inches (15 to 20 cm) deep. Fill the bottom 4 inches (10 cm) with coarse gravel or crushed stone. This layer provides a “capillary break” that prevents moisture from the soil below from wicking up into your cob. This foundation is essentially the “boots” of your path.
Finishing the surface is where you can add extra durability. Once the cob has dried to a “leather-hard” state, you can burnish it with a smooth stone to compress the surface and close up the pores. For added water resistance, apply several coats of boiled linseed oil mixed with a little beeswax. This creates a natural, breathable sealant that hardens over time, making the surface nearly as impermeable as stone.
Incorporate local stones into the design for both beauty and function. Placing flat stepping stones into the wet cob provides a harder wearing surface for heavy-traffic areas. These stones take the brunt of the foot impact, while the cob acts as a beautiful, sculpted mortar that holds them in place. This “earth-stone mosaic” approach is often the most durable option for outdoor natural building.
Advanced Considerations for Serious Practitioners
Serious builders may want to explore “stabilized cob” for areas with high moisture or heavier loads. Adding a small amount of hydrated lime (not agricultural lime) to the mix—roughly 5% to 10%—creates a chemical bond that makes the cob significantly more water-resistant and harder. Lime stabilization was a common practice in ancient Roman and Chinese construction and remains a powerful tool for the modern homesteader.
Drainage can also be taken to the next level with the inclusion of “French drains” alongside the path. If your land has a significant slope, install a perforated pipe within your gravel base to carry water away from the path foundation. This ensures that the gravel layer never becomes saturated, protecting the cob from frost damage in the winter.
Think about the seasonal timing of your build. Earthen construction is a summer activity. You need warm, dry weather to ensure the path dries thoroughly. Building cob in the late autumn is a recipe for disaster, as the moisture trapped in the wet mud can freeze before the material has hardened, shattering the internal structure. Aim to have your path finished and sealed at least a month before the first hard frost.
Example Scenario: The Kitchen Garden Walkway
Imagine a homestead in a temperate climate with heavy clay soil. The owner wants a 20-foot (6-meter) path from the back porch to the chicken coop. The first step is marking the path with a garden hose to create a natural, flowing curve. The owner then excavates 6 inches of soil, setting the topsoil aside for the garden and the clay-rich subsoil aside for the path mix.
After laying 4 inches of crushed limestone for drainage, the owner mixes the subsoil with sharp sand at a 1:2 ratio. They add a generous amount of wheat straw, “dancing” the mixture on a tarp until it forms a stiff roll. They apply the cob in 3-inch (7.5 cm) thick sections, tamping it down firmly with a wooden mallet. To finish, they press several large, flat pieces of slate into the center of the path where they know they will be walking most frequently.
After two weeks of sunny weather, the cob has turned from dark chocolate brown to a light tan. The owner brushes on a mixture of warm linseed oil and citrus solvent. The result is a rock-hard, slightly glossy path that sheds rain like a duck’s back. The total cost was $40 for the gravel and $15 for the oil. The subsoil, sand (found in a nearby creek), and straw were all free.
Final Thoughts
The transition from a consumer of industrial materials to a creator of natural ones is a profound step in the journey of self-reliance. Building a cob path is more than a weekend project; it is an act of defiance against a culture that says you must buy your infrastructure from a store. By using the very soil you stand on, you are creating a legacy of sustainability that respects the planet and your bank account.
Take the time to experiment with small batches. Learn the feel of your clay, the grit of your sand, and the strength of your straw. There is a deep, ancestral satisfaction in walking on a path that you grew from the earth and sculpted with your own feet. Once you master the earth-stone, the rest of the homestead—from benches to outdoor ovens—becomes a canvas for your creativity.
Encourage others to join you. Natural building is a communal art that thrives on shared labor and shared knowledge. As you walk your new path, you are not just traversing your garden; you are following in the footsteps of the builders who came before us, proving that the most sophisticated solutions are often the ones buried right under our feet.
