How To Become More Self-Sufficient Without Starting a Full-Blown Farm…
Want to start preserving your harvest, making your own soap, or building a backyard root cellar — but not sure where to begin? “Homesteading Advice” gives you instant lifetime access to 35+ practical homesteading books on food preservation, veggie gardening, DIY natural cleaning products (save over $250 per year with this skill alone), brewing, off-grid energy, and a whole lot more…
Click Here To Check It Out Now!
If your backyard cooker only does one thing, it’s wasting your fuel. In a resilient backyard, every BTU of heat must work twice. A cob oven doesn’t just bake bread—it’s a thermal battery that protects your early seedlings from frost.
When you fire up a traditional masonry oven, you aren’t just making dinner; you are charging a biological battery. While a standard metal barbecue radiates its heat into the atmosphere within minutes of the flame dying out, a cob oven stores that energy in its dense earthen walls for hours, or even days. This stored energy, known as thermal mass, creates a microclimate that can be the difference between life and death for your spring starts.
Building a cob oven is an exercise in ancestral wisdom. It is a return to a time when our ancestors utilized the very ground beneath their feet to create structures that were both functional and enduring. By combining clay, sand, and straw in specific ratios, you create a stone-like material that manages heat with incredible efficiency. This guide will walk you through the process of building your own, from the first bucket of mud to the first loaf of wood-fired sourdough.
DIY Backyard Cob Oven For Thermal Mass
A cob oven is a wood-fired masonry oven built primarily from “cob”—an ancient building material consisting of clay, sand, and straw. Unlike modern ovens that rely on a constant source of gas or electricity to maintain temperature, a cob oven uses the principle of retained heat. You build a fire inside the chamber to “charge” the thermal mass of the walls, then scrape the embers out and use the radiating heat to bake.
In a real-world setting, these ovens serve as the heart of a productive homestead. Because cob is so dense—with a heat capacity significantly higher than lighter materials like straw or wood—it acts as a thermal buffer. Research indicates that cob has a thermal mass value of approximately 1,900 kJ/m³K, whereas straw bale insulation sits at only about 250 kJ/m³K. This means the oven can absorb a massive amount of energy and release it slowly over a long duration.
Visualize your oven as a sponge for heat. During the firing process, the heat from the wood flames doesn’t just warm the air; it “soaks” into the 3-inch (7.6 cm) to 4-inch (10 cm) thick clay walls. Once the fire is gone, that heat begins to move back toward the center of the oven and outward toward the atmosphere. If you’ve placed your oven near a greenhouse or a protected garden bed, that outward radiation creates a warm pocket of air, or a microclimate, that can raise local temperatures by 3–5°F (1.6–2.7°C) during a frost event.
How It Works: Step-by-Step Construction
Building an oven requires a logical progression of layers, often referred to as the “boots, belly, and hat” approach. You must protect the mud from moisture below and above while ensuring the core remains dense enough to hold heat.
1. The Foundation and Plinth (The Boots)
Because cob is effectively raw earth, it will dissolve if it sits in standing water. You must build a solid, raised foundation or “plinth.” This is typically constructed from reclaimed bricks, local stone, or even recycled concrete chunks. Aim for a height that is comfortable for you to work—usually around waist height or 36 inches (91 cm). Ensure the foundation is level and has a solid layer of gravel at the base to prevent “rising damp” from the soil from wicking into your oven.
2. The Insulation Layer
Before laying your hearth, you need a layer of insulation to prevent the heat from escaping into the foundation. A common and effective method is to create a “bottle bed.” Lay empty glass bottles on their sides on top of a thin layer of sand. Fill the gaps between the bottles with a mixture of clay slip and perlite or vermiculite. The air trapped inside the bottles and the perlite acts as a thermal break, ensuring the heat stays in the oven floor where it belongs.
3. The Hearth (The Cooking Surface)
The floor of your oven must be smooth and durable. High-duty firebricks are the standard choice here because they can withstand the “thermal shock” of being heated and cooled repeatedly without cracking. Lay them tightly together on a thin bed of fine sand. Do not use mortar; a tight, dry-fit layout allows the bricks to expand and contract freely. Aim for a circular or oval cooking surface about 22 to 27 inches (56 to 68 cm) in diameter.
4. The Sand Dome (The Form)
To create the interior void of the oven, you must build a “sand castle.” Use moist sand to build a dome the exact size and shape of the interior chamber. Cover this sand dome with wet newspaper or a thin layer of damp cloth. This prevents the cob from sticking to the sand and makes it easier to remove the sand once the oven is dry.
5. The Thermal Layer (The Belly)
This is the most critical layer for heat retention. The mix is typically 1 part clay to 2 parts sharp sand, though this varies based on the quality of your local soil. You want a mix that is sticky but doesn’t crack when it dries. The “cob dance” is the traditional way to mix: spread the sand and clay on a tarp and stomp it with your bare feet until it is homogenous. Apply this mix over the sand dome in 3-inch (7.6 cm) to 4-inch (10 cm) increments, tamping it down firmly to eliminate air pockets.
6. The Door and Venting
One of the most important rules of cob oven physics is the door-to-dome ratio. For the oven to “draw” air properly and exhaust smoke without losing too much heat, the height of the door opening should be exactly 63% of the height of the interior dome. For example, if your dome is 16 inches (40.6 cm) high, your door should be 10 inches (25.4 cm) high. Cut the door out while the cob is still “leather hard” but before it fully dries.
Benefits of a Thermal Mass Oven
The advantages of choosing cob over a modern metal unit are measurable and practical. These benefits extend beyond the kitchen and into the very resilience of your backyard ecosystem.
- Radiant Heat Quality: Unlike the convection heat of a standard grill, cob ovens provide far-infrared radiant heat. This cooks food from the inside out, retaining approximately 15% more moisture in meats and creating the “oven spring” necessary for professional-grade crusty bread.
- Extreme Fuel Efficiency: A well-insulated cob oven can bake dozens of loaves of bread on a single firing. Historic accounts mention communal ovens baking over 600 pounds (272 kg) of dough with only 130 pounds (59 kg) of wood.
- Microclimate Creation: The thermal mass of the oven stays warm for up to 24 hours. By placing the oven on the north side of a garden bed, the south-facing wall of the oven acts as a “heat sink,” radiating warmth to sensitive plants during cold spring nights.
- Low Cost: If you have access to clay-rich subsoil and local sand, the primary cost is your labor. Reclaimed materials like glass bottles and stone keep the budget significantly lower than a $3,000 pre-fabricated masonry kit.
Challenges and Common Mistakes
While cob is a forgiving material, there are specific pitfalls that can lead to structural failure or poor performance.
The “Too Much Water” Trap: Beginners often add too much water to the cob mix because it makes it easier to handle. However, as the water evaporates, the cob will shrink. If the mix is too wet, it will develop deep “shrinkage cracks” that compromise the oven’s integrity. Always use the minimum amount of water necessary to get the clay and sand to bond.
The Wrong Sand: You must use “sharp” or “angular” sand, such as builder’s sand or concrete sand. Beach sand is rounded by the waves and doesn’t “lock” together with the clay, leading to a weak structure that may crumble under heat stress.
Rushing the Drying Process: Patience is mandatory. If you light a large fire in a wet oven, the steam trapped inside the cob will expand and cause the walls to explode or delaminate. You must allow the oven to air-dry for several weeks, then start with very small “curing fires” to slowly drive out the remaining moisture.
Limitations and Environmental Constraints
A cob oven is not a “set it and forget it” tool. It requires a specific environment and ongoing maintenance to remain functional over the years.
In extremely wet or humid climates, cob requires a “raincoat.” Without a roof or a lime plaster finish, the driving rain will slowly erode the clay. This is the “hat” of the “boots and hat” philosophy. If you live in an area with high precipitation, a simple timber-frame roof over the oven is not optional; it is a requirement for survival.
Additionally, cob ovens are not ideal for “quick” meals. It takes roughly two to three hours to properly charge the thermal mass of a medium-sized oven. If you only want to grill a single steak, the energy and time required to fire the cob oven make it an inefficient choice compared to a small rocket stove or a simple charcoal grate.
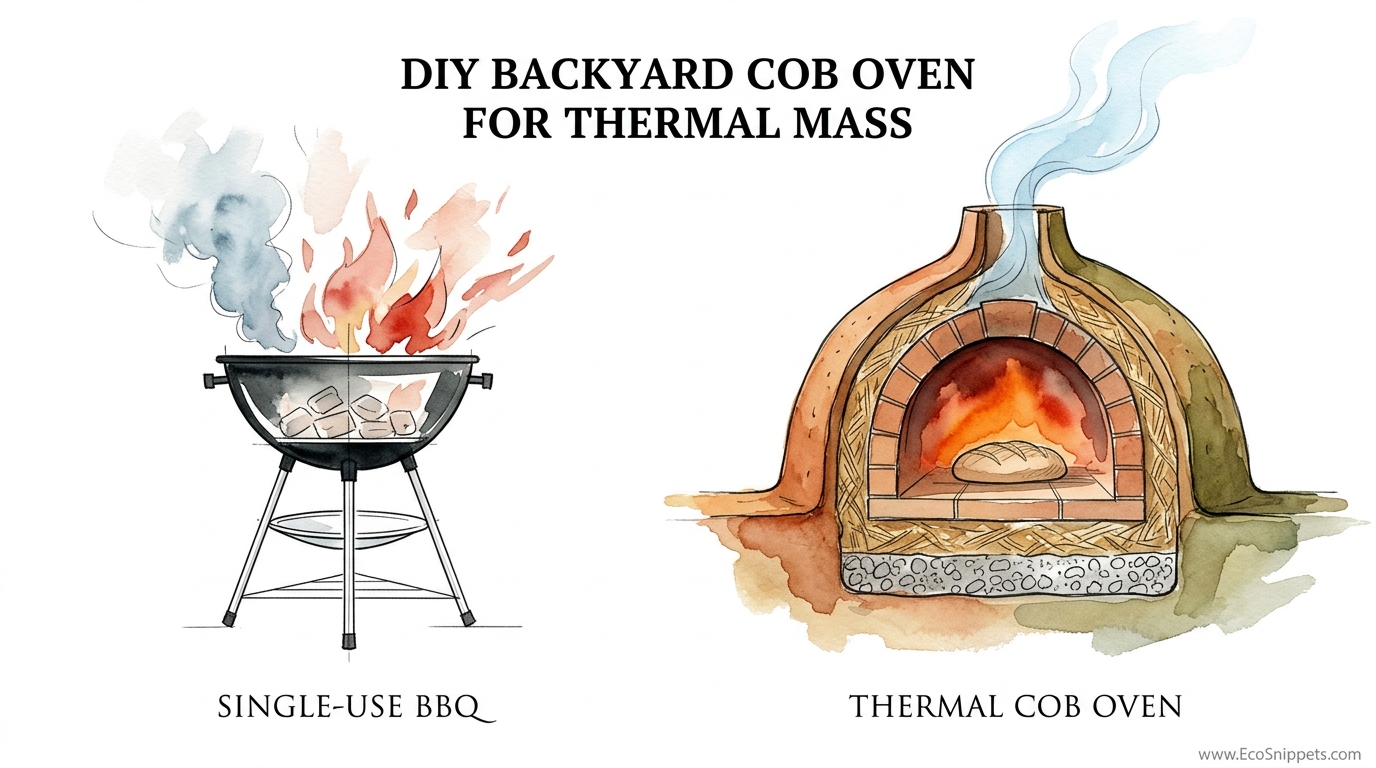
Comparison: Single-Use BBQ vs. Thermal Cob Oven
The following table illustrates the measurable differences between a standard metal BBQ and a high-mass cob oven.
| Feature | Single-Use BBQ (Metal) | Thermal Cob Oven |
|---|---|---|
| Heat Retention | Low (Cool down in 20-30 mins) | High (Warm for 12-24 hours) |
| Fuel Type | Propane or Charcoal | Dry Wood / Brush / Scrap lumber |
| Cooking Style | Direct Convection / Grilling | Radiant / Conductive / Convected |
| Durability | Rusts / 5-10 year lifespan | Indefinite with proper roof |
| Secondary Use | None | Thermal battery for garden / seedlings |
| Materials Cost | $200 – $1,500 | $50 – $300 (Mostly DIY) |
Practical Tips and Best Practices
To ensure your oven stands the test of time, follow these optimization techniques during your build.
- The Soil Ribbon Test: To see if your backyard soil has enough clay, take a handful of damp soil and roll it into a “snake” or ribbon. If you can hang the ribbon over your finger and it reaches 2 inches (5 cm) before breaking, you have a high clay content suitable for cob.
- Straw for Strength: Only use straw in the outer insulation layer, not the inner thermal layer. Straw in the inner layer will eventually burn out, leaving voids that reduce the thermal mass. In the outer layer, however, the straw provides the structural “tensile strength” that prevents the oven from cracking.
- Lime Plaster Finishing: For a waterproof finish that still “breathes,” use a lime plaster (a mix of hydraulic lime and sand). Unlike cement, lime allows moisture vapor to escape the cob walls, preventing the “rot” that occurs when water gets trapped inside the earthen mass.
Advanced Considerations: The Integrated Greenhouse
For those looking to maximize the “BTU per buck” philosophy, consider integrating your cob oven into a north-wall greenhouse design. By building the oven so that its rear wall resides inside a greenhouse, you create a massive radiator that charges during your Sunday bake and keeps the greenhouse warm throughout a freezing Sunday night.
Advanced practitioners also experiment with “Rocket Oven” hybrids. This involves using a rocket stove combustion chamber to heat the cob mass. This design allows for a much cleaner burn with almost zero smoke, making it a viable option for urban backyards where smoke might bother neighbors. It also reaches cooking temperatures much faster while still maintaining the massive thermal storage capacity of traditional cob.
The “Full Cycle” Scenario
To truly understand why thermal mass matters, look at a typical day with a fully charged cob oven:
10:00 AM: You light a fire. The flames lick the dome, and the carbon (soot) begins to burn off the ceiling, indicating the oven has reached 800°F (427°C).
1:00 PM: You clear the embers. The first pizzas go in, cooking in 90 seconds due to the intense radiant heat.
3:00 PM: The temperature has dropped to 500°F (260°C). You slide in three loaves of sourdough. The high thermal mass ensures the temperature doesn’t drop when the cold dough hits the bricks.
5:00 PM: The oven is at 350°F (177°C). You slide in a cast-iron pot with a slow-roasting chicken and root vegetables.
9:00 PM: The oven is still at 200°F (93°C). You put in a tray of sliced apples to dehydrate overnight.
6:00 AM (Next Day): The oven exterior is still radiating 80°F (27°C). You move your tray of sensitive tomato seedlings next to the oven wall, protecting them from the morning frost.
Final Thoughts
Building a cob oven is more than a weekend project; it is an investment in the resilience of your home. It teaches you to read the soil, understand the physics of fire, and respect the slow release of energy. In an age of disposable appliances, a cob oven stands as a monument to durability and multi-functional design.
By moving away from single-use tools and toward high-mass systems, you reclaim the ability to turn local, raw materials into a centerpiece of productivity. Whether you are seeking the perfect pizza crust or a way to stretch your growing season by two weeks, the answer lies in the mud. Start with a small test dome, get your feet in the clay, and discover the power of the thermal battery in your own backyard.
