
How To Become More Self-Sufficient Without Starting a Full-Blown Farm…
Want to start preserving your harvest, making your own soap, or building a backyard root cellar — but not sure where to begin? “Homesteading Advice” gives you instant lifetime access to 35+ practical homesteading books on food preservation, veggie gardening, DIY natural cleaning products (save over $250 per year with this skill alone), brewing, off-grid energy, and a whole lot more…
Click Here To Check It Out Now!
Your backyard is hiding a rainbow of permanent colors that won’t irritate your skin or the planet. Why buy synthetic chemicals in plastic bottles when the forest floor is giving away high-quality pigments for free? Discover the ancient craft of foraged dyes and give your homestead textiles a soul.
Foraging for color is more than a hobby; it is a way to reconnect with the land under your boots. Every season offers a different palette if you know where to look. From the deep ambers of autumn walnuts to the bright yellows of spring dandelions, the earth provides everything needed to transform plain cloth into something heirloom-quality.
Modern life has disconnected us from the sources of our belongings. Most store-bought clothes are saturated with petrochemical dyes that require heavy metals and vast amounts of water to produce. Choosing to forage your own color is a quiet act of rebellion against a throwaway culture. It teaches patience, observation, and a deep respect for the botanical world.
You do not need a laboratory or expensive equipment to get started. A simple stainless steel pot, some clean water, and a handful of local plants are the only entry requirements. This guide will take you through the gritty details of extracting lasting color from the wild, ensuring your hand-dyed pieces stand the test of time and sunlight.
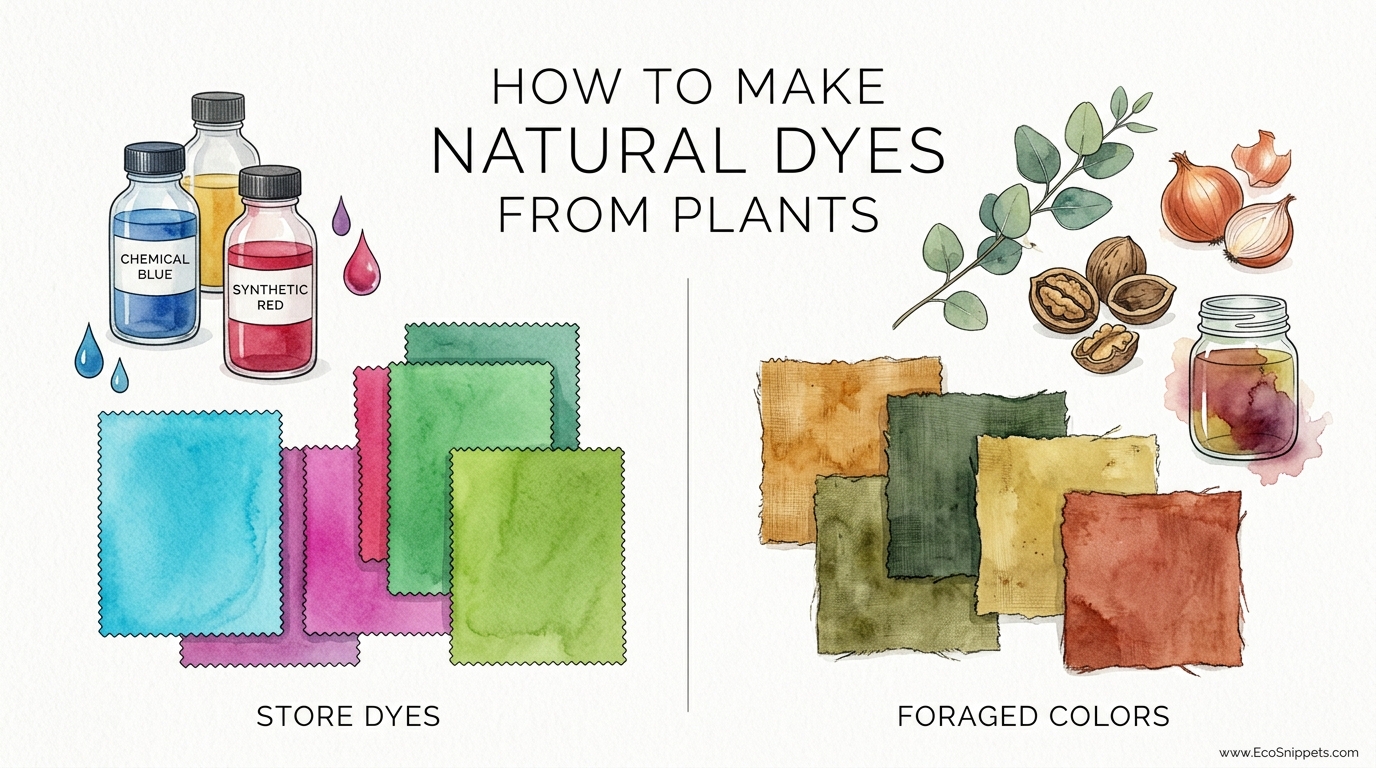
How To Make Natural Dyes From Plants
Natural dyeing is the process of extracting pigments from organic materials—such as leaves, roots, bark, and flowers—and fixing them onto natural fibers. It is an ancient technology that predates the industrial revolution. Long before synthetic “mauveine” was discovered in a coal tar experiment in 1856, every piece of colored clothing on the planet came from the earth or the sea.
At its core, this craft is about chemistry and timing. Plants contain various compounds like tannins, flavonoids, and anthocyanins. Some of these stick to fabric easily on their own, while others need a “handshake” molecule, known as a mordant, to stay put. Understanding which plants provide “fast” color (permanent) versus “fugitive” color (temporary) is the first step toward mastery.
In the real world, natural dyes are used by small-scale textile artists, homesteaders, and sustainable fashion brands looking to reduce their toxic footprint. Unlike the flat, uniform colors of commercial dyes, foraged pigments have a “living” quality. They possess a depth and slight variegation that mimics the natural world, often shifting in tone depending on the light or the pH of the water used in the pot.
The History of the Dye Pot
Ancestral wisdom dictates that certain plants were once worth their weight in gold. Indigo for blue, madder for red, and weld for yellow formed the primary triad of the traditional dyer’s garden. Today, we can find these same hues in common “weeds” like goldenrod, or in the cast-off hulls of black walnuts that litter suburban driveways every autumn.
The Step-by-Step Process of Harvesting Color
Successfully dyeing a piece of fabric is a three-part journey: preparation, extraction, and immersion. Skipping the preparation is the most common reason for failure. You cannot simply throw a dirty t-shirt into a pot of boiled weeds and expect it to look professional. The fibers must be “scoured” and “mordanted” first.
Step 1: Scouring the Fiber
Scouring is a deep-cleaning process that removes oils, waxes, and industrial “sizing” from the fabric. Even if a garment looks clean, it often has residues that will block the dye from penetrating the fibers. For protein fibers like wool or silk, use a gentle pH-neutral detergent and warm water around 60°C (140°F). Do not agitate wool too much, or you will end up with a felted mess.
For cellulose fibers like cotton, linen, or hemp, you need a more aggressive approach. Simmer the fabric for two hours in a pot with soda ash (sodium carbonate) and a drop of detergent. Use roughly 2 teaspoons of soda ash per 200 grams (approx. 7 oz) of dry fabric. You will likely see the water turn a murky brown; this is the gunk you just saved your dye job from.
Step 2: Choosing and Using a Mordant
The word “mordant” comes from the Latin mordere, meaning “to bite.” A mordant is a mineral salt that binds to the fiber and then catches the dye molecule, locking it in place. Without it, most plant colors will wash out or fade to a dull grey within weeks. The most common and safest mordant is Alum (Potassium Aluminum Sulfate).
To mordant with Alum, weigh your dry fabric. This is your “Weight of Fiber” (WOF). Use 15% of that weight in Alum. Dissolve the Alum in hot water, add it to a large pot, and submerge your wet, scoured fabric. Heat the pot to just under a simmer—about 85°C to 90°C (185°F to 195°F)—for one hour. Let the fabric cool in the pot overnight for the best results.
Step 3: Extracting the Pigment
While your fabric is soaking, prepare your dye bath. Chop your plant material into small pieces to increase the surface area. A good rule of thumb is to use a 1:1 ratio—100 grams of plant material for every 100 grams of fabric. If you are using dried roots or barks, soak them overnight first.
Place the plants in a pot, cover with water, and simmer for about an hour. Do not let the water reach a rolling boil, as high heat can “brown” or dull sensitive pigments like those found in flowers. Strain out the plant material using a fine sieve or cheesecloth. The liquid remaining in the pot is your “dye liquor.”
Step 4: The Dye Bath
Add your wet, mordanted fabric to the dye liquor. Make sure there is enough water for the fabric to move freely; overcrowding is the number one cause of blotchy, uneven color. Heat the pot slowly back up to a simmer and hold it there for 45 to 60 minutes. Stir gently but frequently to ensure the dye reaches every fold of the cloth.
The Benefits of Using Foraged Plant Dyes
The most immediate benefit is the elimination of “hidden” toxins. Synthetic dyes often contain aromatic amines, lead, and mercury, which can linger in the fabric and eventually leach into your skin or the water table when washed. Foraged dyes are biodegradable and, when handled correctly, pose no threat to the environment.
There is also the matter of aesthetic “harmony.” Because natural dyes are made of complex mixtures of many different pigments, they almost always look good together. You can mix a goldenrod yellow with a walnut brown and a madder red, and they will feel like they belong to the same family. This is rarely true with the harsh, single-pigment nature of synthetic colors.
From a self-reliance perspective, foraged dyes provide a sense of security and connection. When you know that the “weeds” in your pasture can turn your wool blankets into a deep, earthy green, you stop seeing the world as a collection of problems and start seeing it as a storehouse of resources. It turns a simple walk in the woods into a treasure hunt.
Challenges and Common Mistakes
Nature is not a factory, and lack of consistency is the biggest challenge for beginners. The same species of plant grown in two different soil types can yield two different shades of color. This variability is beautiful to some, but frustrating to those seeking an exact match for a commercial project.
Skipping the mordant: Many beginners try to dye with “kitchen scraps” like beet skins or black beans without a mordant. While the color looks vibrant in the pot, it is nearly always “fugitive.” It will fade to a muddy tan or disappear entirely after the first wash. Always use a proper mordant if you want your work to last.
Overcrowding the pot: If you try to dye a king-sized sheet in a 10-liter (approx. 2.6 gallon) pot, the fabric will be bunched up. The dye cannot reach the inner folds, resulting in dark streaks and pale patches. Always use a vessel large enough for the fabric to “swim.”
Rushing the process: Natural dyeing is “slow craft.” Forcing the heat too high to save time will often destroy the color. Similarly, pulling the fabric out too early will result in a weak, unsaturated hue. Patience is as much an ingredient as the plants themselves.
Limitations and Environmental Constraints
While foraged dyes are wonderful, they do have boundaries. They do not work on synthetic fibers like polyester, nylon, or spandex. Natural dyes need the porous, organic structure of protein (wool, silk) or cellulose (cotton, linen) to bond. If you try to dye a 50/50 cotton-poly blend, the cotton will take the color, but the polyester will remain white, leading to a heathered, faded look.
Environmental ethics are another limitation. You cannot simply strip a forest of all its lichen or bark without consequence. Lichen, for instance, can take decades to grow just a few centimeters. Responsible dyers only harvest “windfall” (materials that have already fallen to the ground) or invasive species that the ecosystem doesn’t need. If you cannot find an abundance of a plant, you should not harvest it for dye.
Water usage is a practical constraint. The process of scouring, mordanting, dyeing, and rinsing requires significant amounts of water. In drought-prone areas, this can be a drawback. Advanced practitioners often reuse their mordant baths or use “exhaust baths” (the leftover dye after the first round) to minimize waste.
Practical Tips and Best Practices
To get the most out of your foraged colors, keep a detailed “Dye Journal.” Record the weight of the fabric, the type of mordant used, the plant species, the time of year it was harvested, and the final result. Attach a small swatch of the dyed fabric to the page. This record becomes an invaluable map of your local landscape over time.
- Use non-reactive pots: Always use stainless steel or unchipped enamel. Copper, aluminum, and iron pots will “shift” the color of your dye. While this can be used intentionally, it will ruin your results if it happens by accident.
- Water quality matters: Hard water with high mineral content can dull bright yellows and oranges. If your tap water is very hard, consider using collected rainwater for your dye baths.
- Temperature control: Keep a thermometer handy. For wool, never let the water boil, or you will damage the “scales” of the fiber, making it scratchy and stiff.
- Label everything: Mordanted fabric looks exactly like un-mordanted fabric once it’s dry. Label your batches so you don’t find yourself wondering why your dye didn’t take three months from now.
Advanced Considerations: Shifting the Palette
Once you master the basics, you can begin “modifying” your colors using pH shifts and mineral after-baths. This allows you to get multiple colors from a single plant. For example, a dye bath made from red hibiscus flowers will usually produce a grey-purple. However, adding a bit of vinegar (an acid) can shift it toward pink, while adding baking soda (an alkali) can push it toward a deep teal or green.
Iron modifiers: Iron is a “sad” modifier. Dipping a dyed piece of yellow fabric into a bucket of “rusty nail water” (ferrous sulfate) for just a few minutes will turn the yellow into a rich, mossy forest green. This process, called “saddening,” darkens the tone and increases the lightfastness of the dye.
Indigo Vats: Unlike other plant dyes, Indigo does not use a mordant. It requires a fermentation vat where oxygen is removed so the pigment can become soluble. When the fabric is pulled from the yellow-green vat and hits the air, it “breathes” in oxygen and turns blue right before your eyes. It is one of the most magical processes in the fiber arts world.
Examples and Recipes
Recipe 1: The Reliable Onion Skin Gold
Yellow onion skins are the perfect “gateway” dye. They are rich in tannins and produce a vibrant, lightfast gold. Collect two large handfuls of dry, papery skins from your local grocer or pantry. Simmer the skins in 4 liters (approx. 1 gallon) of water for 45 minutes. Strain the skins and add your alum-mordanted cotton or wool. Simmer for an hour. The result is a sun-drenched orange-gold that is surprisingly permanent.
Recipe 2: The Deep Black Walnut Brown
Black walnuts (Juglans nigra) are “substantive” dyes, meaning they are so rich in tannins they don’t strictly require a mordant. Collect the green or blackened hulls in the autumn. Caution: Wear gloves, as they will stain your hands for weeks. Soak the hulls for two days, then boil them for two hours to create a dark, coffee-like liquor. This will produce a range of browns from tan to near-black on any natural fiber. It is one of the most permanent dyes in nature.
Final Thoughts
The journey into foraged dyes is a lifelong education. It changes the way you look at a vacant lot or a fallen branch. Instead of seeing “weeds” or “debris,” you begin to see a palette of potential. You start to notice when the goldenrod is at its peak and when the oak galls are ready to be gathered. This awareness is the true prize of the craft.
While the process requires more effort than buying a bottle of synthetic dye, the results have a soul that industrial products cannot replicate. A hand-dyed scarf carries the memory of the afternoon you spent gathering acorns and the steady rhythm of the stirring spoon. It is a connection to the generations of makers who came before us, working in harmony with the seasons.
Start small, experiment often, and do not be afraid of “failure.” Even a “failed” dye job usually results in a soft, earthy tone that is far more beautiful than a plain white cloth. The earth is ready to share its colors; all you have to do is step outside and start looking.
