How To Become More Self-Sufficient Without Starting a Full-Blown Farm…
Want to start preserving your harvest, making your own soap, or building a backyard root cellar — but not sure where to begin? “Homesteading Advice” gives you instant lifetime access to 35+ practical homesteading books on food preservation, veggie gardening, DIY natural cleaning products (save over $250 per year with this skill alone), brewing, off-grid energy, and a whole lot more…
Click Here To Check It Out Now!
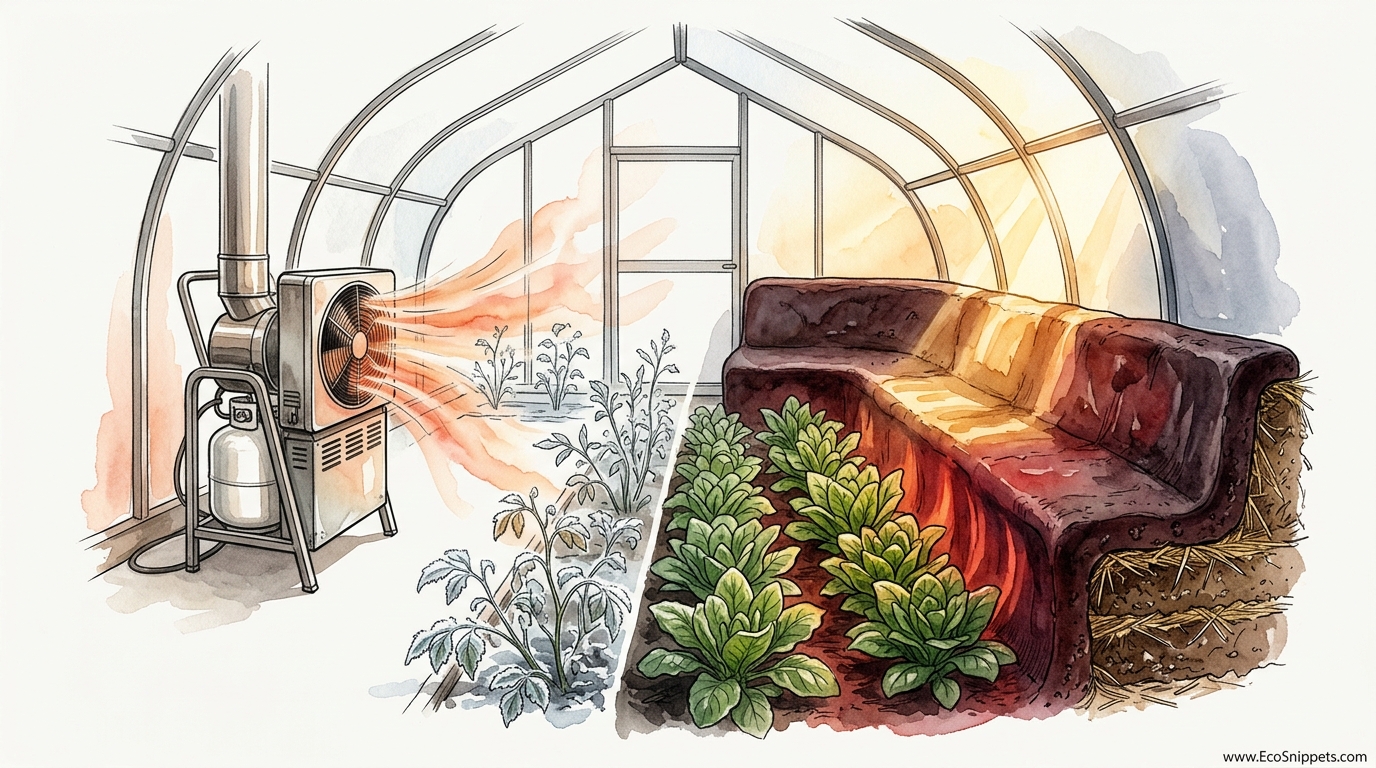
Stop burning fuel to keep your plants warm when the sun and mud will do it for free. Mechanical heaters create hot spots and high bills. Ancient ‘thermal benches’ use the physics of mass to store the sun’s energy during the day and release it precisely where the plants need it at night. No plugs, no propane, just the power of mud.
Every winter, gardeners face the same expensive struggle. They watch their hard-earned money vanish into thin air as propane heaters roar or electric fans hum. These mechanical solutions are temporary, brittle, and disconnected from the natural cycles of the earth. There is a different way, a method used for thousands of years by people who lived before the age of cheap oil. They looked at the ground beneath their feet and saw a battery.
The concept is simple: use heavy materials to soak up the sun’s heat while it is high in the sky. When the temperature drops and the stars come out, that heat slowly flows back into the room. It provides a gentle, radiant warmth that plants love. This isn’t just about saving money; it is about building a system that respects the laws of physics and the wisdom of the ancestors. We call this thermal mass, and when you build it out of mud and straw, it becomes one of the most effective tools in a self-reliant gardener’s kit.
In this guide, we will explore the art and science of the thermal mud bench. You will learn how to identify the right soil, how to mix the “cob” material that forms the bench, and how to position it for maximum efficiency. This is a journey back to the roots of agriculture, where success depends on grit and understanding rather than a credit card and a gas tank.
Heating A Greenhouse With Mud And Straw
Heating a greenhouse with mud and straw is an application of “cob” construction. Cob is an ancient building material made from a specific mixture of clay-heavy soil, sand, water, and long-fiber straw. While we often think of mud as something that washes away in the rain, cob dries into a rock-hard, durable substance that can last for centuries if it is kept under a roof. In a greenhouse, we use this material to build benches, walls, or floor systems that act as a thermal flywheel.
This method exists because air is a terrible heat storage medium. Air loses its temperature almost instantly when a door is opened or the sun goes down. Solid materials like mud, however, have high “thermal inertia.” They take a long time to heat up and an equally long time to cool down. By building a massive bench of mud and straw directly in the path of the winter sun, you are creating a solar battery that recharges every clear day and discharges every night.
In the real world, this technique is the backbone of the “Chinese Solar Greenhouse.” These structures often use a massive north wall made of rammed earth or mud blocks. In temperatures as low as -22°C (-7.6°F), these greenhouses can stay above freezing without a single drop of fuel. The mud bench is a localized version of this principle. It brings the heat storage directly to the roots of your plants, where it does the most good.
Visualize a traditional greenhouse with thin plastic walls. When the sun hits it, the inside temperature might spike to 32°C (90°F) in the afternoon, only to crash to -1°C (30°F) by midnight. Now, imagine that same greenhouse with a 2-ton (1,814 kg) mud bench. The bench absorbs that excess afternoon heat, preventing the plants from wilting. At night, it releases that stored energy, keeping the greenhouse at a steady 10°C (50°F) or higher. It levels the mountain of daytime heat and fills the valley of nighttime cold.
How It Works: The Science of Thermal Mass
To build an effective system, you must understand how heat moves through mud. This is a process of absorption, conduction, and radiation. During the day, short-wave radiation from the sun passes through your greenhouse glazing. This radiation strikes the dark surface of your mud bench. The bench surface gets hot, and through conduction, that heat begins to crawl deeper into the mass of the mud and sand.
Mud is the perfect medium for this because it has a high volumetric heat capacity. This means it can hold a significant amount of energy relative to its size. Sand provides the weight and the bulk of the storage capacity, while the clay acts as the glue that holds everything together. The straw serves a different purpose: it provides tensile strength, preventing the bench from cracking as it dries and expands, and it adds tiny pockets of air that help regulate the speed at which heat moves through the mass.
The Construction Process
Building a mud bench is a physical, rewarding process. It begins with sourcing your materials. You need subsoil that is high in clay. You can test your soil by putting a handful in a glass jar with water, shaking it, and letting it settle. The sand will fall to the bottom, the silt will settle in the middle, and the clay will form a layer on top. Ideally, you want a mix that is roughly 25-30% clay and 70-75% sand.
Once you have your ratio, you create the cob. This is traditionally done on a large tarp. You spread out your sand and clay, add water, and “dance” on it with your feet. You fold the tarp over to mix it, then add more water until it feels like stiff dough. Finally, you sprinkle in long-strand straw—wheat, oat, or rice straw works best. You continue to mix until the straw is fully coated in the mud. The result is a material that you can form into “cobs” (hand-sized loaves) and stack together.
When building the bench, start with a solid foundation. You do not want the mud sitting directly on damp earth, as it can wick up moisture and lose its structural integrity. A base of stone, brick, or “urbanite” (broken concrete) is ideal. Build your bench in layers of about 15-30 cm (6-12 inches) at a time. Allow each layer to dry until it is firm but still slightly “leathery” before adding the next. This ensures the bottom layers don’t slump under the weight of the top ones.
Strategic Placement
A thermal bench is useless if the sun cannot reach it. In the Northern Hemisphere, your bench should be located along the north wall of the greenhouse, facing south. This allows it to capture the low winter sun. In the Southern Hemisphere, the orientation is reversed. You want the bench to be the first thing the sun hits when it enters the structure. To further increase efficiency, paint the finished and dried bench a dark color. Black, dark brown, or deep forest green are excellent for absorbing the maximum amount of solar radiation.
The Practical Benefits of Mud and Straw
The most immediate benefit is the elimination or significant reduction of heating costs. While a propane heater might cost hundreds of dollars a season to run, mud is often free. If you have clay soil on your property and a local farmer with straw, your only cost is the sweat required to mix it. This makes it a truly democratic technology, accessible to anyone with a shovel and a tarp.
Beyond the cost, there is the health of the plants. Mechanical heaters create dry, moving air. This can stress plants, encourage pests like spider mites, and dry out the soil quickly. Thermal mass provides radiant heat. This is the same kind of heat you feel from a wood stove or the sun on your back. It warms the objects in the room—including the plant pots and the root systems—without stripping the air of its natural humidity. This creates a much more stable and “gentle” microclimate for winter greens or early spring starts.
Sustainability and self-reliance are also key factors. A mud bench has no moving parts. It cannot break down in a snowstorm. It doesn’t require a technician to fix it. If a crack develops, you simply smear a little more mud into it. It is a permanent fixture that actually gets more efficient over time as it fully cures. By choosing passive mud over active propane, you are disconnecting your food production from the global supply chain and the fluctuations of the energy market.
Challenges and Common Mistakes
The biggest challenge is the labor involved. Building a 2-ton bench is a heavy task. It requires hours of digging, hauling, and mixing by foot. Many people underestimate the physical toll and try to do too much in one day. This leads to fatigue and poor-quality mixing. The solution is to treat it as a community project or to build it in small, manageable sections over several weeks.
Cracking is the most common technical error. This usually happens because the mixture has too much water or too much clay. As the water evaporates, the material shrinks. If the clay content is too high, the shrinkage is dramatic, and deep cracks will appear. To avoid this, always do a “test brick” first. Mix your clay and sand in your chosen ratio, form a small brick, and let it dry in the sun. If it cracks, add more sand. If it crumbles, add more clay. Finding the “goldilocks” ratio for your specific soil is the secret to a successful build.
Moisture management is another pitfall. In a greenhouse, humidity can be high. If your mud bench is not protected with a lime plaster or a simple clay-and-flour paste, the surface can become soft over time. Additionally, ensure that your greenhouse has good ventilation. If the bench stays perpetually damp, it cannot absorb heat as effectively. A dry bench is an efficient bench.
Limitations and Environmental Constraints
This method is not a “magic bullet” for every situation. Its success is entirely dependent on sunlight. If you live in a region with persistent winter cloud cover or extremely short daylight hours, your bench may not receive enough energy to recharge. In these environments, the mud bench acts more as a stabilizer than a primary heat source. You might still need a backup system for long stretches of grey weather.
Weight is a serious constraint. A cob bench can weigh upwards of 1600 kg per cubic meter (100 lbs per cubic foot). You cannot build this on a standard wooden greenhouse floor. It must be built on a ground-level foundation or a reinforced concrete slab. If you are building a small hobby greenhouse on a raised deck, a mud bench is likely too heavy for the structure to support.
Space is the final trade-off. A mud bench takes up a significant amount of “real estate” inside the greenhouse. In a small 2×3 meter (6×10 foot) structure, a large thermal bench might take up 20-30% of your floor space. You have to decide if the thermal stability is worth the loss of growing area. For serious winter gardeners, the answer is almost always yes, but it requires careful planning to ensure you still have enough room for your crops.
ACTIVE PROPANE vs PASSIVE MUD
When deciding how to protect your plants, it helps to see the long-term trade-offs. While propane offers “push-button” convenience, mud offers “build-once” resilience. The table below compares the two approaches across several key factors.
| Factor | Active Propane Heating | Passive Mud & Straw Bench |
|---|---|---|
| Initial Cost | Low to Moderate (Heater purchase) | Near Zero (Materials are often free) |
| Operating Cost | High (Fuel prices fluctuate) | Zero |
| Maintenance | High (Cleaning, fuel refills, parts) | Near Zero (Occasional patching) |
| Reliability | Moderate (Depends on fuel/parts) | Excellent (Cannot fail) |
| Plant Health | Potential stress (Dry, moving air) | Optimal (Radiant heat, stable humidity) |
| Labor Required | Minimal | High (Initial construction phase) |
| Environmental Impact | High (Carbon emissions) | Zero (Natural, sequestered carbon) |
Practical Tips and Best Practices
To get the most out of your thermal mass, focus on the details of absorption. The surface texture of your bench matters. A slightly rough surface has more area to catch the sun than a perfectly smooth, polished one. When you apply your final coat of dark paint or pigment, keep the texture organic. Also, consider the “insulation-mass” sandwich. Heat always moves from hot to cold. If your mud bench is built against a cold, uninsulated north wall, the heat will leak out of the back into the outside air. Always place a layer of rigid foam insulation or a thick layer of straw-clay (heavy on the straw) between your bench and the exterior wall. This forces the heat to release into the greenhouse rather than the outdoors.
- Use the “Jar Test” to accurately determine your soil’s clay-to-sand ratio before you start mixing large batches.
- Incorporate “Urbanite” or glass bottles into the center of the bench to save on mud and add air pockets that slow the heat release.
- Seal the surface with a natural finish like linseed oil or a thin lime wash to prevent dusting and moisture absorption.
- Install a thermal curtain over your greenhouse glazing at night. This keeps the heat radiated by the mud bench inside the structure instead of letting it escape through the glass.
- Keep the bench clear of clutter. Do not stack pots or trays on top of the bench during the day, as this will shade the mass and prevent it from charging.
Advanced Considerations for Serious Practitioners
For those who want to take their greenhouse to the next level, the mud bench can be integrated with a “Rocket Mass Heater” (RMH). This is an incredibly efficient wood-burning stove that vents its exhaust through a horizontal pipe buried inside your mud bench. Instead of the heat going out the chimney, it travels through the mud, heating the bench from the inside out. This allows you to “force-charge” your solar battery on days when the sun isn’t shining. A single small fire in the evening can keep the bench warm for 12 to 24 hours.
Another advanced technique is the use of a “Climate Battery” or “Sub-Surface Air Heating.” This involves burying perforated pipes deep in the ground beneath your mud benches. A small solar-powered fan pushes hot air from the top of the greenhouse into the ground during the day. The earth (and your mud bench above it) soaks up that heat. At night, the fan reverses or simply allows the natural convection to pull the warmth back up. This turns the entire floor of your greenhouse into a massive thermal reservoir.
Scaling is also an important consideration. If you have a large commercial-scale greenhouse, a single mud bench won’t be enough. You will need to calculate the ratio of glazing to mass. A general rule of thumb is to have 1 square foot of thermal mass surface area for every 2 to 3 square feet of south-facing glazing (or roughly 1 square meter of mass for every 2-3 square meters of glazing). Achieving this balance ensures your greenhouse doesn’t overheat during the day or freeze at night.
Example Scenario: The 12-Foot Winter Greenhouse
Consider a gardener in a temperate zone with a 12-foot (3.6-meter) long greenhouse. Outside, the January temperatures fluctuate between -6°C (21°F) at night and 4°C (39°F) during the day. Without any thermal mass, the interior of the greenhouse would drop to near-outside temperatures within two hours of sunset.
The gardener builds a cob bench along the entire 12-foot north wall. The bench is 2 feet (60 cm) wide and 2 feet (60 cm) tall. This creates approximately 48 cubic feet (1.36 cubic meters) of mud and straw mass, weighing roughly 4,800 lbs (2,177 kg). They paint the bench black and insulate the back of it with 2 inches (5 cm) of rigid foam.
On a clear winter day, the sun strikes the black bench for six hours. The surface temperature of the mud reaches 43°C (110°F). By sunset, the core of the bench has warmed to 27°C (80°F). Throughout the night, as the air in the greenhouse tries to cool, the bench radiates heat. At 4:00 AM, the coldest part of the night, the greenhouse air remains at a steady 7°C (45°F). The kale, spinach, and carrots inside continue to grow, protected by a battery made of nothing but the earth under the gardener’s feet.
Final Thoughts
Building with mud and straw is an act of defiance against a world that demands we pay for every degree of warmth. It is a return to a time when we understood the materials around us and how to use them to our advantage. A thermal bench is more than just a heater; it is a long-term investment in the resilience of your garden. It rewards the patient, the hardworking, and the observant.
As you begin your project, remember that the ancestors did not have sensors or thermostats. They had their hands in the mud and their eyes on the sun. Trust your instincts, do your tests, and don’t be afraid to get your feet dirty. The warmth you feel from that mud bench on a freezing January night will be the most satisfying heat you’ve ever experienced.
Once you have mastered the thermal bench, you may find yourself looking at other parts of your homestead with new eyes. The same principles of mass and solar gain can be applied to your home, your workshops, and your livestock shelters. Every pound of mud you stack is a step toward a more grounded, self-reliant future. Stop burning fuel and start building mass.
