How To Become More Self-Sufficient Without Starting a Full-Blown Farm…
Want to start preserving your harvest, making your own soap, or building a backyard root cellar — but not sure where to begin? “Homesteading Advice” gives you instant lifetime access to 35+ practical homesteading books on food preservation, veggie gardening, DIY natural cleaning products (save over $250 per year with this skill alone), brewing, off-grid energy, and a whole lot more…
Click Here To Check It Out Now!
Stop throwing away the highest-density nitrogen source on your farm every time your birds molt. Your birds are shedding garden gold every autumn. Feathers are nearly pure nitrogen, but they take forever to break down—unless you know the fermentation secret that turns them into high-speed plant fuel for free.
Most folks look at a coop full of feathers and see a mess to be raked and burned. That is a mistake born of modern convenience. In the days of our grandfathers, nothing was wasted, especially not a resource that carries a nitrogen punch stronger than almost any other organic material. The trick lies in cracking the code of keratin, the protein that makes feathers so tough.
You can wait years for a feather to rot in a dry compost pile, or you can use microbial fermentation to do the job in weeks. This process mimics the natural forest floor but at a much higher intensity. Once you master it, you will never look at molting season the same way again. You are essentially growing your own liquid nitrogen at home.
High Nitrogen Organic Fertilizer From Feathers
Feathers are a biological marvel of structural engineering. They are composed of approximately 90% keratin, a fibrous protein that is incredibly resistant to the typical bacteria found in a backyard compost bin. This durability is why feathers can survive in the soil for years without disappearing. However, that very same protein structure holds a secret: a nitrogen concentration that typically ranges from 12% to 15% by dry weight.
In the world of organic gardening, a nitrogen-phosphorus-potassium (NPK) rating of 12-0-0 is considered a powerhouse. Most store-bought organic fertilizers struggle to hit these numbers without expensive additives. When you ferment feathers, you are releasing this locked-up nitrogen and turning it into a bio-available liquid form that plants can drink up almost immediately.
This fertilizer is not just a nutrient source; it is a bio-stimulant. The fermentation process breaks down the complex keratin proteins into amino acids and peptides. These compounds act as “blueprints” for plant growth, helping crops build their own proteins more efficiently. It is used in high-stakes agriculture for heavy feeders like corn, brassicas, and leafy greens that require a massive nitrogen boost to hit their peak potential.
Think of feathers as a biological battery. They store the energy and nutrients the bird consumed all year. When the bird molts, it is discarding that battery. By fermenting them, you are simply “plugging in” that battery to your soil. It is a closed-loop system that turns a waste product into the most valuable liquid on the farm.
How to Ferment Feathers: The Biological Breakdown
To turn a pile of tough feathers into liquid gold, you must recruit the right microbial workforce. Standard composting bacteria cannot easily “eat” keratin because they lack the specific enzyme known as keratinase. To succeed, you need to cultivate specialized bacteria, primarily from the Bacillus family, or use the ancestral method of leaf-mold inoculation.
First, collect your feathers. Whether they are from the autumn molt or from processing birds, keep them as clean as possible. While a little dirt or bedding won’t hurt, you want the bulk of the material to be feathers. If you are starting with dry, molted feathers, they are very light and airy, so you will need to pack them down.
The “Pioneer Method” of fermentation involves an anaerobic or semi-anaerobic environment. Find a sturdy 5-gallon (19-liter) bucket or a 55-gallon (208-liter) drum depending on your scale. Fill the container about two-thirds full with feathers. You must then add an inoculant. The most reliable source of keratin-degrading microbes is the “forest floor” or high-quality leaf mold.
Go to a nearby woods and find a spot where the leaves have been rotting for years. Dig down until you see the white, thread-like fungal structures (mycelium) and smell that rich, earthy aroma. A handful or two of this “primitive” soil contains the diverse microbial community needed to tackle tough proteins. Add this to your container.
Next, fill the container with water. Rainwater is best because it lacks the chlorine found in municipal tap water, which can kill your microbial workers. If you must use tap water, let it sit out for 24 hours so the chlorine can dissipate. Cover the container with a lid to keep out mosquitoes and light, but do not seal it airtight if you want a slightly faster aerobic-to-anaerobic transition.
The process takes time. In warm weather (25°C to 30°C or 77°F to 86°F), you will see the feathers begin to lose their structure within 14 to 21 days. For a complete breakdown where the quills dissolve, it may take 3 to 6 months. When the liquid turns a dark, amber color and the feathers have turned into a slurry, your “feather tea” is ready.
Benefits of Feather-Derived Nitrogen
The primary advantage of this method is the sheer density of the nutrient profile. While many liquid “manure teas” offer a quick hit of nitrogen, they often leach out of the soil just as quickly. Feather fermentation produces a more complex nitrogen profile that includes both immediate-release amino acids and slower-release organic nitrogen.
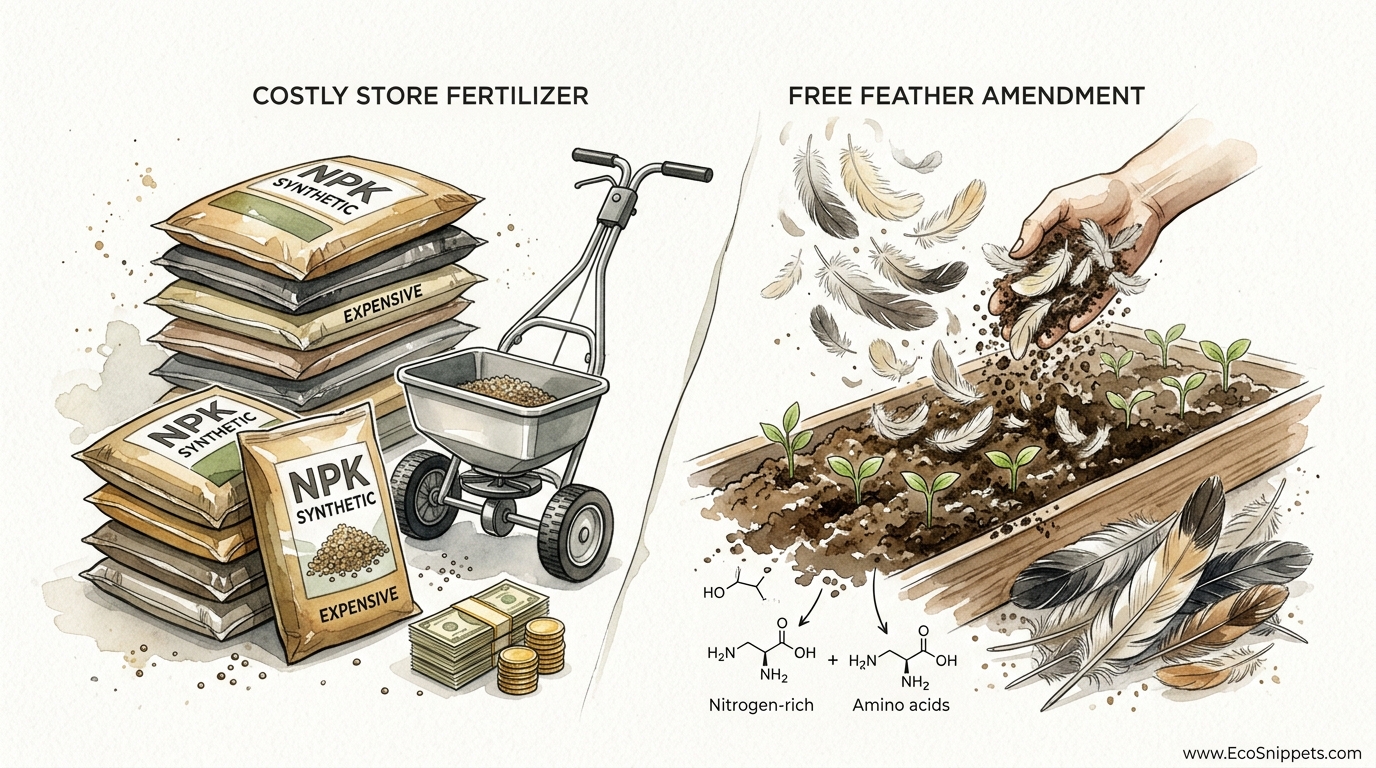
One of the greatest practical benefits is the cost. When you compare COSTLY STORE FERTILIZER vs FREE FEATHER AMENDMENT, the savings are staggering. A single gallon of high-quality organic liquid nitrogen can cost upwards of $40 to $50 at a garden center. You can produce the same volume for the cost of a bucket and some “free” feathers from your coop.
Beyond the NPK numbers, this fertilizer improves soil biology. Because you used forest microbes to start the process, you are reintroducing a diverse range of beneficial bacteria and fungi to your garden. These microbes don’t just deliver the nitrogen; they stay in the soil, helping to break down other organic matter and improving the overall soil structure.
Furthermore, feathers contain a significant amount of sulfur (around 2% to 5%). Sulfur is an often-overlooked macronutrient that is essential for the production of oils and flavors in plants. If you are growing garlic, onions, or brassicas like broccoli, the sulfur in feather fertilizer will significantly improve the pungency and health of your harvest.
Challenges and Common Mistakes
The most immediate challenge you will face is the smell. Anaerobic fermentation of high-protein material is not for the faint of heart. As the microbes break down the keratin and sulfur bonds, they release gases that can be quite pungent. This is why you should always keep your fermentation buckets far from the house and downwind from your neighbors.
A common mistake is using too many feathers and not enough water. If the mixture is too thick, the microbes will struggle to move through the medium, and the process will stall. You want a “soupy” consistency. If the bucket smells like “death” rather than “swamp,” you may have a lack of airflow or a lack of microbial diversity. Adding a little more leaf mold or a handful of finished compost can often right the ship.
Another pitfall is failing to clean the feathers if they are heavily soiled with manure. While manure adds nitrogen, too much of it can shift the fermentation into a different metabolic path that produces more methane and less of the beneficial amino acids you are after. A quick rinse of the feathers in a mesh bag before fermenting can help ensure a cleaner, more efficient breakdown.
Pathogen management is also a concern for the cautious practitioner. While the fermentation process creates an environment that is hostile to many common pathogens due to pH changes and microbial competition, you should treat the raw liquid with respect. Wear gloves when handling the concentrate and never apply it to the edible portions of leafy greens that will be eaten raw within a few weeks.
Limitations and When to Avoid This Method
This method is not a “silver bullet” for every situation. Because it is so high in nitrogen, it is entirely inappropriate for plants that are in their flowering or fruiting stage where you want to discourage excessive leaf growth. If you drench your tomato plants in feather tea once they have set fruit, you may end up with a massive, beautiful green bush but very little actual fruit.
Environmental conditions play a huge role. Fermentation nearly stops in cold weather. If you are in a region with harsh winters, you need to start your batches in the spring or summer. Trying to start a feather ferment in a freezing barn will result in a bucket of wet feathers that sits unchanged until spring.
This method also requires patience. Unlike synthetic fertilizers that work the moment they hit the soil, feather nitrogen takes a few days to “awaken” the soil biology. If your plants are showing severe, immediate signs of nitrogen deficiency (yellowing of the lower leaves), you might need a faster-acting source like fish emulsion while your feather ferment finishes its cycle.
Finally, consider the salt index. While lower than synthetic fertilizers, any concentrated liquid amendment can cause issues in very dry, arid soils if not properly diluted. If your soil is already prone to salt buildup, use this amendment sparingly and always follow up with a deep watering.
Comparison: Store-Bought vs. Home-Brewed
| Feature | Store-Bought Nitrogen (Liquid) | Home-Fermented Feather Tea |
|---|---|---|
| Cost | High ($30-$60 per gallon) | Zero (Resource recovery) |
| Nitrogen Density | Standardized (e.g., 5-0-0) | Very High (Potential 12-15%) |
| Microbial Life | Often sterile or limited | Diverse, local microorganisms |
| Preparation Time | Instant (Buy and use) | Weeks to Months |
| Odor | Mild to Moderate | Strong / Pungent |
Practical Tips for Best Results
To speed up the process, shred your feathers. If you have a leaf shredder or even a dedicated old blender, breaking the feathers into smaller pieces increases the surface area for the bacteria to attack. This can cut your fermentation time in half. Small particles of keratin are much easier for the enzymes to dissolve than whole flight feathers with thick quills.
Keep your fermentation vessel in a warm, dark place. Microbes are like us; they work better when they are comfortable. A spot that gets indirect sun to warm the bucket but isn’t in direct UV light (which can kill surface bacteria) is ideal. If the bucket gets too hot (over 40°C or 104°F), you might kill off some of the beneficial Bacillus strains, so keep an eye on the temperature during summer peaks.
Always dilute the final product. The concentrated liquid from a feather ferment is “hot”—meaning it has enough ammonia and nitrogen to burn plant roots if applied directly. A good rule of thumb is a 1:30 dilution (one part tea to thirty parts water) for soil drenching. If you are using it as a foliar spray, go even leaner, around 1:100.
Use a fine mesh strainer when you are ready to use the liquid. This is especially important if you plan to use a watering can or a sprayer. Small bits of undissolved quill can easily clog nozzles. Don’t throw those strained-out solids away, though; toss them into the center of your regular compost pile where they will finish breaking down.
Advanced Considerations for the Serious Practitioner
If you want to take this to a professional level, you can introduce specific strains of Bacillus subtilis or Bacillus licheniformis. These are the “heavy hitters” of the keratin world. You can find these in certain high-end compost starters or biological fungicides. Inoculating your bucket with a pure culture can lead to a 75% degradation of feathers in as little as 8 days under ideal conditions.
Another advanced technique is aerated fermentation. By using a simple aquarium air stone and pump, you can keep the mixture aerobic. This significantly reduces the foul odors associated with anaerobic rot and encourages a different set of beneficial microbes. However, aerated fermentation requires more monitoring, as the water will evaporate faster and the microbial activity will generate more heat.
Consider the pH of your brew. Keratinase enzymes typically work best in a slightly alkaline environment (pH 7.5 to 8.5). If your water is very acidic, the breakdown will be sluggish. Adding a small amount of wood ash or agricultural lime can nudge the pH up and “turn on” the enzymes. Conversely, if you are applying the final tea to acid-loving plants like blueberries, you may need to buffer the liquid back down with a little vinegar before application.
Scaling this process for a larger farm requires a multi-stage system. Instead of one bucket, use a series of three 55-gallon drums. Start a new drum every month during the molting season. This gives you a continuous “pipeline” of fertilizer, ensuring that as one drum is emptied onto the fields, the next is halfway through its fermentation cycle.
Practical Scenarios: Using Feather Gold in the Field
Imagine you are preparing a bed for heavy-feeding sweet corn. Corn is a nitrogen glutton. About two weeks before planting, you drench the soil with a 1:20 dilution of feather tea. This allows the local soil biology to “process” the liquid and prepare the nutrient bed. Once the corn is knee-high, a second application at 1:50 provides the boost needed for that rapid mid-summer growth spurt.
In a market garden scenario, you might use feather tea for your brassicas. Cabbage, broccoli, and kale all thrive on the high nitrogen and sulfur content. Apply the tea as a soil drench every three weeks. Users often report that the leaves become a deeper, darker green and the plants show better resistance to common pests like aphids, likely due to the improved protein synthesis within the plant.
For the orchardist, a diluted drench around the drip line of fruit trees in early spring can help “wake up” the tree. However, stop all applications by mid-summer. You want the tree to stop producing new green growth and start hardening off its wood for the coming winter. The slow-release nature of any remaining feather particles in the soil will continue to provide a gentle, safe level of nutrition without triggering late-season flushes.
If you are reclaiming “tired” soil that has been depleted by years of chemical use, feather tea is a powerful restorative. The combination of high-density nutrients and forest-derived microbes acts as a jump-start for the soil’s natural cycles. It’s not just about feeding the plants; it’s about repairing the biological engine of the earth.
Final Thoughts
Turning bird feathers into fertilizer is a return to a more sensible, self-reliant way of farming. It acknowledges that there is no such thing as “waste” in a healthy ecosystem—only resources that we haven’t yet learned to use. By taking the “mess” of molting and turning it into high-speed plant fuel, you are closing the loop on your homestead and reducing your dependence on industrial inputs.
The process of fermentation may be stinky and it may require a bit of patience, but the results in the garden are undeniable. You will see more vigorous growth, deeper colors, and a level of soil health that store-bought bags simply cannot replicate. It is a practice rooted in ancestral wisdom, backed by modern microbiology, and available to anyone with a few birds and a bucket.
Experiment with your dilutions, find the best spot on your land for your fermentation station, and start harvesting the “garden gold” that falls from your birds every year. Your plants will thank you, your soil will thrive, and your wallet will stay a little heavier. It is the pioneer way: waste nothing, grow everything.
