
How To Become More Self-Sufficient Without Starting a Full-Blown Farm…
Want to start preserving your harvest, making your own soap, or building a backyard root cellar — but not sure where to begin? “Homesteading Advice” gives you instant lifetime access to 35+ practical homesteading books on food preservation, veggie gardening, DIY natural cleaning products (save over $250 per year with this skill alone), brewing, off-grid energy, and a whole lot more…
Click Here To Check It Out Now!
One heavy rainstorm turns your pack into a heavy sponge, but this ancestral coating makes water bead off like a duck’s back. Most modern outdoor fabrics rely on chemical sprays that wear off in a month. We went back to the old ways, using a simple blend of beeswax and paraffin to create a permanent, breathable, and indestructible shield for your canvas bags and jackets. It’s not just waterproofing; it’s armor.
For centuries, the formula for surviving a deluge was hidden in the pockets and sails of those who lived on the edge of the world. Sailors and woodsmen didn’t have access to the fluoropolymer-based DWR coatings that dominate the market today. Instead, they relied on natural substances that physically bonded with the fibers of their gear, creating a barrier that would outlast the very threads it protected.
When you choose to wax your own canvas, you are stepping away from the disposable nature of modern gear. You are taking a raw, breathable material and imbuing it with a custom finish that is entirely repairable. This guide will walk you through the chemistry, the history, and the hands-on process of turning a simple piece of fabric into a weather-hardened tool.
How To Wax Canvas For Waterproof Gear
Waxed canvas is a specialized textile created by saturating a heavy-duty cotton weave with a blend of waxes and oils. This process fills the tiny gaps between the threads, creating a hydrophobic surface that prevents water from soaking into the fibers. Historically, this began in the 15th century when Scottish sailors noticed that wet sails caught the wind better but became too heavy when sodden. They initially experimented with fish oils and grease to keep the sails light and efficient.
By the mid-19th century, linseed oil became the standard for “curing” sailcloth, which eventually led to the development of the iconic yellow fisherman’s slicker (the oil turned yellow as it aged and oxidized). However, linseed oil eventually cracked and lost its effectiveness. The 1930s brought the introduction of paraffin-based treatments, which were more stable and did not yellow over time. Today, modern outdoor enthusiasts use a blend of paraffin and beeswax to achieve a balance of flexibility, durability, and a classic matte finish.
This material is the backbone of “heritage” gear. It is used in everything from tool rolls and rucksacks to heavy chore coats and tents. It exists because it is one of the few waterproofing methods that actually improves with age, developing a unique patina of creases and scuffs that tell the story of your travels.
The Physics of Water Resistance
Understanding how wax works requires looking at the fabric on a microscopic level. Cotton is naturally porous and absorbent. When a droplet of rain hits bare canvas, the capillary action of the fibers pulls the water into the heart of the thread. This causes the fibers to swell, the fabric to gain significant weight, and the moisture to eventually pass through to whatever is underneath.
Applying a wax shield changes the surface energy of the fabric. The wax coats every individual fiber and plugs the interstices of the weave. This creates high surface tension, causing water to “bead” rather than soak. Furthermore, because the wax is a solid at room temperature, it provides a physical layer of armor that protects the cotton from abrasion and UV damage.
Ingredients for the Perfect Blend
While you can buy pre-made wax bars, creating your own blend allows you to tune the gear to your specific environment. Most practitioners use a combination of two primary ingredients:
- Paraffin Wax: This is a petroleum-based wax that is highly hydrophobic. It is the primary waterproofing agent and provides a stiff, durable finish.
- Beeswax: This natural wax is more pliable and “tacky.” Adding beeswax prevents the paraffin from becoming too brittle and cracking in cold weather. It also adds a pleasant, natural scent.
A common starting ratio is 90% paraffin to 10% beeswax for a “dry” finish, or a 50/50 blend for a softer, more traditional “oilskin” feel. Some users even add a small amount of boiled linseed oil (about 5-10%) to the melted mixture to increase the penetration and flexibility of the coating.
How to Do It: A Step-by-Step Guide
Waxing canvas is a rewarding but time-consuming process. Set aside several hours for a medium-sized bag or jacket. You will need a clean workspace, your wax blend, a heat source (heat gun or a powerful hair dryer), and a stiff brush.
Step 1: Preparation and Cleaning
The wax will permanently seal whatever is on the surface of the fabric. Use a lint roller to remove all dust, hair, and loose threads. If the gear is dirty, scrub it with cold water and a stiff brush. Avoid using detergents, as they can interfere with the way the wax bonds to the fibers. Ensure the fabric is 100% dry before you begin; moisture trapped under the wax can lead to mildew.
Step 2: Applying the Wax
There are two primary methods for application. The first is the Rub-On Method, where you use a solid bar of wax and rub it vigorously onto the fabric like a bar of soap. The friction of the rubbing will slightly warm the wax, allowing it to leave a thick, visible layer. Pay extra attention to the seams and high-wear areas like the bottom of a bag or the elbows of a jacket.
The second is the Brush-On Method. Melt your wax blend in a double boiler (never melt wax over a direct flame). Once liquid, use a natural-bristle brush to “paint” the wax onto the fabric. This method is faster for large items but can result in a heavier coating that may require more work to even out.
Step 3: Setting the Shield
Once the fabric is coated, it will look blotchy and white. This is where the magic happens. Use your heat gun on a medium setting and hold it about 6-8 inches (15-20 cm) from the surface. Move in circular motions. As the wax melts, it will turn from a white solid into a clear liquid that disappears into the weave. The fabric will darken significantly.
Use your fingers or a clean cloth to push the liquid wax into the seams and corners while it is still warm. If you see “shiny” spots, it means there is too much wax; use a cloth to wipe away the excess. If the fabric still feels like raw cotton, you may need a second coat.
Step 4: The Cure
Hang the item in a warm, dry, and well-ventilated area for 24 to 48 hours. This allows the wax to fully set and the fibers to stabilize. During this time, the “waxy” smell will begin to dissipate, and the fabric will regain some of its natural stiffness.
The Practical Benefits of Waxed Gear
Choosing waxed canvas over modern synthetics isn’t just about nostalgia; it’s about a different philosophy of durability. Modern DWR (Durable Water Repellent) sprays are temporary and must be reapplied frequently. When they fail, the jacket is no longer waterproof. Waxed canvas, however, is a permanent modification to the material.
One of the greatest advantages is Repairability. If you get a scratch or a “dry” spot where water is starting to soak in, you don’t need a specialized chemical treatment. You simply take a hair dryer to the area to redistribute the wax, or rub a bit more on and melt it in. This makes it the ideal choice for long-term expeditions where gear failure is not an option.
Additionally, waxed canvas is remarkably Windproof. By sealing the weave, you create a barrier that stops wind chill in its tracks while still allowing a tiny amount of moisture vapor to escape—far more than a plastic raincoat would. This “breathable armor” keeps you comfortable during high-intensity activities like hiking or chopping wood in a light drizzle.
Challenges and Common Mistakes
The most common error is Over-waxing. It is tempting to put on a thick layer to ensure maximum waterproofing, but too much wax makes the item incredibly stiff and heavy. In cold weather, an over-waxed jacket can feel like wearing a sheet of plywood. It can also lead to “crocking,” where the excess wax rubs off on your car seats or furniture.
Another pitfall is Inadequate Cleaning. If you wax over salt from sea spray or dirt from the trail, those particles will act as sandpaper inside the wax layer, slowly grinding down the cotton fibers every time the fabric moves. Always start with a pristine surface.
Finally, many beginners forget to Test a Small Area first. Wax will always darken the color of the canvas—sometimes by several shades. If you are working on a light-colored item, the final result might be much darker than you anticipated. Always do a test patch on an inconspicuous area like the inside of a pocket.
Limitations: When Wax is Not Ideal
Waxed canvas is heavy. A standard 10oz (283g) dry canvas can increase in weight by 25-35% once fully saturated with wax. For ultralight backpackers, this is often a dealbreaker. It is also not suitable for high-heat environments. If you leave a waxed bag in a hot car in the middle of summer (where temperatures can exceed 140°F or 60°C), the wax can melt and migrate, potentially staining other items.
Furthermore, waxed canvas is not suitable for Synthetic Fabrics like nylon or polyester. These fibers are too smooth and non-porous for the wax to “grip.” While you might get a temporary coating, it will quickly flake off and leave a mess. This technique is strictly for natural fibers like cotton, linen, and hemp.
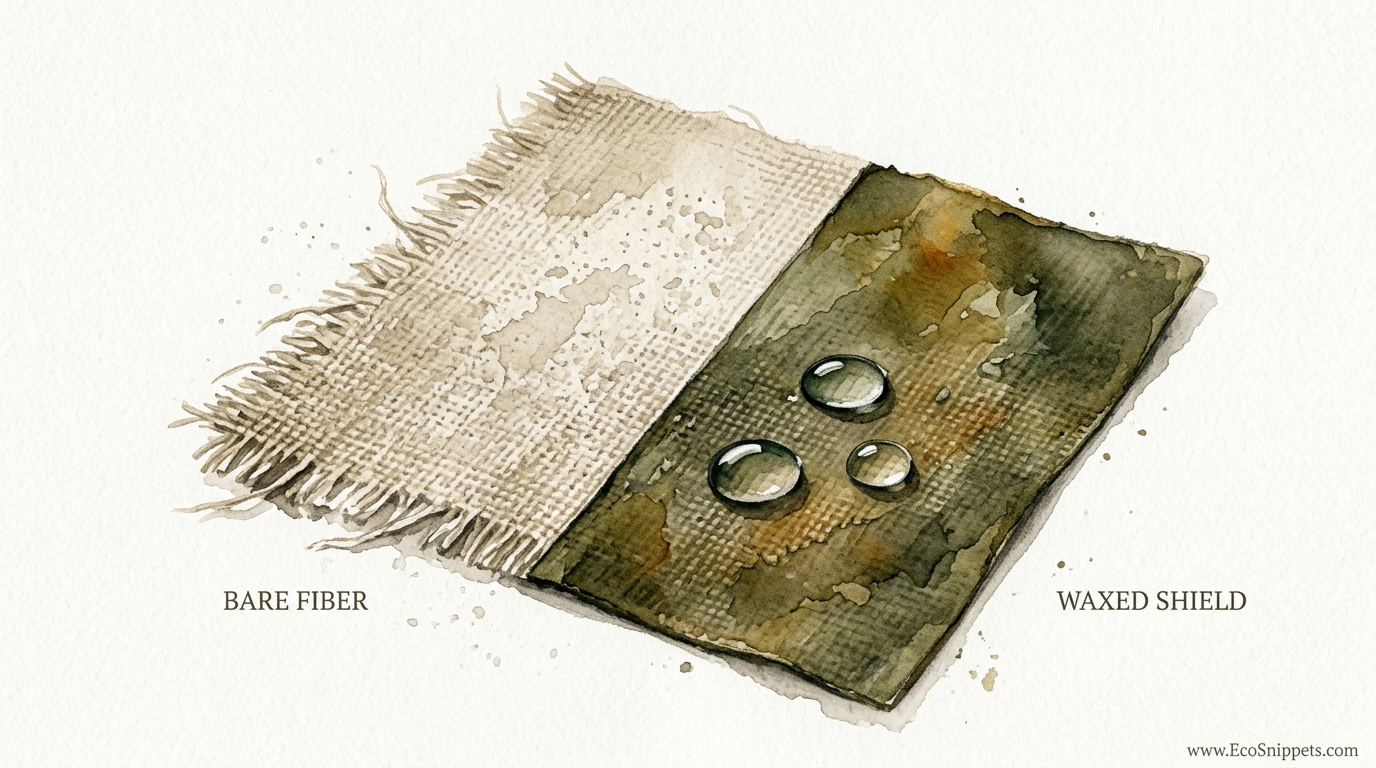
BARE FIBER vs WAXED SHIELD
The following table illustrates the trade-offs between leaving your canvas untreated and applying a traditional wax finish.
| Feature | BARE FIBER | WAXED SHIELD |
|---|---|---|
| Water Resistance | Minimal (Absorbs moisture) | High (Repels water) |
| Weight | Lighter (unless wet) | Heavier (15-30% increase) |
| Breathability | Maximum | Moderate (Reduced by ~60%) |
| Durability | Standard cotton wear | High abrasion resistance |
| Maintenance | Machine washable | Spot clean only; Re-wax annually |
| Aesthetics | Flat, consistent color | Rugged patina and character |
Practical Tips and Best Practices
To keep your gear in top condition, follow these hard-earned rules from the field:
- The Golden Rule: Never Machine Wash. Detergents and hot water will strip the wax, but they won’t do it evenly. You will end up with a ruined, blotchy mess. If the item is filthy, use cold water and a soft brush only.
- Storage Matters. Store your waxed gear in a cool, dry place. Avoid damp basements or garages where mold can grow. If your gear gets moldy, use a mixture of white vinegar and water to kill the spores before re-waxing.
- Annual Checkups. Once a year, give your gear the “Bead Test.” Splash some water on it. If the water stops beading and starts soaking in, it’s time for a touch-up. You usually don’t need a full re-wax; just focus on the high-friction areas.
- Temperature Sensitivity. If your gear is too stiff in the winter, wear it around the house for an hour. Your body heat will soften the wax and make the item more pliable.
Advanced Considerations: Customizing the Blend
For those who want to take their gear to the next level, you can experiment with the chemistry of your wax. If you live in a tropical, humid environment, increase the Paraffin content to keep the coating “dry” and prevent it from feeling tacky in the heat. If you are in a sub-zero Arctic environment, increase the Beeswax or add a tablespoon of Raw Neatsfoot Oil to the mix to ensure the fabric remains flexible enough to move without cracking.
Some practitioners also add Pine Resin (rosin) to their blend. This increases the “grip” and tackiness of the fabric, which is excellent for tool rolls or the palms of work gloves, though it can make a jacket feel too sticky for casual wear. Always melt these additives thoroughly and strain the mixture through cheesecloth to remove any impurities.
Example Scenarios
Consider a Standard Cotton Rucksack used for daily commuting. Left untreated, a 15-minute walk in a light drizzle will soak the contents of the bag. By applying a 1:1 beeswax/paraffin blend, the water will bead off for the duration of the walk. The bag might gain 6 ounces (170g) in weight, but the contents stay dry, and the bag will likely last 10 years longer because the wax protects the cotton from the constant friction of the commute.
In another scenario, a Canvas Tool Roll kept in a damp shed will often rust the tools inside. A heavy application of wax creates a moisture-proof barrier that protects the metal from the ambient humidity. In this case, breathability is not a concern, so a heavy “dipped” wax application is ideal for maximum protection.
Final Thoughts
Waxing your own gear is a reclamation of self-reliance. It is a slow, tactile process that forces you to understand the architecture of your equipment. By moving away from disposable synthetic sprays and embracing the ancestral wisdom of wax and oil, you are creating items that don’t just survive the elements—they thrive in them.
Whether you are preparing a jacket for a winter trek or waterproofing a bag for a lifetime of travel, the principles remain the same. Start with clean fabric, apply your wax with intention, and set it with heat. The result is a piece of gear that carries the marks of your journey and the strength of the old ways. Experiment with your blends, learn how the fabric responds to your climate, and trust in the shield you have built with your own hands.
