How To Become More Self-Sufficient Without Starting a Full-Blown Farm…
Want to start preserving your harvest, making your own soap, or building a backyard root cellar — but not sure where to begin? “Homesteading Advice” gives you instant lifetime access to 35+ practical homesteading books on food preservation, veggie gardening, DIY natural cleaning products (save over $250 per year with this skill alone), brewing, off-grid energy, and a whole lot more…
Click Here To Check It Out Now!
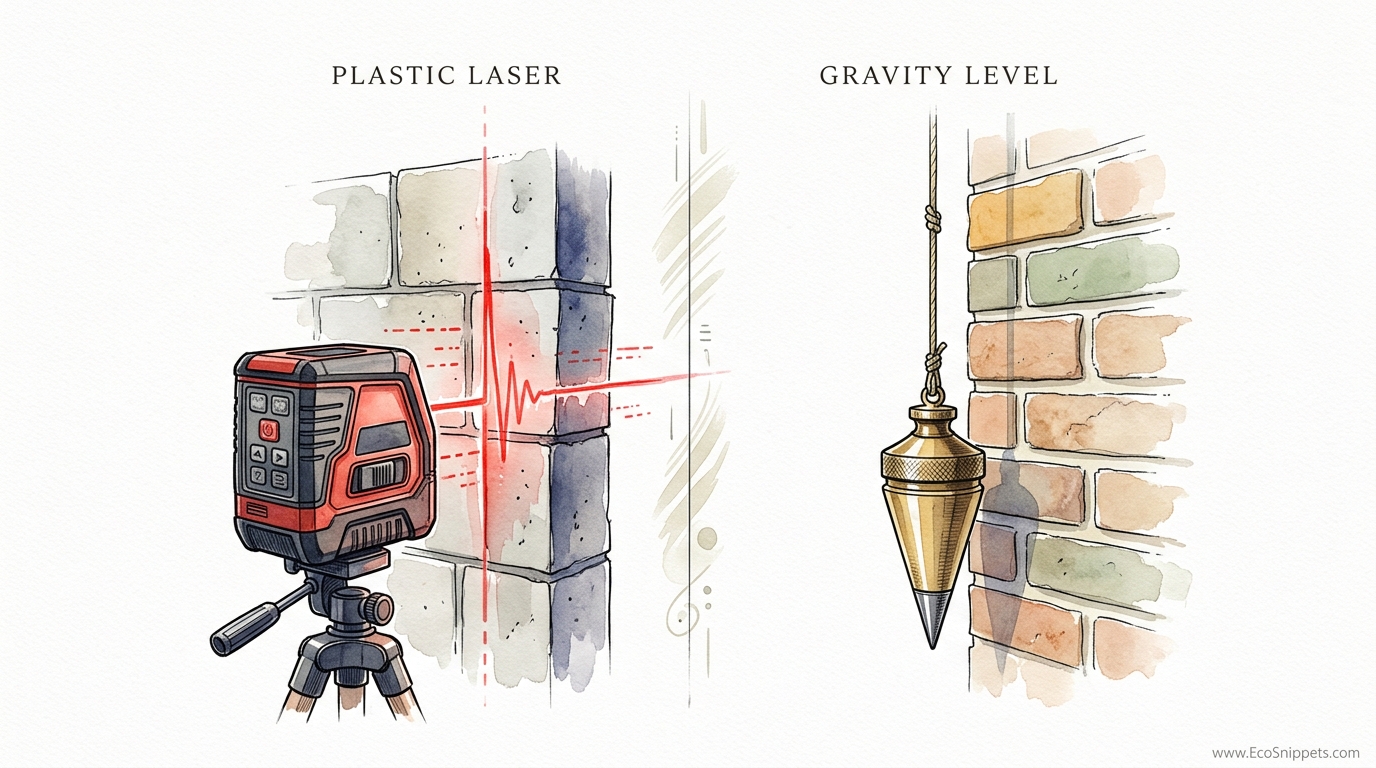
One of these tools needs batteries and recalibration; the other is powered by the Earth itself. Laser levels are great until they drop, run out of juice, or lose calibration. The Roman Plumb Bob has been building perfect structures for 2,000 years. It never lies, it never breaks, and it costs almost nothing to make yourself.
Standing before a massive stone wall or a simple wooden frame, the ancient builder did not reach for an electronic sensor. He reached for a string and a weight. This simple tool, known as the plumb bob or plummet, uses the unwavering pull of gravity to define a perfectly vertical line. While modern construction has embraced the laser, the humble weight on a string remains the final authority on what is truly straight.
Relying on ancestral wisdom means understanding that high-tech is not always high-accuracy. A laser beam can spread, blur, or be knocked out of alignment by a fraction of a degree, leading to massive errors over long distances. Gravity, however, is a constant. As long as the Earth has mass, a suspended weight will point directly toward its center. This article explores the mechanics, history, and practical application of the plumb bob—a tool that connects the modern craftsman to the master builders of the Roman Empire and Ancient Egypt.
How To Use A Plumb Bob For Perfect Walls
Vertical alignment is the cornerstone of structural integrity. A wall that leans even slightly creates an uneven distribution of weight, leading to cracked foundations, sticking doors, and eventually, structural failure. The plumb bob is the primary tool used to ensure that a surface or object is “plumb”—a term derived from the Latin word plumbum, meaning lead.
Ancient Romans used these tools to construct aqueducts that spanned hundreds of miles with a precision that still baffles modern engineers. They understood that while a spirit level is excellent for short horizontal spans, the plumb bob is the king of verticality. In modern terms, it is used to set doorjambs, align studs in a tall wall, and ensure that chimneys or elevator shafts rise perfectly straight.
Using a plumb bob is a lesson in patience and physics. It consists of a weight—usually pointed at the bottom—and a string attached to the center of its top. When you hang this tool, the string represents a vertical datum. It is used to transfer a point from a ceiling to a floor or to verify that a vertical surface is parallel to the pull of gravity.
The Mechanics of Gravity: How It Works
The physics of the plumb bob are deceptively simple. A suspended mass seeks the lowest possible energy state, which is found when the string is aligned with the local gravitational field. Because gravity pulls objects toward the center of the Earth, the string becomes a physical manifestation of a vertical line.
To establish a plumb line, you must fix the top of the string to a stable point. This might be a nail in a header beam or a mark on a ceiling. As you lower the weight, it will likely swing back and forth like a pendulum. You must wait for this motion to cease. Once the bob is still, the point at its base indicates the exact spot on the floor (the nadir) that is vertically aligned with the anchor point at the top.
Precision comes from the weight’s design. Quality bobs are machined to be perfectly symmetrical so that the center of gravity remains directly under the string’s attachment point. If a weight is lopsided, it will hang at a slight angle, ruining your measurement. This is why the pointed tips of Roman and modern bobs are so critical; they allow for pinpoint marking on the surface below.
The Right Materials: Brass, Steel, and Lead
The choice of material for your weight changes how the tool behaves in different environments. Ancient builders used lead because it is dense and easy to cast, but modern craftsmen have more options.
Brass Plumb Bobs: Brass is favored for its high density and resistance to corrosion. Because brass is non-magnetic, it won’t be pulled toward steel framing or nearby electrical lines, ensuring the reading is based solely on gravity. Most professional brass bobs feature a hardened steel tip that can be replaced if dropped or dulled.
Steel Plumb Bobs: Steel is a common, cost-effective alternative. It is often found in hexagonal shapes, which prevents the tool from rolling away if dropped on a flat surface. However, steel is lighter than brass and can be influenced by magnetic fields, which may lead to slight inaccuracies in specific industrial settings.
Braided String: The line itself is just as important as the weight. Builders prefer braided nylon or silk because these materials do not untwist under tension. A twisted cotton string can cause the bob to spin rapidly as it settles, extending the time you have to wait for a steady reading.
How to Use a Plumb Bob Step-by-Step
Achieving a perfect vertical requires a methodical approach. Follow these steps to ensure your framing or masonry is true.
Step 1: Secure the Anchor Point.
Drive a nail or screw into the top plate of your wall or the ceiling where you need your vertical reference. Ensure the anchor is solid and won’t shift under the weight of the bob.
Step 2: Attach the String.
Thread the line through the cap of the plumb bob. Professionals often use a “plumb bob reel” or a simple knot like a figure-eight to ensure the string exits the weight exactly at its center.
Step 3: Lower the Weight.
Slowly lower the bob until it is about 1/2 inch (12.7 mm) to 1 inch (25.4 mm) above the floor or the lower reference mark. Do not let the weight touch the ground, as friction will prevent it from reaching a true vertical position.
Step 4: Dampen the Swing.
Wait for the bob to stop moving. If you are in a hurry, you can gently steady the weight with your hand, but you must let go and allow it to settle naturally for the final check. In ancient times, builders sometimes lowered the bob into a bucket of water or molasses to “dampen” the swing and speed up the process.
Step 5: Mark Your Point.
Once the bob is perfectly still, look straight down at the pointed tip. Use a pencil or a chalk mark to indicate the spot on the floor directly beneath the point. The line between your top anchor and this bottom mark is now perfectly plumb.
Benefits of the Gravity Level over Plastic Lasers
Modern construction sites are full of glowing red and green lines, but there are distinct advantages to the old ways. Reliability is the primary benefit. A plumb bob has no “off” switch and requires no charging. If you are working on a remote job site or a long-term homestead project, you can always rely on the Earth’s gravity.
Accuracy over distance is another factor. Most consumer-grade laser levels have an accuracy rating of roughly 1/4 inch at 30 feet (6 mm at 9 meters). While that sounds precise, a plumb bob is limited only by the quality of the string and the steadiness of the air. For high-ceilinged cathedrals or tall chimneys, the plumb line remains more accurate than many electronic alternatives because it does not suffer from “beam spread.”
Cost and durability also favor the manual tool. A high-quality brass plumb bob costs a fraction of a self-leveling rotary laser. If you drop a laser level onto concrete, it is likely ruined or needs expensive recalibration. If you drop a plumb bob, you simply pick it up and keep working.
Challenges and Common Mistakes
Even a tool this simple has its pitfalls. The most frequent error is failing to account for environmental factors, specifically wind. Because a plumb line is essentially a long pendulum, even a slight breeze can push the string and the weight off-center.
Mistake: Touching the Surface.
Allowing the string or the bob to rub against the wall you are measuring is a common mistake. Friction will hold the bob in an “almost plumb” position, giving you a false reading. Always hang the line a few inches away from the surface and use a spacer block of known thickness at both the top and bottom to check for parallelism.
Mistake: Using the Wrong String.
Using a thick, fuzzy twine can catch the wind and increase the “drag,” making it harder for the weight to settle. Always use the thinnest, strongest braided line possible for the weight you are using.
Mistake: Eyeing the Angle.
Viewing the plumb line from only one angle can be deceptive. To ensure a post or wall is truly vertical, you must check it from two directions that are 90 degrees apart. A post might look perfect from the front but be leaning significantly toward or away from you.
Limitations of the Plumb Bob
While it is an “eternal” tool, the plumb bob is not universal. It is specifically designed for verticality. It cannot find a horizontal level on its own without the help of a frame, such as a Roman “A-frame” level. In this setup, a plumb bob hangs from the apex of a triangular frame; when the string aligns with a mark on the crossbar, the feet of the frame are level.
Height is also a constraint in outdoor settings. The longer the string, the more susceptible it is to wind and the longer it takes to settle. In extremely tall structures, builders often have to use massive weights—sometimes 20 pounds (9 kg) or more—to maintain stability.
Environmental interference goes beyond wind. In high-vibration environments, such as a construction site with heavy machinery running nearby, the bob may never stop vibrating. In these specific cases, a liquid-dampened bob or an electronic sensor might be necessary to get a reading.
Plastic Laser vs. Gravity Level: A Practical Comparison
| Feature | Laser Level | Roman Plumb Bob |
|---|---|---|
| Power Source | Batteries (AA, Lithium-Ion) | Earth’s Gravity |
| Calibration | Required regularly; easily lost | Never required |
| Distance Accuracy | Degrades as beam spreads | Constant over any distance |
| Durability | Fragile glass and electronics | Solid metal; nearly indestructible |
| Cost | $50 – $500+ | $5 – $30 |
| Setup Time | Fast (self-leveling) | Slow (waiting for swing to stop) |
Practical Tips and Best Practices
Maximizing the effectiveness of your plumb bob requires a few “tricks of the trade” passed down through generations. These adjustments can turn a frustrating experience into a precise one.
- The Spacer Block Method: When checking a wall, use two identical blocks of wood (e.g., two scraps of 2×4). Hold one against the wall at the top where the string is anchored and the other at the bottom. The string should just barely “kiss” the bottom block. If there is a gap or the string is pushed out, the wall is not plumb.
- Chalk the Line: If you need a permanent vertical line on a wall, you can snap a chalk line using your plumb string. Once the bob is still, hold the string tight against the bottom mark and snap it against the wall. This is much faster than marking multiple individual points.
- The Bucket Dampener: For outdoor work, place the plumb bob inside a 5-gallon (19-liter) bucket. Fill the bucket with water or oil until the weight is submerged but not touching the bottom. The liquid will stop the pendulum swing almost instantly without affecting the vertical accuracy.
- Center Mark Checking: Periodically check that your string is perfectly centered. Spin the bob while it is hanging. If the point wobbles in a circle rather than spinning on its axis, the weight or the cap is out of balance and should be replaced.
Advanced Considerations: Transferring Points
One of the most powerful uses for a plumb bob is transferring layout marks between floor and ceiling. This is essential when installing kitchen islands, ceiling fans, or stair newel posts.
Imagine you have a blueprint that marks the center of a chandelier on the floor. To find the exact drilling point on the ceiling, you cannot simply “look up.” You anchor your plumb bob to the ceiling and move the anchor point until the bob’s tip is perfectly centered over the floor mark. This ensures the fixture is installed in the exact 3D coordinate required by the design.
In masonry, the plumb bob is often used in conjunction with a “story pole.” The mason hangs the bob at the corner of the building and uses the string as a constant guide to ensure each course of brick or stone is perfectly aligned with the one below it. This prevents the “twisting” or “leaning” common in poorly built masonry walls.
Scenario: Framing a Basement Wall
Consider a practical scenario: you are framing a new wall in a basement. The floor is concrete and slightly uneven, and the overhead joists are not perfectly square. A spirit level might tell you if a single stud is straight, but it won’t help you align the entire wall relative to the floor and ceiling.
First, you snap a chalk line on the floor where the base plate will go. Next, you need to find where the top plate should be fastened to the joists. You hang your plumb bob from the joists and move the string until the point of the bob hits your chalk line on the floor.
Mark this spot on the joists. Repeat this at both ends of the wall. When you fasten your top plate to these marks, you are guaranteed that the wall will be perfectly vertical, regardless of any imperfections in the basement floor. This creates a solid, square foundation for your drywall and trim, saving hours of frustration later in the project.
Final Thoughts
The Roman Plumb Bob is more than just a tool; it is a connection to the fundamental laws of the universe. It reminds us that accuracy does not always require microchips or laser diodes. Sometimes, the most reliable answer is the one provided by the ground beneath our feet.
By mastering this simple tool, you gain a level of self-reliance that modern technology cannot provide. You will be able to build walls that stand for generations, hang doors that never swing shut on their own, and install fixtures with a precision that honors the craftsmen of the past.
Experiment with making your own weight or investing in a solid brass plummet. Take the time to wait for the swing to stop. In that silence, you are witnessing the same force that keeps the planets in orbit, and you are using it to build something true. Whether you are a professional contractor or a weekend homesteader, the plumb line is the one guide you can always trust.
