How To Become More Self-Sufficient Without Starting a Full-Blown Farm…
Want to start preserving your harvest, making your own soap, or building a backyard root cellar — but not sure where to begin? “Homesteading Advice” gives you instant lifetime access to 35+ practical homesteading books on food preservation, veggie gardening, DIY natural cleaning products (save over $250 per year with this skill alone), brewing, off-grid energy, and a whole lot more…
Click Here To Check It Out Now!
How did the Romans build 50-mile aqueducts with a 1-inch drop per mile without a single battery? A laser level is great until the batteries die or the screen cracks in the mud. The Chorobates uses the oldest sensor on earth: water. This 20-foot wooden bench allows you to sight perfect levels across massive distances. If you’re digging swales or building a foundation, this ancient tool is more accurate than your local rental shop’s gear.
Most modern builders rely on electronic pulses to find a straight line. While that technology is convenient, it is fragile and requires constant calibration against a standard you cannot see. The Roman Chorobates offers a different path. It relies on the absolute law of gravity acting upon a liquid surface, a standard that never needs a software update.
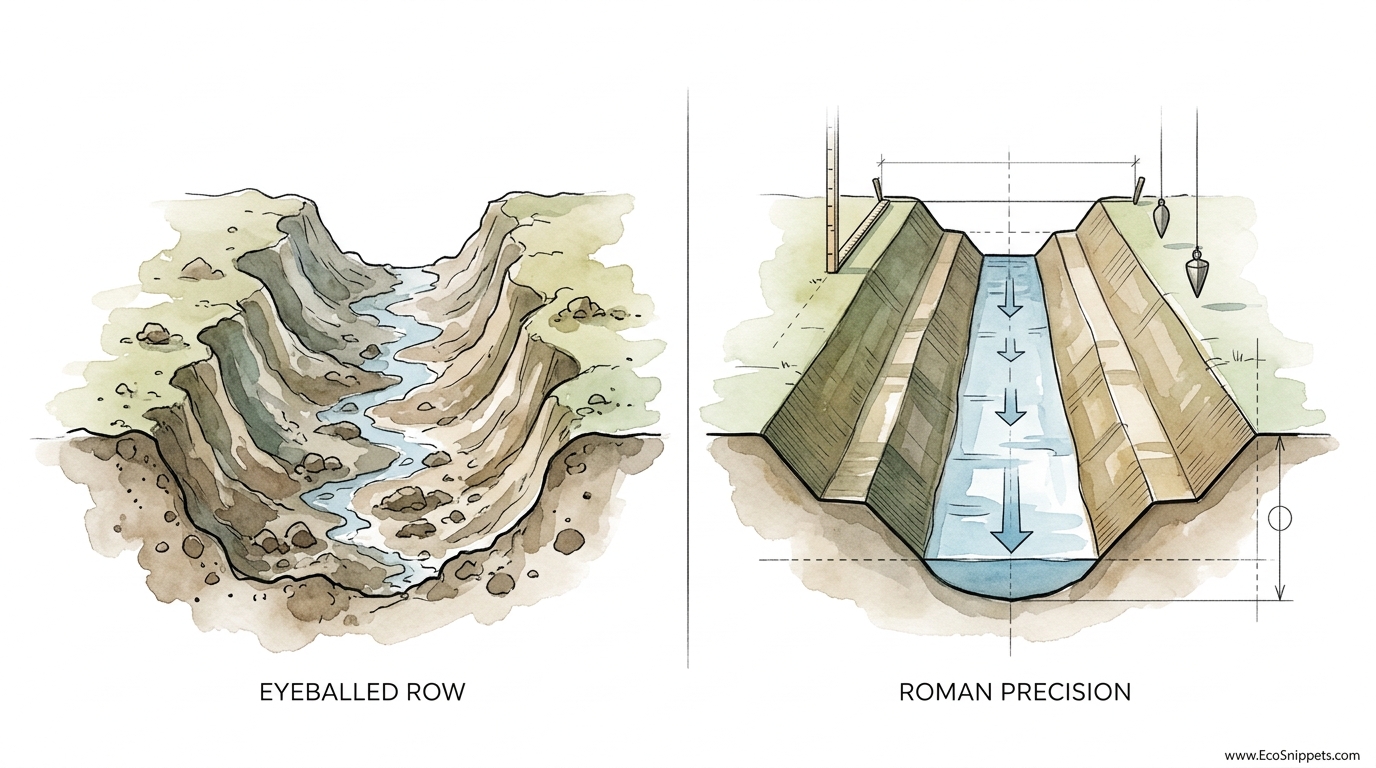
In the world of homesteading and permaculture, precision is often the difference between a thriving hydration system and a washed-out gully. When you understand the mechanics of the Chorobates, you gain the ability to master your landscape using nothing more than timber, string, and a few gallons of water. This is how the ancients tamed the terrain, and it is how you can achieve Roman precision on your own soil.
How To Level Swales Without A Laser Level
A swale is essentially a long, level trench designed to catch rainwater and sink it slowly into the earth. If the swale is even slightly off-level, water will pool at the low end, potentially breaching the berm and causing erosion. Traditional surveying for these features usually involves an A-frame or a laser level, but the Chorobates provides a middle ground of extreme accuracy and long-range sighting.
The tool itself is a heavy wooden beam, traditionally 20 Roman feet (approx. 6 meters or 19.7 feet) long. Because of its length, it averages out the small bumps and dips in the soil that often trip up smaller levels. It exists to provide a perfectly horizontal reference line from which you can measure the “fall” or slope of your land with surgical intent.
In real-world situations, you use the Chorobates to establish a “contour line.” By moving the tool across a hillside and ensuring the water remains level in its central groove, you can mark a path where every point is at the exact same elevation. This allows for the construction of massive water-harvesting systems that function purely on the subtle gradients of the earth.
The Anatomy of an Ancient Powerhouse
Building a Chorobates requires an understanding of its three primary components: the regula (the main beam), the ancones (the legs or brackets), and the struts. According to the Roman architect Vitruvius, the beam should be made of seasoned wood to prevent warping, as any curve in the timber will throw off your sightline.
The legs are fixed at right angles to the beam. To ensure these legs are perfectly perpendicular, cross-struts are tenoned between the legs and the main beam. On these struts, vertical lines are carved. Plumb lines—weighted strings—hang from the main beam and must align perfectly with these carved marks for the tool to be considered level.
The most ingenious feature is the water groove. Carved into the top surface of the 20-foot beam is a channel about 5 feet (1.5 meters) long. When the wind is too high for the plumb bobs to settle, the surveyor pours water into this groove. If the water touches the rims of the channel equally at both ends, the bench is level. This dual-verification system is why Roman aqueducts rarely failed.
Step-by-Step: Using the Chorobates for Earthworks
To begin leveling a swale, you first need a stable starting point. Place one end of the Chorobates at your desired elevation. Your assistant will then adjust the other end until the plumb lines hit their marks or the water in the groove is perfectly still and level with the edges.
Once the tool is level, you have a 20-foot horizontal reference. You can then look across the top of the beam to a sighting rod (a “mensor”) held further down the line. By measuring the distance from the ground to your line of sight on that rod, you can calculate the exact elevation change over the distance. This is how the Romans calculated drops as shallow as 1:2000—a feat that modern contractors often struggle to replicate without GPS-guided machinery.
If you are building a “true contour” swale, you simply move the tool so that both legs rest on ground that keeps the beam level. If you want a slight “diversion” slope to move water toward a pond, you can place a small shim of a known thickness (e.g., 1 inch or 2.5 cm) under one leg. This forces a controlled 1-inch drop over every 20 feet of travel.
Benefits of Ancient Surveying Tools
The most significant advantage of the Chorobates is its durability and self-reliance. In a remote homesteading environment, you cannot always run to the store for a CR2032 battery. The Chorobates is made from the very materials you are likely clearing from your land: timber and water. It is a tool that can be repaired in the field with a chisel and a bit of string.
Furthermore, the tool offers visual transparency. When a laser level gives you a reading, you are trusting a factory-calibrated sensor. When the Chorobates shows you level, you are seeing the literal surface of the earth’s gravitational pull. There is no “ghost in the machine.” If the water is level, the tool is level. This builds a deeper connection between the practitioner and the physics of the landscape.
Another benefit is the accuracy over distance. Because the Chorobates is 20 feet long, it bridges across micro-topography. An A-frame level with a 6-foot spread can easily get “lost” in a small hole or a clump of grass. The Chorobates ignores these minor irregularities, providing a much smoother contour line that results in a more professional and functional swale.
Challenges and Common Pitfalls
The primary challenge is wind. Even a light breeze can cause plumb bobs to sway and water to ripple. The Romans solved this by shielding the plumb bobs or using the water groove, but on a modern homestead, you must be patient. If the water is dancing, your reading is a guess. Always wait for the “still point” before marking your grade.
Weight and Portability are also significant hurdles. A 20-foot oak beam is heavy. It requires two people to move and set up effectively. If you are working alone, you may find the tool frustrating. This is why the Chorobates was historically used by a team of “mensores” rather than a lone surveyor. If you’re building solo, consider a smaller 10-foot (3-meter) version, though you will sacrifice some of that famous Roman precision.
Wood Warping is the silent enemy of the Chorobates. If the main beam sits in the sun or gets soaked in the rain, it may “crown” or “bow.” A bowed beam creates a false horizontal. To combat this, you must store your tool in a flat, dry area and check it for straightness by sighting down the edge of the timber before every use. Using “green” or unseasoned wood is the fastest way to ruin your measurements.
Limitations and Environmental Constraints
The Chorobates is not ideal for extremely steep terrain. If you are working on a 45-degree slope, the 20-foot length becomes a liability. One leg would be touching the ground while the other hangs 15 feet in the air. For steep slopes, the A-frame level or a “Bunyip” water level (using a long hose) is a much more practical choice.
Additionally, it is a slow process. Modern transit levels allow you to take dozens of points from a single setup. The Chorobates requires you to leap-frog the tool across the landscape, point by point. It is a tool for the deliberate builder who values the process and the permanence of the result over the speed of completion.
Finally, there is the surface tension of water to consider. In very small channels, water can “stick” to the sides of the wood, creating a curved meniscus that makes it hard to see the true level. Using a slightly wider groove or adding a single drop of dish soap to the water will break that surface tension and provide a much cleaner, flatter reading.
Tool Comparison: Ancient vs. Modern
| Feature | Chorobates | A-Frame Level | Laser Level |
|---|---|---|---|
| Range | High (Sighting) | Low (Leg Span) | Very High |
| Power Source | Gravity/Water | Gravity | Batteries |
| Crew Size | 2 People | 1 Person | 1 Person |
| Accuracy | Exceptional | Moderate | High (Electronic) |
| Cost | DIY / Low | DIY / Very Low | $200 – $1,500 |
Practical Tips for the Modern Practitioner
- Calibration by Reversal: To check if your Chorobates is accurate, level it once and mark the ground. Then, flip the tool 180 degrees so the legs swap positions. If the plumb lines or water level still show “level,” your tool is perfect. If not, the error is exactly half the distance between the two readings.
- Sighting Vanes: Attach two small metal plates with pinholes at the ends of your beam. This allows you to use the level as a primitive telescope, sighting across valleys to a far-off marker while the beam is confirmed level.
- Leg Adjusters: Instead of fixed wooden legs, consider using threaded rods or adjustable feet. This allows you to fine-tune the level on rocky or uneven ground without needing to dig small holes for the legs to sit in.
- The Meniscus Trick: If you’re struggling to see the water level in the groove, color the water with a bit of beet juice or food coloring. This makes the edge of the water much easier to see against the wood grain.
Advanced Considerations: Calculating the Gradient
While a swale is meant to be level (0% slope), you may occasionally need to build a diversion drain or an irrigation canal. The Romans typically aimed for a gradient of 1 in 200 to 1 in 500 for their aqueducts. To calculate this with a Chorobates, you need to understand the relationship between the length of your beam and the required drop.
If your beam is 20 feet (240 inches) long and you want a 1:400 slope, you divide 240 by 400. This equals 0.6 inches. By placing a shim exactly 0.6 inches thick under the “downstream” leg, you can ensure that every 20-foot section you build maintains that exact 1:400 ratio. Scaling this up over a mile (5,280 feet) requires 264 “placements” of the tool, resulting in a total drop of approximately 13.2 feet.
For serious practitioners, keep a logbook of these measurements. Record the temperature and the type of wood used, as thermal expansion and moisture can subtly change the length of a long wooden beam. While these changes are microscopic, they are the same factors the Roman Agrimensores considered when surveying across the diverse climates of the Empire.
Example Scenario: A Five-Acre Swale Project
Imagine you have a five-acre hillside that suffers from runoff during spring rains. You decide to install three 200-foot swales to hydrate your future orchard. Using a laser level, you might spend hours trying to see the red dot in the bright sun or fighting with a tripod that sinks into the mud.
Instead, you and a partner bring out the Chorobates. You set the first point at the edge of the property. You level the beam, sight across to a stake 20 feet away, and mark the contour. You repeat this ten times. Because each “link” in your chain is 20 feet long, you finish the 200-foot line in just ten moves. The result is a smooth, sweeping curve that follows the natural “hip” of the hill.
When the first rain comes, you watch the water enter the trench. Because you used a 20-foot reference, there are no “high spots” that stop the flow or “low spots” that cause a breach. The water fills the entire 200-foot basin like a bathtub. This is the ancestral wisdom of Roman engineering working on your modern land.
Final Thoughts
The Chorobates is more than just a tool; it is a philosophy of construction. It reminds us that the most reliable systems are often the simplest ones. While modern technology offers speed, it often detaches us from the very elements we are trying to manage. By using water to measure water, you align your work with the natural laws of the planet.
Whether you are a permaculture enthusiast, a history buff, or a homesteader looking to build infrastructure that lasts for generations, mastering the Chorobates is a worthwhile endeavor. It provides a level of accuracy that commands respect and a sense of self-reliance that no electronic device can match.
Next time you find yourself frustrated with a blinking “error” code on a piece of plastic equipment, remember the men who built the Claudian Aqueduct. They didn’t need a signal or a battery. They just needed a long piece of wood, a steady hand, and the ancient, unchanging level of a pool of water. Build your own, test it against the horizon, and see the world through the eyes of a Roman engineer.
