How To Become More Self-Sufficient Without Starting a Full-Blown Farm…
Want to start preserving your harvest, making your own soap, or building a backyard root cellar — but not sure where to begin? “Homesteading Advice” gives you instant lifetime access to 35+ practical homesteading books on food preservation, veggie gardening, DIY natural cleaning products (save over $250 per year with this skill alone), brewing, off-grid energy, and a whole lot more…
Click Here To Check It Out Now!
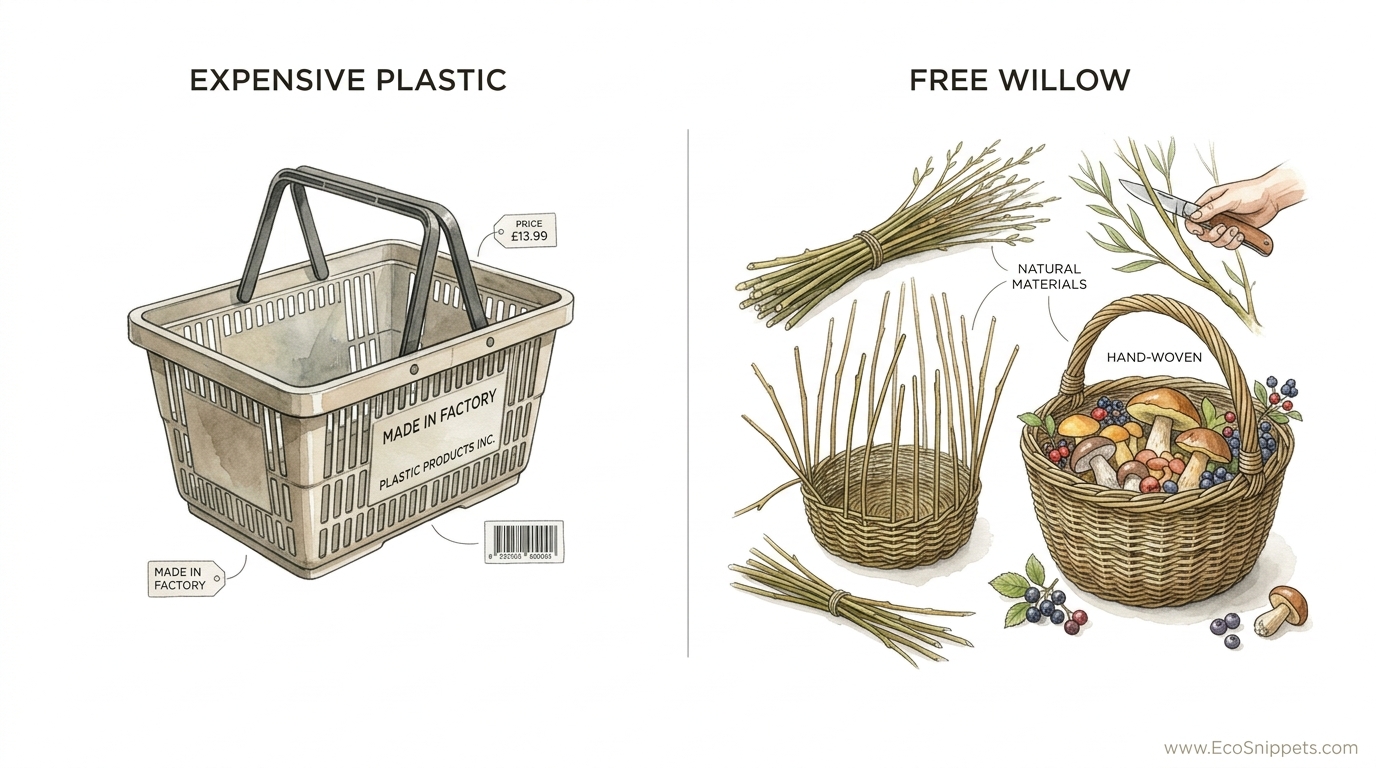
The big-box store wants your money, but the creek bank is trying to give you better storage for free. Most people spend hundreds of dollars at the store just to organize their harvest in plastic that will eventually crack. I spent a morning by the stream harvesting willow switches and an afternoon by the fire. The result? A breathable, unbreakable basket that didn’t cost a single dime and looks better than anything you can buy.
Plastic containers trap heat and moisture, which quickly turns a haul of choice mushrooms or garden greens into a slimy mess. Nature solved this problem centuries ago with the willow basket. These hand-woven vessels allow for constant airflow, and their flexible structure can survive being tossed into a truck bed or dropped on a rocky trail. If a piece of the basket breaks, you simply weave in a new rod rather than throwing the whole thing into a landfill.
Learning this skill connects you to a lineage of makers that spans thousands of years. It requires very few tools—just a sharp knife, a pair of pruners, and your own two hands. Once you understand the rhythm of the weave, you will never look at a roadside thicket the same way again. Every straight branch becomes a potential handle, and every flexible switch becomes a wall for your next foraging companion.
How To Weave A Foraging Basket For Free
A willow foraging basket is a functional work of art created using the “stake and strand” method. This technique involves creating a rigid framework of thick rods (the stakes) and interlacing them with thinner, flexible rods (the weavers). Unlike modern manufactured goods, a willow basket is entirely biodegradable and can be repaired indefinitely with materials found in the wild.
In the world of basketry, the most prized material is the willow (genus Salix). This plant is unique because of its incredible flexibility and its ability to be coppiced—a process where the plant is cut back to the ground to encourage long, straight shoots the following year. While many species work, the Common Osier (Salix viminalis) and Purple Willow (Salix purpurea) are world-renowned for their toughness and slender growth.
These baskets are used globally by foragers, gardeners, and traditional craftsmen. In the forest, a willow basket serves a secondary purpose: it acts as a spore-shaker. As you walk with a load of wild mushrooms, the gaps in the weave allow spores to fall through, effectively replanting the forest as you hike. This symbiotic relationship between the forager and the land is something plastic can never replicate.
How to Do It: From Stream to Stand
Creating a basket begins long before you touch the first rod. Success is rooted in the quality of your harvest and the patience of your preparation. If you rush into weaving with freshly cut “green” willow, you will find that your basket becomes loose and wobbly within a month as the wood shrinks.
1. Harvesting the Willow
The best time to harvest is during the dormant season, typically between late autumn and early spring, when the leaves have fallen and the sap is down. Look for straight, slender rods without side branches. A good rod should be able to bend 90 degrees around your thumb without snapping. If it cracks, it is too brittle for anything but the most basic structural work.
You will need roughly 100 to 120 rods for a medium-sized foraging basket. Collect a variety of thicknesses: six very thick pieces for the base sticks, 24 medium-thick rods for the upright stakes, and a large bundle of thin, flexible weavers for the sides. Bundle them by length and thickness immediately to save time later.
2. The Drying and Soaking Cycle
Freshly cut willow is full of moisture. To prevent the finished basket from shrinking, you must allow the harvested rods to dry completely. This usually takes several months in a cool, dry place with good airflow. Once the rods are “brown”—meaning they have lost their green flexibility and feel bone-dry—they must be re-hydrated.
The standard rule for soaking is one day per foot (30 cm) of length. If your willow is 4 feet (122 cm) long, it needs four days submerged in a trough or a stream. After soaking, wrap the rods in a damp blanket or tarp for 24 hours to “mellow.” This process allows the moisture to penetrate to the core, making the wood as pliable as leather.
3. Weaving the Base (The Slath)
Start with your six thickest base sticks, each cut to about 10 to 12 inches (25–30 cm). Take three of them and use a knife to carefully split a 2-inch (5 cm) slit through their centers. Thread the other three sticks through these slits to form a cross. This structure is called the slath.
Take two long, thin weavers and begin “pairing.” This involves twisting the weavers over and under the groups of three sticks. Go around twice to lock the cross in place, then begin separating the sticks into individual spokes. Weave around each individual spoke until your base reaches the desired diameter, typically 7 to 8 inches (18–20 cm) for a standard basket.
4. Upsetting the Stakes
Once the base is finished, trim the protruding ends of the base sticks. Take your 24 medium-thick stakes and sharpen the butt ends (the thick ends) into a point. Insert one stake into the weave on either side of each base stick. Use a bodkin or a sharpened screwdriver to make room in the tight weave.
Kink the stakes upward at a 90-degree angle to form the “skeleton” of the basket walls. To lock these stakes in place, perform a “three-rod wale.” This is a strong, braided weave using three rods at once, which provides a solid foundation for the sides. It prevents the stakes from flopping outward as you work.
5. Weaving the Sides
With the stakes secure, you can transition to “randing” or “slewing.” Randing is the simplest weave, where a single rod goes in front of one stake and behind the next. To keep the walls even, many weavers use “French randing,” where a new rod is added at every stake and woven simultaneously.
Ensure you maintain consistent tension. If you pull too hard, the basket will “waist,” narrowing toward the center. If you weave too loosely, the walls will bulge and lose their structural integrity. Periodically use a rapping iron or a heavy piece of wood to tap the weaving rows down, keeping the structure tight and gap-free.
6. Finishing the Border
When the walls reach your desired height—usually 8 to 10 inches (20–25 cm)—it is time to create the rim. This is often the most intimidating part for beginners, but it follows a simple logical pattern. Each stake is bent over and woven behind the next one or two stakes before being tucked back into the body of the basket.
A “track border” or a “three-pair plait” creates a beautiful, thick rim that reinforces the top of the basket. Once the stakes are tucked in, trim the excess ends carefully with pruners. The resulting rim should feel solid enough to lift the weight of the entire basket without shifting.
7. Adding the Handle
A sturdy handle requires a thick, “crowned” rod. Find a piece of willow about as thick as your thumb and bend it into a U-shape. Insert the ends deep into the side weaving, following the line of the stakes for maximum strength. To finish the handle, wrap several thin weavers around the main rod in a spiral pattern, tucking the ends into the rim.
The Anatomy of a Basket: Key Terminology
Understanding the language of basketry helps you follow advanced tutorials and troubleshoot issues.
| Term | Definition | Practical Use |
|---|---|---|
| Butt | The thickest end of a willow rod. | Used for base sticks and starting weaves for strength. |
| Tip | The thin, flexible end of a rod. | Used for finishing rows and delicate border work. |
| Withy | Another name for a flexible willow rod. | The general term for your weaving material. |
| Waling | A weave using three or more rods at once. | Adds structural strength to the base and rim. |
| Slype | An angled cut made at the end of a rod. | Helps stakes slide into the base weave easily. |
| Bodkin | A sharp, tapered tool. | Used to pry open space in a tight weave. |
Benefits of Willow Over Modern Alternatives
Choosing willow isn’t just a stylistic preference; it is a functional upgrade for any serious outdoorsman or gardener.
Superior Breathability: Plastic buckets act like ovens in the summer heat. Willow allows air to circulate through the walls and bottom, cooling the contents and preventing the buildup of ethylene gas, which causes produce to rot.
Eco-Friendly Reproduction: As mentioned previously, the open weave of a foraging basket is essential for mushroom hunters. It allows millions of microscopic spores to escape back into the soil as you move through the woods, ensuring future harvests for years to come.
Customization: When you weave your own basket, you control the depth, the handle height, and the weight. You can add “bye-stakes” for extra strength or create a “fitch” (open-work weave) to make the basket lighter for long treks.
Zero Cost: Aside from the one-time purchase of a pair of pruners, the material cost is non-existent. You are turning what most people consider “brush” or “weeds” into a tool that would cost $100 or more in a specialty shop.
Challenges and Common Mistakes
The learning curve for willow weaving can be steep, mostly due to the physical nature of the material.
Improper Preparation
The most frequent error is trying to weave with willow that hasn’t been properly mellowed. If the wood is too dry, it will snap with a loud “pop” right when you reach a critical juncture. If it is too wet (waterlogged), the bark will slide off, and the basket will become incredibly heavy and prone to mold.
Ignoring the Curve
Every willow rod has a natural curve. The outside of the curve is the “back,” and the inside is the “belly.” Professionals always weave with the belly facing the inside of the basket. This makes the rods more compliant and prevents the bark on the back from splitting under tension.
Inconsistent Tension
Beginners often focus so much on the pattern that they forget to manage the shape. If you don’t check the “squareness” of your stakes every few rows, you will end up with a basket that leans or spirals. Use your body to hold the stakes in place, or even use a “hoop” to keep the top stakes spaced correctly while you weave the middle sections.
Limitations of Willow Baskets
While willow is incredibly versatile, it is not the solution for every storage need.
Moisture Management: Willow is a natural fiber. If you leave it in a damp basement or a wet garage for months, it will develop mold and rot. It needs to be dried thoroughly after use and stored in a place with good airflow.
Time Investment: You cannot “mass produce” these at home. A single high-quality foraging basket takes several hours of active weaving, not including the days of harvesting and weeks of drying. It is a slow craft for a slow lifestyle.
Weight Capacity: While very strong, a willow basket does have a breaking point. If you plan to carry heavy loads of stone or wet soil, you must use much thicker stakes and a reinforced base. A standard foraging basket is designed for light to medium hauls—mushrooms, berries, eggs, and greens.
Practical Tips for Success
* Sort your willow religiously. Spend an hour before you start weaving to sort your rods into bundles of identical thickness and length. This prevents you from having to stop mid-weave to hunt for a matching rod.
* Keep a spray bottle handy. If you are weaving in a dry environment or by a fire, the willow will lose its moisture quickly. Spritz the basket every 20 minutes to keep the fibers supple.
* Use your feet. Traditional weavers often sit on a low stool and use their feet to hold the base steady while they “upset” the stakes. This frees up both hands for the complex three-rod waling.
* Avoid “branchy” willow. If a willow rod has side shoots, every joint is a potential break point. Stick to the “whips”—single, unbranched shoots from a coppiced stool.
Advanced Considerations
For those who have mastered the basic round basket, the next step is experimenting with color and form. Different species of willow provide a natural palette of reds, oranges, yellows, and deep purples. By mixing “bark-on” willow with “buff” willow (willow that has been boiled and stripped of its bark), you can create intricate patterns without using any dyes.
Consider the “Oval Base” for your next project. Oval baskets are more ergonomic to carry against the hip during long foraging trips. The construction is more complex, requiring a “hoop” framework rather than a simple cross slath, but the comfort in the field is worth the extra effort.
Another advanced technique is “fitching.” This is an open-weave style where you leave large gaps between the weavers, held together by twisted “fitch rows.” It uses significantly less material and creates a very lightweight basket, ideal for delicate items like medicinal herbs or flowers.
Example Scenario: The Autumn Mushroom Hunt
Imagine a crisp October morning. You’ve spent the last three days soaking a bundle of wild-harvested Salix purpurea. You spent the previous evening by the hearth, weaving the base and upsetting the stakes. By noon, you have a finished basket, the red-tinged bark still smelling of the riverbank.
You head into the hemlock groves. You find a flush of Chanterelles and several large Porcini. In a plastic bag, these would be crushed and sweating within thirty minutes. In your willow basket, they sit on a bed of cool air. As you walk, the basket’s rim protects the fragile gills of the mushrooms from brushing against thickets. When you return home, you simply wipe the basket with a damp cloth and hang it by its handle. It will be ready for the spring ramps and fiddleheads in six months.
Final Thoughts
The willow basket is more than a container; it is a testament to the idea that we don’t need industrial manufacturing to live well. It proves that the most durable and beautiful tools are often those we can grow in our own backyards or find along a local waterway. Taking the time to learn these weaves is an investment in self-reliance that pays off every time you step into the woods.
Do not be discouraged if your first attempt is lopsided or loose. Every master weaver has a “shame basket” tucked away in their attic. The wood is a living thing, and learning its temperament takes time. Once you feel the willow “give” and lock into place under your fingers, you’ll understand why this craft hasn’t changed in millennia.
Start small. Maybe your first project is a simple berry basket or a garlic hanger. As your hands grow stronger and your eyes learn to spot the best willow from a distance, you will find yourself weaving larger and more complex forms. The creek is always flowing, and the willow is always growing—there is no better time to start than today.
