How To Become More Self-Sufficient Without Starting a Full-Blown Farm…
Want to start preserving your harvest, making your own soap, or building a backyard root cellar — but not sure where to begin? “Homesteading Advice” gives you instant lifetime access to 35+ practical homesteading books on food preservation, veggie gardening, DIY natural cleaning products (save over $250 per year with this skill alone), brewing, off-grid energy, and a whole lot more…
Click Here To Check It Out Now!
Is your flock’s health dependent on a plastic bottle or the power of your own pantry? Most homesteaders panic when the supply chain for ‘poultry boosters’ breaks, but true resilience is grown, not bought. See how swapping lab-made powders for foraged fermented tonics creates a flock that doesn’t just survive – it thrives.
True self-reliance means looking at the birds in the coop and knowing they have the internal grit to handle whatever the season throws at them. For generations, keepers of livestock didn’t rely on synthetic vitamin packets or imported probiotic powders. They understood that the strongest defense for any living creature begins in the gut.
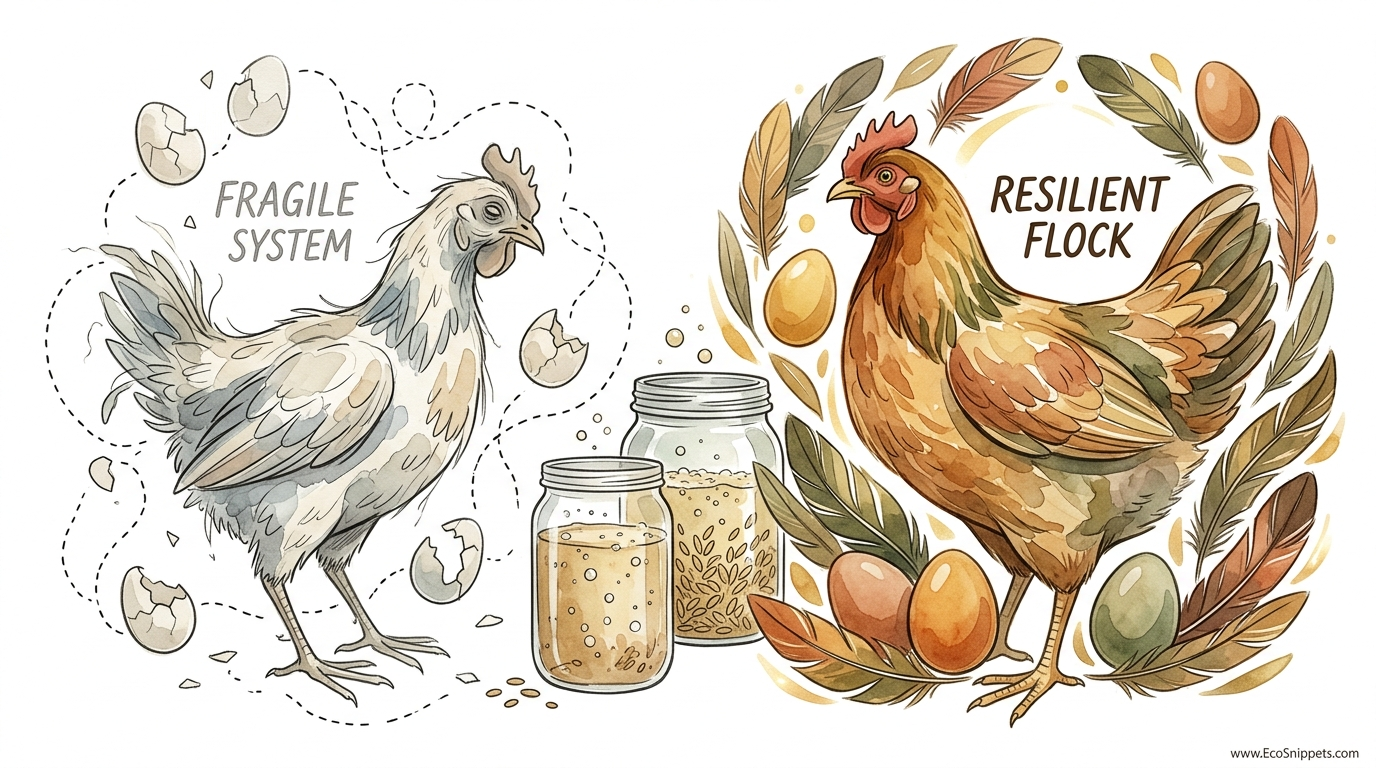
Modern poultry management often feels like a fragile system, where one missed shipment of “booster” powder leads to a dip in production or a rise in respiratory issues. Moving toward a resilient flock involves reclaiming the ancient art of fermentation. This process doesn’t just preserve nutrients; it unlocks them, creating a living medicine chest right on your kitchen counter.
How To Make Fermented Poultry Boosters
Fermented poultry boosters are concentrated, probiotic-rich supplements created through the natural process of lacto-fermentation. This isn’t just about soaking grain in water; it is a biological transformation where beneficial bacteria, primarily lactic acid bacteria (LAB), consume sugars and starches to produce lactic and acetic acids. These acids lower the pH of the mixture, creating an environment where pathogens like Salmonella and E. coli cannot survive.
In a real-world homestead setting, these boosters serve as a preventative tonic. Think of them as a natural “Fire Cider” for your birds. By using common pantry staples like garlic, raw honey, and whole grains, you are creating a supplement that mimics the diverse microbial environment your birds would naturally encounter in a wild, ancestral habitat.
This method exists because it bridges the gap between modern nutrition and traditional wisdom. While dry feed provides basic calories, the fermentation process pre-digests the material, making minerals like phosphorus, zinc, and magnesium significantly more bioavailable to the bird.
How the Fermentation Process Works
Understanding the underlying principles of fermentation ensures your boosters remain safe and effective. The goal is to encourage the growth of Lactobacillus acidophilus, Pediococcus, and Bifidobacterium. These microbes are naturally present on the skins of vegetables and the husks of grains.
The Basic Grain Ferment
To start a basic fermented grain booster, fill a clean glass jar or food-grade bucket about one-third full with whole grains or your standard poultry mash. Submerge the feed completely in dechlorinated water, ensuring there are at least 5 cm (2 inches) of liquid above the grain line. Whole grains typically ferment best because they maintain their structure and are less likely to turn into a “soupy” mess.
Cover the container with a loose lid or a breathable cloth to allow gases to escape. Over the next 24 to 72 hours, you will notice bubbles forming and a pleasant, yeasty aroma similar to sourdough bread. Storing the vessel in a consistent environment between 15°C and 24°C (60°F to 75°F) is essential for a steady fermentation rate.
The Fermented Garlic Honey Tonic
Garlic contains allicin, a powerful natural compound with antimicrobial properties. When fermented in raw honey, these properties are amplified. Peel four whole bulbs of garlic and place the cloves into a 750 ml (25 oz) jar. Pour enough raw honey over the garlic to submerge it completely.
Raw honey contains its own set of beneficial enzymes and wild yeasts. Every few days, rotate the jar to ensure the cloves stay coated. After five to six weeks, the mixture will reach a safe pH of approximately 4.0, which is well below the 4.6 threshold required for shelf stability. This syrup can be added to the flock’s waterers during times of stress or cold weather.
The Practical Benefits for a Resilient Flock
The measurable benefits of using fermented boosters are immediate and observable in the daily life of the coop. One of the most significant advantages is the improvement in gut morphology. Scientific studies have shown that chickens fed fermented products exhibit increased villus height in the intestines, which directly translates to better nutrient absorption.
Enhanced Egg Quality
Hens receiving regular fermented supplements often produce eggs with firmer yolks and significantly thicker shells. This is due to the breakdown of phytic acid during fermentation. Phytic acid is an “anti-nutrient” found in many grains that binds to minerals; fermentation neutralizes it, allowing the hen to utilize the calcium and phosphorus she consumes more effectively.
Reduced Feed Costs and Waste
A resilient flock is also a more efficient one. Chickens often consume 20% to 30% less feed when it is fermented because they are getting more nutritional “mileage” out of every peck. Furthermore, the moist texture of fermented feed prevents the birds from flicking it out of the trough, which significantly reduces the amount of wasted grain on the coop floor.
Pathogen Resistance
The acidic environment created by the fermentation process acts as a barrier against internal parasites and harmful bacteria. By maintaining a low gut pH, you are making the birds’ internal systems inhospitable to the microorganisms that cause common poultry ailments.
Common Mistakes and How to Avoid Them
Even though fermentation is a natural process, homesteaders often run into common pitfalls that can ruin a batch or, worse, harm the birds.
Using Chlorinated Tap Water
Most municipal water systems use chlorine to kill bacteria. Unfortunately, this chemical also kills the beneficial lactic acid bacteria you are trying to cultivate. Always use filtered water or let tap water sit out for 24 hours to allow the chlorine to evaporate before starting your ferment.
Mistaking Kahm Yeast for Mold
During fermentation, a thin, white, wavy film may form on the surface. This is usually Kahm yeast, which is harmless. However, fuzzy mold that is green, black, or red is a sign of spoilage. If you see colorful, fuzzy growth or if the mixture smells rotten rather than sour, discard the batch immediately.
Wrong Container Material
The acids produced during fermentation can leach chemicals out of low-quality plastics or react with certain metals. Always use glass, ceramic, or BPA-free, food-grade plastics (HDPE #2) for your fermentation vessels. Avoid using galvanized metal, as the zinc coating can react with the acidic liquid.
Limitations of Fermented Boosters
While fermented tonics are powerful, they are not a “magic bullet” for all poultry problems. Realistic constraints must be acknowledged to maintain a truly healthy flock.
Fermented feed is a supplement, not a complete replacement for a balanced diet. Young chicks, in particular, need high protein levels that may be diluted if the fermentation process isn’t managed carefully. Furthermore, in extremely cold temperatures below 0°C (32°F), fermented wet feed can freeze quickly in the tray, making it inaccessible to the birds.
Environmental limitations also play a role. In high-humidity regions, the risk of mold increases if the fermentation vessels are not kept in a well-ventilated, shaded area. You must also be prepared for the daily maintenance of cleaning troughs, as wet fermented feed can sour or attract pests if left out for more than 24 hours.
Home-Grown Resilience vs. Store-Bought Supplements
Choosing the pantry over the plastic bottle is a decision based on cost, efficacy, and independence.
| Feature | Store-Bought Boosters | Fermented Tonics |
|---|---|---|
| Cost | High recurring expense | Negligible (pantry staples) |
| Probiotic Diversity | Limited to specific strains | Broad, wild-culture spectrum |
| Self-Reliance | Dependent on supply chains | Fully independent |
| Preparation Time | Instant | 24–72 hours |
Practical Tips for Success
Implementing a fermentation system doesn’t have to be complicated. Start with these best practices to ensure a smooth transition for both you and your birds.
- The 3-Bucket System: To have a fresh batch ready every morning, use three buckets. Label them “Day 1,” “Day 2,” and “Day 3.” By the time you empty Day 3, Day 1 is ready to be restarted.
- Back-Slopping: Once you have a successful ferment, save about 250 ml (1 cup) of the liquid to “seed” the next batch. This introduces an established culture, making the next fermentation process much faster.
- Seasonal Adjustments: In winter, add warming herbs like cayenne pepper or ginger to your ferment. In summer, focus on hydrating ingredients and perhaps a pinch of sea salt for electrolytes.
- Transition Slowly: If your birds have only ever eaten dry pellets, they might be suspicious of the new texture. Mix a small amount of fermented booster into their dry feed for the first week to let them adjust to the taste.
Advanced Considerations for Serious Practitioners
For the practitioner who wants to go beyond basic grain ferments, consider the use of symbiotic fermentation. This involves combining prebiotics (the food for the bacteria) with probiotics (the bacteria themselves).
Integrating regional herbs like stinging nettle, dandelion greens, or cassava leaves into the fermentation process can provide a “hyper-local” immune boost. These plants contain phytonutrients that, when fermented, become more accessible to the poultry.
Serious keepers may also look into isolating specific strains from their own environment. For instance, research into the Lactobacillus plantarum found in heritage breeds like Tibetan chickens shows that these birds have evolved unique gut flora to handle high-altitude stress. While you likely aren’t raising Tibetan chickens, your local environment has its own unique microbial signature. By using “wild” ferments, you are helping your flock adapt to the specific pathogens and stressors present on your specific plot of land.
Example Scenario: The Winter Molt Recovery
Consider a flock of ten hens entering a late autumn molt. Their bodies are under immense stress as they divert all protein and energy into growing new feathers. A dry-feed-only diet often results in a slow recovery and a long break in egg production.
In this scenario, a homesteader provides a daily booster of fermented whole wheat mixed with black soldier fly larvae and a tablespoon of the fermented garlic honey tonic. The high bioavailability of the amino acids in the fermented wheat allows the hens to rebuild feather keratin faster. The probiotics in the garlic honey keep their immune systems high while their energy is low. The result is a flock that finishes their molt weeks earlier than expected and returns to laying even as the days grow shorter.
Final Thoughts
The health of your flock is a reflection of the resilience of your homestead. Moving away from lab-made “boosters” and toward the kitchen apothecary is more than just a cost-saving measure; it is an act of reclaiming ancestral wisdom. By mastering the simple art of fermentation, you are ensuring that your birds are nourished by a system that cannot be broken by a shipping delay or a store closure.
True resilience is found in the bubbling jar on the counter and the vibrant, red-combed health of a hen that hasn’t seen a synthetic vitamin in years. Start with a single jar of garlic or a bucket of grain, and watch as your flock transforms from a fragile system into a thriving, self-sustaining community.
The more you experiment with foraged herbs and seasonal tonics, the more you will understand the deep connection between the land, the microbes, and the animals in your care. This is the heart of the resilient homestead—grown, not bought.
