How To Become More Self-Sufficient Without Starting a Full-Blown Farm…
Want to start preserving your harvest, making your own soap, or building a backyard root cellar — but not sure where to begin? “Homesteading Advice” gives you instant lifetime access to 35+ practical homesteading books on food preservation, veggie gardening, DIY natural cleaning products (save over $250 per year with this skill alone), brewing, off-grid energy, and a whole lot more…
Click Here To Check It Out Now!
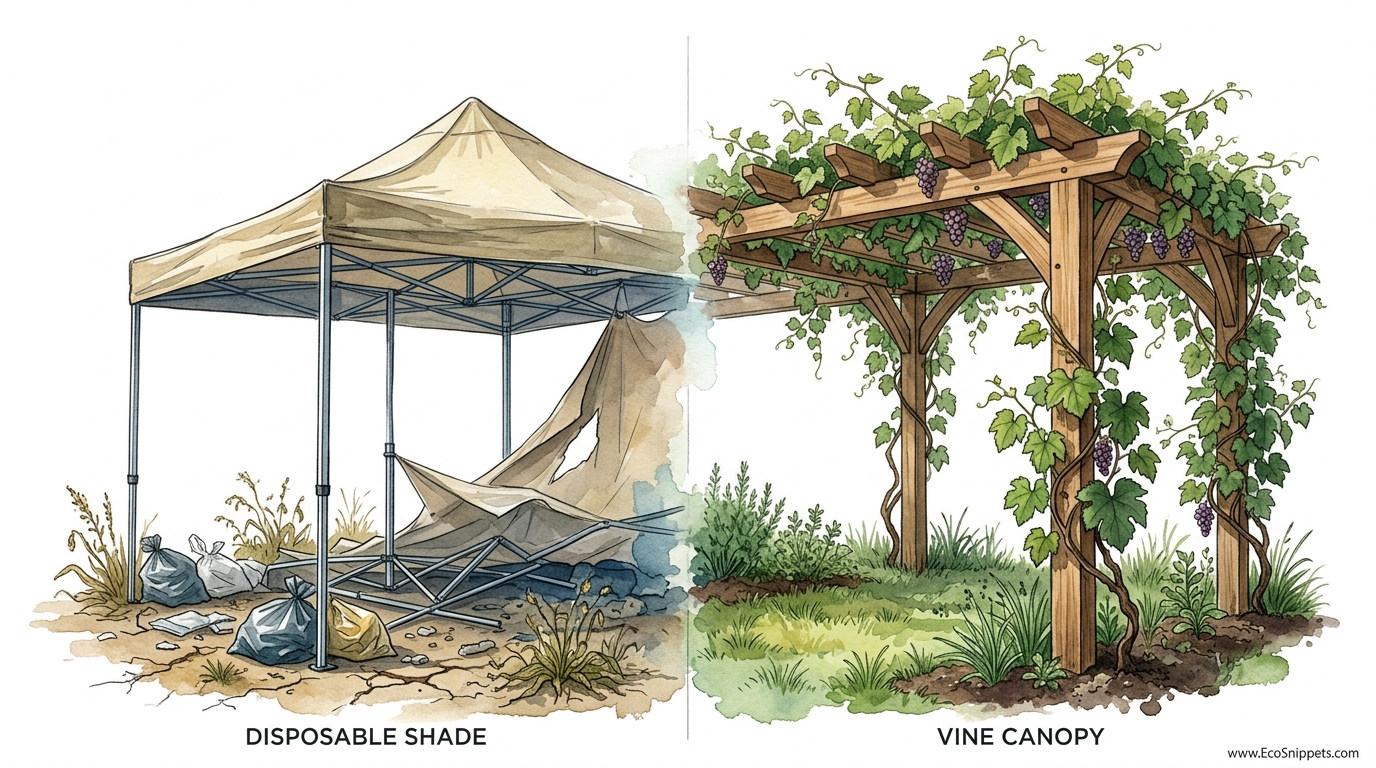
Most people buy their shade in a box, but the best shade grows on a vine. You can spend hundreds every few years on synthetic shade cloth that inevitably rips, or you can plant a grape pergola that feeds you for a lifetime. A living canopy doesn’t just block the sun; it breathes, cools the air through transpiration, and provides an annual harvest. Which legacy are you planting today?
Ancient civilizations understood a secret that modern suburban living has largely forgotten: the most efficient cooling system on Earth is biological. From the courtyard gardens of Ancient Egypt in 1400 BC to the sprawling villa vineyards of Rome, the pergola was never just a structural ornament. It was a functional machine designed to maximize food production in small spaces while creating a microclimate that made the desert heat bearable.
Building a living canopy is a commitment to a different pace of life. It requires the patience to wait three seasons for a full canopy and the grit to maintain a structure that will likely outlive your mortgage. This guide explores the intersection of traditional carpentry and viticulture, providing the blueprint for a shade system that pays dividends in fruit and relief.
DIY Grape Pergola For Backyard Shade
A grape pergola is a permanent outdoor structure consisting of vertical posts that support a cross-grid of beams and rafters, specifically engineered to carry the significant weight of mature grapevines. Unlike a decorative garden arch or a flimsy trellis, a pergola designed for backyard shade must function as both an architectural extension of the home and a high-yield agricultural system.
In real-world applications, these structures serve as “outdoor rooms.” While a plastic umbrella merely blocks the sun, a vine-covered pergola creates dappled light and actively reduces the ambient temperature through evapotranspiration. This is the process where plants release water vapor through their leaves, which consumes heat and cools the surrounding air by as much as 10 to 15 degrees Fahrenheit (5.5 to 8 degrees Celsius).
Visualize a 10-foot by 10-foot (3m x 3m) wooden frame. In the first year, it looks like a skeleton. By the third year, it is a thick, green lung in your backyard, heavy with clusters of purple or green fruit. It represents a shift from “disposable shade” to a “vine canopy” that improves with age rather than degrading in the UV light.
Choosing Your Foundation: Wood Species and Longevity
The longevity of your living canopy is dictated by the timber you bury in the ground. Because grapevines can live for 50 to 100 years, building with cheap, untreated pine is a recipe for structural failure just as the vines reach their peak productivity.
Western Red Cedar and Redwood
These are the gold standards for North American builders. These species contain natural oils and tannins that repel rot, decay, and boring insects. Cedar is particularly valued for its dimensional stability, meaning it is less likely to warp or twist as it seasons in the sun. In a well-ventilated backyard, a cedar pergola can last 20 to 30 years with minimal maintenance.
Pressure-Treated Lumber
For those on a stricter budget, pressure-treated (PT) pine is the most common choice. Modern PT lumber is infused with copper-based preservatives to prevent fungal decay. While functional and affordable, PT pine is prone to “checking” (cracking) and warping. If you use PT lumber, ensure it is rated for “Ground Contact” (UC4A) for the posts and “Above Ground” (UC3B) for the rafters.
Tropical Hardwoods (Ipe and Cumaru)
For a “century build,” practitioners often turn to dense hardwoods like Ipe. These woods are so dense they often do not float in water and carry a fire rating similar to concrete. While extremely expensive and difficult to work with—requiring pre-drilling for every single screw—an Ipe structure can easily last 50 years or more.
The Anatomy of a High-Load Structure
A mature grapevine is not a light “climbing plant.” It is a woody liana that can weigh several hundred pounds when fully leafed out and laden with fruit. After a heavy rain, that weight increases significantly. Your structure must be overbuilt to handle these dynamic loads.
Post Selection and Footings
Do not use 4×4 posts (89mm x 89mm) for a pergola larger than 8 feet (2.4m). A 6×6 post (140mm x 140mm) provides four times the bending resistance and six times the stiffness of a 4×4. To ensure stability, posts should be buried to a depth of at least 3 feet (91cm), or 1/3 of the total post height. In colder regions, you must dig below the frost line to prevent “heaving,” where the freezing ground pushes the post out of alignment.
Beam and Rafter Spacing
The main support beams should be at least 2×8 (38mm x 184mm) or 2×10 (38mm x 235mm) members, doubled and “sandwiched” around the posts for maximum shear strength. Rafters should be spaced every 12 to 24 inches (30cm to 60cm). This tight spacing provides the “ladder” the vine needs to fill the canopy quickly.
Structural Load Math
Calculations for a mature vine canopy often estimate a “dead load” of 5 pounds per square foot (24 kg per square meter). For a 100-square-foot (9.2 square meter) pergola, your structure is supporting a constant 500 pounds (226 kg) of biomass. If you live in a region with heavy snowfall, the structure must be able to handle the combined weight of the vines and the snow, which can easily triple the load.
How to Build and Plant Your Pergola Step-by-Step
Building the frame is only half the battle. To transform it into a living canopy, you must follow a strict three-year training protocol.
Step 1: Frame Assembly and Site Prep
Mark your post holes using a string line to ensure the structure is square. Dig the holes and add 6 inches (15cm) of gravel at the bottom to allow water to drain away from the wood end-grain. Set your posts in concrete, ensuring they are perfectly plumb. Once the concrete cures, install your beams and rafters using stainless steel or hot-dipped galvanized hardware to prevent corrosion from the wood’s acidity.
Step 2: Soil Amendment and Drainage
Grapes hate “wet feet.” They require deep, well-draining soil. If your backyard consists of heavy clay, you must amend it with compost and expanded shale, or consider planting the vines in a large, raised masonry planter at the base of the posts. The ideal pH for most grapes is between 6.0 and 7.0.
Step 3: Year One – The Root Phase
Plant one vine per post. For a 10×10 pergola, two vines are often sufficient to cover the entire top eventually, but four vines (one at each corner) will create a full canopy much faster. In the first year, your goal is not shade; it is root development. Cut the vine back to just two or three strong buds. As it grows, select the strongest shoot and train it up the post using garden twine. Rub off any other side shoots.
Step 4: Year Two – The Trunk Phase
By the second spring, your main shoot should have reached the top of the pergola. This is now the “trunk.” Once it reaches the rafters, pinch off the tip to encourage the vine to branch out horizontally. These horizontal branches, known as “cordons,” should be trained along the main beams.
Step 5: Year Three – The Canopy Phase
In the third year, lateral shoots will grow from the cordons and spread across the rafters. This is when the shade begins to thicken. You may allow a small harvest this year, but many practitioners remove the fruit clusters to ensure the vine puts all its energy into completing the canopy.
Benefits of a Living Vine Canopy
The advantages of a living canopy extend far beyond the aesthetic. It is a multi-functional system that provides measurable ecological and financial benefits.
- Active Cooling: Unlike synthetic fabric, leaves do not store heat. Through transpiration, the canopy acts as a natural evaporative cooler, making the air beneath it feel significantly fresher than the air under a plastic or metal roof.
- Biophilic Connection: Research shows that spending time under a natural canopy reduces cortisol levels and improves mental focus. The dappled “moving” light created by leaves is more restful to the eye than the static shade of a tarp.
- Annual Harvest: A well-managed 10×10 pergola can yield 20 to 50 pounds (9kg to 22kg) of grapes annually. This provides fresh table fruit, juice, or the raw materials for home winemaking.
- Wildlife Habitat: While some may see birds as pests, a grape pergola creates a vertical ecosystem in a sterile backyard, providing nesting sites and food for beneficial insects and songbirds.
Challenges and Common Mistakes
Building a living structure is not without its pitfalls. Most failures occur because the builder treats the plant as an afterthought.
The “Mess” Factor
The most common complaint about grape pergolas is the falling fruit. If you plant over a high-traffic area like a dining table, choose a “seedless table grape” variety that doesn’t drop fruit as easily, or be prepared to harvest early. Avoid planting “wine grapes” over a patio if you aren’t prepared for the stains that crushed dark grapes can leave on concrete or stone.
Over-Pruning and Under-Pruning
Novice growers often fear pruning, leaving the vine to become a tangled, unproductive thicket. Conversely, some prune too aggressively during the growing season, stripping the plant of the leaves it needs for photosynthesis. The rule of thumb is: Heavy pruning in the winter, light thinning in the summer.
Structural Sag
Using spans that are too long without center support is a frequent error. Even 2×8 beams will sag over a 12-foot span under the weight of a mature vine. Limit your spans to 8 or 10 feet (2.4m to 3m) or use larger 2×12 (38mm x 286mm) beams if you need a wider opening.
Limitations: When This May Not Be Ideal
A grape pergola is not a universal solution for every backyard. Realistic constraints must be acknowledged before you break ground.
Humidity and Disease
In regions with extreme humidity, grapes are highly susceptible to powdery mildew and black rot. If you cannot provide 360-degree airflow, the vines may become a source of frustration rather than joy. In these climates, you must select disease-resistant hybrids or be prepared for an organic spraying regimen.
Sunlight Requirements
Grapes are “sun-powered.” They require at least 7 to 8 hours of direct, unfiltered sunlight to produce fruit and maintain a dense canopy. If your backyard is shaded by large oak trees or tall buildings, the vines will become “leggy,” stretching for light and failing to provide the thick shade you desire.
The Time Barrier
A synthetic shade cloth provides instant relief. A vine canopy takes 36 to 48 months to become functional. If you are planning to move in a year or need immediate shade for a summer event, a living canopy is a poor choice. It is a long-term investment in the property’s value and ecosystem.
Comparing Disposable Shade vs. Vine Canopy
To understand the value proposition, compare the traditional living canopy against modern synthetic alternatives.
| Factor | Synthetic Shade Cloth | Grape Vine Canopy |
|---|---|---|
| Initial Cost | Low ($50 – $200) | High ($800 – $3,000) |
| Lifespan | 3 – 5 Years | 50 – 100 Years |
| Cooling Effect | Passive (Blocks light) | Active (Transpiration) |
| Maintenance | None until replacement | Annual pruning/Seasonal care |
| Yield | Microplastics/Waste | Food and Bio-mass |
Practical Tips and Best Practices
If you are ready to start your build, these “pro-tips” will save you years of trial and error.
- Choose the Right Variety: In cold climates (Zones 3-4), look for ‘Valiant’ or ‘Somerset Seedless’. In the hot, humid South, choose ‘Muscadine’ or ‘Southern Home’. In the West, ‘Thompson Seedless’ remains a reliable standard.
- Install Drip Irrigation: Do not rely on hand-watering. Install a simple drip line that runs up the post and delivers water directly to the root zone. Consistent moisture is the secret to rapid canopy growth in years one and two.
- Use Stainless Steel Tension Wire: Instead of thick wooden slats for the roof, use 304 stainless steel wire tensioned between the main rafters. This allows the vine to “grip” more easily and creates a lighter, more elegant look.
- Seal the End-Grain: The most common point of rot is the top of the posts and the ends of the beams. Use a copper-based wood preservative or a high-quality wax sealer on all cuts during assembly.
Advanced Considerations: Integrated Systems
For the serious practitioner, a pergola can be more than just shade. It can be a central hub for a “closed-loop” backyard.
Poultry Integration
Many permaculturists build their chicken runs directly under a grape pergola. The chickens provide constant fertilization through their droppings and eat the “mummy” grapes that fall, which prevents the cycle of fungal diseases like black rot. In exchange, the vines provide the birds with vital protection from hawks and the midday sun.
Vertical Layering
Once the grape canopy is established at the 8-foot (2.4m) level, you can utilize the “vertical space” below. Shorter, shade-tolerant plants like currants, gooseberries, or hostas can thrive in the microclimate created beneath the vines, effectively doubling the productivity of your footprint.
An Example Scenario: The 10×10 “Family Oasis”
Imagine a family in a hot Zone 7 climate. They build a 10’x10′ pergola using 6×6 Cedar posts. They plant two ‘Reliance’ seedless grapevines at opposite corners.
Year 1: The structure is built for approximately $1,200. The vines grow 8 feet up the posts. Total shade: 0%.
Year 2: The cordons reach across the main beams. The family installs a drip timer. Total shade: 25%.
Year 3: The lateral shoots fill the rafters. The first 15 pounds of red grapes are harvested. The temperature under the pergola is measured at 82°F (28°C) while the open patio is 94°F (34°C). Total shade: 80%.
Year 10: The vine trunks are 4 inches thick. The structure has silvered beautifully. The canopy is a solid wall of green, providing a completely private outdoor dining room.
Final Thoughts
Building a DIY grape pergola is an act of defiance against the “disposable” culture of modern landscaping. It is a project that requires you to think in decades rather than seasons. While the labor of digging post holes and the discipline of winter pruning may seem daunting, the reward is a living, breathing architecture that changes with the seasons and feeds your family.
You are not just building a shade structure; you are planting an heirloom. Long after a plastic shade sail has rotted in a landfill, a properly constructed grape pergola will still be standing, its gnarled trunks telling the story of decades of harvests and cool summer afternoons. Are you ready to trade the box for the vine? Experiment with different varieties, build for the heavy loads, and let nature do the cooling for you.
