How To Become More Self-Sufficient Without Starting a Full-Blown Farm…
Want to start preserving your harvest, making your own soap, or building a backyard root cellar — but not sure where to begin? “Homesteading Advice” gives you instant lifetime access to 35+ practical homesteading books on food preservation, veggie gardening, DIY natural cleaning products (save over $250 per year with this skill alone), brewing, off-grid energy, and a whole lot more…
Click Here To Check It Out Now!
Integrated Kitchen Herb Wall: Building a Living Ecosystem for Year-Round Resilience
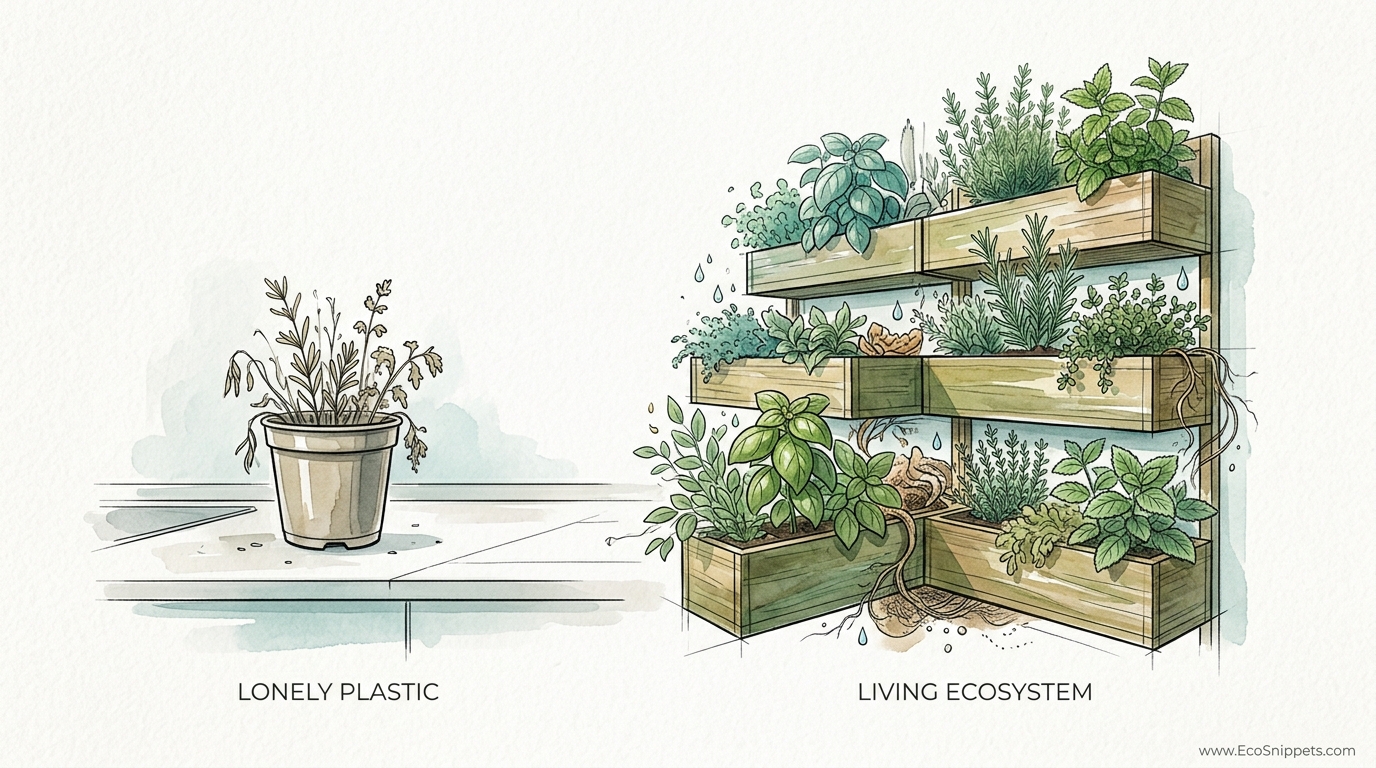
Plants don’t want to be prisoners; they want to be part of a community. We buy herbs in isolated plastic pots and wonder why they die in a week. Real growth happens when you integrate your herbs into a living system that mimics nature. This vertical eco-hub provides shade, humidity, and shared nutrients for a harvest that never ends.
Taking control of your food supply starts with the very ingredients that flavor your meals. For centuries, our ancestors kept a “physic garden” or a kitchen plot within arm’s reach of the hearth. They understood that a sprig of rosemary or a handful of mint was more than just a garnish; it was a testament to self-reliance. Today, we often trade that wisdom for the convenience of a supermarket shelf, but the cost is high: flavorless, pesticide-laden greens that wilt before the bag is even opened.
Creating an integrated kitchen herb wall is about more than aesthetics. It is an act of reclamation. You are building a micro-habitat that breathes with your home, purifies your air, and ensures that your kitchen is never without the vibrant life-force of fresh plants. This guide will walk you through the transition from struggling pot-culture to a thriving, integrated vertical system.
Integrated Kitchen Herb Wall Design
An integrated kitchen herb wall is a vertical growing system that uses a shared support structure, irrigation method, and lighting environment to sustain multiple herb species simultaneously. Unlike a row of individual pots sitting on a windowsill, this design functions as a singular organism. It is a biological machine where the respiration of one plant provides the humidity needed by its neighbor.
In the real world, these systems range from simple wall-mounted cedar frames to high-tech, automated hydroponic panels. They are used in urban apartments where floor space is a luxury and in professional kitchens where chefs require a constant supply of top-tier aromatics. The design focuses on verticality to maximize the use of “dead space” on walls, turning a blank surface into a productive engine of growth.
Visualizing the concept is easier when you think of a forest floor flipped ninety degrees. In nature, plants don’t grow in sterile, isolated containers. They are woven together through fungal networks and shared microclimates. The herb wall mimics this by grouping plants together. This proximity creates a “bubble” of higher humidity, which protects delicate leaves from the dry, stagnant air typical of many modern kitchens.
The core philosophy here is integration. Every element—the backing board that protects your drywall, the pots or pockets that hold the substrate, and the lighting that fuels photosynthesis—must work in concert. When these parts are correctly aligned, the system becomes low-maintenance and high-yield, providing a level of resilience that no single plastic pot can match.
The Mechanics of a Living Wall: How to Do It
Building a successful herb wall requires a shift in how you think about gardening. You are no longer just “watering a plant”; you are managing an environment. The process can be broken down into five critical components: structure, waterproofing, lighting, substrate, and hydration.
Step 1: The Foundation and Waterproofing
Stability is paramount. A square meter (roughly 10 square feet) of wet soil and mature plants can weigh upwards of 30 to 50 kilograms (66 to 110 pounds). You must secure your support frame directly into wall studs or use heavy-duty masonry anchors. Use rot-resistant wood like cedar or heat-treated pine if you prefer a natural look, or powder-coated metal for a modern aesthetic.
Protecting your home from moisture is the non-negotiable first step. Install a waterproof barrier between the garden and the wall. A 0.5 mm (20-mil) EPDM pond liner or a rigid PVC sheet is ideal. This ensures that the inevitable humidity and occasional splashes don’t lead to mold or structural damage behind the scenes.
Step 2: Choosing Your Growing Medium
Standard garden soil is too heavy and compacts too easily for vertical systems. It lacks the “pore space” necessary for roots to breathe when stacked. Instead, use a “soilless” mix. A combination of 40% coconut coir, 30% perlite, and 30% vermiculite provides excellent capillary action for water movement while remaining lightweight.
Adding a small amount of high-quality worm castings or a slow-release organic fertilizer ensures the plants have the “ancestral fuel” they need without the risk of chemical salt buildup. This mixture stays airy, allowing oxygen to reach the roots—a critical factor in preventing the root rot that plagues most indoor herbs.
Step 3: Engineering the Lighting
Most kitchens do not have enough natural light for Mediterranean herbs like rosemary or thyme, which require at least 6 to 8 hours of intense sun. To succeed, you must supplement with full-spectrum LED grow lights. Aim for a light intensity of 200 to 400 micromoles (?mol/m²/s) at the leaf surface.
Position your lights to provide even coverage. Herbs at the top of the wall shouldn’t shade those at the bottom. Use a timer to set a consistent “daylight” cycle of 14 to 16 hours. This regularity mimics the peak growing season, tricking the herbs into a state of permanent, vigorous production.
Step 4: The Hydration Strategy
Vertical gardens dry out faster than traditional pots because of the increased surface area and the “chimney effect” of rising warm air. You have two main options: manual wicking or drip irrigation. A wicking system uses a cotton or nylon cord to pull water from a lower reservoir into the soil, providing “bottom-up” hydration that keeps the leaves dry and disease-free.
For larger installations, a low-pressure drip system with a small submersible pump can automate the process. This ensures that every plant receives exactly what it needs, whether it’s a thirsty mint at the bottom or a drought-tolerant sage at the top. Always include a catchment tray at the base to manage runoff.
The Tangible Benefits of a Vertical Eco-Hub
The advantages of an integrated wall go far beyond having fresh basil for your pasta. When you move away from the “isolated pot” model, you unlock several practical and measurable benefits that improve both the plants’ health and your own living environment.
Culinary Quality and Potency: Herbs grown in a stable, integrated environment produce higher concentrations of essential oils. When a plant is stressed by the rapid drying and heating of a small plastic pot, it focuses on survival rather than flavor. In a living wall, the shared humidity and stable root temperatures allow the plant to thrive, resulting in basil that is more aromatic and rosemary that is more pungent.
Air Purification and Humidity: NASA’s research on indoor plants highlights their ability to remove volatile organic compounds (VOCs) from the air. A wall of herbs acts as a biological filter. Furthermore, through a process called transpiration, the plants release moisture into the air. In winter, when indoor heating systems strip humidity from our homes, a living wall acts as a natural, silent humidifier, easing dry skin and respiratory irritation.
Resource Efficiency: Integrated systems are remarkably efficient with water. In a traditional garden, much of the water is lost to the deep soil or evaporation. In a vertical wall, especially one with a recirculating reservoir, every drop is used. Nutrients are also more effectively managed; because you are controlling the “closed-loop” environment, there is no runoff to waste into the environment.
Psychological Grounding: There is a deep, ancestral satisfaction in tending to a garden. The act of snipping fresh greens while you cook creates a “biophilic” connection that reduces stress and increases mindfulness. It turns the kitchen from a place of chore-work into a place of stewardship and connection to the natural world.
Challenges and Common Mistakes
The journey to a thriving herb wall is not without its hurdles. Most failures are not the result of a “brown thumb” but rather a misunderstanding of the physics and biology of the system. Recognizing these pitfalls early is the key to long-term success.
The “Leggy” Growth Trap: If your herbs are stretching toward the nearest window, looking thin and pale, they are suffering from light starvation. This is the most common mistake. People assume a “bright kitchen” is enough, but light intensity drops off rapidly the further you move from a window. Without dedicated LED supplementation, your herbs will never achieve the bushy, robust growth seen in professional setups.
The Fungus Gnat Invasion: These tiny black flies thrive in the top layer of damp soil. They are often introduced via cheap, unpasteurized potting soil. If you keep the surface of your herb wall constantly wet, you are inviting an infestation. The solution is to use a “top-dressing” of fine gravel or sand, or better yet, move to a wicking system that keeps the surface soil dry while the roots remain hydrated.
Nutrient Lockout: Many beginners over-fertilize, thinking more is better. This leads to a buildup of mineral salts in the substrate, which eventually prevents the plant from absorbing any water or nutrients at all. This is called “osmotic stress.” You should use organic, water-soluble fertilizers at half-strength and occasionally “flush” the system with pure water to wash away excess salts.
Overcrowding: It is tempting to pack as many plants as possible into the wall for an instant “lush” look. However, plants need airflow to prevent powdery mildew and other fungal diseases. As the herbs grow, they will compete for light and space. Regular pruning is not just for the harvest; it is a vital maintenance task to ensure every plant has the “breathing room” it needs to stay healthy.
Limitations and Reality Checks
While an integrated herb wall is a powerful tool, it is not a magic solution that works in every situation. Understanding the boundaries of the technology will help you make better design decisions and set realistic expectations.
Environmental constraints play a significant role. If your kitchen is exceptionally hot (near a commercial-grade range) or suffers from extreme drafts, certain herbs will struggle regardless of the system design. Mediterranean herbs like rosemary and lavender hate “wet feet” and high humidity, whereas tropical herbs like cilantro and mint will wilt in a heartbeat if the air is too dry or the sun is too direct.
Maintenance is another factor. An integrated wall is lower maintenance than 20 individual pots, but it is not *zero* maintenance. You must still monitor the water levels in your reservoir, check for pests weekly, and prune regularly. If you are someone who travels for weeks at a time without an automated system, a living wall may become a wall of dried sticks by the time you return.
Cost and complexity are also considerations. A high-quality, waterproofed, and properly lit vertical garden requires an upfront investment. While you can DIY a system with upcycled materials, the “buy once, cry once” philosophy often applies here. Using cheap components—like non-waterproof lights or flimsy plastic pockets—frequently leads to failure within the first six months.
Lonely Plastic vs. Living Ecosystem
To understand why the integrated wall succeeds where the grocery-store pot fails, we must look at the fundamental differences in how these systems manage the “four pillars” of plant life: Water, Air, Light, and Temperature.
| Factor | Lonely Plastic Pot | Integrated Living Wall |
|---|---|---|
| Root Environment | Restricted, rapid temp swings, high salt buildup. | Stable thermal mass, shared moisture, breathable media. |
| Humidity | Isolated, dries out in hours. | Shared microclimate, high ambient moisture. |
| Maintenance | Daily manual checks, high failure rate. | Weekly reservoir refills, automated lighting. |
| Growth Potential | Stunted; plant often stays in “survival mode.” | Exponential; allows for deep root establishment. |
The “Lonely Plastic” model treats the plant as a disposable commodity. The “Living Ecosystem” model treats it as a long-term investment. By providing a stable foundation, you allow the herb to move beyond simple survival and into “thrival,” where it can produce the complex phytonutrients and oils that we value in the kitchen.
Practical Tips and Best Practices
Once your wall is installed, the real work of stewardship begins. Follow these “grit-tested” tips to ensure your harvest is consistent and your plants remain vibrant through the seasons.
- The Rule of Thirds: When harvesting, never take more than one-third of the plant’s total foliage at once. This ensures the plant has enough leaf surface area to continue photosynthesizing and recovering. Always snip just above a “node” (where new leaves emerge) to encourage bushy growth rather than long, spindly stems.
- Foliar Feeding: Once a month, mist your herbs with a very weak solution of seaweed extract. Herbs can absorb nutrients directly through their leaves, and this provides a boost of trace minerals that might be missing from your substrate.
- The Finger Test: Don’t rely on a schedule. Stick your finger 2.5 cm (1 inch) into the substrate. If it feels dry, water. If it’s damp, wait. Overwatering kills more herbs than drought ever will.
- Rotation and Culling: Every few months, assess the health of your community. Some herbs, like cilantro, are short-lived and will eventually go to seed. Don’t be afraid to pull them out and start fresh. A healthy wall is a dynamic one.
- Airflow is Life: If your kitchen gets “stuffy,” place a small USB-powered fan near the wall. A gentle breeze strengthens the stems (thigmomorphogenesis) and prevents stagnant air where pests like spider mites love to hide.
Advanced Considerations for the Serious Practitioner
For those who want to take their herb wall to the level of a true “pioneer-grit” production center, there are several ways to optimize and scale the system for maximum resilience and efficiency.
Biological Controls: Instead of using chemical pesticides, introduce beneficial organisms. Small amounts of Bacillus thuringiensis israelensis (BTI) in your water will naturally eliminate fungus gnat larvae. You can also “inoculate” your substrate with mycorrhizal fungi, which form a symbiotic relationship with herb roots, helping them absorb phosphorus and water more effectively.
Spectral Tuning: Advanced growers use LEDs with adjustable spectrums. Herbs like basil and mint thrive under “Blue-heavy” light (450nm) during their vegetative phase, which keeps them compact and leafy. If you want herbs to flower—perhaps for seed saving or for the edible flowers of chives—shifting to a “Red-heavy” spectrum (660nm) will trigger that biological response.
Vertical Gradient Planting: Use the natural physics of the wall to your advantage. Heat and light are usually more intense at the top. Place your “sun-worshippers” like rosemary, oregano, and thyme in the upper tiers. The bottom tiers, which are cooler and naturally more humid due to runoff and evaporation from above, are the perfect home for mint, parsley, and chives.
Automated Fertigation: You can integrate a “dosing” pump into your irrigation system that adds a precise amount of organic nutrients to every watering cycle. This “spoon-feeding” approach prevents the feast-or-famine cycle of manual fertilizing and leads to incredibly consistent growth rates and flavor profiles.
Examples and Scenarios
To help you visualize how this fits into your life, let’s look at two different scales of implementation. These examples show that the principles of integrated design work whether you have a tiny corner or a sprawling estate kitchen.
Scenario A: The Urban Apartment “Micro-Hub”
Imagine a 60 cm by 90 cm (24″ x 36″) cedar frame mounted in a small city kitchen. It features 12 felt pockets. The gardener uses a simple wicking system with a 10-liter (2.6-gallon) reservoir hidden at the base. A single 40-watt full-spectrum LED bar is mounted above. This setup provides enough basil, cilantro, and chives for a couple who cooks five nights a week. By refilling the reservoir once every 10 days, they maintain a “living pantry” that costs less to run than a single lightbulb.
Scenario B: The Homestead “Resilience Wall”
In a large, south-facing kitchen, a practitioner installs a 2-meter tall by 1.5-meter wide (roughly 6′ x 5′) modular tray system. It is plumbed directly into a small pump with a digital timer. This wall contains 40 individual plants, including medicinal herbs like lemon balm and calendula alongside culinary staples. The lighting is a high-output 200-watt array. This system doesn’t just provide fresh herbs; it produces enough surplus for the family to dry their own teas and create infused oils for the winter months, truly embodying the spirit of self-reliance.
Final Thoughts
Building an integrated kitchen herb wall is a journey back to a more grounded way of living. It challenges the modern notion that our food must come from a plastic container or a distant farm. By creating a community for your plants, you are also creating a sanctuary for yourself—a place where the scent of bruised sage and the sight of vibrant green leaves provide a daily reminder of nature’s resilience.
The transition from “isolated pots” to a “living system” requires an initial investment of time and thought, but the rewards are measured in decades of harvests. It is about more than just convenience; it is about building a system that works with the laws of biology rather than against them. Whether you start with a small DIY frame or a professional installation, the key is to begin. Observe your plants, listen to what they need, and treat them as the vital community members they are.
As you gain experience, you will find that the skills you learn tending your herb wall—managing light, water, and life—are the same skills needed for greater self-reliance in all areas of life. Start small, stay consistent, and let your kitchen wall be the first step in your own personal green revolution. The harvest never ends for those who garden with the wisdom of the past and the tools of the present.
