How To Become More Self-Sufficient Without Starting a Full-Blown Farm…
Want to start preserving your harvest, making your own soap, or building a backyard root cellar — but not sure where to begin? “Homesteading Advice” gives you instant lifetime access to 35+ practical homesteading books on food preservation, veggie gardening, DIY natural cleaning products (save over $250 per year with this skill alone), brewing, off-grid energy, and a whole lot more…
Click Here To Check It Out Now!
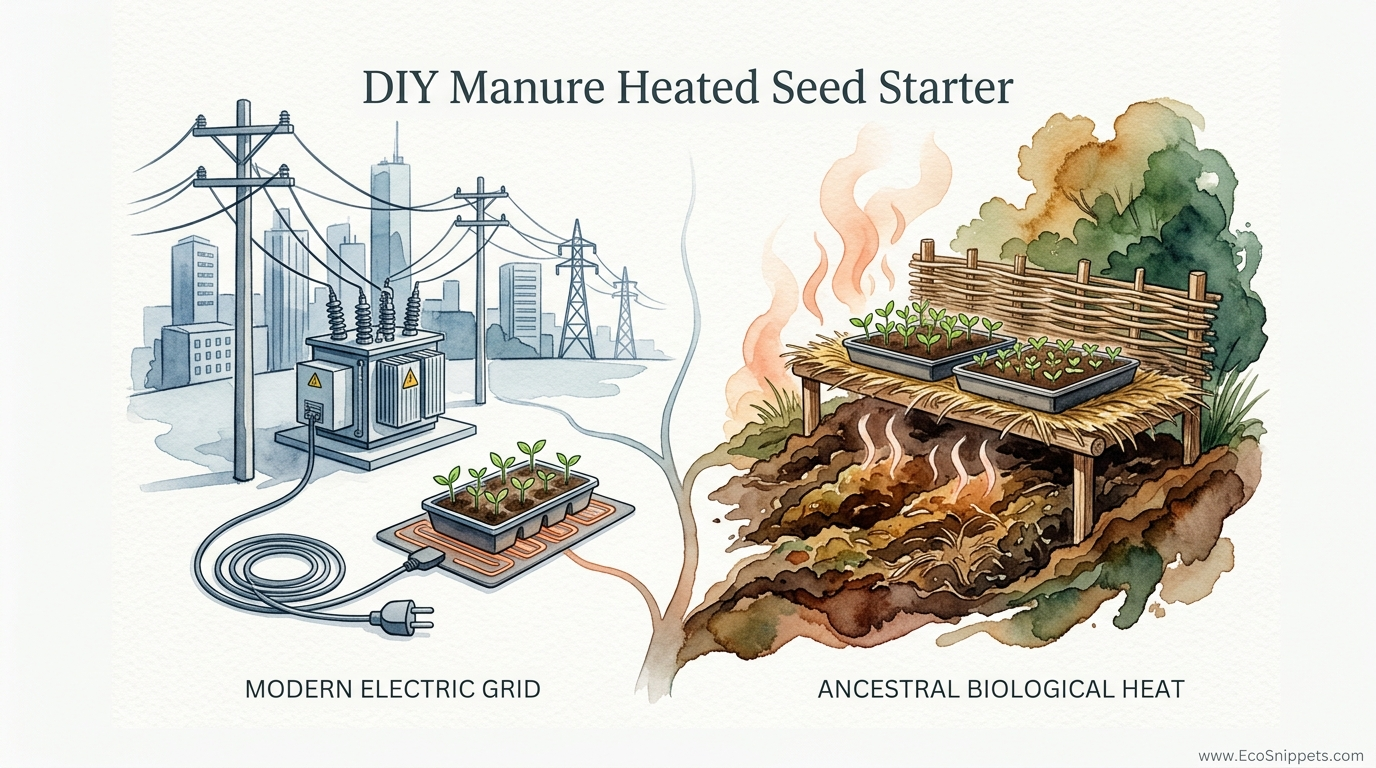
Before we had the power grid, our ancestors used ‘biological batteries’ to grow fresh food in the dead of winter. Most gardeners think they need electric mats and greenhouse heaters to start seeds in February. But a ‘Hot Bed’—an ancestral trick using fresh manure and straw – generates a steady 75 degrees Fahrenheit (24 degrees Celsius) of bottom heat for weeks using nothing but natural decomposition. It’s free, it’s carbon-neutral, and it turns into perfect compost for the spring.
Finding ways to outsmart the seasons is a hallmark of self-reliance. While modern technology offers quick fixes like plug-in mats, these tools leave us dependent on an increasingly fragile energy infrastructure. Learning to harness the raw power of biological heat allows a gardener to step back into a rhythm that worked for centuries. This guide explores the mechanics of the hot bed, from the microscopic bacteria doing the work to the physical labor of stacking the pile.
DIY Manure Heated Seed Starter
A hot bed is essentially a heated cold frame that uses the energy released by decomposing organic matter to warm the soil from below. Historically, this method reached its peak in the 18th and 19th centuries, particularly with the Parisian market gardeners who used horse manure to provide fresh vegetables to the city all winter long. These “biological batteries” allowed them to grow tender crops like melons and cucumbers in climates that should have been far too cold for such things.
In practical terms, a hot bed consists of a deep layer of fresh manure mixed with high-carbon bedding, topped with a thinner layer of growing medium. This entire setup is enclosed in a frame and covered with glass or plastic sashes to trap the ambient heat and sunlight. The magic happens in the bottom layer, where thermophilic bacteria break down the nitrogen-rich manure, releasing heat as a byproduct of their metabolism.
The system exists because it solves the primary problem of early spring gardening: cold soil. Seeds can germinate in cool air, but if the soil is frigid, the roots will stall or rot. By providing consistent bottom heat, you trick the seeds into thinking it is May when the calendar says February. This method is still used today by off-grid homesteaders and organic farmers who want to reduce their reliance on the grid while creating high-quality compost for their main garden beds.
The Science of Thermophilic Decomposition
To build a successful hot bed, you must understand the relationship between carbon and nitrogen. Microorganisms require both to thrive, and the ratio between them determines how much heat the pile generates and how long that heat lasts. This is often referred to as the C:N ratio.
Nitrogen is the “fuel” that drives the population explosion of bacteria. Fresh manure is highly nitrogenous, which is why it is often called “hot” manure. Carbon, found in materials like straw, sawdust, or dried leaves, acts as the “framework” and energy source for the microbes. For a hot bed, you generally want a mix that is slightly more nitrogen-heavy than a standard compost pile to ensure a rapid and sustained spike in temperature.
The Role of Bacteria
Aerobic decomposition is the primary engine here. When you pile fresh manure and straw together, mesophilic bacteria begin the process at ambient temperatures. As they consume the easy-to-digest sugars and proteins, they release heat. Once the temperature of the pile reaches about 104 degrees Fahrenheit (40 degrees Celsius), thermophilic bacteria take over.
These specialized microbes thrive in high heat and can push the core temperature of a pile to 140 or even 160 degrees Fahrenheit (60 to 71 degrees Celsius). In a hot bed, we manage this heat by compacting the pile and adding a soil buffer, ensuring the seedlings above receive a steady, gentle warmth rather than the scorching heat of the core. This biological process can continue for several weeks, providing a reliable “heating pad” that never needs to be plugged in.
How to Build Your Ancestral Hot Bed
Building a hot bed requires more physical effort than setting up an electric mat, but the rewards are significantly higher. You can choose between two main designs: the pit method or the above-ground method.
The Pit Method
Digging a pit is the traditional way to build a hot bed because the earth acts as a natural insulator. Start by digging a hole roughly 2 feet (61 centimeters) deep. The length and width should match the dimensions of the cold frame you intend to place on top.
Lining the bottom with a layer of coarse twigs or gravel can help with drainage, though many old-school gardeners skip this and go straight to the manure. Fill the pit with fresh horse manure, tamping it down firmly with your boots every 6 inches (15 centimeters). This compression is vital because it slows down the decomposition process, allowing the heat to last for a month or more rather than burning out in a week.
The Above-Ground Method
If your soil is heavy clay or you have poor drainage, an above-ground bed is a better choice. You can build a wooden box or use straw bales to create the walls of the bed. This method is easier on the back but requires more insulation around the sides to prevent heat loss through the walls.
Stack your manure and bedding mix at least 2.5 feet (76 centimeters) high inside the frame. Because the sides are exposed to the cold air, you may need to bank extra straw or soil against the exterior of the box to keep the internal “battery” from losing its charge.
Layering the “Lasagna”
Once your manure base is established and compacted, add a 6-inch (15-centimeter) layer of finished compost or high-quality topsoil. This layer serves two purposes: it provides a clean medium for your seeds or flats to sit in, and it acts as a biological filter. This soil layer hosts beneficial organisms that consume the ammonia gas released by the rotting manure below, preventing it from “burning” your tender seedlings.
Sourcing the Right Manure: The Gold Standard
Not all manure is created equal when it comes to generating heat. If you want the most reliable biological battery, horse manure is widely considered the gold standard.
Horse Manure
Fresh horse manure from a stable is ideal because it usually comes pre-mixed with straw or wood shavings. This mix provides a nearly perfect C:N ratio for a hot bed. Horse manure is “hotter” than cow manure because horses have a less efficient digestive system, leaving more undigested organic matter for the bacteria in your pile to feast upon.
Cow and Sheep Manure
Cow manure is generally “cooler” because the animal’s rumen breaks down the material more thoroughly. While it can be used, it may not reach the high temperatures required for a mid-winter start in very cold climates. Sheep and goat manure are excellent alternatives to horse manure as they are high in nitrogen and tend to be quite dry, making them easy to handle and stack.
The Herbicide Warning
A critical modern consideration is the presence of persistent herbicides. Many commercial hay producers use chemicals like aminopyralid, which can survive the digestive tract of a horse and remain active in the manure for years. If you use manure contaminated with these chemicals, your seeds may germinate, but the plants will be stunted, twisted, and eventually die. Always ask your manure source if their animals have been fed hay treated with “broadleaf” herbicides.
Managing Temperatures and Ventilation
Once the bed is built and the sashes are on, the temperature will spike. You must monitor this closely with a long-stemmed soil thermometer. In the first few days, the internal temperature of the manure can exceed 150 degrees Fahrenheit (65 degrees Celsius).
Do not plant anything during this initial “burn.” Wait until the soil temperature at the 4-inch (10-centimeter) depth has stabilized between 70 and 80 degrees Fahrenheit (21 to 27 degrees Celsius). This usually takes about 7 to 10 days after the bed is constructed.
The Importance of Airflow
Heat is only half the battle; ventilation is the other. On a sunny day, even if it is below freezing outside, the air inside a glass-covered hot bed can quickly reach over 100 degrees Fahrenheit (38 degrees Celsius). This will cook your plants.
Use a simple wooden block to prop open the sashes during the day to allow excess heat and moisture to escape. Remember to close them before the sun goes down to trap the warmth for the night. This daily ritual is part of the “pioneer-grit” approach—it requires your presence and attention, connecting you more deeply to the life of your plants.
Benefits of the Manure-Heated Method
Choosing a hot bed over an electric mat offers several practical advantages that go beyond just saving a few dollars on the power bill.
* Thermal Mass: Manure piles have incredible thermal mass. Unlike a thin electric mat that loses heat the moment the power cuts out, a 2-foot (61-centimeter) deep pile of manure will stay warm through a blizzard.
* Nutrient Recycling: At the end of the seed-starting season, the “heater” has turned into high-quality, aged compost. You are essentially pre-processing your fertilizer for the next growing cycle while getting free heat in the process.
* CO2 Enrichment: Decomposition releases carbon dioxide. In the confined space of a hot bed, this enriched CO2 environment can actually stimulate faster and more robust plant growth compared to an indoor setup.
* Self-Reliance: You are not dependent on a supply chain or a utility company. As long as there are local farms or stables, you have a source of heat.
Challenges and Common Mistakes
While the process is natural, it is not foolproof. Understanding where others have failed can save you a season of frustration.
The “Cold” Pile
The most common failure is a pile that never heats up. This usually happens because the manure is too old or too dry. Bacteria need moisture to move and reproduce. If your manure is dry to the touch, you must water it as you stack and compact it. It should feel like a wrung-out sponge. If the manure is already well-rotted (aged), the “easy” fuel is gone, and it won’t generate the thermophilic spike you need.
Ammonia Burn
If you don’t provide a thick enough layer of soil or compost on top of the fresh manure, the ammonia gas released during the initial breakdown can yellow and kill your seedlings. Always ensure at least 6 inches (15 centimeters) of soil buffer. If you smell a strong, pungent odor when you open the sashes, increase your ventilation immediately.
Pathogen Risks
Working with fresh manure involves biological risks. E. coli and Salmonella can be present in fresh animal waste. Always wear gloves when building the bed and wash your hands thoroughly. Because the heat in a properly built hot bed reaches thermophilic levels, many of these pathogens are neutralized over time, but caution is still required during the initial setup phase.
Limitations of Hot Bed Gardening
This method is powerful, but it isn’t suitable for every situation. You must weigh the trade-offs before committing to the labor.
In urban environments, the smell of fresh manure and the sight of a steaming pit may not sit well with neighbors or local ordinances. Furthermore, the sheer volume of manure required—often a small pickup truck load for a standard 4×8 foot (1.2×2.4 meter) bed—can be difficult to transport and handle in a city setting.
Additionally, hot beds are a “one-shot” heater. Once the thermophilic phase ends, the temperature will gradually drop to match the ambient soil temperature. While this usually takes 4 to 6 weeks—enough to get seeds through the hardest part of late winter—you cannot simply “turn it up” if a freak polar vortex arrives in late March. In those cases, you may still need to throw heavy blankets or old rugs over the sashes for extra insulation.
Comparison: Biological Heat vs. Modern Electric Mats
| Feature | Ancestral Hot Bed | Electric Heat Mat |
|---|---|---|
| Initial Cost | Low (Free if you have a manure source) | Moderate ($30 – $100 per mat) |
| Operating Cost | Zero | Ongoing electricity usage |
| Reliability | High (Unaffected by power outages) | Dependent on the grid |
| Byproduct | High-quality garden compost | None (Eventually electronic waste) |
| Labor Level | High (Digging, hauling, packing) | Very Low (Plug and play) |
Practical Tips for Success
To get the most out of your hot bed, consider these best practices that seasoned homesteaders swear by.
* Orientation: Always face your hot bed toward the south (if in the Northern Hemisphere) to maximize solar gain during the short days of February and March. Angle the glass sashes at roughly 30 to 45 degrees to shed snow and catch the low winter sun.
* Insulate the North: Use straw bales or bank soil against the north side of your frame. This creates a windbreak and prevents the coldest winter winds from stripping heat away from your frame.
* The “Second Skin”: On exceptionally cold nights (below 10 degrees Fahrenheit / -12 degrees Celsius), place an old piece of carpet or a heavy moving blanket over the glass. This simple addition can keep the internal temperature 10 degrees warmer than using glass alone.
* Watering: Water your plants in the morning. This allows the foliage to dry out before the sun goes down, significantly reducing the risk of fungal diseases like “damping off” which thrive in cold, damp evening air.
Advanced Considerations: The French Intensive Legacy
For those who want to push the system further, look into the French Intensive method. This approach doesn’t just use hot beds for seed starting; it uses them for the entire life cycle of high-value crops. By rotating crops through the beds as the heat wanes, you can harvest radishes and lettuces in mid-winter, followed by carrots and spinach, and finally use the residual warmth to get a massive head start on heat-loving peppers and eggplants.
Serious practitioners often build a series of beds, starting one every two weeks. This staggered approach ensures a continuous supply of bottom heat throughout the entire spring, allowing you to move older, hardier seedlings to a “cooling” bed while fresh, tender seeds take over the newest “hot” bed.
Example Scenario: The February Tomato Goal
Consider a gardener in Zone 5 (average winter lows of -20 degrees Fahrenheit / -29 degrees Celsius). In a traditional greenhouse, heating the air enough to germinate tomatoes in February would be prohibitively expensive.
By building a hot bed inside a simple unheated hoop house, the gardener creates a micro-climate. They dig a 24-inch (61-centimeter) pit, fill it with steaming horse manure, and top it with soil. Despite the outside air being freezing, the soil in the hot bed maintains a steady 75 degrees Fahrenheit (24 degrees Celsius). The tomato seeds germinate in 5 days. By the time the manure heat begins to fade in April, the spring sun is strong enough to take over the job. The gardener has saved hundreds of dollars in heating costs and produced sturdier, “hardened” plants that are ready for the ground weeks before their neighbors’ plants.
Final Thoughts
The hot bed is more than just a gardening technique; it is a bridge to a time when human ingenuity worked in tandem with biological processes. By harnessing the energy of decomposition, you reduce your footprint and increase your resilience. It turns a waste product—manure—into a vital resource that provides both heat and future fertility for your soil.
While the physical labor required may seem daunting to some, the satisfaction of seeing green shoots thrive amidst a landscape of snow is a reward unlike any other. It connects you to the seasons in a way that an electric mat never could. Experiment with the materials you have available, monitor your temperatures, and don’t be afraid to get your hands dirty.
As you master the art of the biological battery, you may find yourself looking for other ways to integrate ancestral wisdom into your modern life. Whether it is through seed saving, rainwater harvesting, or natural building, every step toward self-reliance is a step toward a more secure and grounded future. Happy growing.
