How To Become More Self-Sufficient Without Starting a Full-Blown Farm…
Want to start preserving your harvest, making your own soap, or building a backyard root cellar — but not sure where to begin? “Homesteading Advice” gives you instant lifetime access to 35+ practical homesteading books on food preservation, veggie gardening, DIY natural cleaning products (save over $250 per year with this skill alone), brewing, off-grid energy, and a whole lot more…
Click Here To Check It Out Now!
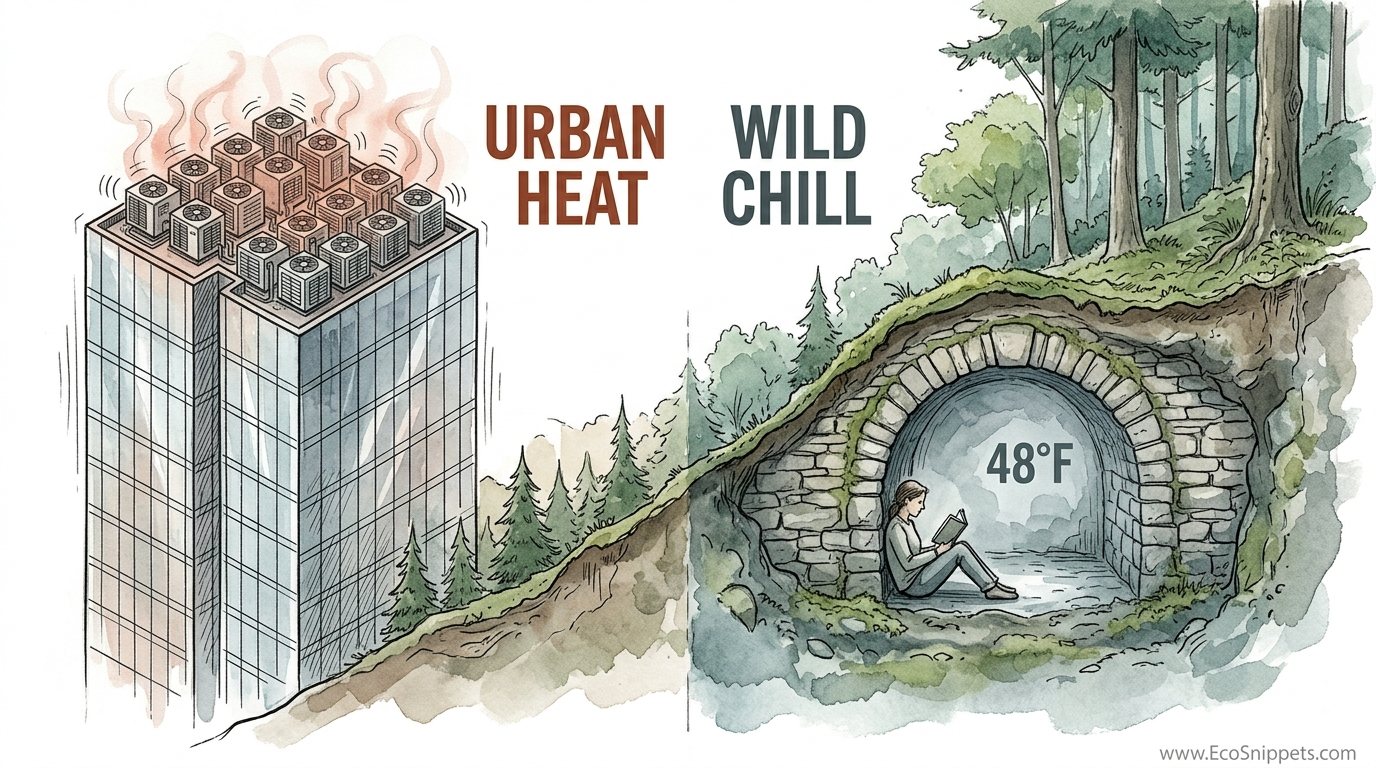
We pay hundreds every month to fight the sun with motors, while the earth provides a permanent 55-degree chill for zero dollars. The ‘Urban’ solution to heat is a fragile machine that stops working the moment the grid fails. The ‘Wild’ solution is the earth’s own thermal mass. Moving your critical cooling needs underground allows you to bypass the energy bill entirely. Discover how to build a passive thermal vault that keeps your harvest crisp using nothing but the physics of the planet.
Modern society has largely forgotten that for thousands of years, humans relied on the ground beneath their feet to preserve food and stay comfortable. While high-tech HVAC systems provide immediate gratification, they are energy-dependent and mechanically complex. An earth vault, or a sophisticated root cellar, offers a stable, zero-energy alternative that works as long as gravity and thermodynamics exist.
Building a passive cooling vault is more than just digging a hole in the dirt. It involves understanding the specific relationship between soil depth, moisture, and air movement. This guide explores the engineering principles and DIY steps required to create a permanent, resilient cooling structure on your property.
Passive Cooling Earth Vault DIY
A passive cooling earth vault is a subterranean structure designed to utilize the constant temperature of the earth to maintain a cool interior environment. Unlike a basement, which is often partially exposed to surface air, a true earth vault is fully insulated by several feet of soil. This depth creates a “thermal lag,” where the intense heat of summer or the freezing cold of winter takes months to penetrate the ground.
The ground temperature at a depth of 6 to 10 feet (2 to 3 meters) stays remarkably stable throughout the year. In most temperate regions, this temperature hovers around 50°F to 55°F (10°C to 13°C). This stability allows the vault to act as a natural refrigerator for produce, a storage room for temperature-sensitive equipment, or even a cooling lung for an adjacent home.
Historically, these structures were the lifeblood of rural homesteads. The Persian Empire perfected this with “yakhchals,” massive conical structures that used underground vaults to store ice in the middle of the desert. In North America, pioneers used root cellars and spring houses to keep dairy and vegetables fresh through the hottest months. Today, these vaults are seeing a resurgence among those seeking food security and off-grid resilience.
How the Earth Vault Works: The Science of Thermal Mass
Understanding the physics of the earth is the first step toward a successful build. The earth’s crust acts as a massive thermal battery. When the sun beats down on the surface, the soil absorbs that heat, but it moves through the earth very slowly—roughly one month per foot of depth in many soil types.
This phenomenon, known as thermal lag, means that the peak heat of August may not reach a 6-foot (1.8-meter) depth until November. By the time that heat arrives, the surface air has already cooled, and the vault begins to shed its stored warmth back toward the surface. This cycle creates a permanent “cool zone” that stays within a tight range regardless of the weather above.
Airflow is the second critical component. A vault without ventilation becomes a stagnant, damp tomb. Effective DIY designs use the “stack effect” or a solar chimney to pull air through the system. Hot air rises; by placing an exhaust vent high above the ground and an intake vent at the floor level of the vault, you create a natural siphon that draws fresh air in, cools it against the vault walls, and pushes warmer air out.
Step-by-Step Construction Guide
1. Site Selection and Excavation
Location determines the success of your vault. Choose a well-drained area, preferably on a slight slope to prevent water from pooling at the entrance. Avoid areas near large trees, as roots can crack walls, and keep the site at least 50 feet (15 meters) away from septic systems or leach fields to prevent contamination.
Excavate to a depth of at least 8 feet (2.4 meters) if you want the most stable temperatures. Use a backhoe for efficiency, ensuring the hole is wider than the planned structure to allow for exterior waterproofing and drainage pipe installation. Remember that the “frost line”—the depth to which the ground freezes—must be exceeded to reach the stable isothermal zone.
2. Foundation and Flooring
Pouring a concrete slab is the standard modern approach, providing a level surface and a barrier against pests. However, some traditionalists prefer a gravel or dirt floor to allow ground moisture to naturally regulate the vault’s humidity. If using concrete, install a vapor barrier beneath the pour to prevent excessive dampness from seeping upward.
Ensure the floor has a slight pitch toward a central drain. This drain should lead to a dry well or a daylight exit if the terrain allows. Managing water is the most difficult part of subterranean building, so never skip the drainage layer.
3. Wall Construction
Reinforced concrete blocks (cinder blocks) or poured concrete are the most common materials for vault walls. They provide the structural strength needed to withstand the lateral pressure of several tons of wet soil. Fill the cores of the blocks with concrete and rebar for maximum durability.
Earthbags (long tubes or bags filled with stabilized soil) are an excellent low-cost alternative. They provide immense thermal mass and are incredibly resistant to seismic activity. Regardless of the material, the exterior of the walls must be sealed with a high-quality waterproofing membrane or “bituminous” coating to prevent groundwater infiltration.
4. The Ceiling and Roof
The roof of an earth vault carries the heaviest load: the “overburden” of soil. Pre-cast concrete planks or a heavily reinforced poured-in-place slab are the safest options. For a more traditional look, some builders use a masonry arch, which naturally distributes the weight of the earth to the side walls.
Insulate the top of the roof slab with 2 to 4 inches (5 to 10 centimeters) of rigid foam before adding soil. While this may seem counterintuitive, it prevents the surface heat from soaking directly through the ceiling, forcing the vault to rely entirely on the deep-earth cooling of the walls and floor.
5. Passive Ventilation Design
Install two separate pipes for air exchange. The intake pipe should ideally be an “earth tube”—a long pipe buried at the same depth as the vault floor that runs 50 to 100 feet (15 to 30 meters) away from the structure. As outside air travels through this pipe, it is pre-cooled by the earth before it even enters the vault.
The exhaust pipe should be located on the opposite side of the vault and positioned at the highest point of the ceiling. Extend this pipe several feet above the ground surface and cap it with a turbine vent or a black-painted “solar chimney” to encourage upward air movement through convection.
Benefits of an Earth Vault
The primary advantage of a passive earth vault is its total independence from the electrical grid. In a world where energy prices are volatile and extreme weather events are becoming more common, having a space that stays 55°F (13°C) without a single wire is a massive asset. It provides a “fail-safe” for your food supply that mechanical refrigerators cannot match.
Longevity is another significant factor. A well-built concrete or masonry vault can last for over a century with minimal maintenance. There are no compressors to burn out, no refrigerants to leak, and no filters that require constant replacement. The primary maintenance involves simply checking the vents for debris and ensuring the drainage system remains clear.
Earth vaults also offer superior humidity control for specific types of storage. Many root vegetables, such as carrots and potatoes, require high humidity (80-95%) to stay crisp. Modern refrigerators are “dry” environments that wither produce. An earth vault naturally maintains a higher relative humidity because of its contact with the soil, keeping your harvest “alive” and dormant for months longer than a kitchen pantry.
Challenges and Common Mistakes
Water infiltration is the number one cause of earth vault failure. Many DIY builders underestimate the power of hydrostatic pressure—the force of water in the soil pushing against your walls. Failing to install a proper “French drain” (perforated pipe in a gravel bed) at the base of the walls often leads to flooding during heavy rains.
Inadequate ventilation is the second most common error. Without air exchange, humidity can reach 100%, leading to rapid mold growth on walls and produce. This not only ruins your food but can also create an unhealthy environment. Always ensure there is a clear “cross-draft” between the intake and exhaust vents.
Structural collapse is a serious risk for those who do not understand soil weight. A single cubic foot of wet soil can weigh over 100 pounds (45 kilograms). If you are building a vault with a flat roof, the reinforcement must be calculated by a professional or based on proven engineering tables. Never attempt to use standard wooden house-framing for a buried roof; it will eventually rot and fail under the load.
Limitations and When This May Not Be Ideal
High water tables make earth vaults nearly impossible to build in certain low-lying areas. If your property has a “seasonally high” water table where the ground saturates within 4 feet (1.2 meters) of the surface, your vault will likely become a swimming pool. In these cases, a “bermed” vault—built above ground and covered with a massive mound of earth—is a better option.
Soil type also plays a role in efficiency. Sandy soils drain well but have less thermal mass than heavy clays. Conversely, expansive clays can put immense pressure on walls when they wet and dry, potentially cracking the structure. Always perform a simple soil-ribbon test to understand what you are digging into before you start your foundation.
Geographic climate is a final consideration. In very tropical regions where the deep-earth temperature is already 75°F (24°C), an earth vault will not provide the “refrigerator” temperatures needed for long-term vegetable storage. It will still be cooler than the 95°F (35°C) surface air, but it will function more like a cool basement than a true cold-storage vault.
Comparison: Urban HVAC vs. Wild Earth Vault
| Feature | Urban Mechanical Cooling | Wild Earth Vault |
|---|---|---|
| Energy Source | Grid Electricity / Generators | Passive Geothermal / Gravity |
| Operating Cost | $50–$300+ per month | $0 per month |
| Lifespan | 10–15 years | 50–100+ years |
| Maintenance | High (Filters, Gas, Motors) | Very Low (Vent cleaning) |
| Food Preservation | Dry air (withers produce) | Humid air (keeps produce crisp) |
Practical Tips and Best Practices
Monitor your temperatures using a dual-probe thermometer. Place one sensor at the ceiling and one at the floor. This will help you understand the temperature gradient and allow you to adjust your vents. On particularly hot days, you may want to close the intake vent during the peak of the day and open it at night when the outside air is at its coolest.
Use “hygrometers” to track humidity. If the vault becomes too dry, you can mist the floor or place buckets of water inside to increase evaporation. If it becomes too humid, increasing the height of your exhaust stack will increase the airflow and help dry the space out. Achieving the perfect balance is an art that varies by season.
Rodent proofing is essential. Mice and rats love the stable temperatures of a vault just as much as humans do. Cover all intake and exhaust pipes with a fine stainless-steel mesh (1/4 inch or 6 millimeters). Ensure the door is heavy, well-sealed, and made of a material that cannot be gnawed through, such as steel or reinforced concrete.
Advanced Considerations: Radon and Earth Tubes
Radon gas is a naturally occurring radioactive gas that can seep from the soil into subterranean spaces. In some regions, radon can accumulate in poorly ventilated earth vaults. Serious practitioners should test their vault with a digital radon monitor after completion. If levels are high, increasing passive ventilation or adding a small solar-powered fan to the exhaust stack can effectively mitigate the risk.
Integrating earth tubes with the vault is the “gold standard” for performance. Instead of a simple 4-inch (10-centimeter) pipe, consider using 6-inch (15-centimeter) HDPE smooth-wall pipe buried at least 6 feet (1.8 meters) deep for a run of 100 feet (30 meters). This provides enough surface area for the air to reach ground temperature before it hits your vault, significantly boosting the cooling capacity during summer heatwaves.
Condensation management in earth tubes is critical. As warm, humid air is cooled by the ground, water will inevitably condense inside the pipe. Slope the earth tube at a 2% grade toward a dedicated drain point or a gravel-filled sump. Failure to do this will result in standing water in your intake pipe, which can lead to mold and “sick building syndrome” for the vault.
Example Scenario: The 100-Bushel Vault
Consider a small farm in a climate with 95°F (35°C) summers. The owner excavates an 8-foot by 10-foot (2.4 by 3 meter) pit on a north-facing slope. They build walls of 8-inch concrete blocks, waterproof the exterior with a rubberized membrane, and install a 12-inch (30-centimeter) layer of gravel around the perimeter for drainage.
For ventilation, they run a 75-foot (23-meter) earth tube 6 feet deep, entering the vault at the floor level. The exhaust is a 10-foot (3-meter) black PVC pipe that stands above the mounded earth roof. Inside, the temperature stays at a constant 54°F (12°C) even when the surface air reaches its peak. This owner can store 100 bushels of apples and potatoes through the winter and keep their home-brewed beverages at cellar temperature all summer, all without a penny spent on electricity.
Final Thoughts
Building a passive cooling earth vault is an investment in both your property and your personal resilience. It requires a shift in thinking—from active, mechanical consumption to passive, structural participation with the planet. While the initial labor is significant, the rewards of a permanent, zero-cost cooling system are unmatched by any modern appliance.
The wisdom of the past, combined with modern materials like waterproofing membranes and HDPE piping, makes today the best time to build a vault. Whether you are looking to preserve a massive garden harvest or simply want a cool retreat that functions when the power fails, the earth is ready to provide. Start small, plan your drainage carefully, and let the thermal mass of the planet do the heavy lifting for you.
Once you experience the “wild chill” of an earth vault, the hum of a refrigerator begins to sound like a needless expense. Explore related concepts like passive solar greenhouses or earth-sheltered homes to further integrate these principles into your life. The path to self-reliance is buried right beneath your feet.
