How To Become More Self-Sufficient Without Starting a Full-Blown Farm…
Want to start preserving your harvest, making your own soap, or building a backyard root cellar — but not sure where to begin? “Homesteading Advice” gives you instant lifetime access to 35+ practical homesteading books on food preservation, veggie gardening, DIY natural cleaning products (save over $250 per year with this skill alone), brewing, off-grid energy, and a whole lot more…
Click Here To Check It Out Now!
Most homesteaders lose half their squash harvest by Christmas because they skip the one step that turns the skin into an impenetrable shield. You spent all summer growing that squash, only to have it turn to mush on the counter by December. The difference between a 2-month shelf life and a 12-month shelf life isn’t the variety – it’s the cure. Through ‘sheltering’ your harvest with a high-heat curing phase, you’re essentially creating a natural vacuum seal that keeps the inside garden-fresh until next summer.
How To Cure Squash For Year-long Storage
Curing is the deliberate process of exposing harvested winter squash to specific environmental conditions to toughen the rind and heal surface wounds. This technique transforms a perishable garden fruit into a durable pantry staple that can withstand months of storage. While it sounds complex, curing is essentially a biological signal to the squash that its time on the vine is over and its time as a survival ration has begun.
In the natural world, a squash left in the garden might eventually dry out or rot, but a controlled cure mimics the transition from late summer heat to autumn cooling. It involves a short period of high temperature and high humidity followed by a move to a cool, dry location. This process triggers the lignification of the skin, making it woodier and less permeable to the bacteria and fungi that cause rot.
Most people treat their harvest like a decoration, leaving it on a drafty porch or a chilly kitchen floor. These environments lack the heat necessary to lock in the fruit’s internal moisture. Proper curing is the “pioneer’s secret” to food security. It ensures that the calories you worked so hard to grow in July are still available to feed your family in March.
The Biological Shield: How Curing Works
The primary mechanism of curing is the toughening of the fruit’s skin, often referred to as the “rind.” During the curing phase, the cells in the outer epidermis of the squash undergo a transformation. This change creates a barrier that prevents water loss through respiration. Without this shield, the squash would slowly shrivel and lose its culinary quality within weeks.
High-heat curing also accelerates the healing of minor scuffs and scratches. If the skin is nicked during harvest, the curing environment allows the squash to form a callous over the wound, much like a scab on human skin. This seal is vital because even a microscopic opening is an invitation for mold spores to enter and liquefy the sweet flesh inside.
Another critical biological shift occurs within the squash during this time. The starch reserves in the fruit begin to convert into sugars. This enzymatic process not only improves the flavor, making the squash sweeter and more palatable, but it also increases the nutrient density of certain compounds like carotenoids. Well-cured squash often tastes better after two months in the pantry than it did the day it was picked.
The Curing Protocol: Step-by-Step Instructions
Success begins with a careful harvest. Use sharp, clean bypass pruners to cut the squash from the vine, leaving at least 2 to 4 inches (5 to 10 cm) of stem attached. This stem acts as a biological “cork.” If the stem is broken off at the base, the fruit is highly susceptible to rot and should be eaten immediately rather than stored.
Once harvested, place the squash in a single layer in a warm, well-ventilated area. The ideal temperature for curing most winter squash is between 80°F and 85°F (27°C and 29°C). Relative humidity should remain high, around 80% to 85%. These conditions may feel counterintuitive, but they are exactly what the fruit needs to seal its skin.
Small-scale homesteaders can use a sunny windowsill, a high shelf in a warm kitchen, or a greenhouse. Large harvests might require a temporary curing chamber. You can create one by partitioning off a section of a garage or shed with plastic sheeting and using a space heater with a thermostat. Maintain these conditions for 10 to 14 days, ensuring there is plenty of airflow to prevent condensation.
Variety-Specific Curing Rules
Not every squash handles the curing process in the same way. While the 80°F/80% (27°C/80%) rule applies to most, some varieties have specific needs that must be respected to avoid ruining the texture.
Butternut and Hubbard Squash
These are the heavyweights of the storage world. Varieties like Waltham Butternut or Blue Hubbard require the full 14-day high-heat cure. Their thick rinds respond exceptionally well to lignification. A properly cured Hubbard can sometimes last up to 18 months in a cool cellar.
Acorn and Delicata Squash
Cucurbita pepo varieties, including Acorn and Delicata, are the exceptions to the high-heat rule. Curing these at high temperatures for too long can actually shorten their lifespan and cause the flesh to become stringy. A very brief cure of 2 to 3 days at 75°F (24°C) is usually sufficient. These varieties naturally have thinner skins and should be the first ones you eat from your winter stash.
Kabocha and Buttercup Squash
Kabocha types benefit from a moderate cure. They need enough time to convert starches to sugars to reach their peak flavor. If you find your Kabocha is dry or lacks sweetness, it likely didn’t receive a long enough curing phase. Aim for 10 days at 80°F (27°C).
The Benefits of the Cured Shield
The most obvious advantage of curing is the dramatic extension of shelf life. Without curing, a butternut squash might last until Thanksgiving. With a proper cure, that same squash will remain firm and delicious until the following summer. This longevity is the cornerstone of self-reliance, providing a bridge between harvest seasons.
Flavor enhancement is the second major benefit. The conversion of starch to sugar is a chemical miracle that happens in the dark of your pantry. Cured squash has a deeper, more complex sweetness and a smoother texture. This makes it far superior for roasting, soups, and pies compared to freshly harvested, uncured fruit.
Curing also simplifies your storage management. Once the skin is “locked,” the squash is less sensitive to minor environmental fluctuations. While a basement that stays between 50°F and 60°F (10°C to 15°C) is ideal, a cured squash is much more forgiving of a temporary warm spell than one that was never properly sealed.
Challenges and Common Mistakes
Temperature management is the most frequent hurdle. If the curing area is too cold, the skin will not harden, and the squash will remain “soft.” Conversely, if it gets too hot—above 90°F (32°C)—you risk “cooking” the fruit or triggering rapid dehydration. Using a simple digital thermometer-hygrometer is the best way to monitor these levels.
Poor airflow is another silent killer. Even in a warm room, stagnant air allows moisture to build up where the squash touches the surface. This leads to bottom rot. Always place squash on a breathable surface like a wire rack, a wooden pallet, or a layer of dry straw. Avoid placing them directly on cold concrete or plastic sheeting, which can trap dampness.
Handling mistakes can undo all your hard work. Never pick up a squash by its stem. The weight of the fruit can cause the stem to pull away slightly from the flesh, creating a tiny tear. This tear is a highway for bacteria. Always cradle the squash from the bottom like a fragile egg.
Limitations: When Curing Won’t Save the Harvest
Curing is not a magic fix for damaged or immature fruit. If a squash has been hit by a hard frost in the garden, the cellular structure of the skin has already been compromised. These “frosted” squash may look fine initially, but they will inevitably rot in storage regardless of how well you cure them. Use these immediately or process them for the freezer.
Immature squash—those with soft skins that you can easily pierce with a fingernail—will never cure properly. They lack the necessary starch reserves and the physiological maturity to develop a hard rind. These are best eaten as “summer” squash or used in soups within a week of harvest.
Environmental constraints also play a role. If you live in a region with extremely high humidity (consistently above 90%), curing becomes difficult because the fruit cannot shed enough moisture to seal. In these cases, using a dehumidifier in the curing room is essential to prevent the growth of surface molds during the process.
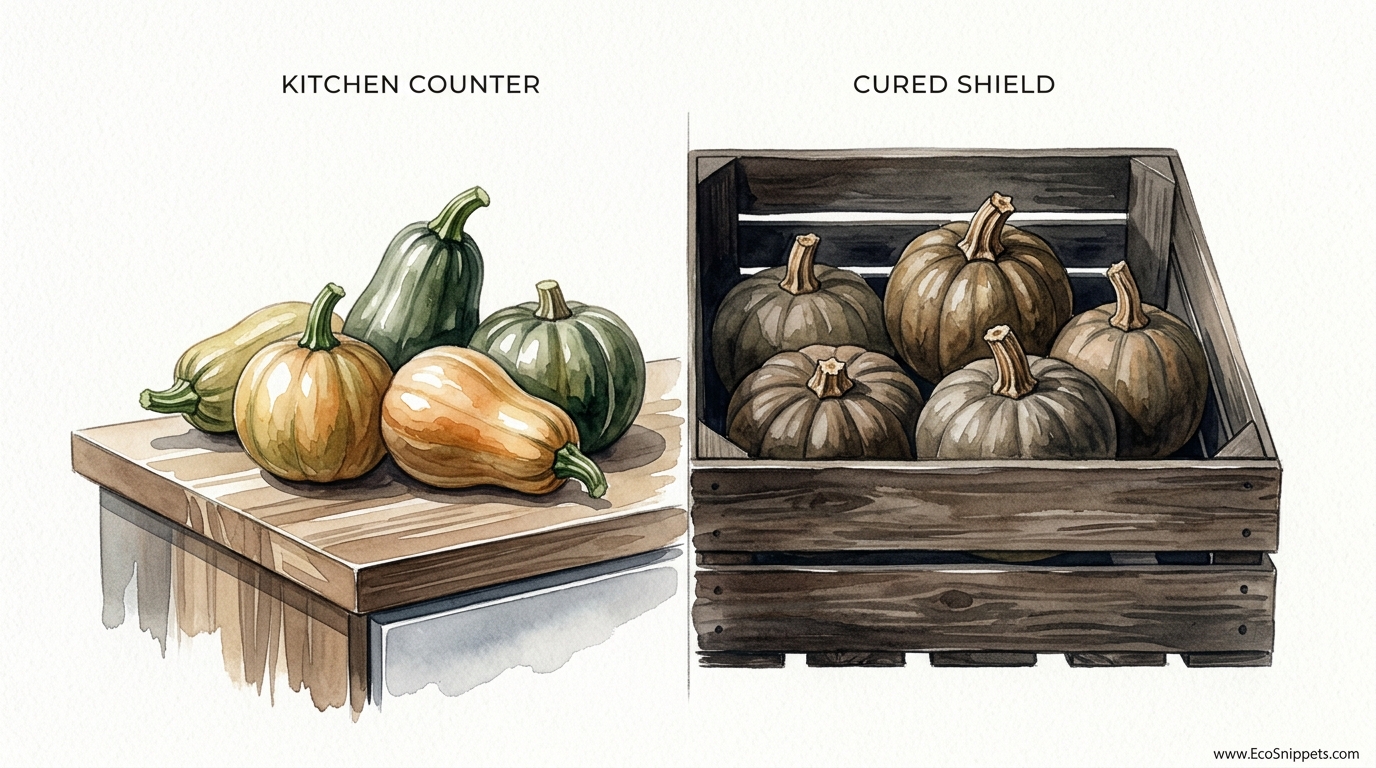
Kitchen Counter vs. Cured Shield
The following table highlights the measurable differences between casual storage and the disciplined curing method.
| Factor | Kitchen Counter (Uncured) | Cured Shield Method |
|---|---|---|
| Shelf Life | 2 – 3 Months | 6 – 12+ Months |
| Sugar Content | Lower; starchier taste | Highest; concentrated sweetness |
| Skin Texture | Soft, easily bruised | Hard, woody, protective |
| Respiration Rate | High (leads to shriveling) | Low (maintains density) |
| Risk of Rot | Moderate to High | Very Low |
Practical Tips and Best Practices
Wiping your squash with a mild disinfectant before curing can significantly reduce storage losses. Use a solution of one part white vinegar to four parts water. Dampen a cloth and gently wipe the entire surface of the squash to remove soil and kill surface bacteria. Ensure the fruit is completely dry before moving it into the curing area.
Checking your storage regularly is a mandatory chore. Once a week, walk through your pantry or cellar and gently squeeze the squash. If you find one that feels soft or has a dark, sunken spot, remove it immediately. One rotting squash can release ethylene gas and moisture that will cause its neighbors to spoil.
Maintaining a gap between fruits is vital. Space them so that they do not touch. This prevents “nesting,” where moisture is trapped between two surfaces. If space is at a premium, you can wrap individual squash loosely in a single layer of newspaper. This helps absorb excess humidity while still allowing the fruit to breathe.
Advanced Considerations for the Serious Practitioner
Scaling up your storage requires a deeper understanding of ethylene gas. Apples, pears, and many other ripening fruits release ethylene, which acts as a ripening hormone. If you store your cured squash in the same room as your apple harvest, the squash will “age” prematurely, becoming stringy and losing its flavor. Always keep your squash in a separate air zone from pome fruits.
Humidity control in the long-term storage phase is just as important as the temperature. While curing requires high humidity, storage requires moderate levels—between 50% and 70%. If the air is too dry, the squash will lose weight and the skin will wrinkle. If it is too wet, you will battle mold. A hygrometer in the storage room is a small investment that pays for itself in saved calories.
Thinking about “variety rotation” can maximize your food security. Plant a mix of “short-keepers” (Acorn, Delicata), “medium-keepers” (Butternut, Kabocha), and “long-keepers” (Hubbard, Jarrahdale). By eating through them in that order, you ensure that you are always consuming the squash at its peak quality.
Scenario: The Winter Squash Success Story
Consider a homesteader in a temperate region who harvests 50 pounds (23 kg) of Waltham Butternut in late September. Following the “Kitchen Counter” method, they simply pile the squash in a crate in the basement. By Christmas, they find that 15 pounds (7 kg) have developed soft spots and must be thrown out. By February, the remaining squash are wrinkled and the flavor is flat.
Now, imagine that same homesteader follows the Curing Protocol. They wipe the squash with vinegar and place them in a sunroom at 82°F (28°C) for 12 days. The skin turns from a pale tan to a deep, matte bronze. They move the harvest to a cool, dark pantry at 55°F (13°C).
In March, six months after harvest, they pull a butternut from the shelf. The skin is so hard it requires a sharp chef’s knife to cut. The inside is vibrant orange, dense, and dripping with sweetness. Not a single squash was lost to rot. This is the power of the cure.
Final Thoughts
Mastering the art of the cure is the final piece of the gardening puzzle. It represents a shift from being a seasonal consumer to a year-round provider. When you take the time to harden that rind, you are honoring the months of water, sun, and soil that went into creating the fruit.
Every squash in your pantry is a biological battery, storing the energy of the summer sun for the darkest days of winter. Protecting that energy with a proper cure is a practical skill that pays dividends in flavor, nutrition, and peace of mind.
Start small this season by curing just a few of your best fruits. Once you taste the difference in a February stew made with a perfectly cured Hubbard, you will never go back to the kitchen counter method again. The shield you build today is the meal you enjoy tomorrow.
