How To Become More Self-Sufficient Without Starting a Full-Blown Farm…
Want to start preserving your harvest, making your own soap, or building a backyard root cellar — but not sure where to begin? “Homesteading Advice” gives you instant lifetime access to 35+ practical homesteading books on food preservation, veggie gardening, DIY natural cleaning products (save over $250 per year with this skill alone), brewing, off-grid energy, and a whole lot more…
Click Here To Check It Out Now!
This 500-year-old storage trick keeps your harvest crisp for 6 months without using a single watt of power. Before the grid, homesteaders relied on the earth’s natural insulation. Sand cellaring preserves the texture and sweetness of root crops far better than the ‘thaw and mush’ cycle of a freezer. It’s time to rediscover the low-tech legacy of the root cellar.
Modern convenience often hides the fact that our ancestors had food preservation figured out long before the first humming refrigerator was ever plugged into a wall. When you pull a carrot out of a freezer bag in February, it often lacks the snap and vibrancy of a fresh-picked vegetable. Sand cellaring solves this by tricking the plant into thinking it is still resting in the earth, dormant but alive.
This method is more than just a survival skill; it is a way to reclaim your food independence. You are not relying on a complex supply chain or an expensive appliance to keep your family fed through the winter months. Instead, you are using the simplest materials—sand and cool air—to create a microclimate that mimics the natural winter soil.
Living a self-sufficient life requires us to look backward as often as we look forward. Every bucket of sand you prepare is a vote for stability and a nod to the wisdom of those who farmed these lands before us. Let’s walk through the grit and glory of sand cellaring so you can master this essential homesteading art.
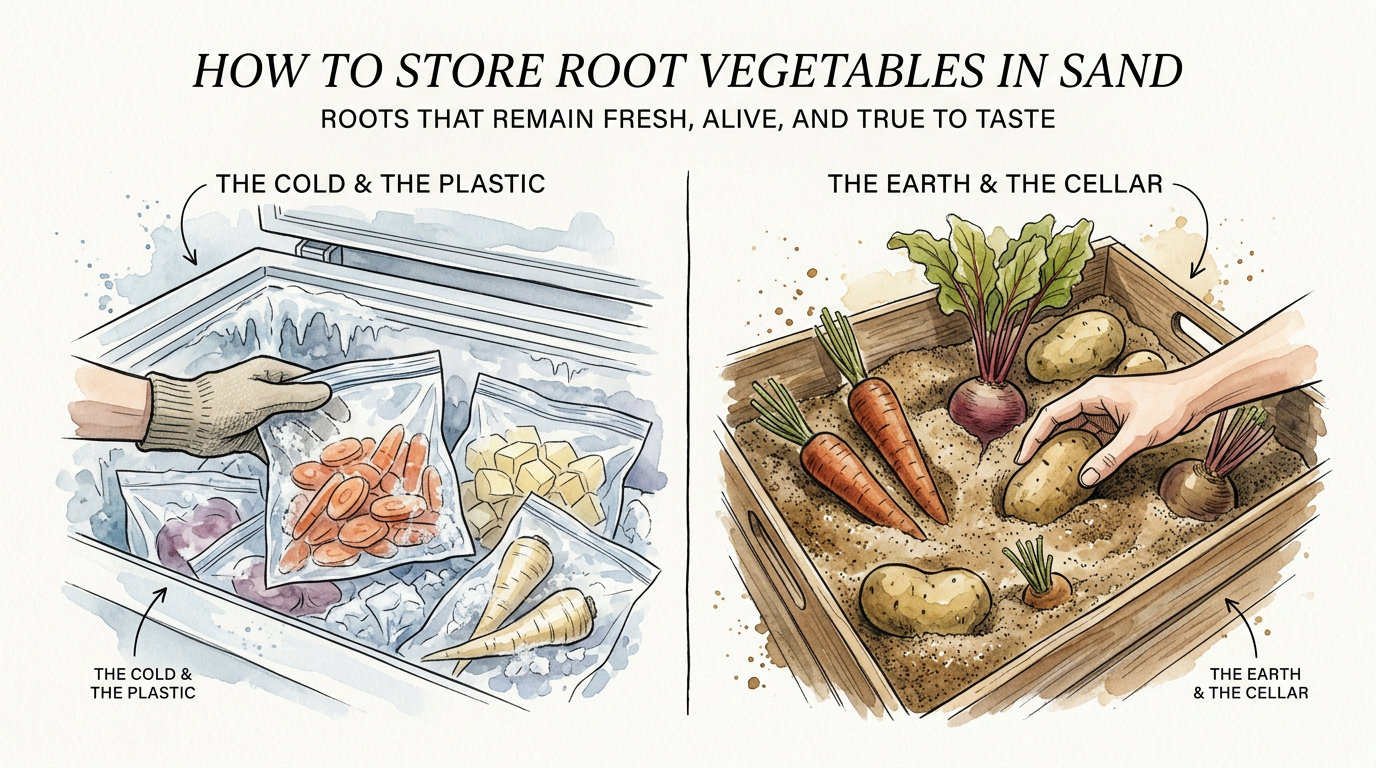
How To Store Root Vegetables In Sand
Storing root vegetables in sand is a traditional preservation method that involves burying unwashed, dormant crops in layers of damp sand to regulate humidity and temperature. It is a biological hack that prevents the vegetable from losing its internal moisture to the dry winter air. Without this protection, a carrot or beet would quickly shrivel into a leathery, inedible nub.
Historically, this was the primary way families kept their calories through the “hungry gap” of late winter. In old farmhouses, you would find large wooden bins or stone-lined pits filled with sand, holding everything from parsnips to rutabagas. Today, it remains the gold standard for anyone who values the flavor and nutritional density of their homegrown produce.
The concept works because sand is an incredible insulator. It creates a physical barrier against fluctuating temperatures while holding onto just enough moisture to keep the vegetables hydrated. It also allows for minimal gas exchange, slowing down the ripening process without cutting off oxygen entirely, which would lead to anaerobic rot.
You can implement this system in a dedicated root cellar, a cold basement, or even a buried galvanized trash can in your backyard. The goal is to provide a dark, cool, and damp environment where the vegetables can sleep peacefully until you are ready to bring them to the kitchen table.
The Mechanics of Dormancy: How It Works
Root vegetables are biologically designed to survive the winter underground. In their natural lifecycle, they store energy in their roots during the first year so they can flower and go to seed in the second. Sand cellaring exploits this first-year storage phase by providing the exact conditions the plant expects during its winter slumber.
To do this correctly, you must understand the “Big Three” of sand cellaring: temperature, humidity, and airflow. Most root crops prefer a temperature range between 32°F and 40°F. If it gets too warm, the vegetables will think it is spring and start to sprout green tops; if it freezes, the cell walls will burst, leading to the dreaded “thaw and mush.”
Humidity is equally critical. Root crops are mostly water, and they will naturally lose that water to the surrounding air through evaporation. By surrounding them with damp sand, you create a 90% to 95% humidity environment that keeps the vegetables plump. The sand acts like a wet blanket that never actually gets the vegetable soaking wet, which would cause fungal issues.
Layering is the physical technique used to manage these factors. You start with a few inches of sand at the bottom of a container, place your vegetables so they aren’t touching each other, and then cover them with more sand. This isolation is vital. If one carrot begins to rot, the sand acts as a firebreak, preventing the decay from spreading to the rest of your harvest.
Step-by-Step Guide to Sand Cellaring
Preparation begins in the garden, not in the cellar. You should wait for the first light frost to hit your crops, as this often triggers the plant to convert starches into sugars, making them sweeter and more resistant to rot. Harvest on a dry day, and handle the vegetables with extreme care to avoid bruising the delicate skin.
The most important rule is to never wash your vegetables before sand cellaring. The natural soil bacteria and the protective outer skin are your best defenses against spoilage. Simply brush off the excess dirt with your hands or a soft brush, leaving the “bloom” of the vegetable intact.
Next, you must trim the greens. Cut the tops off about a half-inch above the crown of the root. Do not cut into the root itself, as this creates a wound where bacteria can enter. Removing the foliage prevents the plant from trying to continue growing and drawing energy out of the root while in storage.
Choose your sand wisely. Use clean “builder’s sand” or “sharp sand” rather than play sand, which is often too fine and can pack too tightly. Moisten the sand until it feels like a wrung-out sponge—it should hold its shape when you squeeze a handful but shouldn’t drip any water. Layer your veggies, ensure they are fully submerged, and keep the container in the coolest part of your home.
The Benefits of Choosing Sand Over Modern Methods
The most immediate benefit of sand cellaring is the preservation of culinary quality. Unlike freezing, which changes the cellular structure of the vegetable, sand storage keeps the produce in its raw, natural state. A sand-stored beet retains its earthy crunch and deep color, making it indistinguishable from one pulled fresh from the garden.
From an energy perspective, this method is entirely passive. In an era of rising electricity costs and potential grid instability, having a “living pantry” that doesn’t require a generator is a massive advantage. It provides a level of food security that a chest freezer simply cannot match, especially during long winter storms or power outages.
There is also a significant cost saving involved. You don’t need to buy expensive vacuum sealers, plastic bags, or jars. Sand is cheap and can be reused year after year if you dry it out in the sun during the summer to kill off any lingering pathogens. It is the ultimate “buy once, use forever” storage solution.
Finally, sand cellaring extends the harvest window significantly. Instead of spending three days straight in a hot kitchen canning dozens of jars of carrots, you can simply pack them into bins and be done in an afternoon. It respects your time and allows you to enjoy the transition into the slower pace of winter without the frantic pressure of traditional “putting up” season.
Challenges and Common Mistakes
The biggest challenge in sand cellaring is moisture management. If your sand is too dry, your vegetables will shrivel within a month. If it is too wet, you will find a fuzzy coat of white mold or a slimy mess when you go to retrieve your dinner. Checking the moisture level of the sand every few weeks is a habit every serious homesteader must develop.
Another frequent error is storing damaged produce. A single nick from a garden spade or a hole from a wireworm can invite rot that will eventually compromise the bin. You must be ruthless during the sorting process. Only the “perfect” specimens go into the sand; any bruised or cut vegetables should be eaten immediately or processed in a different way.
Rodents are a constant threat to a root cellar. Mice and rats love a buffet of sweet, protected carrots. If you are storing your bins in a garage or an unfinished basement, you must ensure your containers have tight-fitting lids with small air holes, or wrap the bins in hardware cloth to keep the critters out.
Temperature fluctuations are the final hurdle. A cellar that stays cool in November might warm up during a January thaw if it isn’t properly insulated. Monitoring your storage area with a simple thermometer is essential. If the temperature rises above 45°F for an extended period, the shelf life of your vegetables will drop dramatically.
Limitations and When to Reconsider
Sand cellaring is not a “set it and forget it” solution for every climate. If you live in a region with high humidity and warm winters, like the deep South, you will likely struggle to keep your cellar cool enough without mechanical refrigeration. This method relies on the ambient cold of the earth or the atmosphere to function.
Space can also be a limiting factor. Several 18-gallon bins filled with damp sand and heavy root vegetables are incredibly heavy and take up a significant footprint. If you are homesteading in an apartment or a small urban home with no basement or crawlspace, you may find the logistics of moving and storing these bins to be more trouble than they are worth.
Not all vegetables are candidates for sand storage. While it works wonders for carrots, beets, parsnips, rutabagas, and turnips, it is a poor choice for potatoes or onions. Potatoes prefer a slightly drier environment and darkness to prevent greening, while onions need high airflow and low humidity to prevent neck rot.
There is also the “mess factor.” Retrieving vegetables from sand involves getting your hands dirty and potentially bringing sand into the kitchen. If you prefer a sterile, high-tech kitchen environment, the grit of the sand cellar might feel like a step backward rather than an improvement.
Comparison: Plastic Freezing vs. Sand Cellaring
To understand why sand cellaring remains superior for certain crops, we can look at how it compares to the modern default of freezing in plastic.
| Feature | Plastic Freezing | Sand Cellaring |
|---|---|---|
| Texture | Soft/Mushy (Cell walls burst) | Crisp/Raw (Original state) |
| Energy Cost | Continuous (Electricity) | Zero (Passive) |
| Sustainability | High plastic waste | Zero waste (Reusable sand) |
| Flavor Profile | Diluted by blanching | Concentrated sweetness |
| Complexity | High (Blanching, sealing) | Low (Layering) |
While freezing is excellent for greens or berries, it robs root vegetables of their best qualities. Sand cellaring preserves the integrity of the food, ensuring that your winter stews and roasts feature ingredients that taste like they were just unearthed from the garden patch.
Practical Tips and Best Practices
If you want to succeed with sand cellaring, start by sourcing the right containers. While traditionalists love wooden crates for their breathability, many modern homesteaders find that heavy-duty plastic totes work well as long as you leave the lid slightly ajar or drill a few half-inch ventilation holes near the top.
Always use a dedicated thermometer and hygrometer in your storage area. You can find digital versions that send alerts to your phone, which is a great way to marry ancestral wisdom with modern technology. Knowing the exact conditions of your cellar allows you to make adjustments before your harvest is at risk.
When you go to retrieve vegetables for a meal, always pull from the top and check the surrounding roots for any soft spots. If you find a vegetable that is starting to turn, remove it immediately. This “periodic auditing” of your bins is the most effective way to prevent a total loss of your stored food.
Consider using “sacrificial” vegetables. Place a few smaller, less perfect carrots at the very top of the sand. Since they are the most exposed to the air, they will be the first to show signs of shriveling or mold. They act as your early warning system, telling you if the sand needs more moisture or if the cellar is too warm.
Advanced Considerations for the Serious Practitioner
For those who want to take sand cellaring to the next level, consider the chemistry of your storage medium. Some advanced growers mix a small amount of wood ash or garden lime into their sand to raise the pH. This creates an alkaline environment that is naturally resistant to many types of fungal growth and bacteria.
Another advanced technique is the use of varied mediums. While sand is the standard, some homesteaders swear by a mix of 50% sand and 50% peat moss or sawdust. Peat moss holds moisture exceptionally well and is naturally acidic, which can help preserve certain types of roots like parsnips that are prone to surface browning.
If you are building a permanent root cellar, consider the floor. A dirt or gravel floor is superior to concrete because it allows the natural humidity of the earth to rise into the room. If you are stuck with a concrete floor, you can place a few buckets of water in the corners of the room to help keep the humidity levels high.
Think about “succession storage.” Some root crops, like radishes and turnips, have a shorter storage life than others, like parsnips and rutabagas. Organize your bins so that the short-lived crops are the most accessible. This ensures you are eating your way through the harvest in a logical order that minimizes waste.
Real-World Example: The Winter Carrot Harvest
Imagine it is a frigid Tuesday in January. Outside, the ground is frozen solid and covered in six inches of snow. In a modern house, the owner might be reaching for a bag of frozen, pre-sliced carrots that have become icy and flavorless in the freezer.
Down in your cellar, however, you have a 20-gallon bin filled with damp builder’s sand. You reach in, your hand disappearing into the cool, gritty medium, and pull out three large Nantes carrots. They are firm, vibrant orange, and smell like the earth they were grown in back in October.
You take them to the kitchen, give them a quick scrub, and take a bite. The carrot is incredibly sweet—sweeter than it was at harvest because the cold temperature has converted its starches into sugar. There is a satisfying “snap” as you bite through it.
This isn’t just theory; it is the reality for thousands of people who have opted out of the “thaw and mush” cycle. These carrots will provide the base for a hearty winter roast, providing the same vitamin C and beta-carotene they would have offered the day they were picked. This is the practical power of ancestral food storage.
Final Thoughts
Mastering the art of sand cellaring is a significant milestone on the path to self-reliance. It forces you to slow down and pay attention to the subtle rhythms of the seasons and the biological needs of your food. By providing the right balance of moisture and cold, you are acting as a steward of your harvest, ensuring nothing goes to waste.
This method connects us to a long line of survivors and providers. It proves that we don’t always need complex technology to solve basic human needs. Sometimes, the best solutions are the ones that have been under our feet for centuries. The humble bucket of sand is a testament to the fact that simplicity often outperforms complexity when the stakes are high.
I encourage you to start small this coming autumn. Even if you only store a single bucket of carrots in a corner of your garage, you will gain the experience needed to scale up in the future. Once you taste the difference between a sand-stored root and a frozen one, you will never want to go back to the modern way of doing things.
